【Android测试】【第七节】Monkey——源码浅谈
◆版权声明:本文出自胖喵~的博客,转载必须注明出处。
转载请注明出处:http://www.cnblogs.com/by-dream/p/4713466.html
前言
根据上一篇我们学会了Monkey的用法,知道了Monkey可以非常容易的模拟伪随机的模拟事件。也许有的时候我们想让他稍微智能化一些,例如只在某个屏幕范围产生伪随机事件,或者说是只对某些指定Activity进行操作,这样就需要我们对Monkey进行改良了。而改良必须去改Monkey的源码,因此本节课们就简单的说说Monkey的源码。
源码下载地址:https://code.google.com/p/android-source-browsing/source/browse/cmds/monkey/src/com/android/commands/monkey/?repo=platform--development&name=android-cts-4.2_r2 ( 这里只是Monkey的源码,如果要编译Monkey需要下载Android的源码 )
概述
如果你真的打算改造一个属于你的Monkey,那么过程必须要做的是:
1、下载Android源码
2、阅读Monkey源码如果需要修改代码
3、代码编译
4、运行Monkey
本节内容主要针对第二部分的 “阅读Monkey源码”,其他的1、3、4 部分会在另外一篇“只允许注册用户访问的”的番外篇里进行介绍,因为这部分有些内容不是本人原创,因此对博客进行了加密处理,以免侵犯到源作者的权利,如需交流这部分内容,请留言给我。
Monkey源码
Monkey的入口在 Monkey.java中:
 /**

     * Command-line entry point.

     *

     * @param args The command-line arguments

     */

    public static void main(String[] args) {

        // Set the process name showing in "ps" or "top"

        Process.setArgV0("com.android.commands.monkey");

        int resultCode = (new Monkey()).run(args);

        System.exit(resultCode);

    }
第一句的意思就是在 shell 命令行下 使用 ps | grep com.**.monkey 就找到正在运行的monkey进程
第二句是后续的内容,我们继续看后续干了什么。
    /**

     * Run the command!

     *

     * @param args The command-line arguments

     * @return Returns a posix-style result code. 0 for no error.

     */

    private int run(String[] args) {

        // Super-early debugger wait

        for (String s : args) {

            if ("--wait-dbg".equals(s)) {

                Debug.waitForDebugger();

            }

        }

        // Default values for some command-line options

        mVerbose = 0;

        mCount = 1000;

        mSeed = 0;

        mThrottle = 0;

        // prepare for command-line processing

        mArgs = args;

        mNextArg = 0;

        // set a positive value, indicating none of the factors is provided yet

        for (int i = 0; i < MonkeySourceRandom.FACTORZ_COUNT; i++) {

            mFactors[i] = 1.0f;

        }

        if (!processOptions()) {

            return -1;

        }

        if (!loadPackageLists()) {

            return -1;

        }

        // now set up additional data in preparation for launch

        if (mMainCategories.size() == 0) {

            mMainCategories.add(Intent.CATEGORY_LAUNCHER);

            mMainCategories.add(Intent.CATEGORY_MONKEY);

        }

        if (mVerbose > 0) {

            System.out.println(":Monkey: seed=" + mSeed + " count=" + mCount);

            if (mValidPackages.size() > 0) {

                Iterator<String> it = mValidPackages.iterator();

                while (it.hasNext()) {

                    System.out.println(":AllowPackage: " + it.next());

                }

            }

            if (mInvalidPackages.size() > 0) {

                Iterator<String> it = mInvalidPackages.iterator();

                while (it.hasNext()) {

                    System.out.println(":DisallowPackage: " + it.next());

                }

            }

            if (mMainCategories.size() != 0) {

                Iterator<String> it = mMainCategories.iterator();

                while (it.hasNext()) {

                    System.out.println(":IncludeCategory: " + it.next());

                }

            }

        }

        if (!checkInternalConfiguration()) {

            return -2;

        }

        if (!getSystemInterfaces()) {

            return -3;

        }

        if (!getMainApps()) {

            return -4;

        }

        mRandom = new SecureRandom();

        mRandom.setSeed((mSeed == 0) ? -1 : mSeed);

        if (mScriptFileNames != null && mScriptFileNames.size() == 1) {

            // script mode, ignore other options

            mEventSource = new MonkeySourceScript(mRandom, mScriptFileNames.get(0), mThrottle,

                    mRandomizeThrottle, mProfileWaitTime, mDeviceSleepTime);

            mEventSource.setVerbose(mVerbose);

            mCountEvents = false;

        } else if (mScriptFileNames != null && mScriptFileNames.size() > 1) {

            if (mSetupFileName != null) {

                mEventSource = new MonkeySourceRandomScript(mSetupFileName,

                        mScriptFileNames, mThrottle, mRandomizeThrottle, mRandom,

                        mProfileWaitTime, mDeviceSleepTime, mRandomizeScript);

                mCount++;

            } else {

                mEventSource = new MonkeySourceRandomScript(mScriptFileNames,

                        mThrottle, mRandomizeThrottle, mRandom,

                        mProfileWaitTime, mDeviceSleepTime, mRandomizeScript);

            }

            mEventSource.setVerbose(mVerbose);

            mCountEvents = false;

        } else if (mServerPort != -1) {

            try {

                mEventSource = new MonkeySourceNetwork(mServerPort);

            } catch (IOException e) {

                System.out.println("Error binding to network socket.");

                return -5;

            }

            mCount = Integer.MAX_VALUE;

        } else {

            // random source by default

            if (mVerbose >= 2) { // check seeding performance

                System.out.println("// Seeded: " + mSeed);

            }

            mEventSource = new MonkeySourceRandom(mRandom, mMainApps, mThrottle, mRandomizeThrottle);

            mEventSource.setVerbose(mVerbose);

            // set any of the factors that has been set

            for (int i = 0; i < MonkeySourceRandom.FACTORZ_COUNT; i++) {

                if (mFactors[i] <= 0.0f) {

                    ((MonkeySourceRandom) mEventSource).setFactors(i, mFactors[i]);

                }

            }

            // in random mode, we start with a random activity

            ((MonkeySourceRandom) mEventSource).generateActivity();

        }

        // validate source generator

        if (!mEventSource.validate()) {

            return -5;

        }

        // If we're profiling, do it immediately before/after the main monkey

        // loop

        if (mGenerateHprof) {

            signalPersistentProcesses();

        }

        mNetworkMonitor.start();

        int crashedAtCycle = runMonkeyCycles();

        mNetworkMonitor.stop();

        synchronized (this) {

            if (mRequestAnrTraces) {

                reportAnrTraces();

                mRequestAnrTraces = false;

            }

            if (mRequestAnrBugreport){

                System.out.println("Print the anr report");

                getBugreport("anr_" + mReportProcessName + "_");

                mRequestAnrBugreport = false;

            }

            if (mRequestAppCrashBugreport){

                getBugreport("app_crash" + mReportProcessName + "_");

                mRequestAppCrashBugreport = false;

            }

            if (mRequestDumpsysMemInfo) {

                reportDumpsysMemInfo();

                mRequestDumpsysMemInfo = false;

            }

            if (mRequestPeriodicBugreport){

                getBugreport("Bugreport_");

                mRequestPeriodicBugreport = false;

            }

        }

        if (mGenerateHprof) {

            signalPersistentProcesses();

            if (mVerbose > 0) {

                System.out.println("// Generated profiling reports in /data/misc");

            }

        }

        try {

            mAm.setActivityController(null);

            mNetworkMonitor.unregister(mAm);

        } catch (RemoteException e) {

            // just in case this was latent (after mCount cycles), make sure

            // we report it

            if (crashedAtCycle >= mCount) {

                crashedAtCycle = mCount - 1;

            }

        }

        // report dropped event stats

        if (mVerbose > 0) {

            System.out.print(":Dropped: keys=");

            System.out.print(mDroppedKeyEvents);

            System.out.print(" pointers=");

            System.out.print(mDroppedPointerEvents);

            System.out.print(" trackballs=");

            System.out.print(mDroppedTrackballEvents);

            System.out.print(" flips=");

            System.out.println(mDroppedFlipEvents);

        }

        // report network stats

        mNetworkMonitor.dump();

        if (crashedAtCycle < mCount - 1) {

            System.err.println("** System appears to have crashed at event " + crashedAtCycle

                    + " of " + mCount + " using seed " + mSeed);

            return crashedAtCycle;

        } else {

            if (mVerbose > 0) {

                System.out.println("// Monkey finished");

            }

            return 0;

        }

    }
run
这个run中的内容基本就是Monkey运行的流程,主要做了:
1、处理命令行参数:
if (!processOptions()) {

            return -1;

        }
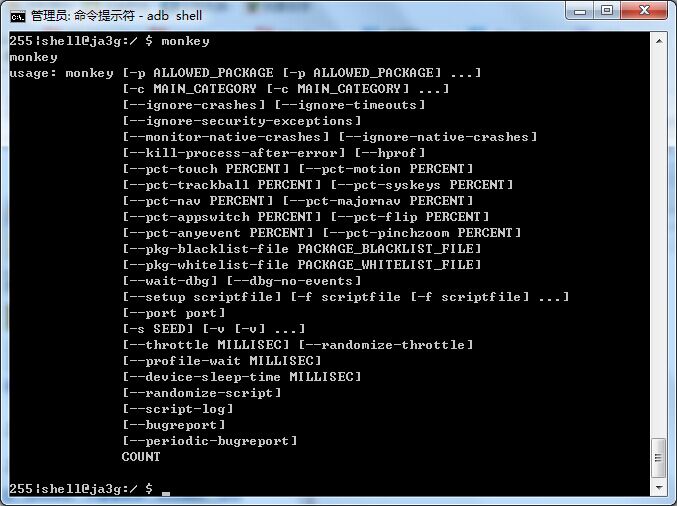
没有什么特殊的地方,主要是针对下面这张图里我们用到的参数进行一个统计和预处理。
2、处理要拉起的应用程序的Activity:
我们在运行Monkey的时候,如果指定了“ -p 包名 ”,那么Monkey一定会拉起这个App的第一个Activity,这个究竟是怎么实现的呢?就是借助Intent这个东西:
     // now set up additional data in preparation for launch

        if (mMainCategories.size() == 0) {

            mMainCategories.add(Intent.CATEGORY_LAUNCHER);

            mMainCategories.add(Intent.CATEGORY_MONKEY);

        }
3、处理Source模块:
Source模块,以MonkeyEventSource为接口,衍生出三种Source类:MonkeySourceRandom类(随机生成事件)、MonkeySourceScript(从脚本获取事件)、MonkeySourceNetwork(从网络获取事件)。
      if (mScriptFileNames != null && mScriptFileNames.size() == 1) {

            // script mode, ignore other options

            mEventSource = new MonkeySourceScript(mRandom, mScriptFileNames.get(0), mThrottle,

                    mRandomizeThrottle, mProfileWaitTime, mDeviceSleepTime);

            mEventSource.setVerbose(mVerbose);

            mCountEvents = false;

        } else if (mScriptFileNames != null && mScriptFileNames.size() > 1) {

            if (mSetupFileName != null) {

                mEventSource = new MonkeySourceRandomScript(mSetupFileName,

                        mScriptFileNames, mThrottle, mRandomizeThrottle, mRandom,

                        mProfileWaitTime, mDeviceSleepTime, mRandomizeScript);

                mCount++;

            } else {

                mEventSource = new MonkeySourceRandomScript(mScriptFileNames,

                        mThrottle, mRandomizeThrottle, mRandom,

                        mProfileWaitTime, mDeviceSleepTime, mRandomizeScript);

            }

            mEventSource.setVerbose(mVerbose);

            mCountEvents = false;

        } else if (mServerPort != -1) {

            try {

                mEventSource = new MonkeySourceNetwork(mServerPort);

            } catch (IOException e) {

                System.out.println("Error binding to network socket.");

                return -5;

            }

            mCount = Integer.MAX_VALUE;

        } else {

            // random source by default

            if (mVerbose >= 2) { // check seeding performance

                System.out.println("// Seeded: " + mSeed);

            }

            mEventSource = new MonkeySourceRandom(mRandom, mMainApps, mThrottle, mRandomizeThrottle);

            mEventSource.setVerbose(mVerbose);

            // set any of the factors that has been set

            for (int i = 0; i < MonkeySourceRandom.FACTORZ_COUNT; i++) {

                if (mFactors[i] <= 0.0f) {

                    ((MonkeySourceRandom) mEventSource).setFactors(i, mFactors[i]);

                }

            }

            // in random mode, we start with a random activity

            ((MonkeySourceRandom) mEventSource).generateActivity();

        }
这部分只要是来判断Monkey的事件源来自何方,根据这些事件的来源,由不同的类做处理。MonkeySourceRandom事件的来源就是我们在命令行输入参数后的伪随机压力测试;MonkeySourceScript事件来源于Monkey识别的一种脚本,事实上Monkey也可以做到通过脚本指定位置点击,滑动等操作,但是该脚本的可读性非常的差,编写不易,因此这里我也没有介绍;第三种MonkeySourceNetwork来自于后面我们要讲的Monkeyrunner,Monkeyrunner通过socket将一些要处理的事件发给Monkey,由Monkey来完成最后的处理。
4、循环处理事件:
        mNetworkMonitor.start();

        int crashedAtCycle = runMonkeyCycles();

        mNetworkMonitor.stop();
主要看看 runMonkeyCycles() 这个函数主要做了什么:
    /**

     * Run mCount cycles and see if we hit any crashers.

     * <p>

     * TODO: Meta state on keys

     *

     * @return Returns the last cycle which executed. If the value == mCount, no

     *         errors detected.

     */

    private int runMonkeyCycles() {

        int eventCounter = 0;

        int cycleCounter = 0;

        boolean shouldReportAnrTraces = false;

        boolean shouldReportDumpsysMemInfo = false;

        boolean shouldAbort = false;

        boolean systemCrashed = false;

        // TO DO : The count should apply to each of the script file.

        while (!systemCrashed && cycleCounter < mCount) {

                ...

            MonkeyEvent ev = mEventSource.getNextEvent();

            if (ev != null) {

                int injectCode = ev.injectEvent(mWm, mAm, mVerbose);

                ...

             }

        ...

        }

       ....

}
这里涉及到了一个重要的东西就是MonkeyEvent。
以MonkeyEvent为基类,衍生出各种Event类,如Monkey中常见的点击,输入,滑动事件;
那么一个点击的操作究竟是怎么进行下去的呢?我们可以到上面调用的是injectEvent,这个方法是由基类定义的,每一个子类去实现不同的内容,点击、滑动等这个方法都是通过第一个参数一个iWindowManager的对象而完成的,当然也有不需要这个参数,例如MonkeyThrottleEvent这个类的实现方法,根本没有用到iwm:
@Override

public int injectEvent(IWindowManager iwm, IActivityManager iam, int verbose) {

    if (verbose > 1) {

        System.out.println("Sleeping for " + mThrottle + " milliseconds");

    }

    try {

        Thread.sleep(mThrottle);

    } catch (InterruptedException e1) {

        System.out.println("** Monkey interrupted in sleep.");

        return MonkeyEvent.INJECT_FAIL;

    }

    return MonkeyEvent.INJECT_SUCCESS;

}
那么这个iWindowManager的对象究竟是什么呢?这个事系统隐藏的一个接口,通过这个接口可以注入一些操作事件,那么我们以后是不是也可以用这个接口来进行事件的注入呢?答案是no,为什么呢?我们来看看:
谷歌为了方便Monkey能够轻松的完成一些点击、滑动事件,因此在使用了这个系统隐藏的接口,Monkey这个应用拥有这个两个独特的权限:第一个是SET_ACTIVITY_WATCHER这个权限,它允许monkey对activity的生命周期进行全权控制。第二个就是INJECT_EVENTS这个权限它允许monkey去模拟触摸和按键事件。为了防止这个系统隐藏接口暴露出的漏洞,普通的App是不能请求到这些权限的,只有android系统同意的应用才会得到允许获得这些权限。为了防止坏人使用Monkey来进行这个事件的注入,Monkey也只被允许root运行或者是shell这个组的成员运行。
【Android测试】【第七节】Monkey——源码浅谈的更多相关文章
- 【Android测试】【第三节】ADB——源码浅谈
◆版权声明:本文出自carter_dream的博客,转载必须注明出处. 转载请注明出处:http://www.cnblogs.com/by-dream/p/4651724.html 前言 由于本人精力 ...
- 源码浅谈(一):java中的 toString()方法
前言: toString()方法 相信大家都用到过,一般用于以字符串的形式返回对象的相关数据. 最近项目中需要对一个ArrayList<ArrayList<Integer>> ...
- 源码浅谈(二):java中的 Integer.parseInt(String str)方法
这个方法是将字符串转换为整型 一.parseInt方法 ,可以看到默认又调用了parseInt(s,10) , 第二个参数为基数,默认10 ,当然也可以自己设置 public static int ...
- 结合源码浅谈Spring容器与其子容器Spring MVC 冲突问题
容器是整个Spring 框架的核心思想,用来管理Bean的整个生命周期. 一个项目中引入Spring和SpringMVC这两个框架,Spring是父容器,SpringMVC是其子容器,子容器可以看见父 ...
- glibc memcpy() 源码浅谈
其实我本来只是想搞懂为什么memcpy()函数的参数类型是void *的: 我以为会在memcpy()源码中能找到答案,其实并没有,void *只是在传递参数的时候起了作用,可以让memcpy()接受 ...
- 【原】Android热更新开源项目Tinker源码解析系列之二:资源文件热更新
上一篇文章介绍了Dex文件的热更新流程,本文将会分析Tinker中对资源文件的热更新流程. 同Dex,资源文件的热更新同样包括三个部分:资源补丁生成,资源补丁合成及资源补丁加载. 本系列将从以下三个方 ...
- Monkey源码分析之事件源
上一篇文章<Monkey源码分析之运行流程>给出了monkey运行的整个流程,让我们有一个概貌,那么往后的文章我们会尝试进一步的阐述相关的一些知识点. 这里先把整个monkey类的结构图给 ...
- Monkey源码分析之事件注入
本系列的上一篇文章<Monkey源码分析之事件源>中我们描述了monkey是怎么从事件源取得命令,然后将命令转换成事件放到事件队列里面的,但是到现在位置我们还没有了解monkey里面的事件 ...
- monkey源码分析之事件注入方法变化
在上一篇文章<Monkey源码分析之事件注入>中,我们看到了monkey在注入事件的时候用到了<Monkey源码分析番外篇之Android注入事件的三种方法比较>中的第一种方法 ...
随机推荐
- js:数据结构笔记14--高级算法
动态规划: 递归是从顶部开始将问题分解,通过解决所有分解出小问题来解决整体问题: 动态规划从底部开始解决问题,将所有小问题解决,然后合并掉一个整体解决方案: function dynFib(n) { ...
- [LintCode] Word Break
Given a string s and a dictionary of words dict, determine if s can be break into a space-separated ...
- 超级楼梯[HDU2041]
超级楼梯 Time Limit: 2000/1000 MS (Java/Others) Memory Limit: 65536/32768 K (Java/Others)Total Submis ...
- Machine Schedule
Machine Schedule Time Limit: 2000/1000 MS (Java/Others) Memory Limit: 65536/32768 K (Java/Others) ...
- myeclipse下安装svn
在网上查了一下,安装的方法有几种,这里给大家推荐一种快速安装的方法. //第一步 : 下载 site-1.6.5.zip //===================================== ...
- BZOJ4377 : [POI2015]Kurs szybkiego czytania
因为$a$与$n$互质,所以对于$0$到$n-1$里每个$i$,$ai\bmod n$的值互不相同. 设匹配成功的起点为$i$,那么可以得到$3m$段$ai\bmod n$的值不能取的禁区,每段都是连 ...
- BZOJ4294 : [PA2015]Fibonacci
斐波那契数列模$10^m$的循环节为$6\times10^m$,于是从低位到高位dfs即可. #include<cstdio> #include<cstring> #defin ...
- centos 安装网络错误
yum install vnc-server 提示安装成功 rpm -q vnc-server 返回 package vnc-server is not installed 然而再重新安装时 yu ...
- 【转】Profiling application LLC cache misses under Linux using Perf Events
转自:http://ariasprado.name/2011/11/30/profiling-application-llc-cache-misses-under-linux-using-perf-e ...
- 用iftop监控流量
1.下载iftop http://pan.baidu.com/share/link?shareid=387372457&uk=1829018343 或 wget http://www.ex-p ...