transaction事务案例--银行转账
1)dao层
package cn.spring.transaction.dao;

public interface MoneyDao {

    //加钱的方法

    void addMoney(double money);

    //减钱的方法

    void subMoney(double money);

}
代码实现
(2)daoImpl层
package cn.spring.transaction.dao.impl;

import cn.spring.transaction.dao.MoneyDao;

import org.springframework.jdbc.core.JdbcTemplate;

import org.springframework.jdbc.core.support.JdbcDaoSupport;

public class MoneyDaoImpl extends JdbcDaoSupport implements MoneyDao {

    JdbcTemplate jdbcTemplate=this.getJdbcTemplate();

    @Override

    public void addMoney(double money) {

        String sql="update accounts set balance=balance+? where accountname='小明'";

        this.getJdbcTemplate().update(sql,money);

    }

    @Override

    public void subMoney(double money) {

        String sql="update accounts set balance=balance-? where accountname='小李'";

        this.getJdbcTemplate().update(sql,money);

    }

}
代码实现
(3)service层
package cn.spring.transaction.service;

public interface MoneyService {

    //转账的方法

    void transferMoney(double money);

}
代码实现
(4)serviceImpl层
package cn.spring.transaction.service.impl;

import cn.spring.transaction.dao.MoneyDao;

import cn.spring.transaction.service.MoneyService;

public class MoneyServiceImpl implements MoneyService {

    MoneyDao moneyDao;

    @Override

    public void transferMoney(double money) {

        //金额先减后加

        moneyDao.subMoney(money);

        moneyDao.addMoney(money);

    }

    public MoneyDao getMoneyDao() {

        return moneyDao;

    }

    public void setMoneyDao(MoneyDao moneyDao) {

        this.moneyDao = moneyDao;

    }

}
代码实现
(5)applicationContext.xml配置文件
<?xml version="1.0" encoding="UTF-8" ?>

<beans xmlns="http://www.springframework.org/schema/beans"

       xmlns:xsi="http://www.w3.org/2001/XMLSchema-instance"

       xmlns:aop="http://www.springframework.org/schema/aop"

       xmlns:p="http://www.springframework.org/schema/p"

       xmlns:context="http://www.springframework.org/schema/context"

       xsi:schemaLocation="http://www.springframework.org/schema/beans

       http://www.springframework.org/schema/beans/spring-beans.xsd

       http://www.springframework.org/schema/aop

       http://www.springframework.org/schema/aop/spring-aop.xsd http://www.springframework.org/schema/context http://www.springframework.org/schema/context/spring-context.xsd">

    <!--1.配置数据源   spring内置的数据源-->

    <bean id="dataSource" class="org.springframework.jdbc.datasource.DriverManagerDataSource">

        <property name="driverClassName" value="${jdbc.driver}"></property>

        <property name="url" value="${jdbc.url}"></property>

        <property name="username" value="${jdbc.username}"></property>

        <property name="password" value="${jdbc.password}"></property>

    </bean>

    <!--2.引入属性文件-->

    <context:property-placeholder location="jdbc.properties"></context:property-placeholder>

    <!--3.构建jdbcTemplate-->

    <bean id="jdbcTemplate" class="org.springframework.jdbc.core.JdbcTemplate">

        <property name="dataSource" ref="dataSource"></property>

    </bean>

    <!--4.dao-->

    <bean id="moneyDaoImpl" class="cn.spring.transaction.dao.impl.MoneyDaoImpl">

        <!--为jdbcTemplate配置数据源-->

        <property name="jdbcTemplate" ref="jdbcTemplate"></property>

    </bean>

    <!--5.service-->

    <bean id="moneyServiceImpl" class="cn.spring.transaction.service.impl.MoneyServiceImpl">

        <property name="moneyDao" ref="moneyDaoImpl"></property>

    </bean>

    <!--扫描注解:包扫描器-->

    <context:component-scan base-package="cn.spring"></context:component-scan>

    <!--开启AOP注解支持-->

    <aop:aspectj-autoproxy></aop:aspectj-autoproxy>

</beans>
代码实现
(6)测试类
package cn.spring;

import cn.spring.transaction.service.MoneyService;

import org.springframework.context.ApplicationContext;

import org.springframework.context.support.ClassPathXmlApplicationContext;

public class TransactionTest {

    public static void main(String[] args) {

        ApplicationContext context=new ClassPathXmlApplicationContext("app01.xml");

        MoneyService moneyService = context.getBean(MoneyService.class);

        //实现转账

        moneyService.transferMoney(1000);

    }

}
代码实现
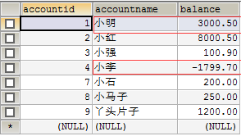
(7)效果展示
转账前 转账后


1、使用代理工厂实现事务
<!--1.配置数据源   spring内置的数据源-->

<bean id="dataSource" class="org.springframework.jdbc.datasource.DriverManagerDataSource">

        <property name="driverClassName" value="${jdbc.driver}"></property>

        <property name="url" value="${jdbc.url}"></property>

        <property name="username" value="${jdbc.username}"></property>

        <property name="password" value="${jdbc.password}"></property>

    </bean>

    <!--2.引入属性文件-->

    <context:property-placeholder location="jdbc.properties"></context:property-placeholder>

    <!--3.构建jdbcTemplate-->

    <bean id="jdbcTemplate" class="org.springframework.jdbc.core.JdbcTemplate">

        <property name="dataSource" ref="dataSource"></property>

    </bean>

    <!--配置Spring的事务管理器,默认在发生异常的情况下回滚,否则提交-->

    <bean id="transactionManager" class="org.springframework.jdbc.datasource.DataSourceTransactionManager">

        <property name="dataSource" ref="dataSource"></property>

    </bean>

    <!--第一种事务-->

    <!--配置Spring事务的代理工厂-->

    <bean id="transactionFactory" class="org.springframework.transaction.interceptor.TransactionProxyFactoryBean">

        <!--事务管理器-->

        <property name="transactionManager" ref="transactionManager"></property>

        <!--目标对象-->

        <property name="target" ref="moneyServiceImpl"></property>

        <!--设置方法-->

        <property name="transactionAttributes">

            <props>

                <!--方法对应的隔离级别和传播行为-->

                <prop key="transferMoney">ISOLATION_READ_COMMITTED</prop>

            </props>

        </property>

    </bean>

<!--扫描注解:包扫描器-->

    <context:component-scan base-package="cn.spring"></context:component-scan>

    <!--开启AOP注解支持-->

    <aop:aspectj-autoproxy></aop:aspectj-autoproxy>
2、使用AOP实现事务
<!--1.配置数据源   spring内置的数据源-->

<bean id="dataSource" class="org.springframework.jdbc.datasource.DriverManagerDataSource">

    <property name="driverClassName" value="${jdbc.driver}"></property>

    <property name="url" value="${jdbc.url}"></property>

    <property name="username" value="${jdbc.username}"></property>

    <property name="password" value="${jdbc.password}"></property>

</bean>

<!--2.引入属性文件-->

<context:property-placeholder location="jdbc.properties"></context:property-placeholder>

<!--3.构建jdbcTemplate-->

<bean id="jdbcTemplate" class="org.springframework.jdbc.core.JdbcTemplate">

    <property name="dataSource" ref="dataSource"></property>

</bean>

<!--配置Spring的事务管理器,默认在发生异常的情况下回滚,否则提交-->

<bean id="transactionManager" class="org.springframework.jdbc.datasource.DataSourceTransactionManager">

    <property name="dataSource" ref="dataSource"></property>

</bean>

<!--第二种事务AOP事务-->

<tx:advice id="transactionAdvice" transaction-manager="transactionManager" >

    <tx:attributes>

        <tx:method name="transferMoney" propagation="REQUIRED" isolation="READ_COMMITTED"></tx:method>

    </tx:attributes>

</tx:advice>

<aop:config>

    <aop:pointcut id="pointcut" expression="execution(* *..service.impl.*.*(..))"/>

    <aop:advisor advice-ref="transactionAdvice" pointcut-ref="pointcut"></aop:advisor>

</aop:config>

<!--扫描注解:包扫描器-->

<context:component-scan base-package="cn.spring"></context:component-scan>

<!--开启AOP注解支持-->

<aop:aspectj-autoproxy></aop:aspectj-autoproxy>
3、使用注解实现事务

<!--第三种事务注解事务-->

<tx:annotation-driven></tx:annotation-driven>
transaction事务案例--银行转账的更多相关文章
- 大数据学习day35----flume01-------1 agent(关于agent的一些问题),2 event,3 有关agent和event的一些问题,4 transaction(事务控制机制),5 flume安装 6.Flume入门案例
具体见文档,以下只是简单笔记(内容不全) 1.agent Flume中最核心的角色是agent,flume采集系统就是由一个个agent连接起来所形成的一个或简单或复杂的数据传输通道.对于每一个Age ...
- [原创]java WEB学习笔记77:Hibernate学习之路---Hibernate 版本 helloword 与 解析,.环境搭建,hibernate.cfg.xml文件及参数说明,持久化类,对象-关系映射文件.hbm.xml,Hibernate API (Configuration 类,SessionFactory 接口,Session 接口,Transaction(事务))
本博客的目的:①总结自己的学习过程,相当于学习笔记 ②将自己的经验分享给大家,相互学习,互相交流,不可商用 内容难免出现问题,欢迎指正,交流,探讨,可以留言,也可以通过以下方式联系. 本人互联网技术爱 ...
- SqlCommand对象-Transaction事务的使用
using (SqlConnection connection = new SqlConnection(connStr)) { SqlCommand sqlcmd = new SqlCommand() ...
- Spring事务经典案例-银行转账
1.entity实体类 2.dao层 3.dao实现类 4.service层 5.serviceimpl层 6.大配置.xml <?xml version="1.0" enc ...
- Transaction事务传播行为种类PROPAGATION_REQUIRED
事务传播行为种类 Spring在TransactionDefinition接口中规定了7种类型的事务传播行为,它们规定了事务方法和事务方法发生嵌套调用时事务如何进行传播: 表1事务传播行为类型 事务传 ...
- MSSQL Transaction[事务] and Procedure[存储过程]
--事务分三种 --1.显示事务 --我们手动begin transaction ...... commit transaction/rollback transaction --上面这种写法叫做“显 ...
- android 数据库中的事务_银行转账示例
主java package com.itheima.transtation; import com.itheima.transtation.db.BankOpenHelper; import andr ...
- Spring transaction事务之roll back回滚
转载自:http://blog.csdn.net/lovejavaydj/article/details/7635848 试验方法: 写一个单元测试,调用一个service层方法(发生对数据库进行写操 ...
- 浩哥解析MyBatis源码(三)——Transaction事务模块
原创作品,可以转载,但是请标注出处地址:http://www.cnblogs.com/V1haoge/p/6634151.html 1.回顾 之前介绍了Environment环境类,这其实是一个单例类 ...
随机推荐
- Android开发之OkHttp介绍
要论时下最火的网络请求框架,当属OkHttp了.自从Android4.4开始,google已经开始将源码中的HttpURLConnection替换为OkHttp,而在Android6.0之后的SDK中 ...
- SpringCloud之Zuul:服务网关
Zuul在Web项目中的使用见上文<SpringBoot中使用Zuul>,下面例子为Zuul在Spring Cloud的使用. 开发工具:IntelliJ IDEA 2019.2.3 一. ...
- WEB UI分布式自动化测试框架
Github地址: https://github.com/zhangweixu/Autotest.git
- python之os模块(os.path)
我们在做自动化测试的时候,可能会遇到一些需要处理文件一些需求,那么我们可以通过直接写文件的目录进行操作,当然作为一名自动化测试工程师,怎么可能用这种方法?python中自带的有OS,我们可以通过os模 ...
- Python生成requirements.txt方法
在查看别人的Python项目时,经常会看到一个requirements.txt文件,里面记录了当前程序的所有依赖包及版本号,其作用是用来在另一个环境上重新构建项目所需要的运行环境依赖. require ...
- Ubuntu16.04 GTX750安装CUDA9.0,Pytorch,Anaconda教程
Ubuntu16 GTX750安装CUDA9.0,Pytorch,Anaconda教程 安装前警告 不要使用Ubuntu18! 不要使用Ubuntu18! 不要使用Ubuntu18! 务必重装成Ubu ...
- FreeHttp1.2升级说明
一.升级方法 下载新版本插件 https://files.cnblogs.com/files/lulianqi/FreeHttp1.2.zip 或 http://lulianqi.com/file/ ...
- 【安富莱】V6,V5开发板用户手册,重在BSP驱动包设计方法,HAL库的框架学习,授人以渔(2019-11-04)
说明: 1.本教程重在BSP驱动包设计方法和HAL库的框架学习,并将HAL库里面的各种弯弯绕捋顺,从而方便我们的程序设计. 2.本次工程延续以往的代码风格,从底层BSP驱动包到应用代码,变量命名,文件 ...
- IT兄弟连 HTML5教程 HTML5表单 新增的表单属性1
HTML5 Input表单为<form>和<input>标签添加了几个新属性,属性如表1. 1 autocomplete属性 autocomplete属性规定form或inp ...
- 在IntelliJ IDEA中,Lombok注解@Slf4j找不到log解决方案
在IntelliJ IDEA中,注解@Slf4j找不到log时,可以安装Lombok插件 File → settings → Plugins, 然后点击"Browse repositorie ...