Spring Cloud Alibaba | Nacos服务中心初探
Spring Cloud Alibaba | Nacos服务注册与发现
Springboot: 2.1.6.RELEASE
SpringCloud: Greenwich.SR1
如无特殊说明,本系列文章全采用以上版本
上一篇《Spring Cloud Alibaba | Nacos服务中心初探》我们聊了什么是Nacos以及Nacos如何搭建,这一篇我们接着聊Nacos如何简单使用。
首先,Nacos是一个服务注册和服务发现的注册中心,在Spring Cloud中,可以替代Eureka的功能,我们先聊一下Nacos如何和Spring Cloud集成做一个注册中心。
整体流程为:
- 先启动注册中心Nacos
- 启动服务的提供者将提供服务,并将服务注册到注册中心Nacos上
- 启动服务的消费者,在Nacos中找到服务并完成消费
1. 服务提供者
新建一个producer的项目,项目依赖如下:
1.1 pom.xml项目依赖
<?xml version="1.0" encoding="UTF-8"?>

<project xmlns="http://maven.apache.org/POM/4.0.0" xmlns:xsi="http://www.w3.org/2001/XMLSchema-instance"

	xsi:schemaLocation="http://maven.apache.org/POM/4.0.0 http://maven.apache.org/xsd/maven-4.0.0.xsd">

	<modelVersion>4.0.0</modelVersion>

	<parent>

		<groupId>org.springframework.boot</groupId>

		<artifactId>spring-boot-starter-parent</artifactId>

		<version>2.1.6.RELEASE</version>

		<relativePath/> <!-- lookup parent from repository -->

	</parent>

	<groupId>com.springcloud</groupId>

	<artifactId>producer</artifactId>

	<version>0.0.1-SNAPSHOT</version>

	<name>producer</name>

	<description>Demo project for Spring Boot</description>

	<properties>

		<java.version>1.8</java.version>

	</properties>

	<dependencies>

		<dependency>

			<groupId>org.springframework.boot</groupId>

			<artifactId>spring-boot-starter-web</artifactId>

		</dependency>

		<dependency>

			<groupId>org.springframework.cloud</groupId>

			<artifactId>spring-cloud-starter-alibaba-nacos-discovery</artifactId>

			<version>0.9.0.RELEASE</version>

		</dependency>

		<dependency>

			<groupId>org.springframework.boot</groupId>

			<artifactId>spring-boot-starter-test</artifactId>

			<scope>test</scope>

		</dependency>

	</dependencies>

	<build>

		<plugins>

			<plugin>

				<groupId>org.springframework.boot</groupId>

				<artifactId>spring-boot-maven-plugin</artifactId>

			</plugin>

		</plugins>

	</build>

</project>
增加Nacos的服务发现的依赖:spring-cloud-starter-alibaba-nacos-discovery,根据版本SpringCloud和SpringBoot的版本,这里我们使用0.9.0.RELEASE版本。其他版本使用请看上一篇《Spring Cloud Alibaba | Nacos服务中心初探》。
1.2 配置文件application.yml
server:

  port: 9000

spring:

  application:

    name: spring-cloud-nacos-producer

  cloud:

    nacos:

      discovery:

        server-addr: localhost:8848
1.3 启动类ProducerApplication.java
package com.springcloud.producer;

import org.springframework.boot.SpringApplication;

import org.springframework.boot.autoconfigure.SpringBootApplication;

import org.springframework.cloud.client.discovery.EnableDiscoveryClient;

@SpringBootApplication

@EnableDiscoveryClient

public class ProducerApplication {

	public static void main(String[] args) {

		SpringApplication.run(ProducerApplication.class, args);

	}

}
@EnableDiscoveryClient 注册服务至Nacos。
1.4 controller
package com.springcloud.producer.controller;

import org.springframework.web.bind.annotation.RequestMapping;

import org.springframework.web.bind.annotation.RequestParam;

import org.springframework.web.bind.annotation.RestController;

/**

 * Created with IntelliJ IDEA.

 *

 * @Date: 2019/7/14

 * @Time: 10:04

 * @email: inwsy@hotmail.com

 * Description:

 */

@RestController

public class HelloController {

    @RequestMapping("/hello")

    public String hello(@RequestParam String name) {

        return "hello "+name+",producer is ready";

    }

}
1.5 测试
启动服务producer,在浏览器访问链接:http://localhost:9000/hello?name=nacos, 可以看到页面显示hello nacos,producer is ready。
打开Nacos显示页面,可以看到服务spring-cloud-nacos-producer正常上线。
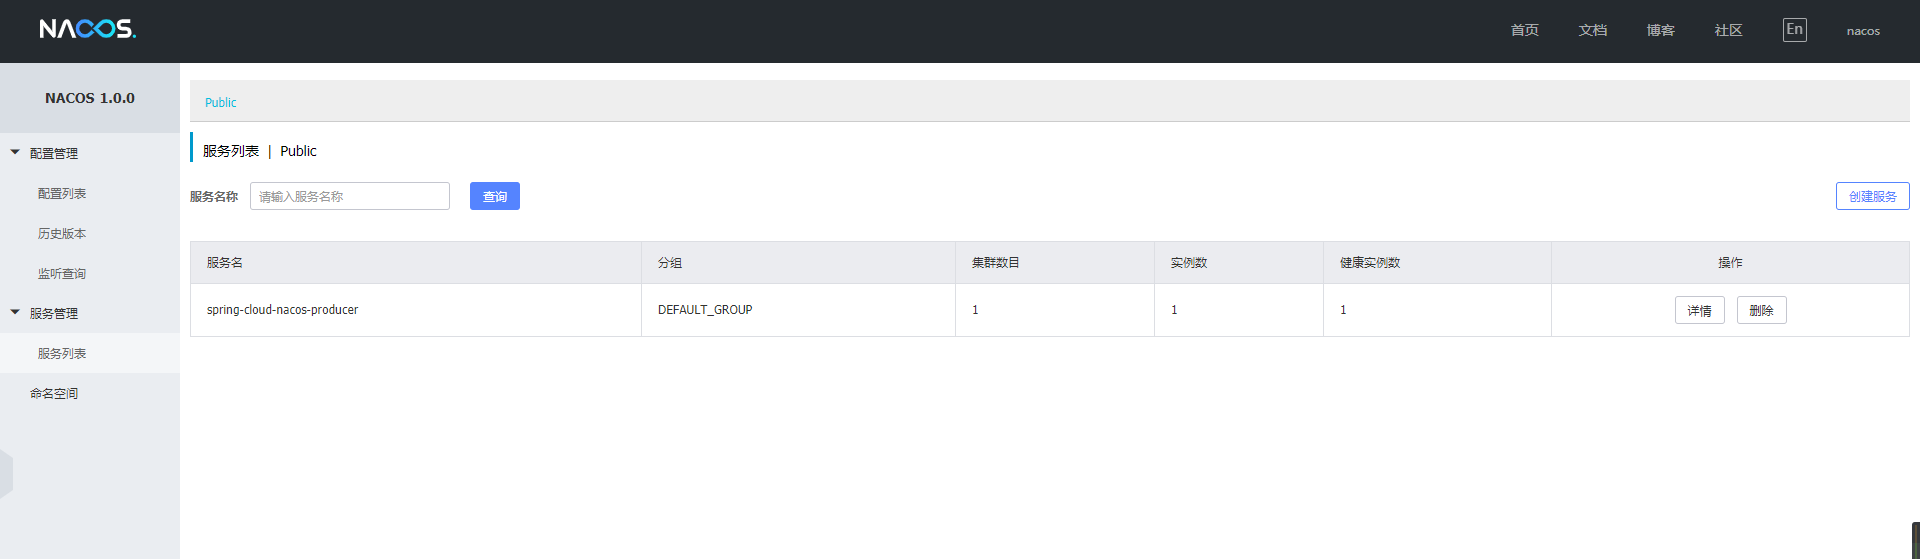
到这里,我们的服务提供者已经正常搭建完毕。
2. 服务消费者
2.1 pom.xml项目依赖
<?xml version="1.0" encoding="UTF-8"?>

<project xmlns="http://maven.apache.org/POM/4.0.0" xmlns:xsi="http://www.w3.org/2001/XMLSchema-instance"

	xsi:schemaLocation="http://maven.apache.org/POM/4.0.0 http://maven.apache.org/xsd/maven-4.0.0.xsd">

	<modelVersion>4.0.0</modelVersion>

	<parent>

		<groupId>org.springframework.boot</groupId>

		<artifactId>spring-boot-starter-parent</artifactId>

		<version>2.1.6.RELEASE</version>

		<relativePath/> <!-- lookup parent from repository -->

	</parent>

	<groupId>com.spring</groupId>

	<artifactId>nacos-cosumers</artifactId>

	<version>0.0.1-SNAPSHOT</version>

	<name>nacos-cosumers</name>

	<description>Demo project for Spring Boot</description>

	<properties>

		<java.version>1.8</java.version>

		<spring-cloud.version>Greenwich.SR2</spring-cloud.version>

	</properties>

	<dependencies>

		<dependency>

			<groupId>org.springframework.boot</groupId>

			<artifactId>spring-boot-starter-web</artifactId>

		</dependency>

		<dependency>

			<groupId>org.springframework.cloud</groupId>

			<artifactId>spring-cloud-starter-openfeign</artifactId>

		</dependency>

		<dependency>

			<groupId>org.springframework.cloud</groupId>

			<artifactId>spring-cloud-starter-alibaba-nacos-discovery</artifactId>

			<version>0.9.0.RELEASE</version>

		</dependency>

		<dependency>

			<groupId>org.springframework.boot</groupId>

			<artifactId>spring-boot-starter-test</artifactId>

			<scope>test</scope>

		</dependency>

	</dependencies>

	<dependencyManagement>

		<dependencies>

			<dependency>

				<groupId>org.springframework.cloud</groupId>

				<artifactId>spring-cloud-dependencies</artifactId>

				<version>${spring-cloud.version}</version>

				<type>pom</type>

				<scope>import</scope>

			</dependency>

		</dependencies>

	</dependencyManagement>

	<build>

		<plugins>

			<plugin>

				<groupId>org.springframework.boot</groupId>

				<artifactId>spring-boot-maven-plugin</artifactId>

			</plugin>

		</plugins>

	</build>

</project>
这里增加了spring-cloud-starter-openfeign依赖包
2.2 配置文件application.yml
server:

  port: 8080

spring:

  application:

    name: spring-cloud-nacos-consumers

  cloud:

    nacos:

      discovery:

        server-addr: localhost:8848
2.3 启动类NacosCosumersApplication.java
package com.spring.nacoscosumers;

import org.springframework.boot.SpringApplication;

import org.springframework.boot.autoconfigure.SpringBootApplication;

import org.springframework.cloud.client.discovery.EnableDiscoveryClient;

import org.springframework.cloud.openfeign.EnableFeignClients;

@SpringBootApplication

@EnableDiscoveryClient

@EnableFeignClients

public class NacosCosumersApplication {

	public static void main(String[] args) {

		SpringApplication.run(NacosCosumersApplication.class, args);

	}

}
@EnableFeignClients这个注解是声明Feign远程调用
2.4 Feign远程调用
创建一个remote接口
package com.spring.nacoscosumers.remote;

import org.springframework.cloud.openfeign.FeignClient;

import org.springframework.web.bind.annotation.RequestMapping;

import org.springframework.web.bind.annotation.RequestParam;

@FeignClient(name= "spring-cloud-nacos-producer")

public interface HelloRemote {

    @RequestMapping(value = "/hello")

    String hello(@RequestParam(value = "name") String name);

}
2.5 web层调用远程接口 Controller
package com.spring.nacoscosumers.controller;

import com.spring.nacoscosumers.remote.HelloRemote;

import org.springframework.beans.factory.annotation.Autowired;

import org.springframework.web.bind.annotation.PathVariable;

import org.springframework.web.bind.annotation.RequestMapping;

import org.springframework.web.bind.annotation.RestController;

/**

 * Created with IntelliJ IDEA.

 *

 * @Date: 2019/7/14

 * @Time: 10:24

 * @email: inwsy@hotmail.com

 * Description:

 */

@RestController

public class HelloController {

    @Autowired

    HelloRemote helloRemote;

    @RequestMapping("/hello/{name}")

    public String index(@PathVariable("name") String name) {

        return helloRemote.hello(name);

    }

}
2.6 测试
启动服务消费者nacos-consumers,打开浏览器访问链接:http://localhost:8080/hello/nacos, 这时页面正常返回hello nacos,producer is ready,证明我们的已经通过Nacos作为注册中心已经正常提供了服务注册与发现。
3. 集成Gateway
上面介绍了Nacos可以和Feign集成使用,更多的情况下,我们需要和API网关来集成。
这里我们还是使用之前的服务提供者,新建一个服务网关。
这里我们使用了Gateway做演示,想使用Zuul的朋友可以作为参考,在原有Zuul+Eureka的基础上只需要更换配置和依赖包就可以,无需其他过多的修改。
3.1 pom.xml项目依赖
<?xml version="1.0" encoding="UTF-8"?>

<project xmlns="http://maven.apache.org/POM/4.0.0" xmlns:xsi="http://www.w3.org/2001/XMLSchema-instance"

	xsi:schemaLocation="http://maven.apache.org/POM/4.0.0 http://maven.apache.org/xsd/maven-4.0.0.xsd">

	<modelVersion>4.0.0</modelVersion>

	<parent>

		<groupId>org.springframework.boot</groupId>

		<artifactId>spring-boot-starter-parent</artifactId>

		<version>2.1.6.RELEASE</version>

		<relativePath/> <!-- lookup parent from repository -->

	</parent>

	<groupId>com.spring</groupId>

	<artifactId>nacos-gateway</artifactId>

	<version>0.0.1-SNAPSHOT</version>

	<name>nacos-gateway</name>

	<description>Demo project for Spring Boot</description>

	<properties>

		<java.version>1.8</java.version>

		<spring-cloud.version>Greenwich.SR2</spring-cloud.version>

	</properties>

	<dependencies>

		<dependency>

			<groupId>org.springframework.cloud</groupId>

			<artifactId>spring-cloud-starter-gateway</artifactId>

		</dependency>

		<dependency>

			<groupId>org.springframework.cloud</groupId>

			<artifactId>spring-cloud-starter-alibaba-nacos-discovery</artifactId>

			<version>0.9.0.RELEASE</version>

		</dependency>

		<dependency>

			<groupId>org.springframework.boot</groupId>

			<artifactId>spring-boot-starter-test</artifactId>

			<scope>test</scope>

		</dependency>

	</dependencies>

	<dependencyManagement>

		<dependencies>

			<dependency>

				<groupId>org.springframework.cloud</groupId>

				<artifactId>spring-cloud-dependencies</artifactId>

				<version>${spring-cloud.version}</version>

				<type>pom</type>

				<scope>import</scope>

			</dependency>

		</dependencies>

	</dependencyManagement>

	<build>

		<plugins>

			<plugin>

				<groupId>org.springframework.boot</groupId>

				<artifactId>spring-boot-maven-plugin</artifactId>

			</plugin>

		</plugins>

	</build>

</project>
3.2 配置文件application.xml
server:

  port: 8088

spring:

  application:

    name: spring-cloud-nacos-gateway

  cloud:

    nacos:

      discovery:

        server-addr: localhost:8848

    gateway:

      discovery:

        locator:

          enabled: true

      routes:

        - id: hello_route

          #格式为:lb://应用注册服务名

          uri: lb://spring-cloud-nacos-producer

          predicates:

            - Method=GET
3.3 启动类NacosGatewayApplication.java
package com.spring.nacosgateway;

import org.springframework.boot.SpringApplication;

import org.springframework.boot.autoconfigure.SpringBootApplication;

@SpringBootApplication

public class NacosGatewayApplication {

	public static void main(String[] args) {

		SpringApplication.run(NacosGatewayApplication.class, args);

	}

}
3.4 测试
我们启动Gateway,打开浏览器访问链接:http://localhost:8088/spring-cloud-nacos-producer/hello?name=nacos, 浏览器正常返回:hello nacos,producer is ready, 证明我们通过服务网关来访问服务是正常的。
最后,我们打开看一下Nacos的服务列表:
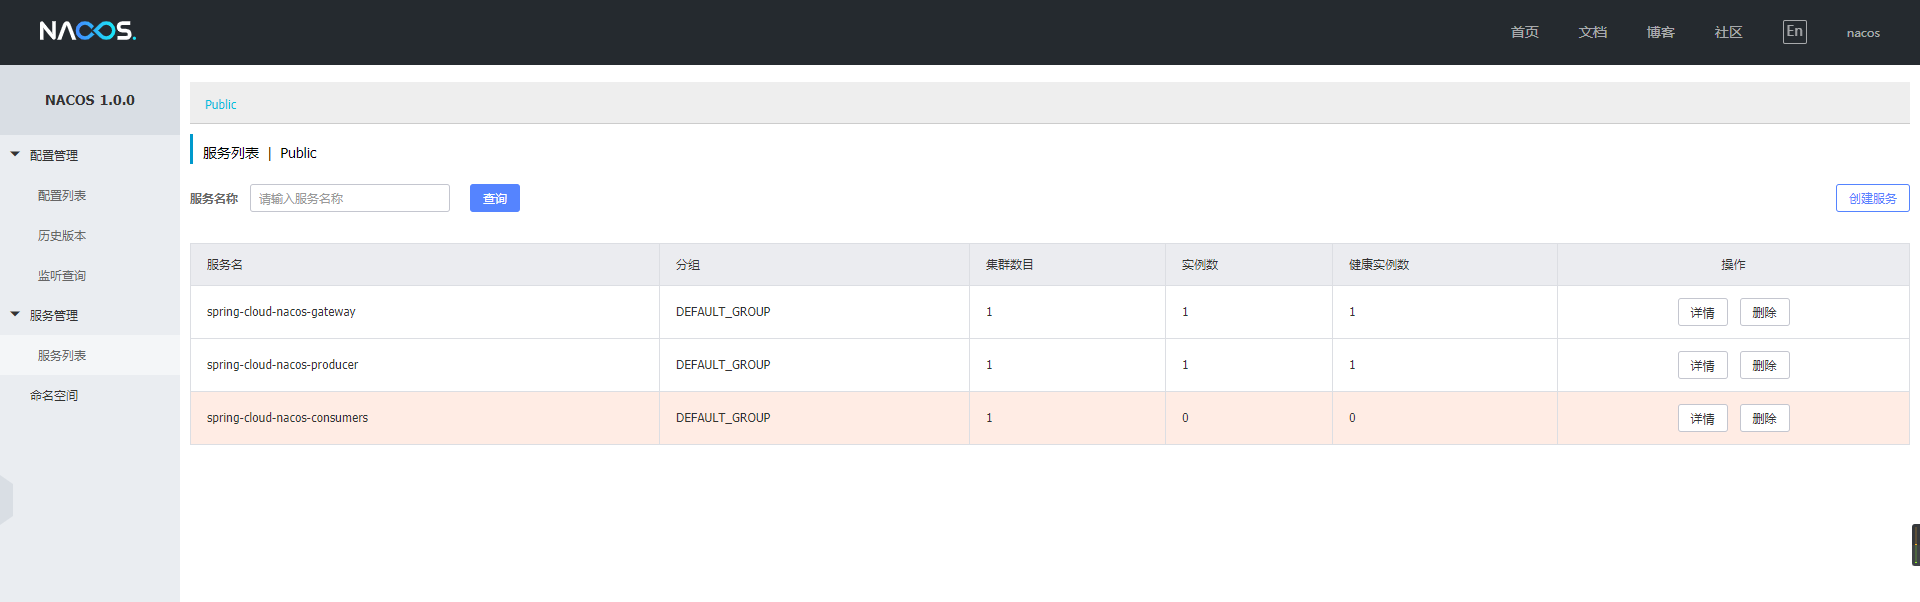
这里我把消费者服务停止掉了,可以看到Nacos可以实时的显示出来。
Nacos就介绍到这里,有不清楚的可以给我留言~
Spring Cloud Alibaba | Nacos服务中心初探的更多相关文章
- Spring Cloud Alibaba | Nacos服务注册与发现
目录 Spring Cloud Alibaba | Nacos服务注册与发现 1. 服务提供者 1.1 pom.xml项目依赖 1.2 配置文件application.yml 1.3 启动类Produ ...
- Spring Cloud Alibaba | Nacos配置管理
目录 Spring Cloud Alibaba | Nacos配置管理 1. pom.xml 项目依赖 2. 在 bootstrap.properties 中配置 Nacos server 的地址和应 ...
- Spring Cloud Alibaba | Nacos集群部署
目录 Spring Cloud Alibaba | Nacos集群部署 1. Nacos支持三种部署模式 2. 集群模式下部署Nacos 2.1 架构图 2.2 下载源码或者安装包 2.3 配置集群配 ...
- 0.9.0.RELEASE版本的spring cloud alibaba nacos+feign实例
这里的feign依然是原来的feign,只不过将注册中心由eureka换成了nacos.服务提供方参见0.9.0.RELEASE版本的spring cloud alibaba nacos实例,消费方跟 ...
- 0.9.0.RELEASE版本的spring cloud alibaba nacos实例
简而言之,nacos与eureka的不同之处有三:后台老板.部署方式.功能.nacos是阿里的,eureka是奈飞的:nacos有自己的安装包,需要独立部署,eureka仅作为一个服务组件,引入jar ...
- Spring Cloud Alibaba Nacos
1. Spring Cloud Alibaba 介绍 Spring Cloud Alibaba 为分布式应用程序开发提供了一站式解决方案.它包含了开发分布式应用程序所需的所有组件,使得你可以轻松地使用 ...
- Spring Cloud Alibaba+Nacos搭建微服务架构
1. Spring Cloud Alibaba 简介 Spring Cloud Alibaba是阿里巴巴为分布式应用提供的一站式解决方案,能够更方便快捷地搭建分布式平台,nacos拥有着替换eu ...
- Spring Cloud Alibaba Nacos Config 实战
Nacos 提供用于存储配置和其他元数据的 key/value 存储,为分布式系统中的外部化配置提供服务器端和客户端支持.使用 Spring Cloud Alibaba Nacos Config,您可 ...
- Spring Cloud Alibaba Nacos Config 的使用
Spring Cloud Alibaba Nacos Config 的使用 一.需求 二.实现功能 1.加载 product-provider-dev.yaml 配置文件 2.实现配置的自动刷新 3. ...
随机推荐
- linux虚拟机上svn客户端连接问题
在虚拟机上搭建好的svn,本地连接居然不行,原来是防火墙端口没开造成的. 修改配置文件:vi /etc/sysconfig/iptables # Generated by iptables-save ...
- WPF中的多进程(Threading)处理实例(二)
原文:WPF中的多进程(Threading)处理实例(二) //错误的处理 private void cmdBreakRules_Click(object sender, RoutedEventArg ...
- 【Python】Camera拍照休眠唤醒测试
#!/usr/bin/python # -*- coding: UTF-8 -*- import os import sys import time rebootCount = int(input(& ...
- 轮廓追踪与C#实现
原文:轮廓追踪与C#实现 轮廓追踪是图像处理中常见的方法,主要目的是追踪二值图像中目标物体的外轮廓,所得结果为单像素闭合轮廓. 流 程: 1. 确定种子点,即追踪的起始像素(如最左上方在轮 ...
- 基于svg.js实现可编辑的图像
svg.js的git地址https://github.com/svgdotjs/svg.js 实现可以拖动,可双击编辑,可拖动改变长短,线条可旋转以及一个可点击改变大小,可更改内容的二维码. 首先引入 ...
- 配置QSslConfiguration让客户端程序跳过本地SSL验证
大家下午好哦.今天我们在重新制作我们萌梦聊天室的时候,出现了这样的问题.那就是我们的客户端能够对qtdream.com服务器进行登录,但是不能对localhost服务器(也就是本机啦)进行登录.这究竟 ...
- Google C++测试框架系列入门篇:第二章 开始一个新项目
上一篇:Google C++测试框架系列入门篇:第一章 介绍:为什么使用GTest? 原始链接:Setting up a New Test Project 词汇表 版本号:v_0.1 开始一个新项目 ...
- win2003浏览器提示是否需要将当前访问的网站添加到自己信任的站点中去
Win2003的操作系统,的确比其它操作系统在安全上增加了不少,这是为用户所考虑的.当然,既然提供了安全性,尤其是在上网的时候,可以禁止某些活动脚本的显示,这样,就可以多方面的避免在使用Win2003 ...
- Spring中如何获取request的方法汇总及其线程安全性分析
前言 本文将介绍在Spring MVC开发的web系统中,获取request对象的几种方法,并讨论其线程安全性.下面话不多说了,来一起看看详细的介绍吧. 概述 在使用Spring MVC开发Web系统 ...
- 平衡二叉树 JAVA实现 亲测可用
平衡二叉树的JAVA实现 亲测可用 包括LL LR RL RR四种情况的旋转算法 以及添加删除树结点之后对平衡二叉树的维护算法 都已经实现并测试过 没有问题. 代码地址可以直接上我的GIT clone ...