Linux基础-----------nginx安装和nginx web、nginx反向代理、nfs 服务
作业一:nginx服务
1)二进制安装nginx包


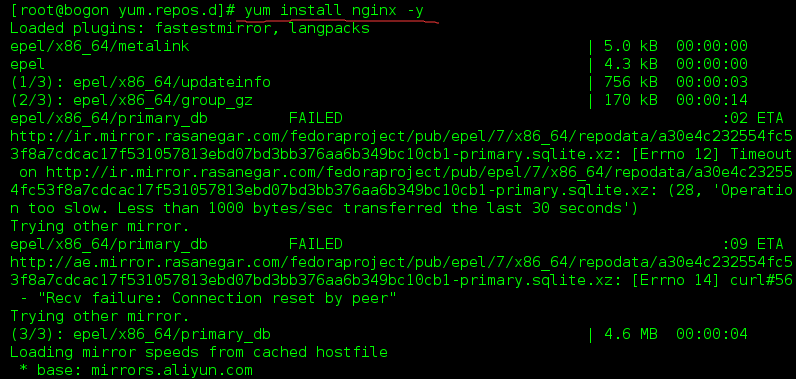
- yum install epel-release -y 先安装epel-release

- 再查看yum源中已经安装上了epel相关文件
 中间省去了一些安装进度细节(系统自动安装过程)
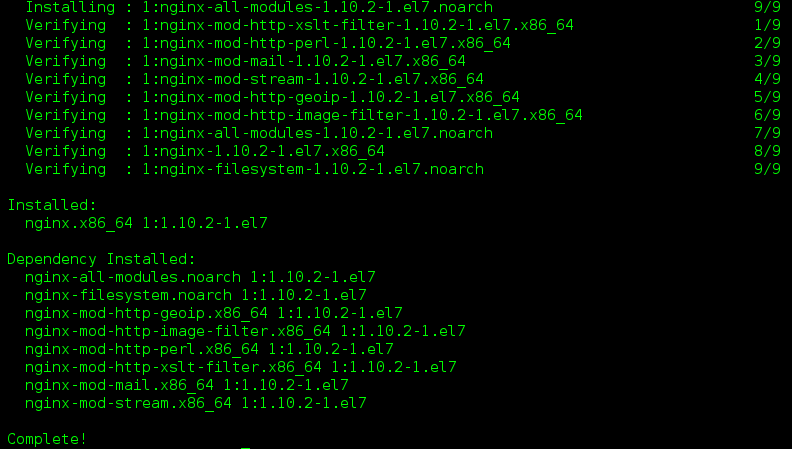
- yum install nginx -y 使用yum源安装nginx
2)作为web服务修改配置文件,让配置生效,并且验证配置

- 配置nginx.conf文件(系统貌似都有了)

- mkdir /usr/share/nginx/html/a/b/ -p 在改目录下创建/a/b目录

- echo 'welecome oldboy' > /usr/share/nginx/html/a/b/c.txt 在/b目录下创建c.txt并写入welecome oldboy

- systemctl start nginx 启动nginx

- systemctl status nginx 查看nginx启动没有
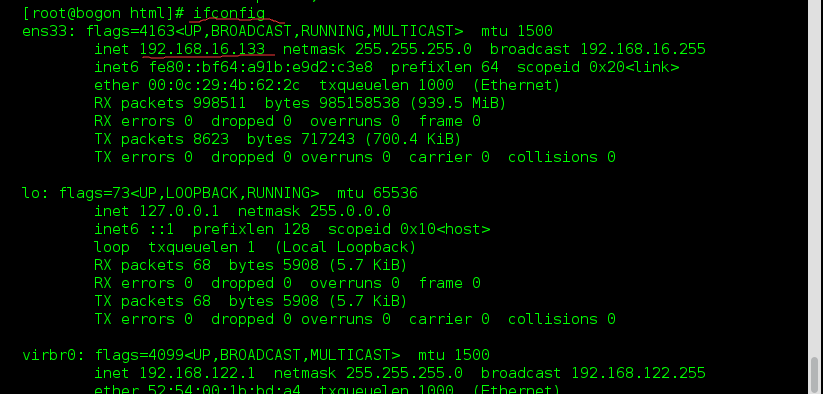
- ifconfig 找到自己机子的IP地址
 验证
验证
 验证结果:出了问题
- 在地址栏输入验证,发现会发现卡在那里,验证结果是有问题,原因是存在防火墙
 那么我们要关闭防火墙
systemctl stop firewalld 关闭防火墙
引申:systemctl disable firewalld 开机不启动防火墙(这是更粗暴的方式关闭防火墙,也是一种方式)
 再次验证,就可以了!
在输入网址,就可以看到之前创建的目下的welecome oldboy
- 总结步骤:
- 1)yum install epel-release -y 安装需要的文件epel-release
- 2)yum install nginx -y 安装nginx
- 3)vim /etc/nginx/nginx.conf 配置文件(系统有默认)
- root /usr/share/nginx/html
- 4)mkdir /usr/share/nginx/html/a/b/ -p 在改目录下创建/a/b目录
- 5)echo 'welecome oldboy' > /usr/share/nginx/html/a/b/c.txt 在/b目录下创建c.txt并写入welecome oldboy
- 6)systemctl start(或者restart) nginx 启动nginx
- systemctl status 查看nginx的安装状况是否成功启动
- 7)测试:这里是用自己的ip地址测试(ifconfig找自己的ip地址)
- http://192.168.16.133:80/a/b/c.txt
- 8)发现测试有问题,原因:防火墙(这一步其实应该在前面就该做好,做好初始化的环境,这里方便学习发现并解决这个问题)
- 9)关闭防火墙:systemctl stop firewalld
- systemctl disable firewalld 开机不启动防火墙(这是更粗暴的方式关闭防火墙,也是一种方式)
- 10)再测试,OK
作业二:nfs服务
1)二进制安装nfs
yum install rpcbind nfs-utils -y
2)作为共享存储挂载在三台web的网站根目录下
nfs服务端 192.168.16.133
web01 192.168.16.180
web02 192.168.16.181
web03 192.168.16.182
nfs服务端[root@proxy ~]# cat /etc/exports/share 192.168.16.0/24(rw,sync,fsid=0)[root@proxy ~]# mkdir /share[root@proxy ~]# chmod o+w /share[root@proxy ~]# cat /etc/exports/share 192.168.16.0/24(rw,sync,fsid=0)[root@proxy ~]# mkdir /share[root@proxy ~]# chmod o+w /share[root@proxy ~]# systemctl start rpcbind.service[root@proxy ~]# systemctl start nfs-server.service[root@proxy ~]# echo "192.168.16.133 proxy" >>/etc/hosts[root@proxy ~]# exportfs/share 192.168.16.0/24[root@proxy ~]# showmount -eExport list for proxy:/share 192.168.16.180/24,192.168.16.181/24,192.168.16.182/24web01 设置[root@bogon ~]# yum install rpcbind nfs-utils -y[root@web01 ~]# systemctl start rpcbind.service[root@web01 ~]# systemctl start nfs-server.service[root@web01 ~]# showmount -e 192.168.16.133Export list for 192.168.16.133:/share 192.168.16.180/24,192.168.16.181/24,192.168.16.182/24[root@web01 ~]# mount -t nfs 192.168.16.133:/share /usr/share/nginx/html/[root@web01 ~]# df -h文件系统 容量 已用 可用 已用% 挂载点/dev/mapper/cl-root 18G 4.6G 13G 26% /devtmpfs 473M 0 473M 0% /devtmpfs 489M 0 489M 0% /dev/shmtmpfs 489M 7.1M 482M 2% /runtmpfs 489M 0 489M 0% /sys/fs/cgroup/dev/sda1 509M 169M 341M 34% /boottmpfs 98M 0 98M 0% /run/user/0192.168.16.133:/share 18G 5.0G 13G 29% /usr/share/nginx/htmlweb02 设置[root@bogon ~]# yum install rpcbind nfs-utils -y[root@web02 ~]# systemctl start rpcbind.service[root@web02 ~]# systemctl start nfs-server.service[root@web02 ~]# showmount -e 192.168.16.133Export list for 192.168.16.133:/share 192.168.16.180/24,192.168.16.181/24,192.168.16.182/24[root@web01 ~]# mount -t nfs 192.168.16.133:/share /usr/share/nginx/html/[root@web02 ~]# mount -t nfs 192.168.16.133:/share /usr/share/nginx/html/[root@web02 ~]# df -h文件系统 容量 已用 可用 已用% 挂载点/dev/mapper/cl-root 18G 4.6G 13G 26% /devtmpfs 473M 0 473M 0% /devtmpfs 489M 0 489M 0% /dev/shmtmpfs 489M 7.1M 482M 2% /runtmpfs 489M 0 489M 0% /sys/fs/cgroup/dev/sda1 509M 169M 341M 34% /boottmpfs 98M 0 98M 0% /run/user/0192.168.16.133:/share 18G 5.0G 13G 29% /usr/share/nginx/htmlweb03 设置[root@bogon ~]# yum install rpcbind nfs-utils -y[root@web03 ~]# systemctl start rpcbind.service[root@web03 ~]# systemctl start nfs-server.service[root@web03~]# showmount -e 192.168.16.133Export list for 192.168.16.133:/share 192.168.16.180/24,192.168.16.181/24,192.168.16.182/24[root@web01 ~]# mount -t nfs 192.168.16.133:/share /usr/share/nginx/html/[root@web02 ~]# mount -t nfs 192.168.16.133:/share /usr/share/nginx/html/[root@web03 ~]# df -h文件系统 容量 已用 可用 已用% 挂载点/dev/mapper/cl-root 18G 4.6G 13G 26% /devtmpfs 473M 0 473M 0% /devtmpfs 489M 0 489M 0% /dev/shmtmpfs 489M 7.1M 482M 2% /runtmpfs 489M 0 489M 0% /sys/fs/cgroup/dev/sda1 509M 169M 341M 34% /boottmpfs 98M 0 98M 0% /run/user/0192.168.16.133:/share 18G 5.0G 13G 29% /usr/share/nginx/html3)实现,在任意一台web上修改的结果,其余两台都可以看到
[root@proxy share]# echo "Nginx" >/share/index.html[root@web01 html]# cat /usr/share/nginx/html/index.htmlNginx[root@web02~]# cat /usr/share/nginx/html/index.htmlNginx[root@web03~]# cat /usr/share/nginx/html/index.htmlNginx作业三:nginx反向代理三台web
proxy 192.168.16.133
web01 192.168.16.180
web02 192.168.16.181
web03 192.168.16.182
web01设置
[root@web01~]#yum install nginx -y
[root@web01~]#echo 'web01' > /usr/share/nginx/html/index.html
[root@web01~]#systemctl start nginx.service
[root@web01~]#curl 192.168.16.180
web02设置
[root@web02~]#yum install nginx -y
[root@web02~]#echo 'web02' > /usr/share/nginx/html/index.html
[root@web02~]#systemctl start nginx.service
[root@web02~]#curl 192.168.16.181
web03设置
[root@web03~]#yum install nginx -y
[root@web03~]#echo 'web03' > /usr/share/nginx/html/index.html
[root@web03~]#systemctl start nginx.service
[root@web03~]#curl 192.168.16.182
proxy设置
[root@proxy~]#vim /etc/nginx/nginx.conf
http {
upstream web{
server 192.168.16.180;
server 192.168.16.181;
server 192.168.16.182;
}
server {
listen 80;
location / {
proxy_pass http://web;
}
}
}
[root@proxy~]#systemctl reload nginx.service
1)实现基于轮询的方式调度三台web,并验证结果
http {
upstream pythonweb {
server 192.168.16.180;
server 192.168.16.181;
server 192.168.16.182;
}
server {
listen 80;
location / {
proxy_pass http://pythonweb;
}
}
}
2)实现基于权重的方式调度三台web,并验证结果
http {
upstream pythonweb {
server 192.168.16.180 weight=3;
server 192.168.16.181;
server 192.168.16.182;
}
server {
listen 80;
location / {
proxy_pass http://pythonweb;
}
}
}
3)实现基于hash的方式调用三台web,并验证结果
http {
upstream pythonweb {
ip_hash;
server 192.168.16.180 ;
server 192.168.16.181;
server 192.168.16.182;
}
server {
listen 80;
location / {
proxy_pass http://pythonweb;
}
}
}
作业四:nginx反向代理+三台web+nfs共享存储实现集群配置
web01[root@web01 html]# tail -f /var/log/nginx/access.log192.168.16.133 - - [20/Mar/2017:23:15:25 +0800] "GET / HTTP/1.0" 304 0 "-" "Mozilla/4.0 (compatible; MSIE 7.0; Windows NT 6.1; Win64; x64) AppleWebKit/537.36 (KHTML, like Gecko) Chrome/56.0.2924.87 Safari/537.36" "-"web02[root@web02 html]# tail -f /var/log/nginx/access.log192.168.16.133- - [20/Mar/2017:23:15:26 +0800] "GET / HTTP/1.0" 200 21 "-" "Mozilla/4.0 (compatible; MSIE 7.0; Windows NT 6.1; Win64; x64) AppleWebKit/537.36 (KHTML, like Gecko) Chrome/56.0.2924.87 Safari/537.36" "-"web03[root@web02 html]# tail -f /var/log/nginx/access.log192.168.16.133- - [20/Mar/2017:23:15:28 +0800] "GET / HTTP/1.0" 200 21 "-" "Mozilla/4.0 (compatible; MSIE 7.0; Windows NT 6.1; Win64; x64) AppleWebKit/537.36 (KHTML, like Gecko) Chrome/56.0.2924.87 Safari/537.36" "-"作业五:源码安装nginx,并按照作业一描述的那样去测试使用
[root@web01 html]#yum remove nginx
[root@web01 html]#useradd -s /sbin/nologin -M www[root@web01 html]#yum -y install pcre pcre-devel openssl openssl-devel[root@web01 html]#wget http://nginx.org/download/nginx-1.10.3.tar.gz[root@web01 ~]# tar xf nginx-1.10.3.tar.gz[root@web01 nginx-1.10.3]# cd nginx-1.10.3/[root@web01 nginx-1.10.3]#./configure --prefix=/usr/local/nginx --user=www --group=www --with-http_ssl_module --with-http_stub_status_module --with-file-aio --with-stream[root@web01]#make && make install[root@web01~]#/usr/local/nginx/sbin/nginx -t[root@web01~]#nginx: the configuration file /usr/local/nginx/conf/nginx.conf syntax is ok[root@web01~]#nginx: configuration file /usr/local/nginx/conf/nginx.conf test is successful[root@web01 ~]# echo "Hello Word" > /usr/local/nginx/html/index.html[root@web01 ~]# /usr/local/nginx/sbin/nginx[root@web01 ~]# curl 192.168.16.186Hello WordLinux基础-----------nginx安装和nginx web、nginx反向代理、nfs 服务的更多相关文章
- Linux下一键安装包的基础上安装SVN及实现nginx web同步更新
Linux下一键安装包的基础上安装SVN及实现nginx web同步更新 一.安装 1.查看是否安装cvs rpm -qa | grep subversion 2.安装 yum install sub ...
- 双nginx(主备、主主)反向代理tomcat实现web端负载均衡
经过以前做完的产品,受前公司几位前辈技术大拿指点,来自己动手实现并总结一下web端的负载解决方法,高手请略过,个人认知有限,请各位指正错误. 下面是结构图: 我的系统环境是Fedora22(适用rea ...
- linux下yum安装最新稳定版nginx
## 摘抄nginx官网文档 URL:http://nginx.org/en/linux_packages.html#stable To set up the yum repository for R ...
- centos7安装nginx,以及使用node测试反向代理
1.添加nginx的安装源 vi /etc/yum.repos.d/nginx.repo 2.输入下面内容,并保存退出 [nginx] name=nginx repo baseurl=http://n ...
- Nginx做web服务器反向代理
实验目的 通过nginx实现反向代理的功能,类似apache反向代理和haproxy反向代理 工作中用nginx做反向代理和负载均衡的也越来越多了 有些公司从web服务器到反向代理,都使用nginx. ...
- nginx安装&负载均衡配置&nginx反爬虫&nginx命令
Nginx安装 wget https://nginx.org/download/nginx-1.14.0.tar.gz tar -zxvf nginx-1.14.0.tar.gz cd nginx-1 ...
- Nginx 全模块安装及匹配方式、反向代理和负载均衡配置
一.安装 OpenResty OpenResty 是一个基于 Nginx 与 Lua 的高性能 Web 平台,其内部集成了大量精良的 Lua 库.第三方模块以及大多数的依赖项.用于方便地搭建能够处理超 ...
- nginx 安装手记 分类: Nginx 服务器搭建 2015-07-14 14:28 15人阅读 评论(0) 收藏
Nginx需要依赖下面3个包 gzip 模块需要 zlib 库 ( 下载: http://www.zlib.net/ ) zlib-1.2.8.tar.gz rewrite 模块需要 pcre 库 ( ...
- Nginx安装 默认虚拟主机 Nginx用户认证 Nginx域名重定向
Nginx安装 cd /usr/local/src (http://nginx.org/en/download.html) wget http://nginx.org/download/nginx-1 ...
- 安装Nginx并为node.js设置反向代理
最近看了反向代理和正向代理的东西,想到自己的node.js服务器是运行在3333端口的,也没有为他设置反向代理,node.js项目的一些静态文件是完全可以部署在Nginx上,以减少对node.js的请 ...
随机推荐
- String、StringBuffer、StringBuilder有什么区别
区别 先说说String和StringBuffer/StringBuilder: String是标准的不可变类,是一个字符串常量池,并且声明的对象在方法中是唯一存在的. StringBuffer/St ...
- HDU-4055:Number String
链接:HDU-4055:Number String 题意:给你一个字符串s,s[i] = 'D'表示排列中a[i] > a[i+1],s[i] = 'I'表示排列中a[i] < a[i+1 ...
- PHPCMS如何让手机站点取消浏览大图直接加载原图
一.然后找到phpcms\modules\wap\functions\global.func.php 文件,找到相关代码,如下图: return '<img src="'.thumb( ...
- xpath抓取的值有\r\n\t时,去掉的方法
解决办法: normalize-space() 例子: 原来的xpath为: user=selector.xpath('//*[@id="Con"]/tr[1]/th/text() ...
- PECE
CE客户端边界路由器.与PE设备直连,主要功能是将VPN客户的路由通告给PE,以及从PE学习同一个VPN下其他站点的路由.PE和CE直连的运营商设备(运营商边界路由器). #PE和CE也可以是用一台 ...
- SSM整合CRUD操作(一)
http://www.cnblogs.com/loger1995/p/6352179.html?utm_source=itdadao&utm_medium=referral 说明:这是我刚开始 ...
- 对scrum站立会议的理解
个人理解:首先我不明白scrum的含义,查了一下,scrum是迭代式增量软件开发过程,通常用于敏捷开发.scrum包括了一系列实践和预定义角色的过程骨架.scrum中的主要角色包括同项目经理类似的sc ...
- 使用union all 遇到的问题(俩条sql语句行数的和 不等于union all 后的 行数的和 !);遗留问题 怎么找到 相差的呐俩条数据 ?
create table buyer as SELECT b.id AS bankid FROM v_product_deal_main m, base_member b WHERE b.id = m ...
- crontab笔记
* * * * * root rm -f /var/spool/cron/lastrun/cron.hourly > out.file 第一部分:执行的周期与时间 ...
- Spring Cloud构建微服务架构
Dalston版本 由于Brixton和Camden版本的教程已经停止更新,所以笔者计划在2017年上半年完成Dalston版本的教程编写(原计划完成Camden版本教程,但由于写了两篇Dalston ...