Intel Omin-Path Architecture 搭建调优与测试
OPA在Centos上的搭建
1. 首先确认Omni-Path Host Fabric Interfaces (HFIs)
# yum install –y pciutils

# lspci -vv | grep Omni

:00.0 Fabric controller: Intel Corporation Omni-Path HFI Silicon  Series [discrete] (rev )

        Subsystem: Intel Corporation Omni-Path HFI Silicon  Series [discrete]
2. 安装Intel® Omni-Path Software
Intel® Omni-Path Software可以通过下载安装包的方式安装也可以通过从包源(Package Source)的方式,安装包可以从以下链接下载,
https://downloadcenter.intel.com/search?keyword=Omni-Path
由于Intel® Omni-Path Software已经被打包进CentOS的包源,我们这里采用从包源来安装。
首先安装前提包:
# yum install -y libibmad libibverbs librdmacm libibcm qperf perftest rdma infinipath-psm expat elfutils-libelf-devel libstdc++-devel gcc-gfortran atlas tcl expect tcsh sysfsutils pciutils bc libibumad libibumad-devel libibumad libibumad-devel libibverbs-devel libibmaddevel librdmacm-devel ibacm-devel openssl-devel libuuid-devel expatdevel infinipath-psm-devel valgrind-devel libgnome libibverbs* opensm-libs libhfi1 papi ncurses-devel hwloc hwloc-gui
接着安装Intel® Omni-Path Software并重启机器
#yum install -y opa-basic-tools

# reboot

确认Host Fabric Interfaces (HFIs)驱动hfi1安装并装载

# modprobe hfi1

$ lsmod | grep hfi1
3. 配置 IPoIB IPV4
vi /etc/sysconfig/network-scripts/ifcfg-ib0

DEVICE=ib0

BOOTPROTO=static

IPADDR=10.4.204.173

BROADCAST=10.4.255.255

NETWORK=10.4.0.0

NETMASK=255.255.0.0

ONBOOT=yes

CONNECTED_MODE=yes

MTU=
4. 安装OPA FM
yum install –y opa-fastfabric opa-address-resolution opa-fm

# systemctl start opafm
5. 启动IPoIB接口
# ifup ib0
Verify that RDMA is working
Verify that RDMA kernel part is loaded
[root@jfz1r04h19 z1r04h19]# lsmod |grep ib

ib_isert

iscsi_target_mod         ib_isert

ib_iser

libiscsi                  ib_iser

scsi_transport_iscsi       ib_iser,libiscsi

ib_srpt

target_core_mod          iscsi_target_mod,ib_srpt,ib_isert

ib_srp

scsi_transport_srp        ib_srp

ib_ipoib

ib_ucm

ib_uverbs                 ib_ucm,rdma_ucm

ib_umad

rdma_cm                   rpcrdma,ib_iser,rdma_ucm,ib_isert

ib_cm                     rdma_cm,ib_srp,ib_ucm,ib_srpt,ib_ipoib

ib_core                  hfi1,rdma_cm,i40iw,ib_cm,iw_cm,rpcrdma,ib_srp,ib_ucm,rdmavt,ib_iser,ib_srpt,ib_umad,ib_uverbs,rdma_ucm,ib_ipoib,ib_isert
Verify that RDMA devices are available
[root@jfz1r04h19 z1r04h19]# ibv_devices

    device                 node GUID

    ------              ----------------

    i40iw1              a4bf014ddd2c0000

    i40iw0              a4bf014ddd2b0000

hfi1_0              001175010172feb8
Verify that RDMA devices can be accessed
[root@jfz1r04h19 z1r04h19]# ibv_devinfo -d hfi1_0

hca_id: hfi1_0

        transport:                      InfiniBand ()

        fw_ver:                         0.0.

        node_guid:                      :::feb8

        sys_image_guid:                 :::feb8

        vendor_id:                      0x1175

        vendor_part_id:

        hw_ver:                         0x11

        board_id:                       Intel Omni-Path Host Fabric Interface Adapter  Series

        phys_port_cnt:

                port:

                        state:                  PORT_ACTIVE ()

                        max_mtu:                 ()

                        active_mtu:              ()

                        sm_lid:

                        port_lid:

                        port_lmc:               0x00

                        link_layer:             InfiniBand

PORT_ACTIVE is
Send traffic using ibv_*_pingpong
Server side:

[z1r04h18@jfz1r04h18 ~]$ ibv_ud_pingpong -g  -d hfi1_0 -i

Client side:

[root@jfz1r04h19 z1r04h19]# ibv_ud_pingpong -g  -d hfi1_0 -i  192.168.200.118

  local address:  LID 0x0001, QPN 0x000062, PSN 0xafa045: GID fe80:::::feb8

  remote address: LID 0x0005, QPN 0x0000d4, PSN 0xdf6b42, GID fe80:::::f1a6

 bytes in 0.01 seconds = 2217.65 Mbit/sec

 iters in 0.01 seconds = 14.78 usec/iter
Send traffic using rping
Yum install –y librdmacm-utils

Server side:

[z1r04h18@jfz1r04h18 ~]$ rping -s -a 192.168.200.118 -v

Client side:

[root@jfz1r04h19 z1r04h19]# rping -c -a 192.168.200.118 -v
IPoIB over OPA调优
Transparent Huge Pages
$ cat /sys/kernel/mm/transparent_hugepage/enabled

[always] madvise never
Do Not Enable intel_iommu
[root@jfz1r04h19 z1r04h19]# cat /etc/default/grub

GRUB_TIMEOUT=

GRUB_DISTRIBUTOR="$(sed 's, release .*$,,g' /etc/system-release)"

GRUB_DEFAULT=saved

GRUB_DISABLE_SUBMENU=true

GRUB_TERMINAL_OUTPUT="console"

GRUB_CMDLINE_LINUX="crashkernel=auto rd.lvm.lv=centos/root rd.lvm.lv=centos/swap rhgb quiet"

GRUB_DISABLE_RECOVERY="true"
HFI1 Driver Module Parameters
显示驱动参数
for x in /sys/module/hfi1/parameters/*; do echo "$(basename $x) " $(cat $x); done

aspm  0

cache_size  256

cap_mask  0x4c09a00cb9a

cu  1

desct_intr  64

eager_buffer_size  2097152

hdrq_entsize  32

kdeth_qp  128

krcvqs

link_crc_mask  3

lkey_table_size  16

loopback  0

max_ahs  65535

max_cqes  3145727

max_cqs  131071

max_mcast_grps  16384

max_mcast_qp_attached  16

max_mtu  10240

max_pds  65535

max_qps  32768

max_qp_wrs  16383

max_sges  96

max_srqs  1024

max_srq_sges  128

max_srq_wrs  131071

num_sdma  0

num_user_contexts  36

num_vls  8

pcie_caps  0

pcie_ctle  1

pcie_force  0

pcie_pset  2

pcie_retry  5

pcie_target  3

piothreshold  256

qp_table_size  256

rcvarr_split  25

rcvhdrcnt  2048

rcv_intr_count  16

rcv_intr_timeout  840

sdma_comp_size  128

sdma_descq_cnt  2048

sdma_idle_cnt  250

sge_copy_mode  0

user_credit_return_threshold  33

wss_clean_period  256

wss_threshold  80
7.0 Verbs Benchmarks
8.0 IPoFabric Performance
OPA 实现的是 IP over Fabric or IPoFabric,从使用的角度也是IPoIB,而且用的是 ib_ipoib驱动
设置8K MTU
Cat /etc/sysconfig/network-scripts/ifcfg-ib0

ONBOOT=yes

NM_CONTROLLED=no

MTU=

CONNECTED_MODE=yes
IPoFabric Datagram Mode Configuration
一般Connected Mode性能最好
[root@jfz1r04h19 z1r04h19]# cat /sys/class/net/ib0/mode

connected
TCP Parameter Tuning for IPoFabric Performance
一般不需要,如果内存充足的话可以设置一下,性能提高10%:
sudo sysctl -w net.ipv4.tcp_rmem="16384 349520 16777216"

sudo sysctl -w net.ipv4.tcp_wmem="16384 349520 16777216"

sudo sysctl -w net.core.rmem_max=

sudo sysctl -w net.core.wmem_max=

sudo sysctl -w net.core.somaxconn=

sudo sysctl -w net.ipv4.tcp_mtu_probing=

sudo sysctl -w net.core.netdev_max_backlog=
实际
[z1r04h19@jfz1r04h19 yuntong]$ iperf3 -c 192.168.200.118
性能在一分钟之内下降
35.8 33.1 24.2 23.0
测试IPoIB over OPA(Omin-Path Architecture)
TCP模式带宽为25G:
[z1r04h19@jfz1r04h19 ~]$ iperf3 -c 192.168.200.118

Connecting to host 192.168.200.118, port

[  ] local 192.168.200.49 port  connected to 192.168.200.118 port

[ ID] Interval           Transfer     Bandwidth       Retr  Cwnd

- - - - - - - - - - - - - - - - - - - - - - - - -

[ ID] Interval           Transfer     Bandwidth       Retr

[  ]   0.00-10.00  sec  29.3 GBytes  25.1 Gbits/sec                 sender

[  ]   0.00-10.00  sec  29.3 GBytes  25.1 Gbits/sec                  receiver
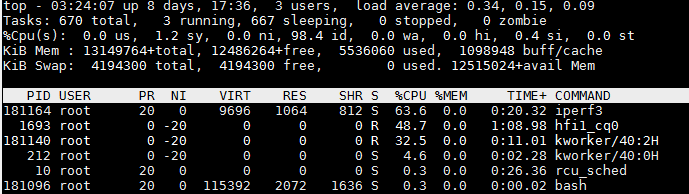
一共72个core,IPoIB CPU占用率很小
UDP模式带宽与TCP一样为25G:
[z1r04h19@jfz1r04h19 ~]$ iperf3 -u -c 192.168.200.118

Connecting to host 192.168.200.118, port

- - - - - - - - - - - - - - - - - - - - - - - - -

[ ID] Interval           Transfer     Bandwidth       Jitter    Lost/Total Datagrams

[  ]   0.00-10.00  sec  1.25 MBytes  1.05 Mbits/sec  0.016 ms  / (%)
只有1G, 原因是:
-b,--bandwidth #[KMG][/#] target bandwidth in bits/sec (0 for unlimited)
(default 1 Mbit/secfor UDP, unlimited for TCP)
(optional slash andpacket count for burst mode)
UDP目标带宽设置为40G
[z1r04h19@jfz1r04h19 ~]$ iperf3 -u -c 192.168.200.118 -b 40G

Connecting to host 192.168.200.118, port

[  ] local 192.168.200.49 port  connected to 192.168.200.118 port

[ ID] Interval           Transfer     Bandwidth       Total Datagrams

- - - - - - - - - - - - - - - - - - - - - - - - -

[ ID] Interval           Transfer     Bandwidth       Jitter    Lost/Total Datagrams

[  ]   0.00-10.00  sec  27.9 GBytes  24.0 Gbits/sec  0.003 ms  / (%)

[  ] Sent  datagrams
length of buffer默认为128K,设置为1M,比起默认的带宽25G有提升:
-l, --len #[KMG] length of buffer to read or write
(default 128 KB for TCP, dynamic or 1 for UDP)
 [z1r04h19@jfz1r04h19 ~]$ iperf3 -c 192.168.200.118 -l 1M

Connecting to host 192.168.200.118, port

[  ] local 192.168.200.49 port  connected to 192.168.200.118 port

- - - - - - - - - - - - - - - - - - - - - - - - -

[ ID] Interval           Transfer     Bandwidth       Retr

[  ]   0.00-10.00  sec  32.1 GBytes  27.5 Gbits/sec                 sender

[  ]   0.00-10.00  sec  32.1 GBytes  27.5 Gbits/sec                  receiver
多线程性能没有提升:
-P,--parallel # number of parallel client streams torun
[z1r04h19@jfz1r04h19 ~]$ iperf3 -c 192.168.200.118  -P

[SUM]   0.00-10.00  sec  28.8 GBytes  24.7 Gbits/sec                 sender

[SUM]   0.00-10.00  sec  28.8 GBytes  24.7 Gbits/sec                  receiver
使用zerocopy 发送,没有任何提升
-Z,--zerocopy use a 'zero copy'method of sending data
[z1r04h19@jfz1r04h19 ~]$ iperf3 -c 192.168.200.118  -Z

- - - - - - - - - - - - - - - - - - - - - - - - -

[ ID] Interval           Transfer     Bandwidth       Retr

[  ]   0.00-10.00  sec  27.3 GBytes  23.4 Gbits/sec                 sender

[  ]   0.00-10.00  sec  27.3 GBytes  23.4 Gbits/sec                  receiver
CPU affinity可达46G
-A, --affinity n/n,m
Set the CPU affinity, if possible (Linux and FreeBSD only). On both the client and server you can set the local affinity by using the n form of this argument (where n is a CPU number). In addition, on the client side you can override the server's affinity for just that one test, using the n,m form of argument. Note that when using this feature, a process will only be bound to a single CPU (as opposed to a set containing potentialy multiple CPUs).
[root@jfz1r04h19 z1r04h19]# iperf3 -c 192.168.200.118 -A

 [ ID] Interval           Transfer     Bandwidth       Retr

[  ]   0.00-10.00  sec  54.2 GBytes  46.6 Gbits/sec                 sender
尝试不同 -A 参数 当-A 4效果最好:
[root@jfz1r04h19 z1r04h19]# iperf3 -c 192.168.200.118 -A

[  ]   8.00-8.57   sec  1.78 GBytes  26.6 Gbits/sec       2.50 MBytes

[root@jfz1r04h19 z1r04h19]# iperf3 -c 192.168.200.118 -A

 [ ID] Interval           Transfer     Bandwidth       Retr

[  ]   0.00-10.00  sec  54.2 GBytes  46.6 Gbits/sec                 sender

[root@jfz1r04h19 z1r04h19]# iperf3 -c 192.168.200.118 -A

[  ]   0.00-10.00  sec  31.0 GBytes  26.6 Gbits/sec                 sender

[  ]   0.00-10.00  sec  31.0 GBytes  26.6 Gbits/sec                  receiver
延迟测试
[root@jfz1r04h19 z1r04h19]# ib_send_lat -a -c UD  -d hfi1_0 -i  192.168.200.118

 Max msg size in UD is MTU

 Changing to this MTU

---------------------------------------------------------------------------------------

                    Send Latency Test

 Dual-port       : OFF          Device         : hfi1_0

 Number of qps   :             Transport type : IB

 Connection type : UD           Using SRQ      : OFF

 TX depth        :

 Mtu             : [B]

 Link type       : IB

 Max inline data : [B]

 rdma_cm QPs     : OFF

 Data ex. method : Ethernet

---------------------------------------------------------------------------------------

 local address: LID 0x01 QPN 0x0078 PSN 0xa16791

 remote address: LID 0x05 QPN 0x00ea PSN 0xf8cb30

---------------------------------------------------------------------------------------

 #bytes #iterations    t_min[usec]    t_max[usec]  t_typical[usec]    t_avg[usec]    t_stdev[usec]   % percentile[usec]   99.9% percentile[usec]

                 4.52           23.20        4.64                4.66             0.26           5.26                 23.20

                 4.44           22.25        4.55                4.59             0.47           4.90                 22.25

                 4.44           5.56         4.56                4.56             0.08           4.73                 5.56

                4.43           5.35         4.53                4.54             0.07           4.96                 5.35

                4.40           7.54         4.54                4.55             0.10           5.07                 7.54

                4.46           6.12         4.56                4.56             0.06           4.74                 6.12

               4.47           12.56        4.59                4.61             0.39           4.74                 12.56

               4.52           12.62        4.64                4.68             0.46           5.25                 12.62

               4.58           6.01         4.70                4.71             0.07           4.91                 6.01

              4.75           7.32         4.87                4.89             0.08           5.37                 7.32

              4.96           6.01         5.11                5.12             0.08           5.34                 6.01

              5.47           7.24         5.64                5.65             0.09           5.89                 7.24

---------------------------------------------------------------------------------------
Intel Omin-Path Architecture 搭建调优与测试的更多相关文章
- (转)centos 7 Tomcat 8.5 的安装及生产环境的搭建调优
原文:https://www.cnblogs.com/linhankbl/articles/9149804.html#top JVM菜鸟进阶高手之路七(tomcat调优以及tomcat7.8性能对比) ...
- 如何利用 JuiceFS 的性能工具做文件系统分析和调优
JuiceFS 是一款面向云原生环境设计的高性能 POSIX 文件系统,在 AGPL v3.0 开源协议下发布.作为一个云上的分布式文件系统,任何存入 JuiceFS 的数据都会按照一定规则拆分成数据 ...
- Kafka_2.12-2.5.1集群搭建与参数调优
Kafka是目前业界使用最广泛的消息队列.数据流转常见这样的业务场景,客户端把采集到的日志推送给Kafka,业务方可以消费Kafka的数据落地HDFS,用于离线分析,也可以使用Spark或Flink消 ...
- 基于CDH 5.9.1 搭建 Hive on Spark 及相关配置和调优
Hive默认使用的计算框架是MapReduce,在我们使用Hive的时候通过写SQL语句,Hive会自动将SQL语句转化成MapReduce作业去执行,但是MapReduce的执行速度远差与Spark ...
- 搭建 windows(7)下Xgboost(0.4)环境 (python,java)以及使用介绍及参数调优
摘要: 1.所需工具 2.详细过程 3.验证 4.使用指南 5.参数调优 内容: 1.所需工具 我用到了git(内含git bash),Visual Studio 2012(10及以上就可以),xgb ...
- 每秒处理3百万请求的Web集群搭建-为最佳性能调优 Nginx
这篇文章是<打造3百万次请求/秒的高性能服务器集群>系列的第2部分,在这个部分中你可以使用任何一种 WEB 服务器,不过我决定使用 Nginx,因其轻量级.高可靠及高性能的优点. 通常来说 ...
- LAMP之Apache调优
一.环境的搭建 实验环境: 操作系统:Centos 7.4 [root@xuegod70 ~]# ls apr-1.6.3.tar.gz apr-util-1.6.1.tar.bz2 httpd-2. ...
- (转)SQL Server 性能调优(cpu)
摘自:http://www.cnblogs.com/Amaranthus/archive/2012/03/07/2383551.html 研究cpu压力工具 perfom SQL跟踪 性能视图 cpu ...
- 《深入理解Java虚拟机》-----第5章 jvm调优案例分析与实战
案例分析 高性能硬件上的程序部署策略 例 如 ,一个15万PV/天左右的在线文档类型网站最近更换了硬件系统,新的硬件为4个CPU.16GB物理内存,操作系统为64位CentOS 5.4 , Resin ...
随机推荐
- java如何使用base64生成图片文件
import org.apache.commons.codec.binary.Base64; public static void decodeFile(String base64Str,File f ...
- 微信小程序 --- 获取网络状态
获取网络状态:wx.getNetworkType btnclick:function(){ wx.getNetworkType({ success:function(res){ console.log ...
- php 常用的系统函数
字符串函数 strlen:获取字符串长度,字节长度 substr_count 某字符串出现的次数 substr:字符串截取,获取字符串(按照字节进行截取) mb_strlenmb_substr str ...
- docker swarm+register-web+shipyard搭建
1.swarm安装 swarm安装有很多种服务注册的方式,token.etcd.zookeeper,本文主要以swarm默认的token方式进行安装.因为最新的docker已经集成了swarm,所以从 ...
- nginx安装和测试 (已验证)
进入:/usr/local/nginx 目录注意:为了保证各插件之间的版本兼容和稳定,建议先通过以下版本进行测试验证. 一.下载版本 下载nginx: wget http://nginx.org/do ...
- Bean Life Cycle
Bean生命周期 Spring Bean Life Cycle https://www.tutorialspoint.com/spring/spring_bean_life_cycle.htm The ...
- F(N)---hdu2802(寻找循环节)
题目链接:http://acm.hdu.edu.cn/showproblem.php?pid=2802 f[1] = 1; f[2] = 7; f[n] = (f[n-2] - (n-1)*(n-1) ...
- Oracle SQL语句积累
字段合并: select EVFOUNDATIONTYPEA || EVFOUNDATIONTYPEB|| EVFOUNDATIONTYPEC ||EVFOUNDATIONTYPED as b fro ...
- 【译】Using Objects to Organize Your Code
耗了一个晚上吐血翻译不过也学到了不少...<使用对象来组织你的代码>,翻译中发现原作者在原文中有部分代码有误或不全,本文已修改和添加~ 丽贝卡·墨菲原文链接:http://rmurphey ...
- php://input、$_POST与$GLOBALS['HTTP_RAW_POST_DATA']三者的区别
$_POST 只有Coentent-Type的值为application/x-www.form-urlencoded和multipart/form-data两种类型时,$_POST才能获取到数据. $ ...