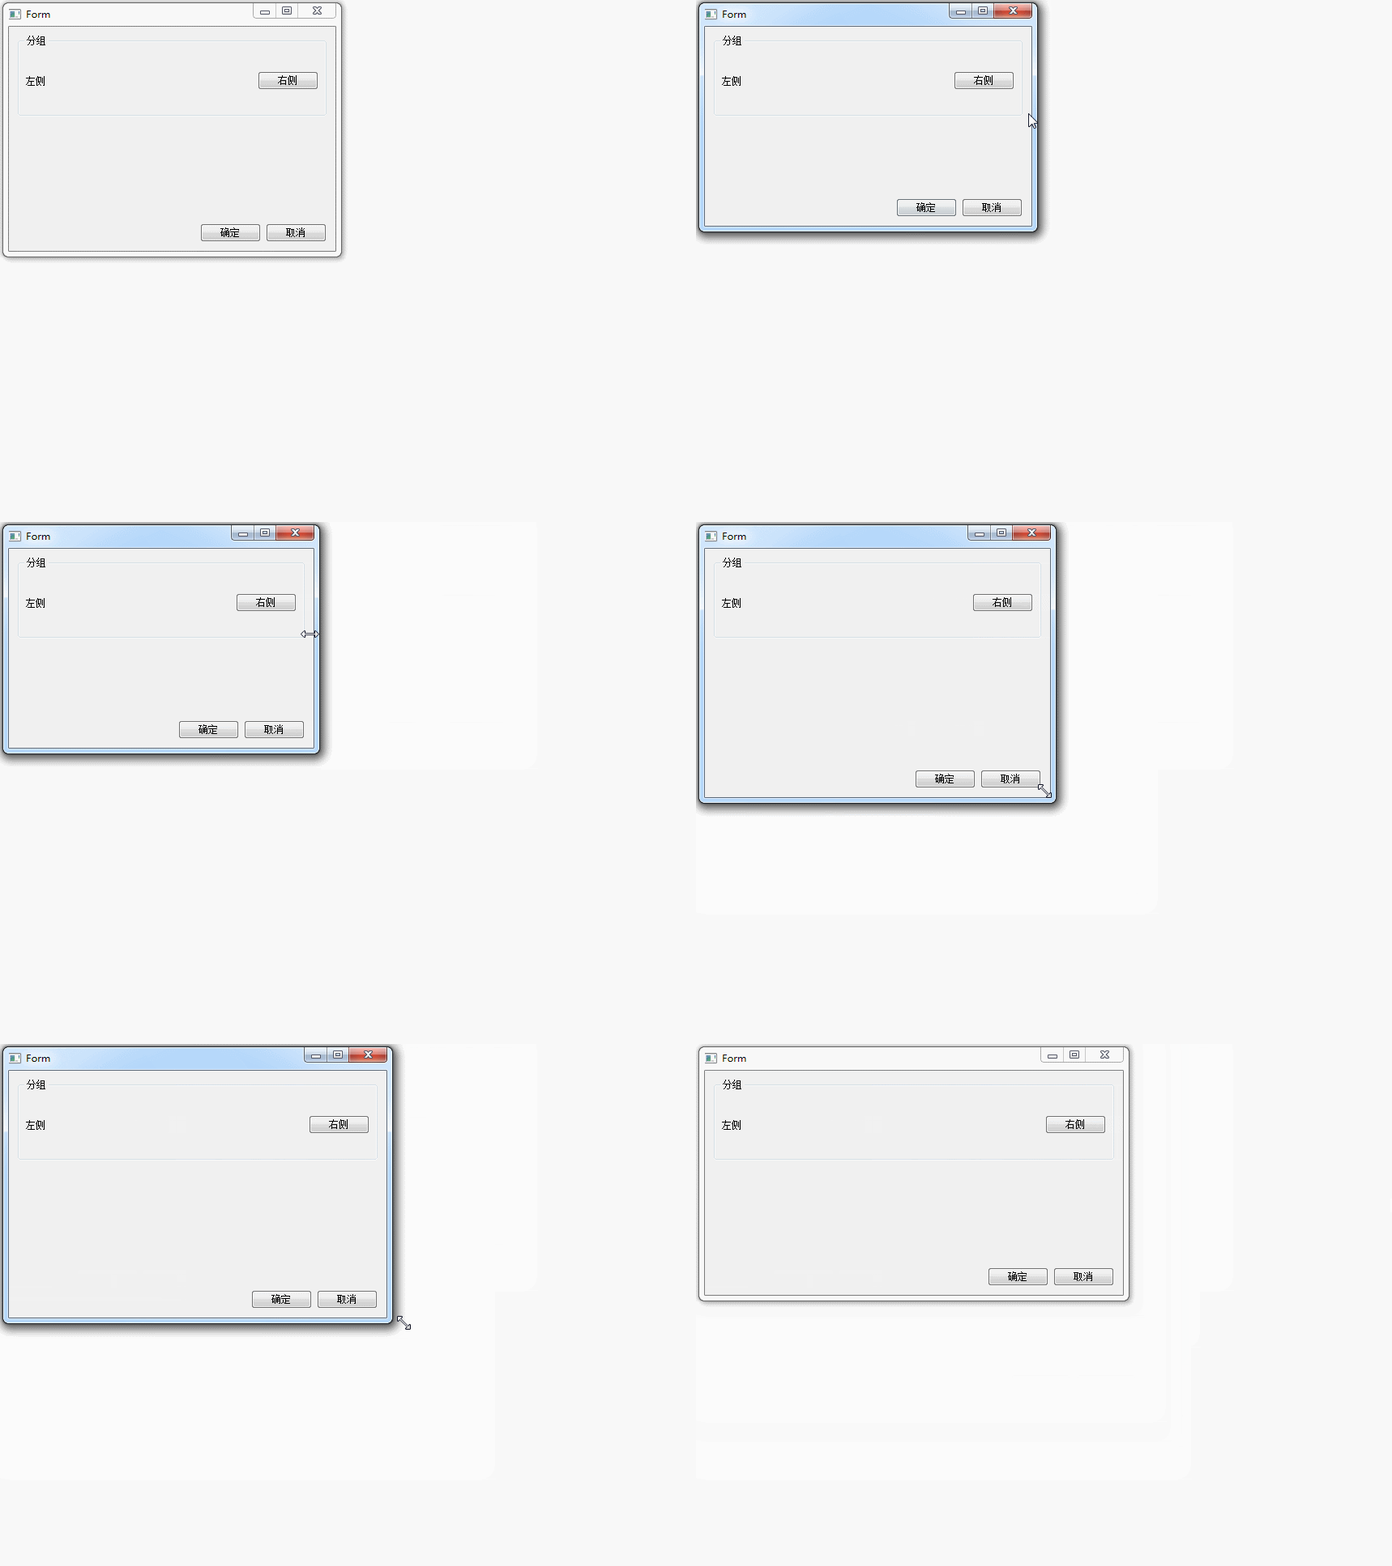
Qt Designer 修改窗体大小改变控件位置
一.新建一个窗体
用qt designer 新建一个QWidget窗体, 在窗体中右键

选择布局, 发现布局是选择不了的,这个是因为窗体里面没有添加控件, 任意添加空间后便可选择 右键-- 布局-- 水平布局/垂直布局 等
二. 添加控件
我们添加一个group box 控件, 然后 右键 选择 布局 -- 垂直布局
在添加一个horizontalLayout, 再给horizontalLayout里面添加两个button按钮

向group box 里面添加一个label 和 botton
然后在group box 的里面选择右键 -- 布局 -- 水平布局
三. 添加spacers效果
我们给group box 里面的两个控件直接添加一个horizontalSpacer
给group box 和horizontalLayout 直接添加一个verticalSpacer

在这里说明下spacers 缩放类型 sizeType

|
Expanding : 可自行增大和收缩 Fixed:不能放大或缩小 Minimum:不能小于sizeHint尺寸,可放大(若设置了最大尺寸) Maximum:不能放大,可缩小到允许的最小尺寸(若setMinimumSize(10,10)只能缩小到(10,10)) Preferred:控件的sizeHint是他的Hint,可以放大或缩小 |
四. 生成ui与py
spacersLayouts.ui文件:
 <?xml version="1.0" encoding="UTF-8"?>

 <ui version="4.0">

  <class>Form</class>

  <widget class="QWidget" name="Form">

   <property name="geometry">

    <rect>

     <x>0</x>

     <y>0</y>

     <width>518</width>

     <height>429</height>

    </rect>

   </property>

   <property name="windowTitle">

    <string>Form</string>

   </property>

   <layout class="QVBoxLayout" name="verticalLayout">

    <item>

     <widget class="QGroupBox" name="groupBox">

      <property name="minimumSize">

       <size>

        <width>0</width>

        <height>100</height>

       </size>

      </property>

      <property name="maximumSize">

       <size>

        <width>16777215</width>

        <height>200</height>

       </size>

      </property>

      <property name="title">

       <string>分组</string>

      </property>

      <layout class="QHBoxLayout" name="horizontalLayout">

       <item>

        <widget class="QLabel" name="label">

         <property name="text">

          <string>左侧</string>

         </property>

        </widget>

       </item>

       <item>

        <spacer name="horizontalSpacer_2">

         <property name="orientation">

          <enum>Qt::Horizontal</enum>

         </property>

         <property name="sizeHint" stdset="0">

          <size>

           <width>40</width>

           <height>20</height>

          </size>

         </property>

        </spacer>

       </item>

       <item>

        <widget class="QPushButton" name="pushButton_2">

         <property name="text">

          <string>右侧</string>

         </property>

        </widget>

       </item>

      </layout>

     </widget>

    </item>

    <item>

     <spacer name="verticalSpacer">

      <property name="orientation">

       <enum>Qt::Vertical</enum>

      </property>

      <property name="sizeType">

       <enum>QSizePolicy::Expanding</enum>

      </property>

      <property name="sizeHint" stdset="0">

       <size>

        <width>20</width>

        <height>100</height>

       </size>

      </property>

     </spacer>

    </item>

    <item>

     <layout class="QHBoxLayout" name="horizontalLayout_2">

      <property name="spacing">

       <number>6</number>

      </property>

      <item>

       <spacer name="horizontalSpacer">

        <property name="orientation">

         <enum>Qt::Horizontal</enum>

        </property>

        <property name="sizeHint" stdset="0">

         <size>

          <width>40</width>

          <height>20</height>

         </size>

        </property>

       </spacer>

      </item>

      <item>

       <widget class="QPushButton" name="pushButton_3">

        <property name="text">

         <string>确定</string>

        </property>

       </widget>

      </item>

      <item>

       <widget class="QPushButton" name="pushButton_4">

        <property name="text">

         <string>取消</string>

        </property>

       </widget>

      </item>

     </layout>

    </item>

   </layout>

  </widget>

  <resources/>

  <connections/>

 </ui>
生成的spacersLayouts.py 文件
 # -*- coding: utf-8 -*-

 # Form implementation generated from reading ui file 'spacersLayouts.ui'

 #

 # Created: Tue Mar 03 15:44:16 2015

 #      by: PyQt4 UI code generator 4.10.3

 #

 # WARNING! All changes made in this file will be lost!

 from PyQt4 import QtCore, QtGui

 try:

     _fromUtf8 = QtCore.QString.fromUtf8

 except AttributeError:

     def _fromUtf8(s):

         return s

 try:

     _encoding = QtGui.QApplication.UnicodeUTF8

     def _translate(context, text, disambig):

         return QtGui.QApplication.translate(context, text, disambig, _encoding)

 except AttributeError:

     def _translate(context, text, disambig):

         return QtGui.QApplication.translate(context, text, disambig)

 class Ui_Form(object):

     def setupUi(self, Form):

         Form.setObjectName(_fromUtf8("Form"))

         Form.resize(518, 429)

         self.verticalLayout = QtGui.QVBoxLayout(Form)

         self.verticalLayout.setObjectName(_fromUtf8("verticalLayout"))

         self.groupBox = QtGui.QGroupBox(Form)

         self.groupBox.setMinimumSize(QtCore.QSize(0, 100))

         self.groupBox.setMaximumSize(QtCore.QSize(16777215, 200))

         self.groupBox.setObjectName(_fromUtf8("groupBox"))

         self.horizontalLayout = QtGui.QHBoxLayout(self.groupBox)

         self.horizontalLayout.setObjectName(_fromUtf8("horizontalLayout"))

         self.label = QtGui.QLabel(self.groupBox)

         self.label.setObjectName(_fromUtf8("label"))

         self.horizontalLayout.addWidget(self.label)

         spacerItem = QtGui.QSpacerItem(40, 20, QtGui.QSizePolicy.Expanding, QtGui.QSizePolicy.Minimum)

         self.horizontalLayout.addItem(spacerItem)

         self.pushButton_2 = QtGui.QPushButton(self.groupBox)

         self.pushButton_2.setObjectName(_fromUtf8("pushButton_2"))

         self.horizontalLayout.addWidget(self.pushButton_2)

         self.verticalLayout.addWidget(self.groupBox)

         spacerItem1 = QtGui.QSpacerItem(20, 100, QtGui.QSizePolicy.Minimum, QtGui.QSizePolicy.Expanding)

         self.verticalLayout.addItem(spacerItem1)

         self.horizontalLayout_2 = QtGui.QHBoxLayout()

         self.horizontalLayout_2.setSpacing(6)

         self.horizontalLayout_2.setObjectName(_fromUtf8("horizontalLayout_2"))

         spacerItem2 = QtGui.QSpacerItem(40, 20, QtGui.QSizePolicy.Expanding, QtGui.QSizePolicy.Minimum)

         self.horizontalLayout_2.addItem(spacerItem2)

         self.pushButton_3 = QtGui.QPushButton(Form)

         self.pushButton_3.setObjectName(_fromUtf8("pushButton_3"))

         self.horizontalLayout_2.addWidget(self.pushButton_3)

         self.pushButton_4 = QtGui.QPushButton(Form)

         self.pushButton_4.setObjectName(_fromUtf8("pushButton_4"))

         self.horizontalLayout_2.addWidget(self.pushButton_4)

         self.verticalLayout.addLayout(self.horizontalLayout_2)

         self.retranslateUi(Form)

         QtCore.QMetaObject.connectSlotsByName(Form)

     def retranslateUi(self, Form):

         Form.setWindowTitle(_translate("Form", "Form", None))

         self.groupBox.setTitle(_translate("Form", "分组", None))

         self.label.setText(_translate("Form", "左侧", None))

         self.pushButton_2.setText(_translate("Form", "右侧", None))

         self.pushButton_3.setText(_translate("Form", "确定", None))

         self.pushButton_4.setText(_translate("Form", "取消", None))

 if __name__ == "__main__":

     import sys

     app = QtGui.QApplication(sys.argv)

     Form = QtGui.QWidget()

     ui = Ui_Form()

     ui.setupUi(Form)

     Form.show()

     sys.exit(app.exec_())
效果:

Qt Designer 修改窗体大小改变控件位置的更多相关文章
- android 动态改变控件位置和大小 .
动态改变控件位置的方法: setPadding()的方法更改布局位置. 如我要把Imageview下移200px: ImageView.setPadding( ImageVie ...
- BCGcontrolBar(五) 对话框大小改变控件自动适应
改变控件大小 首先在 构造函数中加入 EnableLayout(); 在OnInitDialog()函数中加入 CBCGPStaticLayout* pLayout = (CBCGPStaticLay ...
- C# 窗体缩放的时候同步改变控件的大小和字体
最新在写个小程序,需要窗体填满各种尺寸的显示器,同时需要同步缩放控件的大小.于是就写了个类,简单的调用一下即可解决问题. 这个类可以同步缩放控件的位置,宽度高度,字体大小. 使用的时候在FormLoa ...
- 如何实现能像windows 窗体一样改变大小的控件 Silverlight
众所周知,我们可以将鼠标放在windows窗体的边框上,按住鼠标左键改变窗体大小.那么,在silverlight上如何实现呢? 1. 需要将改控件放置在canvas上. 2. 判断鼠标位置,然后将Ar ...
- wpf 控件大小随窗体大小改变而改变
WPF可以直接通过设置图形类控件的水平和垂直Alighment为Stretch实现用一个ViewBox装上所有的Window内容然后当window缩放时就可以一起放大缩小了ViewBox的显示机制是, ...
- c# 可移动可改变大小的控件
因为业务需要,百度了个可移动可改变大小的控件,然后自己修改了下,功能类似vs的设计面板中的功能差不多,可拖拽,改变大小 拖动的 public class MoveControl { #region 自 ...
- MFC中改变控件的大小和位置
用CWnd类的函数MoveWindow()或SetWindowPos()可以改变控件的大小和位置. void MoveWindow(int x,int y,int nWidth,int nHeight ...
- C++ MFC 改变控件大小和位置
用CWnd类的函数MoveWindow()或SetWindowPos()可以改变控件的大小和位置. void MoveWindow(int x,int y,int nWidth,int nHeight ...
- MFC 改变控件的大小和位置
mfc 改变控件大小和位置用到的函数: ) void MoveWindow(int x, int y, int nWidth, int nHeight); ) void MoveWindow(LPCR ...
随机推荐
- 读书笔记-Android初学笔记
Eclipse [ADT] 源 https://dl-ssl.google.com/android/eclipse Notice that no matter what scenario causes ...
- uploadify插件的功能应用
一.相关key值介绍 uploader:uploadify.swf文件的相对路径,该swf文件是一个带有文字BROWSE的按钮,点击后淡出打开文件对话框,默认值:uploadify.swf. scri ...
- ndk学习15: IPC机制
Linux IPC机制 来自为知笔记(Wiz)
- stty命令使用
stty [ -a ] [ -g ] [ Options ] stty(set tty)命令用于显示和修改当前注册的终端的属性. UNIX系统为键盘的输入和终端的输出提供了重要的控制手段,可以通过 ...
- docker ui
docker run -d -p 9000:9000 --privileged -v /var/run/docker.sock:/var/run/docker.sock uifd/ui-for-doc ...
- Convert a given Binary Tree to Doubly Linked List
The question and solution are from: http://www.geeksforgeeks.org/convert-given-binary-tree-doubly-li ...
- IPC----消息队列
消息队列可以认为是一个消息链表,System V 消息队列使用消息队列标识符标识.具有足够特权的任何进程都可以往一个队列放置一个消息,具有足够特权的任何进程都可以从一个给定队列读出一个消息.在某个进程 ...
- Python之队列queue模块使用 常见问题与用法
python 中,队列是线程间最常用的交换数据的形式.queue模块是提供队列操作的模块,虽然简单易用,但是不小心的话,还是会出现一些意外. 1. 阻塞模式 import queue q = queu ...
- linux mysql查看安装信息
ps -ef|grep mysql root ? :: /bin/sh /usr/bin/mysqld_safe --datadir=/var/lib/mys ...
- redis pub/sub 实战: 微信语音识别
2015年5月22日 20:20:20 星期五 效果: 这边对微信说话, 浏览器端及时显示语音识别的文字 注意: 在连接socket.io时, 按下浏览器f12, 如果一直有请求不断的刷, 说明so ...
