【原】iOSCoreAnimation动画系列教程(二):CAKeyFrameAnimation【包会】
在上一篇专题文章【原】iOSCoreAnimation动画系列教程(一):CABasicAnimation【包会】中我们学习了iOS核心动画CoreAnimation中CABasicAnimation动画的使用方法。CABasicAnimation已经可以应付一些比较简单的应用场景了,比如view的平移出现、淡入淡出等。但是在有些情况下直线的运动并不能满足我们的需要,因此有必要学习进阶版的核心动画,那就是CAKeyFrameAnimation。
在上一篇专题中我们提到,CAAnimation可分为以下四种:
1.CABasicAnimation

通过设定起始点,终点,时间,动画会沿着你这设定点进行移动。可以看做特殊的CAKeyFrameAnimation

2.CAKeyframeAnimation

Keyframe顾名思义就是关键点的frame,你可以通过设定CALayer的始点、中间关键点、终点的frame,时间,动画会沿你设定的轨迹进行移动

3.CAAnimationGroup

Group也就是组合的意思,就是把对这个Layer的所有动画都组合起来。PS:一个layer设定了很多动画,他们都会同时执行,如何按顺序执行我到时候再讲。

4.CATransition

这个就是苹果帮开发者封装好的一些动画,
CABasicAnimation算是CAKeyFrameAnimation的特殊情况,即不考虑中间变换过程,只考虑起始点与目标点就可以了。而CAKeyFrameAnimation则更复杂一些,允许我们在起点与终点间自定义更多内容来达到我们的实际应用需求!比如,手机淘宝中,当你添加物品到购物车后会出现将物品抛到购物车的效果,这种效果实现起来也不难,无非是先绘制抛物线在执行position以及scale的GroupAnimation而已,以下图1是我模仿该功能小玩出来的一个demo示例,感兴趣的话你可以自己实现一下试试:D.
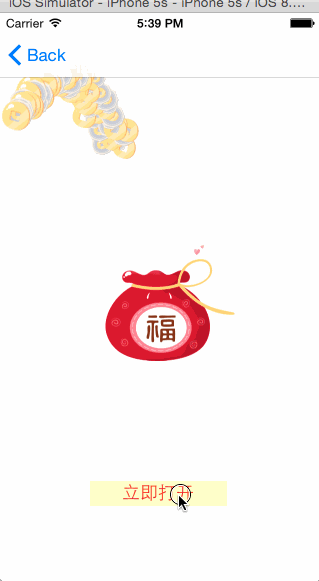

图1 图2
下面我们以实现“小圆球绕矩形跑道循环跑动”为目标开始对CAKeyFrameAnimation的介绍,如图2所示。小圆球的运动轨迹可分为四段,每段的运动速度不同,第一段中先慢后快再慢。先贴上源码方便后面分析:
 //绕矩形循环跑

 - (void)initRectLayer

 {

     rectLayer = [[CALayer alloc] init];

     rectLayer.frame = CGRectMake(, , , );

     rectLayer.cornerRadius = ;

     rectLayer.backgroundColor = [[UIColor blackColor] CGColor];

     [self.view.layer addSublayer:rectLayer];

     CAKeyframeAnimation *rectRunAnimation = [CAKeyframeAnimation animationWithKeyPath:@"position"];

     //设定关键帧位置,必须含起始与终止位置

     rectRunAnimation.values = @[[NSValue valueWithCGPoint:rectLayer.frame.origin],

                                 [NSValue valueWithCGPoint:CGPointMake( - ,

                                                                       rectLayer.frame.origin.y)],

                                 [NSValue valueWithCGPoint:CGPointMake( - ,

                                                                       rectLayer.frame.origin.y + )],

                                 [NSValue valueWithCGPoint:CGPointMake(, rectLayer.frame.origin.y + )],

                                 [NSValue valueWithCGPoint:rectLayer.frame.origin]];

     //设定每个关键帧的时长,如果没有显式地设置,则默认每个帧的时间=总duration/(values.count - 1)

     rectRunAnimation.keyTimes = @[[NSNumber numberWithFloat:0.0], [NSNumber numberWithFloat:0.6],

                                   [NSNumber numberWithFloat:0.7], [NSNumber numberWithFloat:0.8],

                                   [NSNumber numberWithFloat:]];

     rectRunAnimation.timingFunctions = @[[CAMediaTimingFunction functionWithName:kCAMediaTimingFunctionEaseInEaseOut],

                                          [CAMediaTimingFunction functionWithName:kCAMediaTimingFunctionLinear],

                                          [CAMediaTimingFunction functionWithName:kCAMediaTimingFunctionLinear],

                                          [CAMediaTimingFunction functionWithName:kCAMediaTimingFunctionLinear]];

     rectRunAnimation.repeatCount = ;

     rectRunAnimation.autoreverses = NO;

     rectRunAnimation.calculationMode = kCAAnimationLinear;

     rectRunAnimation.duration = ;

     [rectLayer addAnimation:rectRunAnimation forKey:@"rectRunAnimation"];

 }

图3
对CAKeyFrameAnimation的使用与CABasicAnimation大同小异,有些属性是共通的,因此小翁建议你先阅读上一篇文章。KeyFrame的意思是关键帧,所谓“关键”就是改变物体运动趋势的帧,在该点处物体将发生运动状态,比如矩形的四个角,抛物线的顶点等。因此,聪明的你应该知道了,在上述例子中共有5个关键帧(图3中的ABCDE)。上个关键帧到当前关键帧之间的路径与当前关键帧相联系,比如AB->B,我们可以对AB进行定义动画定义,而自定义要通过众多CAKeyFrameAnimation的属性达到目的。CAKeyFrameAnimation的使用中有以下主要的属性需要注意,有些属性可能比较绕比较难以理解,我会结合图片进行必要的说明。
(1)values属性
values属性指明整个动画过程中的关键帧点,例如上例中的A-E就是通过values指定的。需要注意的是,起点必须作为values的第一个值。
(2)path属性
作用与values属性一样,同样是用于指定整个动画所经过的路径的。需要注意的是,values与path是互斥的,当values与path同时指定时,path会覆盖values,即values属性将被忽略。例如上述例子等价于代码中values方式的path设置方式为:
     CGMutablePathRef path = CGPathCreateMutable();

     CGPathMoveToPoint(path, NULL, rectLayer.position.x - , rectLayer.position.y - );

     CGPathAddLineToPoint(path, NULL,  - , rectLayer.frame.origin.y);

     CGPathAddLineToPoint(path, NULL,  - , rectLayer.frame.origin.y + );

     CGPathAddLineToPoint(path, NULL, , rectLayer.frame.origin.y + );

     CGPathAddLineToPoint(path, NULL, , rectLayer.frame.origin.y);

     rectRunAnimation.path = path;

     CGPathRelease(path);
(3)keyTimes属性
该属性是一个数组,用以指定每个子路径(AB,BC,CD)的时间。如果你没有显式地对keyTimes进行设置,则系统会默认每条子路径的时间为:ti=duration/(5-1),即每条子路径的duration相等,都为duration的1\4。当然,我们也可以传个数组让物体快慢结合。例如,你可以传入{0.0, 0.1,0.6,0.7,1.0},其中首尾必须分别是0和1,因此tAB=0.1-0, tCB=0.6-0.1, tDC=0.7-0.6, tED=1-0.7.....
(4)timeFunctions属性
用过UIKit层动画的同学应该对这个属性不陌生,这个属性用以指定时间函数,类似于运动的加速度,有以下几种类型。上例子的AB段就是用了淡入淡出效果。记住,这是一个数组,你有几个子路径就应该传入几个元素
 kCAMediaTimingFunctionLinear//线性

 kCAMediaTimingFunctionEaseIn//淡入

 kCAMediaTimingFunctionEaseOut//淡出

 kCAMediaTimingFunctionEaseInEaseOut//淡入淡出

 kCAMediaTimingFunctionDefault//默认
(5)calculationMode属性
该属性决定了物体在每个子路径下是跳着走还是匀速走,跟timeFunctions属性有点类似
 const kCAAnimationLinear//线性,默认

 const kCAAnimationDiscrete//离散,无中间过程,但keyTimes设置的时间依旧生效,物体跳跃地出现在各个关键帧上

 const kCAAnimationPaced//平均,keyTimes跟timeFunctions失效

 const kCAAnimationCubic//平均,同上

 const kCAAnimationCubicPaced//平均,同上
此外,动画的暂停与开始可以通过下面的方式做到:
 -(void)pauseLayer:(CALayer*)layer

 {

     CFTimeInterval pausedTime = [layer convertTime:CACurrentMediaTime() fromLayer:nil];

     layer.speed = 0.0;

     layer.timeOffset = pausedTime;

 }

 -(void)resumeLayer:(CALayer*)layer

 {

     CFTimeInterval pausedTime = [layer timeOffset];

     layer.speed = 1.0;

     layer.timeOffset = 0.0;

     layer.beginTime = 0.0;

     CFTimeInterval timeSincePause = [layer convertTime:CACurrentMediaTime() fromLayer:nil] - pausedTime;

     layer.beginTime = timeSincePause;

 }
更多更详细的关于这些属性的介绍可以进一步阅读此文。
关于CAKeyFrameAnimation的介绍基本结束了,在文章的最后,开源一个小翁封装的抛物动画代码,上文的图1就是在这份代码的基础上实现的:
 #import <Foundation/Foundation.h>

 #import <UIKit/UIKit.h>

 #import <QuartzCore/QuartzCore.h>

 @protocol ThrowLineToolDelegate;

 @interface ThrowLineTool : NSObject

 @property (nonatomic, assign) id<ThrowLineToolDelegate>delegate;

 @property (nonatomic, retain) UIView *showingView;

 + (ThrowLineTool *)sharedTool;

 /**

  *  将某个view或者layer从起点抛到终点

  *

  *  @param obj    被抛的物体

  *  @param start  起点坐标

  *  @param end    终点坐标

  *  @param height 高度,抛物线最高点比起点/终点y坐标最低(即高度最高)所超出的高度

  */

 - (void)throwObject:(UIView *)obj from:(CGPoint)start to:(CGPoint)end

              height:(CGFloat)height duration:(CGFloat)duration;

 @end

 @protocol ThrowLineToolDelegate <NSObject>

 /**

  *  抛物线结束的回调

  */

 - (void)animationDidFinish;

 @end
ThrowLineTool.h
 #import "ThrowLineTool.h"

 static ThrowLineTool *s_sharedInstance = nil;

 @implementation ThrowLineTool

 + (ThrowLineTool *)sharedTool

 {

     if (!s_sharedInstance) {

         s_sharedInstance = [[[self class] alloc] init];

     }

     return s_sharedInstance;

 }

 /**

  *  将某个view或者layer从起点抛到终点

  *

  *  @param obj    被抛的物体

  *  @param start  起点坐标

  *  @param end    终点坐标

  *  @param height 高度,抛物线最高点比起点/终点y坐标最低(即高度最高)所超出的高度

  */

 - (void)throwObject:(UIView *)obj from:(CGPoint)start to:(CGPoint)end

              height:(CGFloat)height duration:(CGFloat)duration

 {

     self.showingView = obj;

     //初始化抛物线path

     CGMutablePathRef path = CGPathCreateMutable();

     CGFloat cpx = (start.x + end.x) / ;

     CGFloat cpy = -height;

     CGPathMoveToPoint(path, NULL, start.x, start.y);

     CGPathAddQuadCurveToPoint(path, NULL, cpx, cpy, end.x, end.y);

     CAKeyframeAnimation *animation = [CAKeyframeAnimation animationWithKeyPath:@"position"];

     animation.path = path;

     CFRelease(path);

     CABasicAnimation *scaleAnimation = [CABasicAnimation animationWithKeyPath:@"transform.scale"];

     scaleAnimation.autoreverses = YES;

     scaleAnimation.toValue = [NSNumber numberWithFloat:(CGFloat)((arc4random() % ) + ) / 10.0];

     CAAnimationGroup *groupAnimation = [CAAnimationGroup animation];

     groupAnimation.delegate = self;

     groupAnimation.repeatCount = ;

     groupAnimation.duration = duration;

     groupAnimation.removedOnCompletion = NO;

     groupAnimation.animations = @[scaleAnimation, animation];

     [obj.layer addAnimation:groupAnimation forKey:@"position scale"];

 }

 - (void)animationDidStop:(CAAnimation *)anim finished:(BOOL)flag

 {

     if (self.delegate && [self.delegate respondsToSelector:@selector(animationDidFinish)]) {

         [self.delegate performSelector:@selector(animationDidFinish) withObject:nil];

     }

     self.showingView = nil;

 }

 - (void)dealloc

 {

     [super dealloc];

 }

 @end
ThrowLineTool.m
 - (void)beginThrowing:(UIView *)view

 {

     ThrowLineTool *tool = [ThrowLineTool sharedTool];

     tool.delegate = self;

     UIImageView *bagImgView = (UIImageView *)[self viewWithTag:];

     CGFloat startX = ;//arc4random() % (NSInteger)CGRectGetWidth(self.frame);

     CGFloat startY = ;//CGRectGetHeight(self.frame);

     CGFloat endX = CGRectGetMidX(bagImgView.frame) +  - (arc4random() % );

     CGFloat endY = CGRectGetMidY(bagImgView.frame);

     CGFloat height =  + arc4random() % ;

    [tool throwObject:view

                 from:CGPointMake(startX, startY)

                   to:CGPointMake(endX, endY)

               height:height duration:1.6];

 }
使用方法
=======================================================
原创文章,转载请注明 编程小翁@博客园,邮件zilin_weng@163.com,欢迎各位与我在C/C++/Objective-C/机器视觉等领域展开交流!
=======================================================
【原】iOSCoreAnimation动画系列教程(二):CAKeyFrameAnimation【包会】的更多相关文章
- 【原】iOSCoreAnimation动画系列教程(一):CABasicAnimation【包会】
本文的最新版本已经发布在简书[编程小翁]上,强烈建议到上查看简书,[点击这里跳转]. 在iOS中,图形可分为以下几个层次: 越上层,封装程度越高,动画实现越简洁越简单,但是自由度越低:反之亦然.本文着 ...
- 黄聪:Microsoft Enterprise Library 5.0 系列教程(二) Cryptography Application Block (高级)
原文:黄聪:Microsoft Enterprise Library 5.0 系列教程(二) Cryptography Application Block (高级) 本章介绍的是企业库加密应用程序模块 ...
- 黄聪:Microsoft Enterprise Library 5.0 系列教程(二) Cryptography Application Block (初级)
原文:黄聪:Microsoft Enterprise Library 5.0 系列教程(二) Cryptography Application Block (初级) 企业库加密应用程序模块提供了2种方 ...
- WPF系列教程——(二)使用Prism实现MVVM设计模式 - 简书
原文:WPF系列教程--(二)使用Prism实现MVVM设计模式 - 简书 本文假设你已经知道MVVM设计模式是什么,所以直接进入正题,今天我们就用Prism来实现WPF的MVVM设计模式,百度上关于 ...
- CRL快速开发框架系列教程二(基于Lambda表达式查询)
本系列目录 CRL快速开发框架系列教程一(Code First数据表不需再关心) CRL快速开发框架系列教程二(基于Lambda表达式查询) CRL快速开发框架系列教程三(更新数据) CRL快速开发框 ...
- C#微信公众号开发系列教程二(新手接入指南)
http://www.cnblogs.com/zskbll/p/4093954.html 此系列前面已经更新了两篇博文了,都是微信开发的前期准备工作,现在切入正题,本篇讲解新手接入的步骤与方法,大神可 ...
- Android Studio系列教程二--基本设置与运行
Android Studio系列教程二--基本设置与运行 2014 年 11 月 28 日 DevTools 本文为个人原创,欢迎转载,但请务必在明显位置注明出处! 上面一篇博客,介绍了Studio的 ...
- NGUI系列教程二
接下来我们创建一个Label,NGUI->Open the Widget Wizard,打开widgetTool对话框,在Template中选择Label,确定AddTo右侧选项为panel,点 ...
- Fastify 系列教程二 (中间件、钩子函数和装饰器)
Fastify 系列教程: Fastify 系列教程一 (路由和日志) Fastify 系列教程二 (中间件.钩子函数和装饰器) 中间件 Fastify 提供了与 Express 和 Restify ...
随机推荐
- datatables.js 简单使用--多选框和服务器端分页
说明:datatables是一款jQuery表格插件.感觉EasyUI的datagrid更易用 内容:多选框和服务器端分页 缘由:写这篇博客的原因是datatables的文档写的不怎么样,找东西很麻烦 ...
- 【原创】C#搭建足球赛事资料库与预测平台(3) 基础数据表设计
本博客所有文章分类的总目录:http://www.cnblogs.com/asxinyu/p/4288836.html 开源C#彩票数据资料库系列文章总目录:http://www.cn ...
- [Node.js] OAuth 2 和 passport框架
原文地址:http://www.moye.me/?p=592 OAuth是什么 OAuth(开放授权)是一个开放标准,允许用户让第三方应用访问该用户在某一网站上存储的私密的资源(如照片,视频,联系人列 ...
- LeetCode——Jump Game
Description: Given an array of non-negative integers, you are initially positioned at the first inde ...
- redis在centOS的安装
1.安装tcl支持 yum install tcl 2.安装redis我们以最新的2.8.9为例 $ wget http://download.redis.io/releases/redis-2.8. ...
- [ASP.NET]分析MVC5源码,并实现一个ASP.MVC
本节内容不是MVC入门教程,主要讲MVC原理,实现一个和ASP.NET MVC类似基本原理的项目. MVC原理是依赖于ASP.NET管道事件基础之上的.对于这块,可阅读上节内容 [ASP.NET]谈谈 ...
- ThroughRain第二次冲刺(每天更新
第二次冲刺时间: 11月28-12月5号 第一次冲刺目标及分配: 1. 查询点餐界面 认领:梁仕标 2. 链接数据库 认领:冯梓凡 3. 建立数据库的表 ...
- 软件工程——sprint 1回顾总结
主题:“我们在本次sprint中做了什么?接下来的打算?” sprint总结:在本次sprint里,这是我们团队的成员们第一次开始以团队的形式进行一次团队项目开发,早在第一次团队会议之时,我们便因团队 ...
- enum to IEnumerable<T>
想foreach一个枚举,发觉它特别复杂,因此先把枚举转换为IEnumerable接口之后,简单多了.下面是枚举(enum)转换为IEnumerable接口方法: 使用:修改这篇<程序一旦发觉写 ...
- 20161119微信小程序初识
Tritonal ft. Angel Taylor - Getaway [Official Lyric Video]