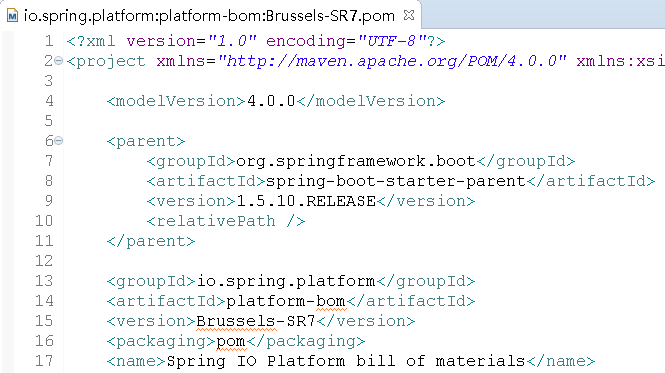
spring-boot-dependencies、spring-boot-starter-parent、io.spring.platform详解
上一篇文章介绍了springboot依赖版本号管理的几种方式,现在来详细分析一下spring-boot-dependencies、spring-boot-starter-parent、io.spring.platform是如何进行版本号控制的,各自有什么作用和区别。
一、spring-boot-dependencies、spring-boot-starter-parent、io.spring.platform三者是继承关系
1.spring-boot-starter-parent继承spring-boot-dependencies

2.io.spring.platform继承spring-boot-starter-parent

二、spring-boot-dependencies
从继承的源点spring-boot-dependencies开始看
1.pom.xml里的dependencyManagement节点
dependencyManagement节点的作用是统一maven引入依赖JAR包的版本号,可以看出spring-boot-dependencies最重要的一个作用就是对springboot可能用到的依赖JAR包做了版本号的控制管理
2.pom.xml里的pluginManagement节点
pluginManagement节点的作用是统一maven引入插件的版本号,可以看出spring-boot-dependencies另一个作用是对springboot可能用到的插件做了版本号的控制管理
3.pom.xml里的plugins节点
spring-boot-dependencies引入(或覆盖)了三个插件:
maven-help-plugin:用于获取有关项目或系统的帮助信息;这个插件是Maven自带的插件,这里进行了覆盖设置;设置inherited(是否继承)为false;设置phase为generate-resources、goal为effective-pom的配置output
<plugin>

  <artifactId>maven-help-plugin</artifactId>

  <inherited>false</inherited>

  <executions>

    <execution>

      <id>generate-effective-dependencies-pom</id>

      <phase>generate-resources</phase>

      <goals>

        <goal>effective-pom</goal>

      </goals>

      <configuration>

        <output>${project.build.directory}/effective-pom/spring-boot-dependencies.xml</output>

      </configuration>

    </execution>

  </executions>

</plugin>
xml-maven-plugin:处理XML相关
<plugin>

  <groupId>org.codehaus.mojo</groupId>

  <artifactId>xml-maven-plugin</artifactId>

  <version>1.0</version>

  <inherited>false</inherited>

  <executions>

    <execution>

      <goals>

        <goal>transform</goal>

      </goals>

    </execution>

  </executions>

  <configuration>

    <transformationSets>

      <transformationSet>

        <dir>${project.build.directory}/effective-pom</dir>

        <stylesheet>src/main/xslt/single-project.xsl</stylesheet>

        <outputDir>${project.build.directory}/effective-pom</outputDir>

      </transformationSet>

    </transformationSets>

  </configuration>

</plugin>
build-helper-maven-plugin:用于设置主源码目录、测试源码目录、主资源文件目录、测试资源文件目录等
<plugin>

  <groupId>org.codehaus.mojo</groupId>

  <artifactId>build-helper-maven-plugin</artifactId>

  <inherited>false</inherited>

  <executions>

    <execution>

      <id>attach-artifacts</id>

      <phase>package</phase>

      <goals>

        <goal>attach-artifact</goal>

      </goals>

      <configuration>

        <artifacts>

          <artifact>

            <file>${project.build.directory}/effective-pom/spring-boot-dependencies.xml</file>

            <type>effective-pom</type>

          </artifact>

        </artifacts>

      </configuration>

    </execution>

  </executions>

</plugin>
这三个插件共同完成了一件事,将spring-boot-dependencies(springboot在项目里使用到的依赖)输出到XML,并且打包install到仓库。
这些就是spring-boot-dependencies主要的作用了,管理控制依赖版本号,管理控制插件版本号以及引入了3个辅助插件。
三、spring-boot-starter-parent
spring-boot-starter-parent继承spring-boot-dependencies
1.pom.xml里的properties节点
spring-boot-starter-parent在properties节点里添加了一些预设配置
java.version:jdk的版本号
<java.version>1.6</java.version>
resource.delimiter:设定占位符为@
<resource.delimiter>@</resource.delimiter>
project.build.sourceEncoding、project.reporting.outputEncoding:设置编码为UTF-8
<project.build.sourceEncoding>UTF-8</project.build.sourceEncoding>

<project.reporting.outputEncoding>UTF-8</project.reporting.outputEncoding>
maven.compiler.source、maven.compiler.target:设置编译打包的jdk版本
<maven.compiler.source>${java.version}</maven.compiler.source>

<maven.compiler.target>${java.version}</maven.compiler.target>
2.pom.xml里的dependencyManagement节点
覆盖了spring-boot-dependencies的spring-core依赖引入,去掉了spring-core里的commons-logging依赖
<dependency>

  <groupId>org.springframework</groupId>

  <artifactId>spring-core</artifactId>

  <version>${spring.version}</version>

  <exclusions>

    <exclusion>

      <groupId>commons-logging</groupId>

      <artifactId>commons-logging</artifactId>

    </exclusion>

  </exclusions>

</dependency>
3.pom.xml里的bulid->resources节点
设置了application.properties配置文件的读取目录在/src/main/resources目录下
<resource>

  <directory>${basedir}/src/main/resources</directory>

  <filtering>true</filtering>

  <includes>

    <include>**/application*.yml</include>

    <include>**/application*.yaml</include>

    <include>**/application*.properties</include>

  </includes>

</resource>

<resource>

  <directory>${basedir}/src/main/resources</directory>

  <excludes>

    <exclude>**/application*.yml</exclude>

    <exclude>**/application*.yaml</exclude>

    <exclude>**/application*.properties</exclude>

  </excludes>

</resource>
4.pom.xml里的pluginManagement节点
覆盖了spring-boot-dependencies的一些插件版本控制管理:maven-failsafe-plugin、maven-jar-plugin、maven-surefire-plugin、maven-war-plugin、exec-maven-plugin、maven-resources-plugin、git-commit-id-plugin、spring-boot-maven-plugin、maven-shade-plugin
maven-failsafe-plugin:配置了绑定Maven打包时integration-test、verify阶段
<plugin>

  <groupId>org.apache.maven.plugins</groupId>

  <artifactId>maven-failsafe-plugin</artifactId>

  <executions>

    <execution>

      <goals>

        <goal>integration-test</goal>

        <goal>verify</goal>

      </goals>

    </execution>

  </executions>

</plugin>
maven-jar-plugin:添加了启动类配置和扫描默认实现JAR包配置
<plugin>

  <groupId>org.apache.maven.plugins</groupId>

  <artifactId>maven-jar-plugin</artifactId>

  <configuration>

    <archive>

      <manifest>

        <mainClass>${start-class}</mainClass>

        <addDefaultImplementationEntries>true</addDefaultImplementationEntries>

      </manifest>

    </archive>

  </configuration>

</plugin>
maven-surefire-plugin:配置了Maven打包时单元测试扫描**/*Tests.java、**/*Test.java类,排除**/Abstract*.java类
<plugin>

  <groupId>org.apache.maven.plugins</groupId>

  <artifactId>maven-surefire-plugin</artifactId>

  <configuration>

    <includes>

      <include>**/*Tests.java</include>

      <include>**/*Test.java</include>

    </includes>

    <excludes>

      <exclude>**/Abstract*.java</exclude>

    </excludes>

  </configuration>

</plugin>
maven-war-plugin:配置了可以没有web.xml文件进行启动;添加了启动类配置和扫描默认实现JAR包配置
<plugin>

  <groupId>org.apache.maven.plugins</groupId>

  <artifactId>maven-war-plugin</artifactId>

  <configuration>

    <failOnMissingWebXml>false</failOnMissingWebXml>

    <archive>

      <manifest>

        <mainClass>${start-class}</mainClass>

        <addDefaultImplementationEntries>true</addDefaultImplementationEntries>

      </manifest>

    </archive>

  </configuration>

</plugin>
exec-maven-plugin:添加了启动类配置
<plugin>

  <groupId>org.codehaus.mojo</groupId>

  <artifactId>exec-maven-plugin</artifactId>

  <configuration>

    <mainClass>${start-class}</mainClass>

  </configuration>

</plugin>
maven-resources-plugin:配置了资源占位符为 @
<plugin>

  <groupId>org.apache.maven.plugins</groupId>

  <artifactId>maven-resources-plugin</artifactId>

  <version>2.6</version>

  <configuration>

    <delimiters>

      <delimiter>${resource.delimiter}</delimiter>

    </delimiters>

    <useDefaultDelimiters>false</useDefaultDelimiters>

  </configuration>

</plugin>
git-commit-id-plugin:配置了绑定Maven打包修订阶段revision的GIT版本号变化;配了verbose为ture;配置了日期格式为yyyy-MM-dd'T'HH:mm:ssZ;配置了生成GIT .properties文件,文件名为${project.build.outputDirectory}/git.properties
<plugin>

  <groupId>pl.project13.maven</groupId>

  <artifactId>git-commit-id-plugin</artifactId>

  <executions>

    <execution>

      <goals>

        <goal>revision</goal>

      </goals>

    </execution>

  </executions>

  <configuration>

    <verbose>true</verbose>

    <dateFormat>yyyy-MM-dd'T'HH:mm:ssZ</dateFormat>

    <generateGitPropertiesFile>true</generateGitPropertiesFile>

    <generateGitPropertiesFilename>${project.build.outputDirectory}/git.properties</generateGitPropertiesFilename>

  </configuration>

</plugin>
spring-boot-maven-plugin:配置了绑定Maven打包repackage阶段插件的使用;配置了启动类
<plugin>

  <groupId>org.springframework.boot</groupId>

  <artifactId>spring-boot-maven-plugin</artifactId>

  <executions>

    <execution>

      <goals>

        <goal>repackage</goal>

      </goals>

    </execution>

  </executions>

  <configuration>

    <mainClass>${start-class}</mainClass>

  </configuration>

</plugin>
maven-shade-plugin:覆盖引入spring-boot-maven-plugin依赖JAR;配置keepDependenciesWithProvidedScope为true;配置createDependencyReducedPom为true;过滤掉META-INF/*.SF、META-INF/*.DSA、META-INF/*.RSA,防止重复引用打包失败;配置绑定Maven打包package阶段shade;
<plugin>

  <groupId>org.apache.maven.plugins</groupId>

  <artifactId>maven-shade-plugin</artifactId>

  <dependencies>

    <dependency>

      <groupId>org.springframework.boot</groupId>

      <artifactId>spring-boot-maven-plugin</artifactId>

      <version>1.5.4.RELEASE</version>

    </dependency>

  </dependencies>

  <configuration>

    <keepDependenciesWithProvidedScope>true</keepDependenciesWithProvidedScope>

    <createDependencyReducedPom>true</createDependencyReducedPom>

    <filters>

      <filter>

        <artifact>*:*</artifact>

        <excludes>

          <exclude>META-INF/*.SF</exclude>

          <exclude>META-INF/*.DSA</exclude>

          <exclude>META-INF/*.RSA</exclude>

        </excludes>

      </filter>

    </filters>

  </configuration>

  <executions>

    <execution>

      <phase>package</phase>

      <goals>

        <goal>shade</goal>

      </goals>

      <configuration>

        <transformers>

          <transformer implementation="org.apache.maven.plugins.shade.resource.AppendingTransformer">

            <resource>META-INF/spring.handlers</resource>

          </transformer>

          <transformer implementation="org.springframework.boot.maven.PropertiesMergingResourceTransformer">

            <resource>META-INF/spring.factories</resource>

          </transformer>

          <transformer implementation="org.apache.maven.plugins.shade.resource.AppendingTransformer">

            <resource>META-INF/spring.schemas</resource>

          </transformer>

          <transformer implementation="org.apache.maven.plugins.shade.resource.ServicesResourceTransformer"/>

          <transformer implementation="org.apache.maven.plugins.shade.resource.ManifestResourceTransformer">

            <mainClass>${start-class}</mainClass>

          </transformer>

        </transformers>

      </configuration>

    </execution>

  </executions>

</plugin>
四、io.spring.platform
io.spring.platform继承spring-boot-starter-parent
1.pom.xml里的properties节点
io.spring.platform一个最大的作用便是将经过集成测试的各类依赖版本号进行整合。
在平时开发中,需要某个JAR包依赖往往是习惯性的找最新版本,或是根据经验选择一个版本;
单对某个JAR包来讲,没有任何问题,但当过多的JAR包依赖整合到一起的时候,就可能会出现各自版本不适配的情况产生,产生BUG漏洞的场景将大大增加;
io.spring.platform所做的事情就是将做过集成测试JAR包依赖整合到一起,大大降低了漏洞出现的可能性。
2.pom.xml里的dependencyManagement节点
覆盖所有父节点里的依赖引入并增加部分新的依赖,使用properties节点里的版本号
3.pom.xml里的plugins节点
覆盖spring-boot-dependencies的插件:maven-help-plugin
maven-help-plugin:
<plugin>

  <artifactId>maven-help-plugin</artifactId>

  <executions>

    <execution>

      <id>generate-effective-dependencies-pom</id>

      <phase>generate-resources</phase>

      <goals>

        <goal>effective-pom</goal>

      </goals>

      <configuration>

        <output>${project.build.directory}/effective-pom.xml</output>

      </configuration>

    </execution>

  </executions>

  <inherited>false</inherited>

</plugin>
新增的插件:gmavenplus-plugin、build-helper-maven-plugin
gmavenplus-plugin:
<plugin>

  <groupId>org.codehaus.gmavenplus</groupId>

  <artifactId>gmavenplus-plugin</artifactId>

  <version>1.1</version>

  <executions>

    <execution>

      <goals>

        <goal>execute</goal>

      </goals>

      <phase>test</phase>

    </execution>

  </executions>

  <configuration>

    <scripts>

      <script>file:///${project.basedir}/src/main/groovyScripts/generateBomPropertiesFile.groovy</script>

    </scripts>

  </configuration>

  <dependencies>

    <dependency>

      <groupId>org.codehaus.groovy</groupId>

      <artifactId>groovy-all</artifactId>

      <version>2.3.0</version>

    </dependency>

  </dependencies>

  <inherited>false</inherited>

</plugin>
build-helper-maven-plugin:
<plugin>

  <groupId>org.codehaus.mojo</groupId>

  <artifactId>build-helper-maven-plugin</artifactId>

  <executions>

    <execution>

      <id>attach-artifacts</id>

      <phase>package</phase>

      <goals>

        <goal>attach-artifact</goal>

      </goals>

      <configuration>

        <artifacts>

          <artifact>

            <file>${project.build.directory}/platform-bom.properties</file>

            <type>properties</type>

          </artifact>

        </artifacts>

      </configuration>

    </execution>

  </executions>

  <inherited>false</inherited>

</plugin>
这样分析之后,对spring-boot-dependencies、spring-boot-starter-parent、io.spring.platform就有了基本的了解了。
这三者最主要的作用还是管理各类依赖的版本控制。
我们完全可以自己做一个pom来管理springboot的依赖引入版本管理,后续文章会展示。
对于pom里各类插件引入的作用,后续也会详细分析。
最终的目的是做到知其然,知其所以然,这样开发起来才会有大局观。
spring-boot-dependencies、spring-boot-starter-parent、io.spring.platform详解的更多相关文章
- 2017.3.31 spring mvc教程(二)核心流程及配置详解
学习的博客:http://elf8848.iteye.com/blog/875830/ 我项目中所用的版本:4.2.0.博客的时间比较早,11年的,学习的是Spring3 MVC.不知道版本上有没有变 ...
- 整合Spring时Service层为什么不做全局包扫描详解
合Spring时Service层为什么不做全局包扫描详解 一.Spring和SpringMVC的父子容器关系 1.讲问题之前要先明白一个关系 一般来说,我们在整合Spring和SpringMVC这两个 ...
- spring盒springMVC整合父子容器问题:整合Spring时Service层为什么不做全局包扫描详解
整合Spring时Service层为什么不做全局包扫描详解 一.Spring和SpringMVC的父子容器关系 1.讲问题之前要先明白一个关系 一般来说,我们在整合Spring和SpringMVC这两 ...
- (转)Linux下select, poll和epoll IO模型的详解
Linux下select, poll和epoll IO模型的详解 原文:http://blog.csdn.net/tianmohust/article/details/6677985 一).Epoll ...
- Spring Security教程(八):用户认证流程源码详解
本篇文章主要围绕下面几个问题来深入源码: 用户认证流程 认证结果如何在多个请求之间共享 获取认证用户信息 一.用户认证流程 上节中提到Spring Security核心就是一系列的过滤器链,当一个请求 ...
- Spring Boot中对自然语言处理工具包hanlp的调用详解
概 述 HanLP 是基于 Java开发的 NLP工具包,由一系列模型与算法组成,目标是普及自然语言处理在生产环境中的应用.而且 HanLP具备功能完善.性能高效.架构清晰.语料时新.可自定义的特点, ...
- Spring Boot的Listener机制的用法和实现原理详解
之前在介绍了在spring-boot启动过程中调用runner的原理,今天我们介绍另外一种可以实现相似功能的机制:spring-boot的Listener机制. 通过注册Listener,可以实现对于 ...
- Spring MVC 学习总结(三)——请求处理方法Action详解
Spring MVC中每个控制器中可以定义多个请求处理方法,我们把这种请求处理方法简称为Action,每个请求处理方法可以有多个不同的参数,以及一个多种类型的返回结果. 一.Action参数类型 如果 ...
- Spring源码解析二:IOC容器初始化过程详解
IOC容器初始化分为三个步骤,分别是: 1.Resource定位,即BeanDefinition的资源定位. 2.BeanDefinition的载入 3.向IOC容器注册BeanDefinition ...
随机推荐
- /bin/java: 没有那个文件或目录spark/bin/spark-class:行71: /usr/java/jdk1.8
1.检查java环境有没有问题 2.1没问题后检查文件的编码是否有问题
- 树莓派3安装openwrt
1.在编译openwrt之前,需要先安装依赖包,命令如下: sudo apt-get install autoconf binutils bison bzip2 flex gawk gettext m ...
- iOS 开发中一些 tips
tableView 的 tableHeaderView 高度不正确的问题: func forceRefreshHeader() { let size = headerView.systemLayout ...
- 手把手教你用最简便的方法免费安装SSL
原文链接:小枫同学的个人博客 随时IT的发展,它几乎涵盖了世界发展中的任何一方面,几乎都和计算机挂钩,也有好多小伙伴想开一个自己的网站,分享一些知识,分享一些心情等等.但是随着IT的发展,网络安全也越 ...
- JDBC对Mysql utf8mb4字符集的处理
写在前面 在开发微信小程序的时候,评论服务模块希望添加上emoji表情,但是emoji表情是4个字节长度的,所以需要进行设置 当前项目是JAVA编写, 使用JDBC连接操作数据库, 如下针对的JDBC ...
- 【Python笔记】Python 基础语法
Python 标识符 在 Python 里,标识符由字母.数字.下划线组成. 在 Python 中,所有标识符可以包括英文.数字以及下划线(_),但不能以数字开头. Python 中的标识符是区分大小 ...
- 【django】分页
分页 1.简单分页 from django.conf.urls import url from django.contrib import admin from app01 import views ...
- html标签和css基础语法与浏览器兼容性等相关基础学习
<!-- table的使用 --> <h3>前端日常</h3> <form action="https://www.baidu.com"& ...
- 读《深入理解Elasticsearch》点滴-改正用户拼写错误
1.使用“建议”的方法:在query body的json结构体中,增加suggest节点:或者使用特殊的REST端点 2.es自带有多个不同的suggest实现,用来纠正用户的拼写错误及创建自动补全等 ...
- .Net Core中间件和过滤器实现错误日志记录
1.中间件的概念 ASP.NET Core的处理流程是一个管道,中间件是组装到应用程序管道中用来处理请求和响应的组件. 每个中间件可以: 选择是否将请求传递给管道中的下一个组件. 可以在调用管道中的下 ...
