转 python 随机走动的模拟
https://blog.csdn.net/python2014/article/details/21231971
麻省理工的随机走动模块,还不错,三天搞懂了,不过懂得不彻底。
def move(self,cp,dist):
Field.move(self,cp,dist)
newLoc = self.loc
x,y = newLoc.getCoords()
if math.fabs(x) == math.fabs(y):
self.loc = Location(0,0)
class usualDrunk(Drunk):
def move(self,field,dist=1):
cp = random.choice(CompassPt.possibles)
Drunk.move(self,field,CompassPt(cp),dist)
class coldDrunk(Drunk):
def move(self,field,dist=1):
cp = random.choice(CompassPt.possibles)
if cp == S:
Drunk.move(self,field,CompassPt(cp),2*dist)
else:
Drunk.move(self,field,CompassPt(cp),dist)
class ewDrunk(Drunk):
def move(self,field,dist=1):
cp = random.choice(CompassPt.possibles)
while cp != E and cp!=W:
cp = random.choice(CompassPt.possibles)
Drunk.move(self,field,CompassPt(cp),dist)
http://tool.oschina.net/codeformat/js
class Drunk(object);
def __init__(self, name);
self.name = name def move(self, field, cp, dist = 1);
if field.getDrunk().name != self.name;
raise ValueError('Drunk.move called with drunk not in field')
for i in range(dist);
field.move(cp, 1)
class ColdDrunk(Drunk);
def move(self, field, dist = 1);
cp = random.choice(CompassPt.possibles)
if cp == 'S';
Drunk.move(self, field, CompassPt(cp), 2 * dist)
else;
Drunk.move(self, field, CompassPt(cp), dist)
class UsualDrunk(Drunk);
def move(self, field, dist = 1);
cp = random.choice(CompassPt.possibles)
Drunk.move(self, field, CompassPt(cp), dist)
class EWDrunk(Drunk);
def move(self, field, time = 1);
cp = random.choice(CompassPt.possibles)
while cp != 'E'and cp != 'W';
cp = random.choice(CompassPt.possibles)
Drunk.move(self, field, CompassPt(cp), time) def performSim(time, numTrials, drunkType);
distLists = []
for trial in range(numTrials);
d = drunkType('Drunk' + str(trial))…def ansQuest(maxTime, numTrials, drunkType, title);
means = [] distLists = performSim(maxTime, numTrials, drunkType)…ansQuest(500, 100, UsualDrunk, ‘UsualDrunk’)
class oddField(Field);
def isChute(self);
x,
y = self.loc.getCoords() return abs(x) - abs(y) == 0 def move(self, cp, dist);
Field.move(self, cp, dist) if self.isChute();
self.loc = Location(0, 0)""
【python笔记】使用matplotlib,pylab进行python绘图
一提到python绘图,matplotlib是不得不提的python最著名的绘图库,它里面包含了类似matlab的一整套绘图的API。因此,作为想要学习python绘图的童鞋们就得在自己的python环境中安装matplotlib库了,安装方式这里就不多讲,方法有很多,给个参考的。
本文将在已安装matplotlib的环境中教新手如何快速使用其中的接口进行绘图操作,并展现一个非常直观的绘图例子,以及控制绘图中的一些细节的方法。
既然绘图要用matplotlib的包,并且我们也已经安装了,那么首先肯定是要引入这个包了: import matplotlib.pyplot as plt
当然也可以替换为引入pylab(是matplotlib的一个子包,非常适合于进行交互式绘图,本文将以这个为例): import pylab as pl
接下来,就是对具体数据进行绘图了。比如我们要绘制一条y=x^2的曲线,可这样写代码:
x = range(10)  # 横轴的数据

y = [i*i for i in x]  # 纵轴的数据

pl.plot(x, y)  # 调用pylab的plot函数绘制曲线

pl.show()  # 显示绘制出的图
执行之后就可以看到绘制出来的图了:
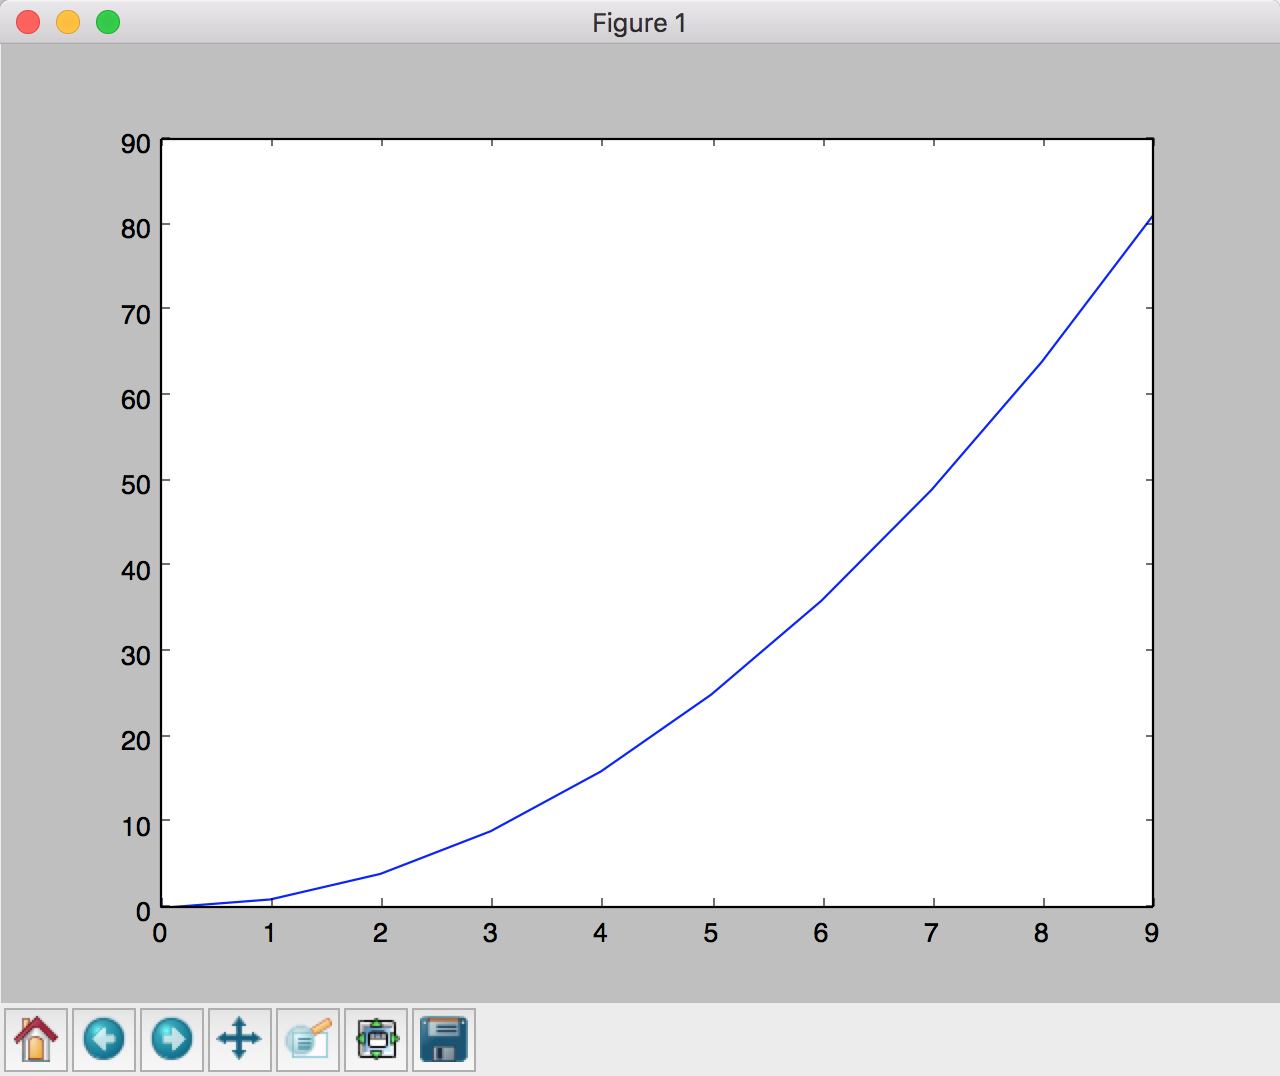
可以看到,要显示一个图非常简单,只要有了两个list作为输入数据,先后调用plot和show函数就可以了。一定要记得只有调用了show之后才会显示出来!只有plot是不行的!
在实际运用中,可能这样一条简单粗暴的线可能并不是我们想要的最好的结果,比如,想要在图形上显示原始数据点,很简单,只要在plot函数中加上一个参数即可: pl.plot(x, y, 'ob-') # 显示数据点,并用蓝色(blue)实现绘制该图形
这个参数用法比较灵活,可以从下面的值中组合选择:

颜色(color 简写为 c):

蓝色: 'b' (blue)

绿色: 'g' (green)

红色: 'r' (red)

蓝绿色(墨绿色): 'c' (cyan)

红紫色(洋红): 'm' (magenta)

黄色: 'y' (yellow)

黑色: 'k' (black)

白色: 'w' (white)

线型(linestyle 简写为 ls):

实线: '-'

虚线: '--'

虚点线: '-.'

点线: ':'

点: '.'

点型(标记marker):

像素: ','

圆形: 'o'

上三角: '^'

下三角: 'v'

左三角: '<'

右三角: '>'

方形: 's'

加号: '+'

叉形: 'x'

棱形: 'D'

细棱形: 'd'

三脚架朝下: '1'(像'丫')

三脚架朝上: '2'

三脚架朝左: '3'

三脚架朝右: '4'

六角形: 'h'

旋转六角形: 'H'

五角形: 'p'

垂直线: '|'

水平线: '_'
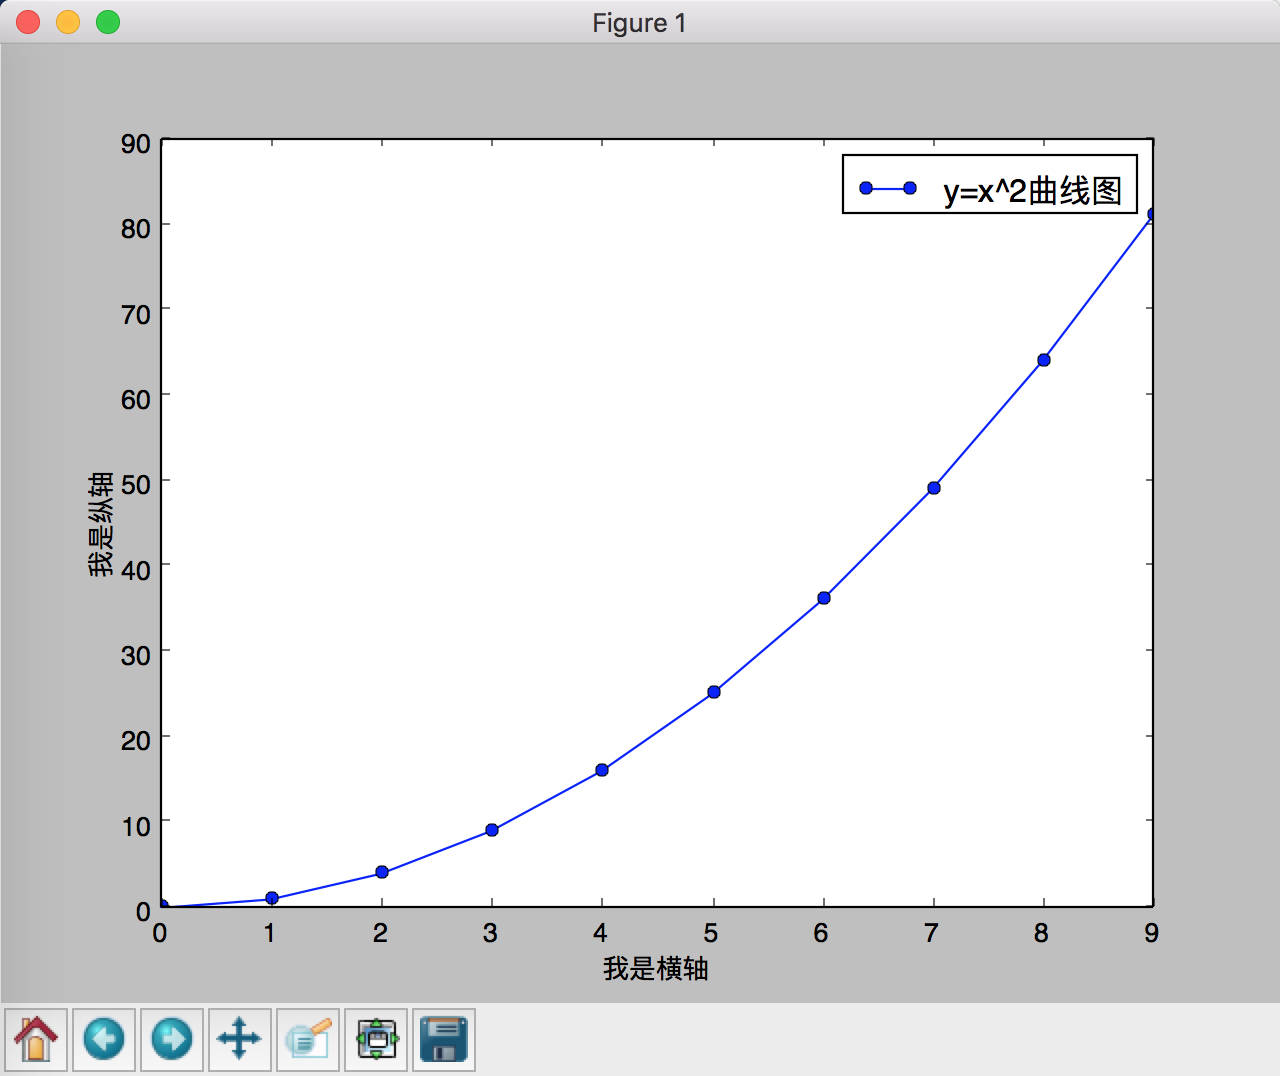
线是调好了,可是还想加上横纵坐标的说明呢?也很简单,在调用show函数之前添加如下代码:
pl.xlabel(u"我是横轴")

pl.ylabel(u"我是纵轴")
效果如下:

这里一定要记住,传递的字符串一定要是Unicode编码,如果是直接传入字符串,形式如 u'这里是要写的字符串' 即可。
现在就直观多了吧,终于像一个正常的图了,不过,还想再在图里加个图例该咋办?也不难,继续给plot传参数:
pl.plot(x, y, 'ob-', label=u'y=x^2曲线图')  # 加上label参数添加图例

pl.legend()  # 让图例生效
这里也是一样,label字符串参数务必加上u''声明为unicode编码,否则图例将会添加失败。效果图如下:
oh,看到图像上面光秃秃的,就好想给它加个标题: pl.title(u'图像标题') # 字符串也需要是unicode编码
有时候,我们的数据可能分布并没有这么集中,比如我们想要对项目中的某些数据进行绘图观察时发现,大量数据聚集在0附近,而少量很大的数据会导致图像显示效果很不好,比如:
x = range(10)+[100]

y = [i*i for i in x]

pl.plot(x, y, 'ob-', label=u'y=x^2曲线图')
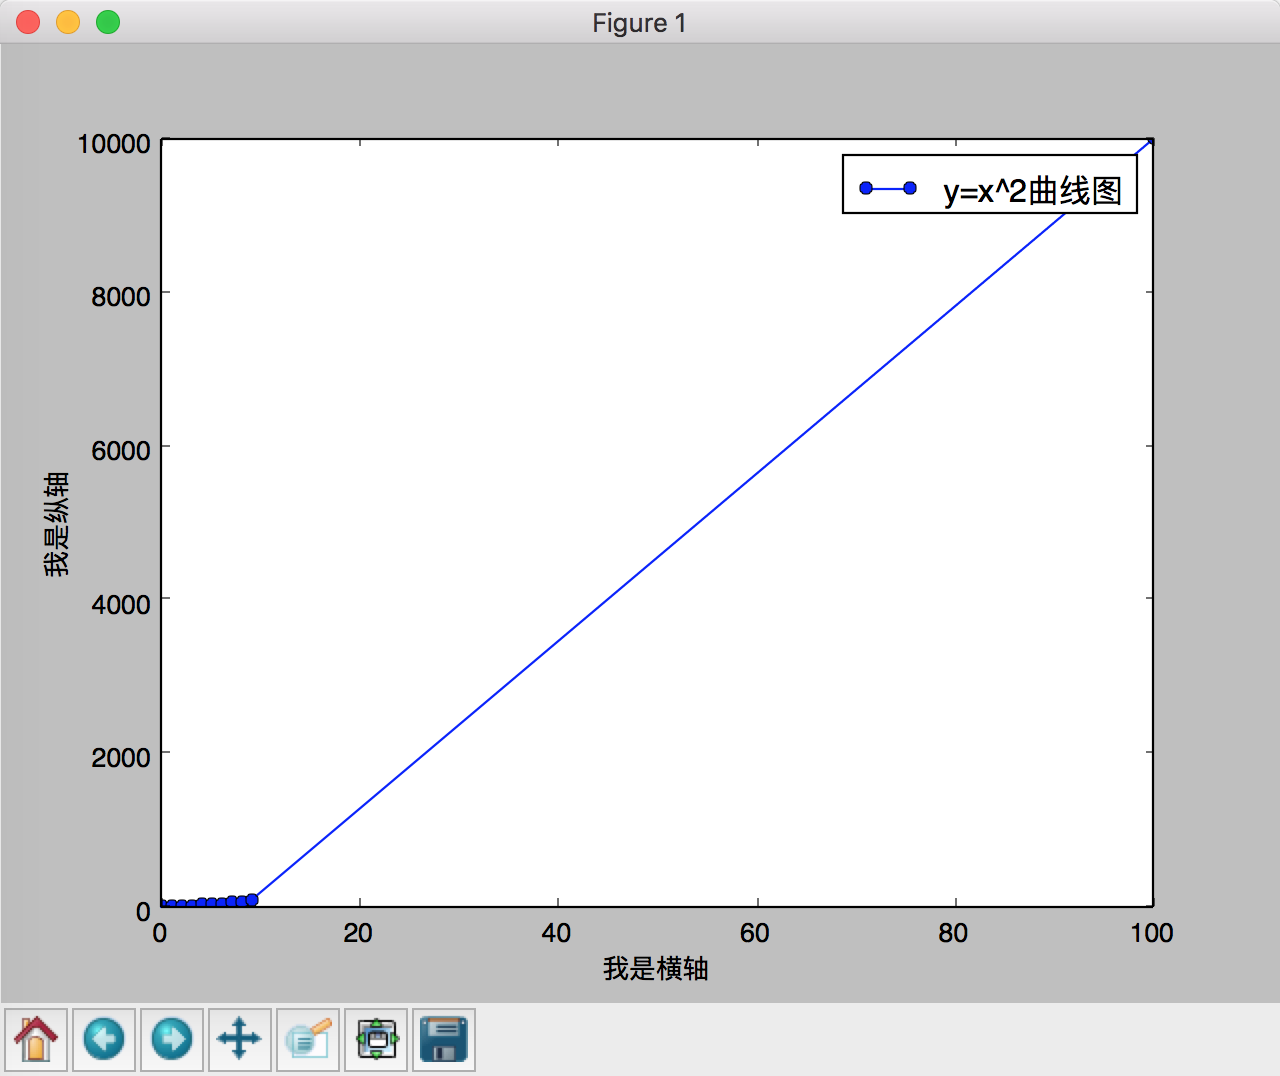
这时,我们想要限制需要显示的坐标范围:
pl.xlim(-1, 11)  # 限定横轴的范围

pl.ylim(-1, 110)  # 限定纵轴的范围
再上效果图:
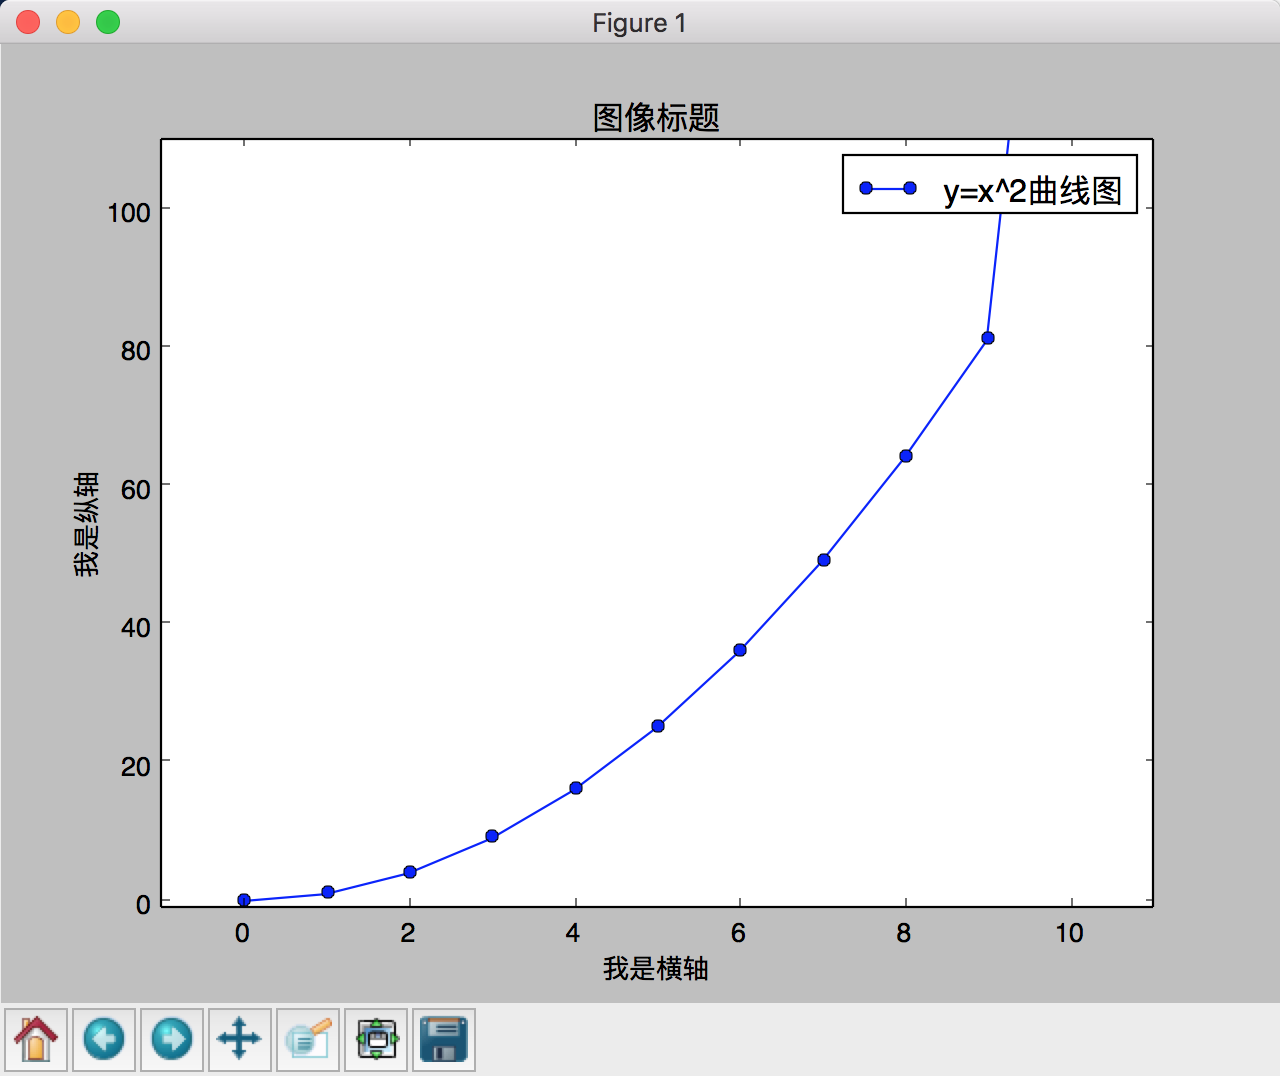
好了,到这里plot的常用绘图用法就讲完了,另外,如果需要在一幅图中显示多条线,可以在show函数调用前继续调用plot函数,传入需要绘制的数据和图形显示要求。
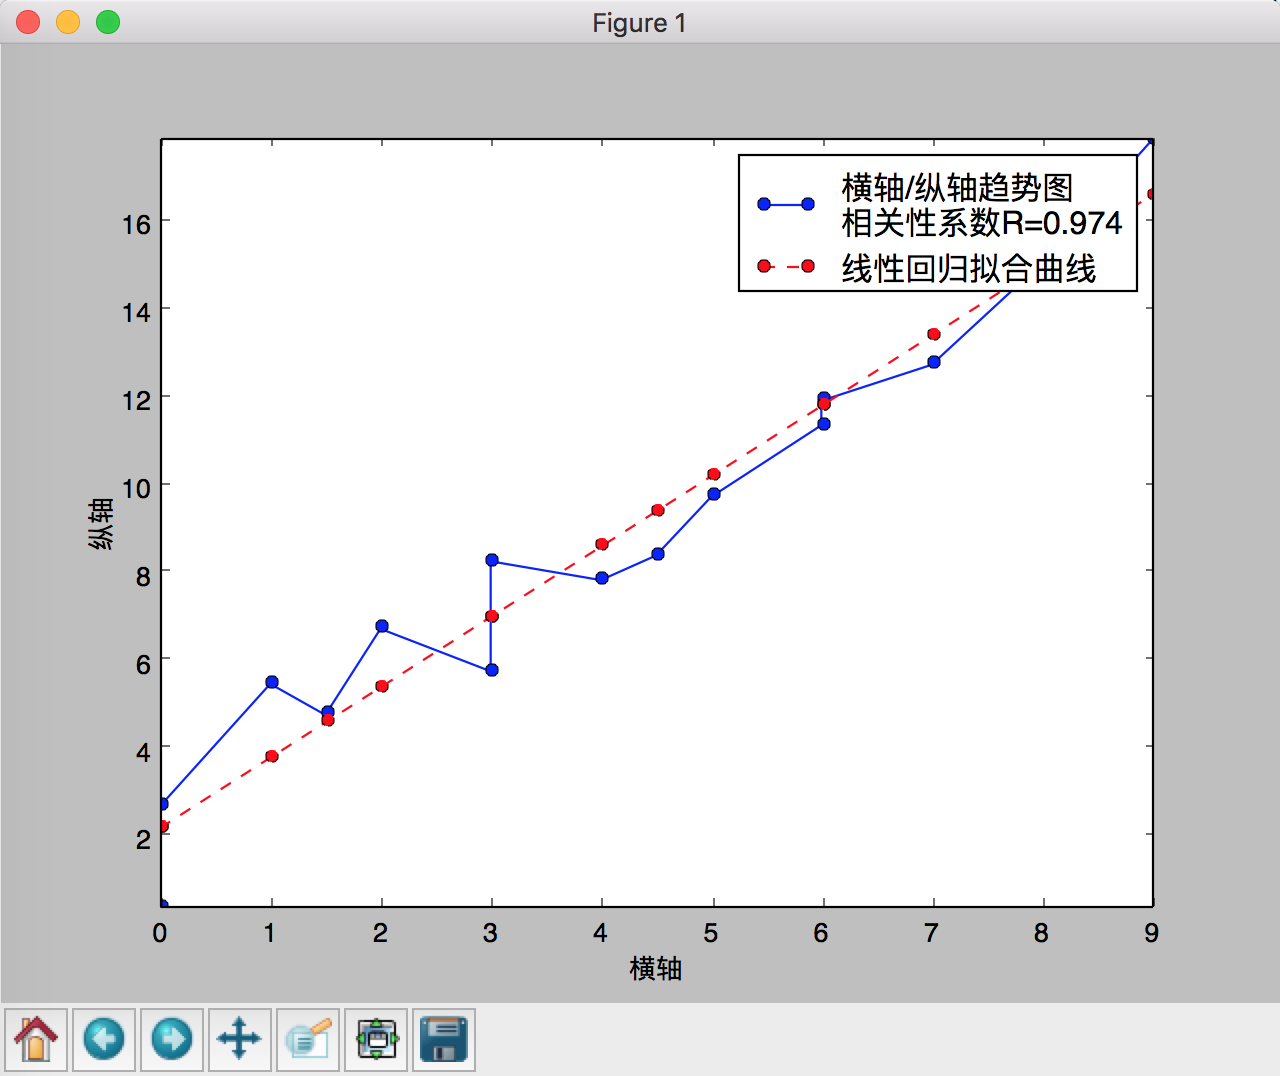
matplotlib是个非常好用的库,不管是对于需要写论文画图,还是数据调研中看数据相关性,都是一个得力助手。写这篇文章的背景是我之前在项目中也使用这个做了一个特征与结果之间的相关性调研中使用到了绘图,就学习了一下,下面是对真实数据进行屏蔽改写之后的一个很像的示意图(感兴趣的可以到我github中看源码,本文的完整代码及注释也可在本链接只中找到):
本文简要介绍了下python绘图入门的一些用法,如有不对之处,欢迎大家指正。我也是不久前才开始真正使用python,这个强大而方便的语言会让我们能更快地实现自己的想法,大家有比较好的python资料也欢迎留言,共同学习,谢谢!
转载请注明出处:使用matplotlib,pylab进行python绘图(http://www.cnblogs.com/webary/p/5813855.html)
![]()
转 python 随机走动的模拟的更多相关文章
- Python使用mechanize模拟浏览器
Python使用mechanize模拟浏览器 之前我使用自带的urllib2模拟浏览器去进行訪问网页等操作,非常多站点都会出错误,还会返回乱码.之后使用了 mechanize模拟浏览器,这些情况都没出 ...
- 测试开发Python培训:模拟登录新浪微博-技术篇
测试开发Python培训:模拟登录新浪微博-技术篇 一般一个初学者项目的起点就是登陆功能的自动化,而面临的项目不同实现的技术难度是不一样的,poptest在做测试开发培训中更加关注技术难点,掌握技 ...
- Python爬虫之模拟登录微信wechat
不知何时,微信已经成为我们不可缺少的一部分了,我们的社交圈.关注的新闻或是公众号.还有个人信息或是隐私都被绑定在了一起.既然它这么重要,如果我们可以利用爬虫模拟登录,是不是就意味着我们可以获取这些信息 ...
- Python实现网站模拟登陆
一.实验简介 1.1 基本介绍 本实验中我们将通过分析登陆流程并使用 Python 实现模拟登陆到一个实验提供的网站,在实验过程中将学习并实践 Python 的网络编程,Python 实现模拟登陆的方 ...
- 利用Python中的mock库对Python代码进行模拟测试
这篇文章主要介绍了利用Python中的mock库对Python代码进行模拟测试,mock库自从Python3.3依赖成为了Python的内置库,本文也等于介绍了该库的用法,需要的朋友可以参考下 ...
- python入门:模拟简单用户登录(自写)
#!/usr/bin/env python # -*- coding: utf-8 -*- #模拟简单用户登录(自写) import getpass a = raw_input("Pleas ...
- python初体验 ——>>> 模拟体育竞技
python初体验 ——>>> 模拟体育竞技 一.排球训练营 1. 简介: 模拟不同的两个队伍进行排球的模拟比赛. 2. 模拟原理: 通过输入各自的能力值(Ⅰ),模拟比赛的进行( P ...
- Python爬虫-百度模拟登录(二)
上一篇-Python爬虫-百度模拟登录(一) 接上一篇的继续 参数 codestring codestring jxG9506c1811b44e2fd0220153643013f7e6b1898075 ...
- Python+Selenium自动化-模拟键盘操作
Python+Selenium自动化-模拟键盘操作 0.导入键盘类Keys() selenium中的Keys()类提供了大部分的键盘操作方法:通过send_keys()方法来模拟键盘上的按键. # ...
随机推荐
- SDUT 2142 数据结构实验之图论二:基于邻接表的广度优先搜索遍历
数据结构实验之图论二:基于邻接表的广度优先搜索遍历 Time Limit: 1000MS Memory Limit: 65536KB Submit Statistic Problem Descript ...
- HTML完全使用详解 PDF扫描版
<HTML完全使用详解>根据网页制作的实际特点和目前市场需要,全面系统地介绍了最新的HTML4.01.丰富的实例贯穿全书,能帮助您全面掌握HTML,而且本书所有实例均可直接修改使用,可以提 ...
- linux linux系统常用设置
linux linux系统常用设置 一.设置开机时开启数字键 修改rc.local文件 命令:vi /etc/rc.local rc.local文件中增加如下代码: INITTY=/dev/tty ...
- 正经学C#_表达式与其运算符[赋值运算符]:《c#入门经典》
上一节中介绍了算术运算符,算术运算符的优先级. 今天说说赋值运算符,不陌生,=[等号]就是赋值运算符的一种. 除此之外还有好多种的.见下图. 运算符 类别 描述 实例 = 二元 简单的赋值运算符,把右 ...
- git配置项目
1.下载安装完git 2.在git oschina上发布项目 3.管理-公匙管理 4.git上面生成公匙 $ cat ~/.ssh/id_rsa.pub 5.将公匙复制进 git oschina 管理 ...
- cheerio制作markDown索引目录
原文地址:cheerio制作markDown索引目录 制作目录索引这种东西当然是放在前端方便.选择放在后端一是为了了解Node后端生态,掌握更多后端技术:二是因为公司实行前后端分离的方式开发,睾贵的J ...
- webstrom 10 注册码
webStorm : UserName:William ===== LICENSE BEGIN ===== 45550-12042010 00001SzFN0n1bPII7FnAxnt0DDOPJA ...
- P1742 最小圆覆盖
\(\color{#0066ff}{题目描述}\) 给出N个点,让你画一个最小的包含所有点的圆. \(\color{#0066ff}{输入格式}\) 先给出点的个数N,2<=N<=1000 ...
- P1556 幸福的路
题意:平面内有N头牛$N\le 10$john从(0,0)出发,最后回到(0,0) 只有走到牛那里john才可以改变方向,否则沿着直线走 问john经过每一头牛并且在每一头牛出恰好改变方向一次的方案( ...
- 10.18 NOIP2018提高组模拟题(二)
大水题 1.咒语 (curse.pas/c/cpp) [题目描述] 亮亮梦到自己来到了魔法城堡,但一扇巨大的石门阻拦了他通向城堡内的路.正当他沮丧之际,突然发现门上有一处机关,机关上有一张很长的纸条. ...