zabbix4.2监控nginx
项目环境:
| 操作系统 | 主机名 | IP地址 |
| Centos7.6 x86_64 | zabbix-server | 192.168.1.18 |
| Centos7.6 x86_64 | zabbix-client | 192.168.1.20 |
在zabbix-servre安装配置完好的前提下,进行如下操作
配置操作如下:
1. 客户端安装nginx软件
[root@Zabbix-Agent ~]# yum -y install nginx
2. 编辑主配置文件server标签下添加一个location
[root@Zabbix-Agent ~]# vim /etc/nginx/nginx.conf
location /nginx_status {
stub_status on;
access_log off;
allow 127.0.0.1;
deny all;
}
3. 启动nginx服务
[root@Zabbix-Agent ~]# systemctl start nginx
[root@Zabbix-Agent ~]# systemctl enable nginx
4. 本地访问Nginx Status
[root@Zabbix-Agent ~]# curl -s http://127.0.0.1/nginx_status
Active connections: 1
server accepts handled requests
1 1 1
Reading: 0 Writing: 1 Waiting: 0
Nginx状态解释:
Active connections Nginx正处理的活动链接数1个
server Nginx启动到现在共处理了1个连接。
accepts Nginx启动到现在共成功创建1次握手。
handled requests Nginx总共处理了1次请求。
Reading Nginx读取到客户端的 Header 信息数。
Writing Nginx返回给客户端的 Header 信息数。
Waiting Nginx已经处理完正在等候下一次请求指令的驻留链接,开启。
Keepalive的情况下,这个值等于active-(reading + writing)。
请求丢失数=(握手数-连接数)可以看出,本次状态显示没有丢失请求。
5. 编写nginx_status脚本
[root@Zabbix-Agent ~]# mkdir -p /server/scripts/
[root@Zabbix-Agent ~]# vim /server/scripts/zabbix_status.sh
#!/bin/bash
############################################################
# $Name: nginx_status.sh
# $Version: V1.1
# $Function: Nginx_Status
# $Author: Happy峰
# $organization: blog.chenjiangfeng.com
# $Create Date: 2019-05-23
# $Description: Monitor Nginx Service Status
############################################################
#!/bin/bash
NGINX_HOST=127.0.0.1
NGINX_PORT=80 #如果端口不同仅需要修改脚本即可,否则修改xml很麻烦
NGINX_URI=/nginx_status
NGINX_COMMAND=$1
nginx_active(){
/usr/bin/curl -s "http://${NGINX_HOST}:${NGINX_PORT}${NGINX_URI}" |awk '/Active/ {print $NF}'
}
nginx_reading(){
/usr/bin/curl -s "http://${NGINX_HOST}:${NGINX_PORT}${NGINX_URI}" |awk '/Reading/ {print $2}'
}
nginx_writing(){
/usr/bin/curl -s "http://${NGINX_HOST}:${NGINX_PORT}${NGINX_URI}" |awk '/Writing/ {print $4}'
}
nginx_waiting(){
/usr/bin/curl -s "http://${NGINX_HOST}:${NGINX_PORT}${NGINX_URI}" |awk '/Waiting/ {print $6}'
}
nginx_accepts(){
/usr/bin/curl -s "http://${NGINX_HOST}:${NGINX_PORT}${NGINX_URI}" |awk 'NR==3 {print $1}'
}
nginx_handled(){
/usr/bin/curl -s "http://${NGINX_HOST}:${NGINX_PORT}${NGINX_URI}" |awk 'NR==3 {print $2}'
}
nginx_requests(){
/usr/bin/curl -s "http://${NGINX_HOST}:${NGINX_PORT}${NGINX_URI}" |awk 'NR==3 {print $3}'
}
case $NGINX_COMMAND in
active)
nginx_active;
;;
reading)
nginx_reading;
;;
writing)
nginx_writing;
;;
waiting)
nginx_waiting;
;;
accepts)
nginx_accepts;
;;
handled)
nginx_handled;
;;
requests)
nginx_requests;
;;
*)
echo $"USAGE:$0 {active|reading|writing|waiting|accepts|handled|requests}"
esac
6. 给脚本授予执行权限
[root@Zabbix-Agent ~]# chmod a+x /server/scripts/zabbix_status.sh
7. zabbix-agent端本地测试脚本是否能获取到数据
[root@Zabbix-Agent ~]# sh /server/scripts/zabbix_status.sh active
1
[root@Zabbix-Agent ~]# sh /server/scripts/zabbix_status.sh reading
0
[root@Zabbix-Agent ~]# sh /server/scripts/zabbix_status.sh writing
1
[root@Zabbix-Agent ~]# sh /server/scripts/zabbix_status.sh waiting
0
[root@Zabbix-Agent ~]# sh /server/scripts/zabbix_status.sh accepts
15
[root@Zabbix-Agent ~]# sh /server/scripts/zabbix_status.sh handled
16
[root@Zabbix-Agent ~]# sh /server/scripts/zabbix_status.sh requests
17
[root@Zabbix-Agent ~]# sh/server/scripts/zabbix_status.sh nginx
USAGE/etc/zabbix/scripts/zabbix_status.sh {active|reading|writing|waiting|accepts|handled|requests}
7. 在zabbix-agent配置文件添加一个自定义key
[root@Zabbix-Agent ~]# vim /etc/zabbix/zabbix_agent.d/zabbix_nginx_status.conf
UserParameter=nginx_status[*],/bin/bash /server/scripts/zabbix_status.sh "$1"
8. 重启zabbix-agent服务
[root@Zabbix-Agent ~]# systemctl restart zabbix-agent
9. zabbix server 测试agent-key是否能获取到响应值
[root@Zabbix-Server ~]# zabbix_get -s 192.168.1.20 -k nginx_status[active]
1
[root@Zabbix-Server ~]# zabbix_get -s 192.168.1.20 -k nginx_status[reading]
0
[root@Zabbix-Server ~]# zabbix_get -s 192.168.1.20 -k nginx_status[writing]
1
[root@Zabbix-Server ~]# zabbix_get -s 192.168.1.20 -k nginx_status[accepts]
30
[root@Zabbix-Server ~]# zabbix_get -s 192.168.1.20 -k nginx_status[handled]
31
[root@Zabbix-Server ~]# zabbix_get -s 192.168.1.20 -k nginx_status[requests]
32
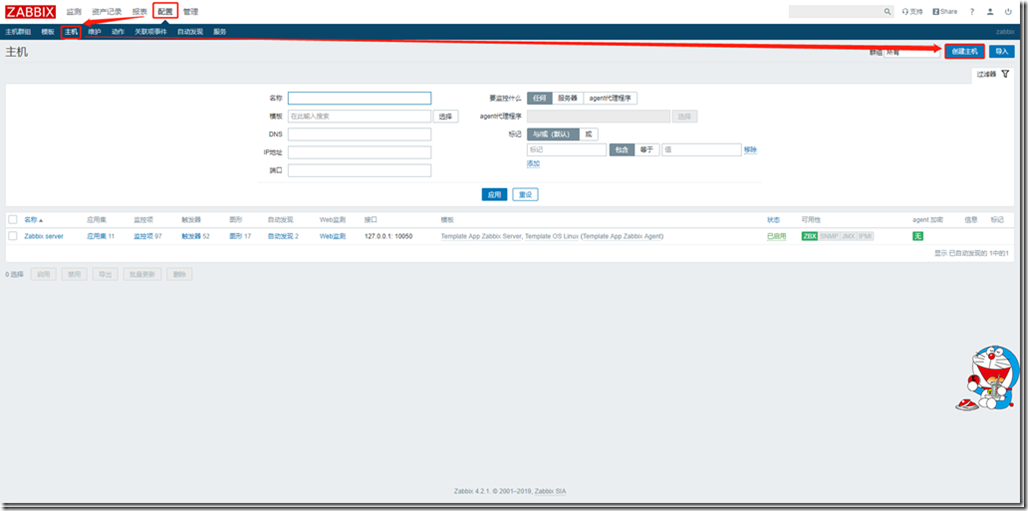
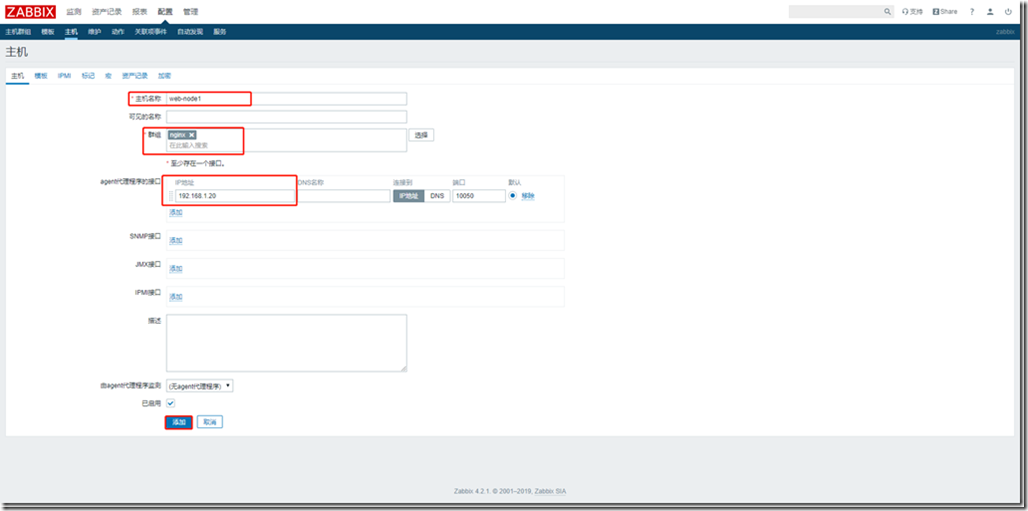
10. zabbix-web端添加监控主机
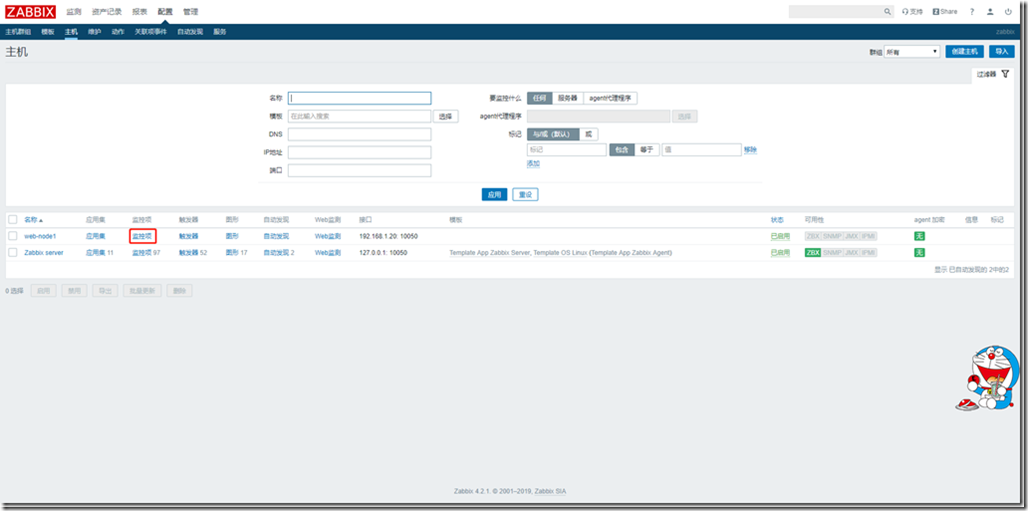
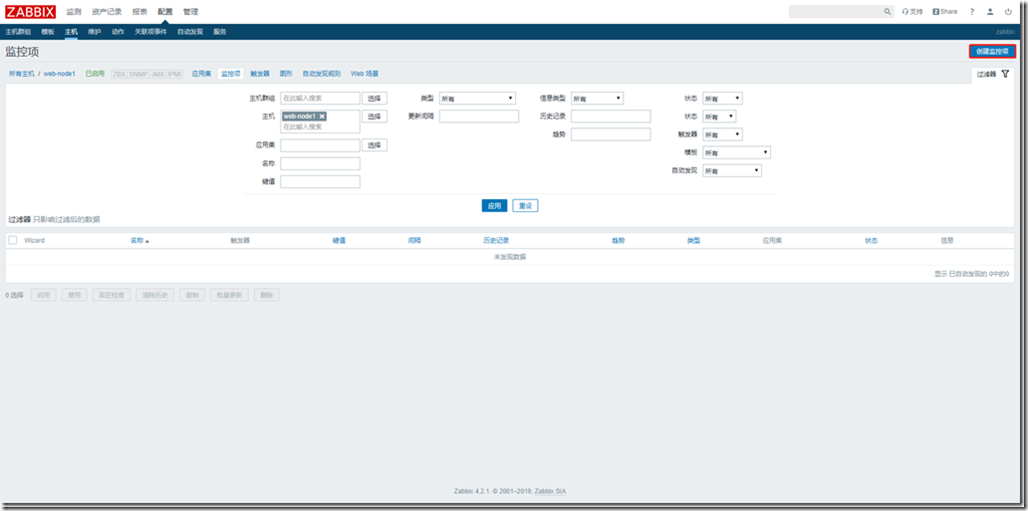
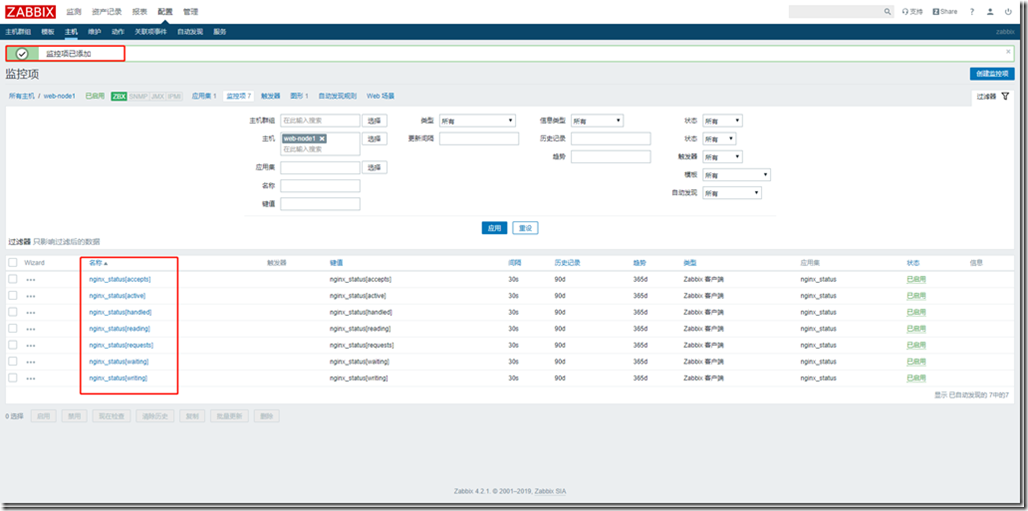
11. 添加监控项


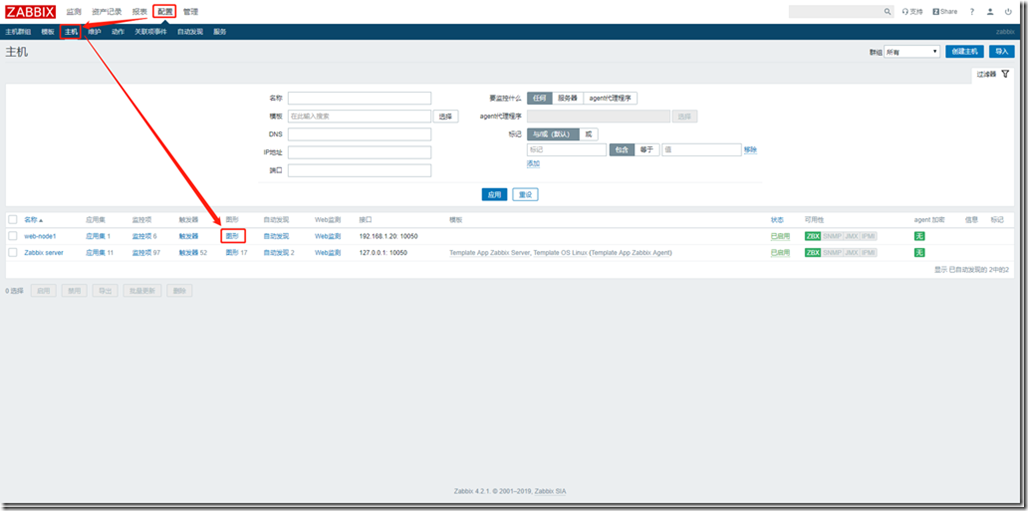
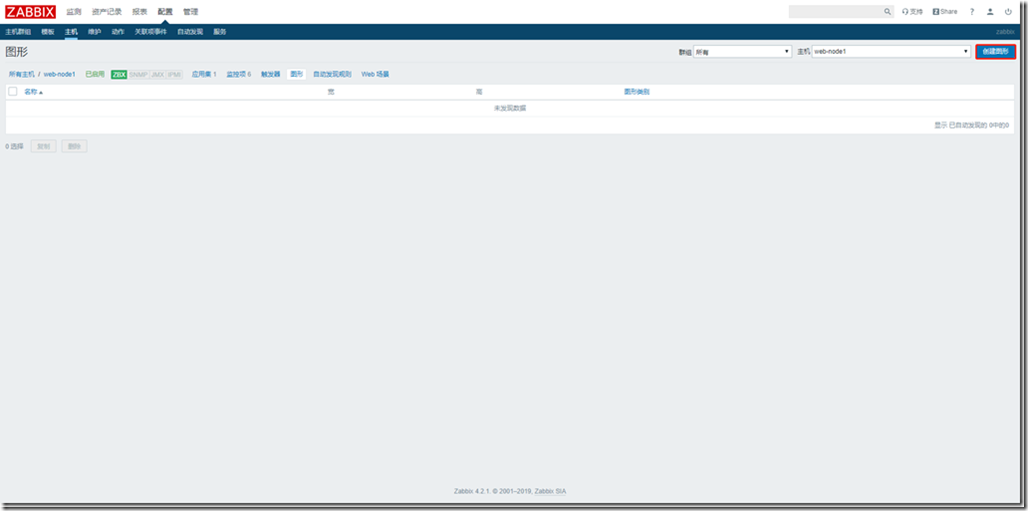
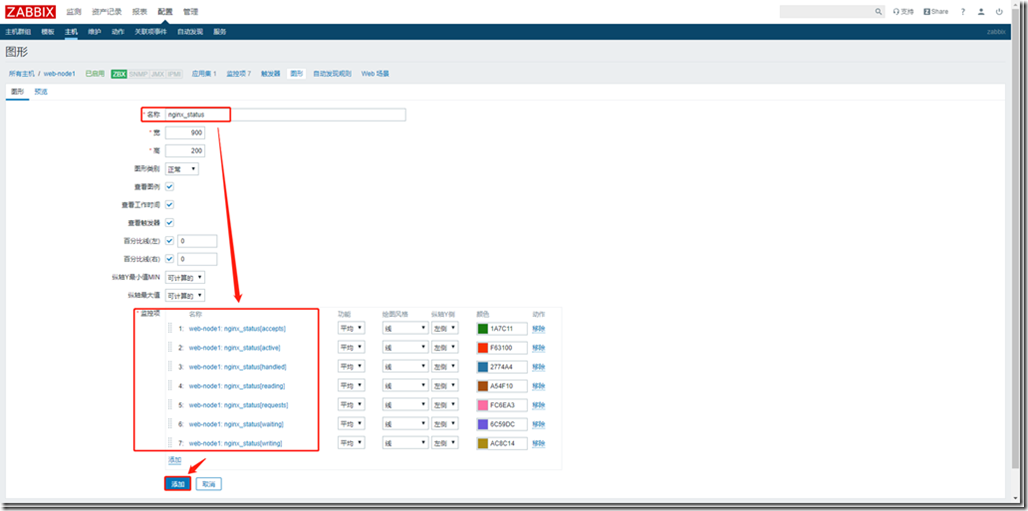
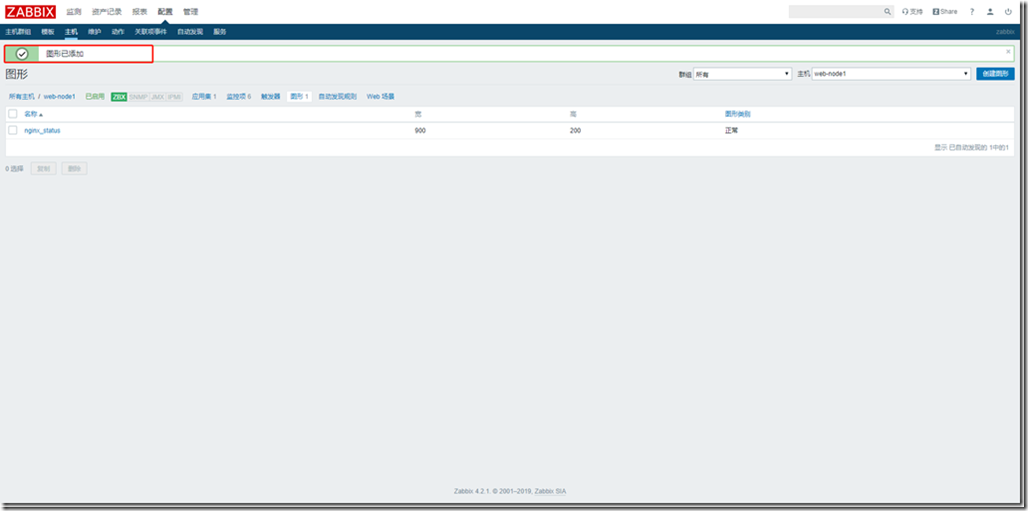
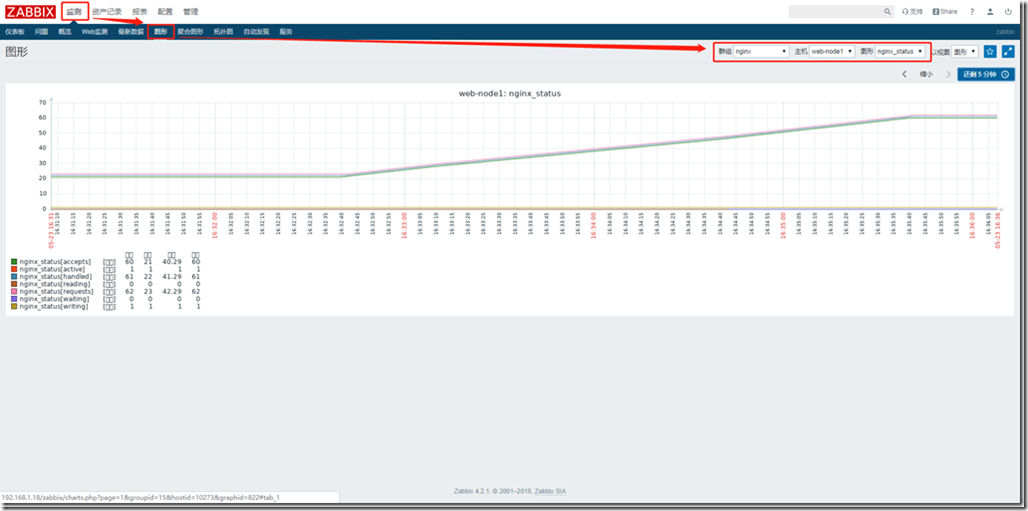
12. 创建一张汇总数据的图形
zabbix4.2监控nginx的更多相关文章
- zabbix4.2学习笔记--监控nginx
图解一个客户端连接开源版本的Nginx情况 Accepts(接受).Handled(已处理).Requests(请求数)是一直在增加的计数器.Active(活跃).Waiting(等待).Readin ...
- zabbix4.2配置监控nginx服务
1.监控原理 通过status模块监控(--with-http_stub_status_module) 2.修改nginx配置(/etc/nginx/conf.d/default.conf) 在被监 ...
- 使用Zabbix监控Nginx服务实战案例
使用Zabbix监控Nginx服务实战案例 作者:尹正杰 版权声明:原创作品,谢绝转载!否则将追究法律责任. 一.编译安装nginx步骤详解并开启状态页 博主推荐阅读: https://www.cn ...
- Zabbix 监控 Nginx(四)
简介: 如何使用 Zabbix 监控 Nginx 状态 ? 1.获取 Nginx 状态( HTTP Stub Status ) [root@localhost ~]# /apps/product/ng ...
- Python 监控nginx服务是否正常
Python 监控nginx服务是否正常 #!/usr/bin/env python import os, sys, time from time import strftime while True ...
- 让keepalived监控NginX的状态
经过前面的配置,如果主服务器的keepalived停止服务,从服务器会自动接管VIP对外服务:一旦主服务器的keepalived恢复,会重新接管VIP. 但这并不是我们需要的,我们需要的是当NginX ...
- ngxtop:在命令行实时监控 Nginx 的神器
Nginx网站服务器在生产环境中运行的时候需要进行实时监控.实际上,诸如Nagios, Zabbix, Munin 的网络监控软件是支持 Nginx 监控的. 如果你不需要以上软件提供的综合性报告或者 ...
- PHP实现简单的监控nginx日志文件功能
此功能是为了实现,定时监控nginx生成的日志数据,并将新增的数据提交到一个接口(比如大数据的接口,让大数据来进行分析) define("MAX_SHOW", 8192*5); / ...
- Zabbix 监控 Nginx 状态
简介: 如何使用 Zabbix 监控 Nginx 状态 ? 1.获取 Nginx 状态( HTTP Stub Status ) shell > /usr/local/nginx/sbin/ngi ...
随机推荐
- Python的传递引用
在研究神经网络的反向传播的时候,不解一点,就是修改的是神经网络的paramets,为什么影响内部的神经元(层),比如Affine层:因为除了创建的时候,使用params作为Affine层的构造函数参数 ...
- 【LeetCode算法-26】Remove Duplicates from Sorted Array
LeetCode第26题 Given a sorted array nums, remove the duplicates in-place such that each element appear ...
- [LeetCode] 636. Exclusive Time of Functions 函数的独家时间
Given the running logs of n functions that are executed in a nonpreemptive single threaded CPU, find ...
- [LeetCode] 655. Print Binary Tree 打印二叉树
Print a binary tree in an m*n 2D string array following these rules: The row number m should be equa ...
- MinGW离线安装
今天安装下载MinGW-W64-install.exe安装MinGW试了好几次都失败了 因此决定用离线安装包进行安装 1.下载 下载地址https://sourceforge.net/projects ...
- 【视频开发】【计算机视觉】doppia编译之四:安装其他库、编译和运行doppia
(与本节内容无关///////////////////////////保存图片参数为--gui.save_all_screenshots true////////////////////) 在我们安 ...
- OpenStack-keystone命令行
Keystone简介 Keystone(OpenStack Identity Service)是OpenStack框架中,负责身份验证.服务规则和服务令牌的功能, 它实现了OpenStack的Iden ...
- java byte与int互相转换
一.Int2Byte byte[] bytes = new byte[4]; for (int i = 0; i < 4; i++) { bytes[i] = (byte)(integer &g ...
- RDP Error: The Identity Of The Remote Computer Cannot Be Verified
As i always need to remote to 20 servers at the same time, so i use a tool called Remote Desktop Con ...
- AVR单片机教程——拨动开关
在按键的上方有4个拨动开关.开关与按键,在原理和使用方法上都是很类似的,但有不同的用途——按键按下后松开就会弹起,而开关可以保存其状态. <switch.h> 定义了与开关相关的函数.sw ...