hessian的简单使用以及与spring整合
Hessian是一个由Caucho Technology开发的轻量级二进制RPC协议。和其他Web服务的实现框架不同的是,Hessian是一个使用二进制格式传输的Web服务协议的框架,相对传统soap web service,更轻量,更快速。它的好处在于免除了一大堆附加的API包,例如XML的处理之类的jar包,这也就是为什么说它是一个轻量级的Web服务实现框架的原因,这个原因还在于手机上的应用程序可以通过Hessian提供的API很方便的访问Hessian的Web服务。
对于我们来说,用来在不同的java服务器之间交换数据使用。底层:rmi。
人员系统,订单系统,统计分析系统。--子系统间用快的hessian。
内部调用就可以使用hessian效率高
hessian与web工程的使用
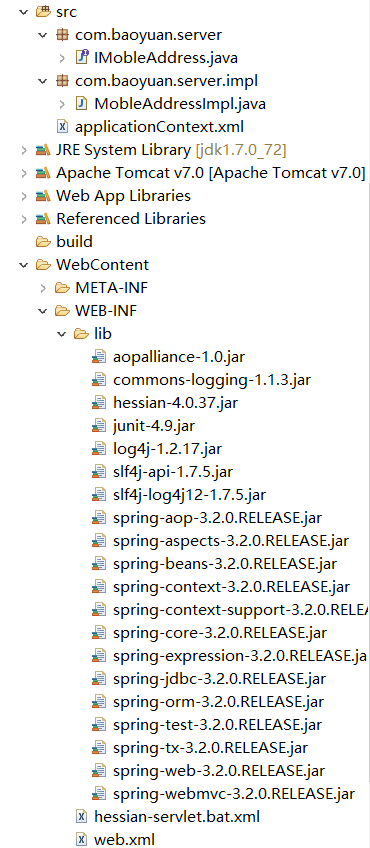
创建服务端的web工程

web.xml的配置
<?xml version="1.0" encoding="UTF-8"?>

<web-app xmlns:xsi="http://www.w3.org/2001/XMLSchema-instance" xmlns="http://java.sun.com/xml/ns/javaee"
 xsi:schemaLocation="http://java.sun.com/xml/ns/javaee http://java.sun.com/xml/ns/javaee/web-app_2_5.xsd" id="WebApp_ID"
 version="2.5">

  <display-name>hessian_web_server</display-name>

  <welcome-file-list>

    <welcome-file>index.html</welcome-file>

    <welcome-file>index.htm</welcome-file>

    <welcome-file>index.jsp</welcome-file>

    <welcome-file>default.html</welcome-file>

    <welcome-file>default.htm</welcome-file>

    <welcome-file>default.jsp</welcome-file>

  </welcome-file-list>]

  <!-- 配置hessian的servlet -->

  <servlet>

      <servlet-name>moble</servlet-name>

      <servlet-class> com.caucho.hessian.server.HessianServlet</servlet-class>

      <!-- 配置业务接口 -->

      <init-param>

          <param-name>home-api</param-name>

          <!--自己定义的业务接口的全路径  -->

          <param-value>com.baoyuan.server.IMobleAddress</param-value>

      </init-param>

      <!-- 配置业务实现类 -->

      <init-param>

          <param-name>home-class</param-name>

          <!--自己定义的业务实现类的全路径  -->

          <param-value>com.baoyuan.server.impl.MobleAddressImpl</param-value>

      </init-param>

  </servlet>

  <servlet-mapping>

      <servlet-name>moble</servlet-name>

      <!--访问服务的路径  -->

      <url-pattern>/moble</url-pattern>

  </servlet-mapping>

</web-app>
业务接口的代码
package com.baoyuan.server;

/**

 * 假定根据手机号查询归属地接口类

 * @author Administrator

 *

 */

public interface IMobleAddress {

    //根据手机号查询归属地

    public String getAddressByMoble(String moble);

}
业务实现类的代码
package com.baoyuan.server.impl;

import com.baoyuan.server.IMobleAddress;

/**

 * 假定根据手机号查询归属地实现类

 * @author Administrator

 *

 */

public class MobleAddressImpl implements IMobleAddress{

    //根据手机号查询归属地

    @Override

    public String getAddressByMoble(String moble) {

        String result=moble+" 归属地:长沙";

        return result;

    }

}
客户端的创建工程,不一定要web工程,java工程也可以
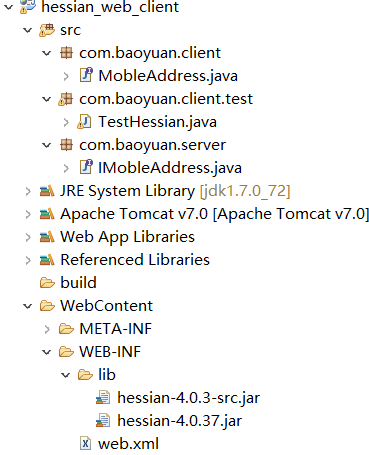
从服务端拿过来的接口类和包代码,和服务的一样
package com.baoyuan.server;

/**

 * 假定根据手机号查询归属地接口类

 * @author Administrator

 *

 */

public interface IMobleAddress {

    //根据手机号查询归属地

    public String getAddressByMoble(String moble);

}
也可以自己定义
package com.baoyuan.client;

/**

 * 假定根据手机号查询归属地接口类与服务端的包名和类名都不一样

 * @author Administrator

 *

 */

public interface MobleAddress {

    //根据手机号查询归属地

    public String getAddressByMoble(String moble);

}
测试代码
package com.baoyuan.client.test;

import com.baoyuan.client.MobleAddress;

import com.baoyuan.server.IMobleAddress;

import com.caucho.hessian.client.HessianProxyFactory;

public class TestHessian {

    public static void main(String[] args) throws Exception {

        //创建代理对象工厂

         HessianProxyFactory proxyFactory = new  HessianProxyFactory ();

         //根据服务端的调用业务的url创建一个对象,然后强转成接口对象

         //注意点:使用这个方式 ,这个接口的包名,类名必须和服务端一致才行

//         IMobleAddress mobleAddress= (IMobleAddress) proxyFactory.create("http://localhost:8080/hessian_web_server/moble");

//         String addressByMoble = mobleAddress.getAddressByMoble("15888888888");

//         System.out.println(addressByMoble);

         //使用上面这种方式,不太好,包名和类名可能与服务端不一致,就用下面这种方式

         //注意:接口的方法必须一样

         MobleAddress mobleAddress= (MobleAddress)proxyFactory.create(MobleAddress.class, "http://localhost:8080/hessian_web_server/moble");

         String address = mobleAddress.getAddressByMoble("15888888888");

         System.out.println(address);

    }

}
hessian与spring整合
创建web工程
web.xml配置代码:注意配置类textConfigLocation时不需要hessian-servlet.xml,所以我将名字改为了hessian-servlet.bat.xml
<?xml version="1.0" encoding="UTF-8"?>

<web-app xmlns:xsi="http://www.w3.org/2001/XMLSchema-instance" xmlns="http://java.sun.com/xml/ns/javaee" xsi:schemaLocation="http://java.sun.com/xml/ns/javaee http://java.sun.com/xml/ns/javaee/web-app_2_5.xsd" id="WebApp_ID" version="2.5">

  <display-name>hessian_spring_server</display-name>

  <welcome-file-list>

    <welcome-file>index.html</welcome-file>

    <welcome-file>index.htm</welcome-file>

    <welcome-file>index.jsp</welcome-file>

    <welcome-file>default.html</welcome-file>

    <welcome-file>default.htm</welcome-file>

    <welcome-file>default.jsp</welcome-file>

  </welcome-file-list>

  <!--配置springMvc 前端控制器 -->

  <servlet>

    <servlet-name>hessian</servlet-name>

    <servlet-class>org.springframework.web.servlet.DispatcherServlet</servlet-class>

    <!--

        默认spring MVC的前端控制器会自动读取WEB-INF/ hessian-servlet.xml,文件名必须满足如下要求:

        hessian-servlet.xml的文件名必须以<servlet-name>hessian</servlet-name>名字开头,并且加上-servlet.xml一段,组成完整的文件名。

        hessian-servlet.xml的文件名格式必须是"servlet name"-servlet.xml格式

        习惯将spring的配置文件放到src目录下,用applicationContext.xml命名,要做下面的配置

     -->

     <init-param>

         <!--contextConfigLocation定义好的必须这么写,加上这个之后将/WEB-INF下的hessian-servlet.xml干掉  -->

         <param-name>contextConfigLocation</param-name>

        <param-value>classpath:applicationContext.xml</param-value>

     </init-param>

  </servlet>

  <servlet-mapping>

    <servlet-name>hessian</servlet-name>

    <url-pattern>/hessian/*</url-pattern>

  </servlet-mapping>

</web-app>
spring配置文件applicationContext.xml
<?xml version="1.0" encoding="UTF-8"?>

<beans xmlns="http://www.springframework.org/schema/beans"

    xmlns:xsi="http://www.w3.org/2001/XMLSchema-instance" xmlns:context="http://www.springframework.org/schema/context"

    xmlns:aop="http://www.springframework.org/schema/aop" xmlns:tx="http://www.springframework.org/schema/tx"

    xsi:schemaLocation="

        http://www.springframework.org/schema/beans

        http://www.springframework.org/schema/beans/spring-beans.xsd

        http://www.springframework.org/schema/context

        http://www.springframework.org/schema/context/spring-context.xsd

        http://www.springframework.org/schema/tx

        http://www.springframework.org/schema/tx/spring-tx.xsd

        http://www.springframework.org/schema/aop

        http://www.springframework.org/schema/aop/spring-aop.xsd

        ">

    <!-- 配置具体的服务 -->

    <!-- 手机号归属地查询的服务

    class:spring整合hessian:org.springframework.remoting.caucho.HessianServiceExporter

    服务需要三个:服务地址、接口类型、实现对象

    id或name:就是具体的服务地址

     -->

    <!-- 服务实现对象 -->

    <bean id="mobileAddress" class="com.baoyuan.server.impl.MobleAddressImpl"/>

    <bean id="/mobile" class="org.springframework.remoting.caucho.HessianServiceExporter">

        <!-- 接口类型 -->

        <property name="serviceInterface" value="com.baoyuan.server.IMobleAddress"/>

        <!-- 实现对象 -->

        <property name="service" ref="mobileAddress"/>

    </bean>

</beans>
业务接口代码
package com.baoyuan.server;

/**

 * 假定根据手机号查询归属地接口类

 * @author Administrator

 *

 */

public interface IMobleAddress {

    //根据手机号查询归属地

    public String getAddressByMoble(String moble);

}
业务实现类
package com.baoyuan.server.impl;

import com.baoyuan.server.IMobleAddress;

/**

 * 假定根据手机号查询归属地实现类

 * @author Administrator

 *

 */

public class MobleAddressImpl implements IMobleAddress{

    //根据手机号查询归属地

    @Override

    public String getAddressByMoble(String moble) {

        String result=moble+" 归属地:长沙";

        return result;

    }

}
客户端的测试代码:
创建工程;注意直接可以将业务接口导出为jar包,放到客户端,hessian_spring_server_1.0.jar为业务接口导出的jar包
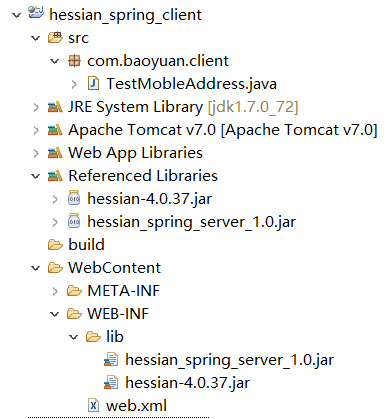
测试代码
package com.baoyuan.client;

import java.net.MalformedURLException;

import com.baoyuan.server.IMobleAddress;

import com.caucho.hessian.client.HessianProxyFactory;

public class TestMobleAddress {

    public static void main(String[] args) throws MalformedURLException {

        HessianProxyFactory proxyFactory = new HessianProxyFactory();

        IMobleAddress mobleAddress=(IMobleAddress) proxyFactory.create(IMobleAddress.class, "http://localhost:8080/hessian_spring_server/hessian/mobile");

        String moble = mobleAddress.getAddressByMoble("13838383838");

        System.out.println(moble);

    }

}
hessian传递复杂数据
创建一个bean类
package com.baoyuan.server.domain;

import java.io.Serializable;

import java.util.Date;

/**

 * 进行传递的类,要进行io操作所以一定要实现serializable接口

 * @author Administrator

 *

 */

public class User implements Serializable {

    private String username;

    private Date  birthday;

    private Integer age;

    public String getUsername() {

        return username;

    }

    public void setUsername(String username) {

        this.username = username;

    }

    public Date getBirthday() {

        return birthday;

    }

    public void setBirthday(Date birthday) {

        this.birthday = birthday;

    }

    public Integer getAge() {

        return age;

    }

    public void setAge(Integer age) {

        this.age = age;

    }

    @Override

    public String toString() {

        return "User [username=" + username + ", birthday=" + birthday + ", age=" + age + "]";

    }

}
给业务接口添加一个方法
package com.baoyuan.server;

import com.baoyuan.server.domain.User;

/**

 * 假定根据手机号查询归属地接口类

 * @author Administrator

 *

 */

public interface IMobleAddress {

    //根据手机号查询归属地

    public String getAddressByMoble(String moble);

    public void saveUser(User user);

}
实现类添加实现方法
package com.baoyuan.server.impl;

import com.baoyuan.server.IMobleAddress;

import com.baoyuan.server.domain.User;

/**

 * 假定根据手机号查询归属地实现类

 * @author Administrator

 *

 */

public class MobleAddressImpl implements IMobleAddress{

    //根据手机号查询归属地

    @Override

    public String getAddressByMoble(String moble) {

        String result=moble+" 归属地:长沙";

        return result;

    }

    //传递复杂类型的数据,不能夸语言

    public void saveUser(User user){

        System.out.println(user);

    }

}
客户端重新导出接口和bean类,导出为hessian_spring_server_2.0.jar,包含IMobleAddress和user
客户端重新将jar包hessian_spring_server_1.0.jar换陈hessian_spring_server_2.0.jar

客户端测试代码
package com.baoyuan.client;

import java.net.MalformedURLException;

import java.util.Date;

import com.baoyuan.server.IMobleAddress;

import com.baoyuan.server.domain.User;

import com.caucho.hessian.client.HessianProxyFactory;

public class TestMobleAddress {

    public static void main(String[] args) throws MalformedURLException {

        HessianProxyFactory proxyFactory = new HessianProxyFactory();

        IMobleAddress mobleAddress=(IMobleAddress) proxyFactory.create(IMobleAddress.class, "http://localhost:8080/hessian_spring_server/hessian/mobile");

        String moble = mobleAddress.getAddressByMoble("13838383838");

        System.out.println(moble);

        User user=new User();

        user.setUsername("张三");

        user.setAge(18);

        user.setBirthday(new Date());

        mobleAddress.saveUser(user);

    }

}
hessian的简单使用以及与spring整合的更多相关文章
- Spring整合Hessian
Spring让Hessian变得不但强大,而且易用,但是易用背后,却有不少陷阱! 这个例子很简单,但实际上的确花费了我超过一小时的时间,排除了种种问题,最后问题终于水落石出. 整合以上篇Hel ...
- Apache shiro的简单介绍与使用(与spring整合使用)
apache shiro框架简介 Apache Shiro是一个强大而灵活的开源安全框架,它能够干净利落地处理身份认证,授权,企业会话管理和加密.现在,使用Apache Shiro的人越来越多,因为它 ...
- 简单探讨spring整合mybatis时sqlSession不需要释放关闭的问题
https://blog.csdn.net/RicardoDing/article/details/79899686 近期,在使用spring和mybatis框架编写代码时,sqlSession不需要 ...
- Apache shiro的简单介绍与使用(与spring整合使用,并加入ehcache缓存权限数据)
apache shiro框架简介 Apache Shiro是一个强大而灵活的开源安全框架,它能够干净利落地处理身份认证,授权,企业会话管理和加密.现在,使用Apache Shiro的人越来越多,因为它 ...
- Spring整合JDBC实现简单的增删改
Spring整合JDBC实现简单的增删改: 1.导入Spring的包和数据库的驱动包: 2.选择一个数据源(dbcp和C3P0) 3.导入数据源的包(这里我们使用dbcp) <span styl ...
- Hessian与Spring整合
1.服务端与Spring的整合 1.1:web.xml中配置控制器 <servlet> <servlet-name>hessian</servlet-name> & ...
- Spring整合Hessian访问远程服务
声明:该文章转载自Spring整合Hessian访问远程服务,本人搬过来只是为了记录下学习Hessian的过程,忘此博主理解,在此感谢,等本人有能力了再学一些原创的东东,本人实践了下,hessianS ...
- spring整合apache-shiro的简单使用
这里不对shiro进行介绍,介绍什么的没有意义 初学初用,不求甚解,简单使用 一.导入jar包(引入坐标) <!--shiro和spring整合--> <dependency> ...
- 手写Mybatis和Spring整合简单版示例窥探Spring的强大扩展能力
Spring 扩展点 **本人博客网站 **IT小神 www.itxiaoshen.com 官网地址****:https://spring.io/projects/spring-framework T ...
随机推荐
- Win10系列:C#应用控件基础20
SemanticZoom控件 SemanticZoom控件由相互关联的缩小视图和放大视图所组成,缩小视图用来显示内容的索引,放大视图可以用来显示内容的详细信息,用户可以根据阅读需要在两种视图之间自由切 ...
- Oracle优化之旅:使用leading, use_nl, rownum调优例子
1.使用leading和use_nl来设置表的查询顺序,来加快查询速度,一般把小表设为第一个表. /*+LEADING(TABLE)*/ 将指定的表作为连接次序中的首表. /*+USE_NL(TAB ...
- python之二分法查找
二分法查找主要的作用就是查找元素 规则. 掐头结尾取中间, 必须是有序列 # 二分法查找 (需要你明白和掌握) # lst = [1,3,5,7,12,36,68,79] # n = int(inpu ...
- redis-sentinel主从复制高可用
Redis-Sentinel Redis-Sentinel是redis官方推荐的高可用性解决方案,当用redis作master-slave的高可用时,如果master本身宕机,redis本身或者客户端 ...
- OC学习笔记
备注:这里只是个人的观点,有的地方也是copy,多多指教,个人笔记,有侵犯你们版权的地方还望海涵!!! ARC单例模式的实现 使用alloc方法初始化一个类的实例的时候,默认是调用了 allocWit ...
- ADO.NET 中的五个主要对象
Connection:主要用来开启程序和数据库的连接 Command:主要是用来对数据库发出一些指令,. DataAdapter;主要在数据源以及DataSet之间执行数据库的传输工作 DataSet ...
- Linux系统基本操作命令
1.文件与文件夹(目录)操作命令 可以参考:http://www.runoob.com/linux/linux-command-manual.html 1)rm:删除命令 例:$ rm -i 文 ...
- jmeter接口测试基础知识2.0
如何在jmeter中上传文件:选择post方式后,选择FILES Upload--文件名称栏点击浏览,值栏写file,如果查看的时候报错,就在MIME类型中写TXT 参数化:添加学生信息:进行参数化1 ...
- Java语法基础学习DayNineteen(反射机制)
一.Refection定义 1.概述 Reflection(反射)是被视为动态语言的关键,反射机制允许程序在执行期借助于Reflection API取得任何类的内部信息,并能直接操作任意对象的内部属性 ...
- 利用教育邮箱注册JetBrains产品(pycharm、idea等)的方法
转载:http://www.cnblogs.com/wang-meng/p/8887436.html 1,申请邮箱 地址为:http://mdu.edu.rs/ 邮箱的前缀可以改成自己喜欢的字符 ...