java框架之SpringCloud(4)-Ribbon&Feign负载均衡
在上一章节已经学习了 Eureka 的使用,SpringCloud 也提供了基于 Eureka 负载均衡的两种方案:Ribbon 和 Feign。
Ribbon负载均衡
介绍
SpringCloud Ribbon 是基于 Netflix Ribbon 实现的一套客户端负载均衡的工具。
Ribbon 是 Netflix 发布的开源项目,主要功能是提供客户端的软件负载均衡算法,将 Netflix 的中间层服务连接在一起。Ribbon 客户端组件提供一系列完善的配置项如连接超时重试等。简单地说,就是在配置文件中列出 Load Balancer(简称 LB)后面所有的机器,Ribbon 会自动帮助你基于某种规则(如简单轮询、随机连接等)去连接这些机器。我们也很容易使用 Ribbon 实现自定义的负载均衡算法。
LB,即负载均衡(Load Balance),在微服务或分布式集群中经常用的一种应用。负载均衡简单地说就是将用户的请求平均的分配到多个服务上,从而达到系统的 HA。
常见的负载均衡方案有软件 Nginx、LVS,硬件 F5 等。
而 LB 又可以分为以下两种:
- 集中式 LB:在服务的消费方和提供方之间使用独立的 LB 设施(可以是硬件,如 F5,也可以是软件,如 Nginx),由该设施负责把访问请求通过某种策略转发至服务的提供方。
- 进程内 LB:将 LB 逻辑集中到消费方,消费方从注册中心获知有哪些地址可用,然后自己再从这些地址中选择出一个合适的服务器。Ribbon 就属于进程内 LB,它只是一个类库,集成于消费方进程,消费方通过它来获取到服务提供方的地址。
使用
1、修改消费者服务工程,对应占用端口为 80,添加依赖如下:
<!--ribbon 相关-->
<dependency>
    <groupId>org.springframework.cloud</groupId>
    <artifactId>spring-cloud-starter-eureka</artifactId>
</dependency>
<dependency>
    <groupId>org.springframework.cloud</groupId>
    <artifactId>spring-cloud-starter-config</artifactId>
</dependency>
<dependency>
    <groupId>org.springframework.cloud</groupId>
    <artifactId>spring-cloud-starter-ribbon</artifactId>
</dependency>
2、修改配置将消费者服务工程作为 Eureka 客户端注册到 Eureka 集群:
server:
  port: 80

eureka:
  client:
    service-url:
      defaultZone: http://www.eurekaserver1.com:7001/eureka,http://www.eurekaserver2.com:7002/eureka,http://www.eurekaserver3.com:7003/eureka
  instance:
    instance-id: microservicecloud-provider-dept
    prefer-ip-address: true # 访问路径显示 IP

spring:
  application:
    name: microservicecloud-consumer-dept
application.yml
3、启用 Eureka 客户端功能:
package zze.springcloud;

import org.springframework.boot.SpringApplication;
import org.springframework.boot.autoconfigure.SpringBootApplication;
import org.springframework.cloud.netflix.eureka.EnableEurekaClient;

@SpringBootApplication
@EnableEurekaClient
public class Application_80 {

    public static void main(String[] args) {
        SpringApplication.run(Application_80.class, args);
    }
}
zze.springcloud.Application_80
4、修改配置类,注册 RestTemplate bean 时添加注解启用负载均衡:
package zze.springcloud.cfgbeans;

import org.springframework.cloud.client.loadbalancer.LoadBalanced;
import org.springframework.context.annotation.Bean;
import org.springframework.context.annotation.Configuration;
import org.springframework.web.client.RestTemplate;

@Configuration
public class ConfigBean {
    @Bean
    @LoadBalanced // 客户端负载均衡
    public RestTemplate restTemplate() {
        return new RestTemplate();
    }
}
zze.springcloud.cfgbeans.ConfigBean
5、修改 Controller,修改微服务具体访问 URL 为微服务名称:
package zze.springcloud.controller;

import org.springframework.beans.factory.annotation.Autowired;
import org.springframework.cloud.client.ServiceInstance;
import org.springframework.cloud.client.discovery.DiscoveryClient;
import org.springframework.web.bind.annotation.*;
import org.springframework.web.client.RestTemplate;
import zze.springcloud.entities.Dept;

import java.util.List;

@RestController
@RequestMapping("/consumer/dept")
public class DeptController {
    // 微服务 Provider 的服务地址
    // private static String REST_URL_PREFIX = "http://localhost:8001";

    // 要调用的微服务名称 即微服务工程的 spring.application.name 对应值
    private static String REST_URL_PREFIX = "http://microservicecloud-provider-dept";
    @Autowired
    private RestTemplate restTemplate;

    @PostMapping("/add")
    public boolean add(@RequestBody Dept dept) {
        return restTemplate.postForObject(REST_URL_PREFIX + "/dept/add", dept, Boolean.class);
    }

    @GetMapping("/get/{id}")
    public Dept get(@PathVariable Long id) {
        return restTemplate.getForObject(REST_URL_PREFIX + "/dept/get/" + id, Dept.class);
    }

    @GetMapping("/list")
    public List<Dept> list() {
        return restTemplate.getForObject(REST_URL_PREFIX + "/dept/list", List.class);
    }
}
zze.springcloud.controller.DeptController
到这里其实已经完成了负载均衡的基本配置,依次启动项目是可以正常访问的,但是因为提供者服务只有一个,看不出负载均衡的效果。
6、新建两个数据库,分别名为 "springcloud_8002" 和 "springcloud_8003",接着分别在两个数据库中执行下面 sql 脚本初始化表结构及数据:
CREATE TABLE dept
(
  dept_no   BIGINT NOT NULL PRIMARY KEY AUTO_INCREMENT,
  dept_name ),
  db_source )
);

INSERT INTO dept(dept_name, db_source)
VALUES ('开发部', DATABASE());
INSERT INTO dept(dept_name, db_source)
VALUES ('人事部', DATABASE());
INSERT INTO dept(dept_name, db_source)
VALUES ('财务部', DATABASE());
INSERT INTO dept(dept_name, db_source)
VALUES ('市场部', DATABASE());
INSERT INTO dept(dept_name, db_source)
VALUES ('运维部', DATABASE());

SELECT * FROM dept;
dept.sql
7、新建两个子工程作为 Provider 服务工程与 "microservicecloud-provider-dept-8001" 提供相同服务做 Provider 服务集群,分别名为 "microservicecloud-provider-dept-8002" 和 "microservicecloud-provider-dept-8003",三个工程连接不同数据库,对应配置如下:
server:
  port: 8001

mybatis:
  config-location: classpath:mybatis/mybatis.cfg.xml # mybatis 配置文件路径
  type-aliases-package: zze.springcloud.entities # 所有 Entity 别名类所在包
  mapper-locations:
    - classpath:mybatis/mapper/**/*.xml # mapper 映射文件

spring:
  application:
    name: microservicecloud-provider-dept # 当前微服务名称
  datasource:
    type: com.alibaba.druid.pool.DruidDataSource # 数据源操作类型
    driver-class-name: org.gjt.mm.mysql.Driver # mysql 驱动包
    url: jdbc:mysql:///springcloud_8001 # 数据库连接 root
    username: root
    password: root
    dbcp2:
      min-idle: 5 # 数据库连接池的最小维持连接数
      initial-size: 5 # 初始化连接数
      max-total: 5 # 最大连接数
      max-wait-millis: 200 # 等待连接获取的最大超时时间

eureka:
  client: # 将当前工程作为 Eureka 客户端
    service-url:
      # 单机版
      # defaultZone: http://localhost:7001/eureka # Eureka 服务端地址
      defaultZone: http://www.eurekaserver1.com:7001/eureka,http://www.eurekaserver2.com:7002/eureka,http://www.eurekaserver3.com:7003/eureka
  instance:
    instance-id: microservicecloud-provider-dept-8001
    prefer-ip-address: true # 访问路径显示 IP

info:
  host: ${java.rmi.server.hostname}
  port: ${server.port}
  app.name: microservicecloud-provider-dept-8001
  build.artifactId: ${project.artifactId}
  build.version: ${project.version}
application.yml#8001
server:
  port: 8002

mybatis:
  config-location: classpath:mybatis/mybatis.cfg.xml # mybatis 配置文件路径
  type-aliases-package: zze.springcloud.entities # 所有 Entity 别名类所在包
  mapper-locations:
    - classpath:mybatis/mapper/**/*.xml # mapper 映射文件

spring:
  application:
    name: microservicecloud-provider-dept # 当前微服务名称
  datasource:
    type: com.alibaba.druid.pool.DruidDataSource # 数据源操作类型
    driver-class-name: org.gjt.mm.mysql.Driver # mysql 驱动包
    url: jdbc:mysql:///springcloud_8002 # 数据库连接 root
    username: root
    password: root
    dbcp2:
      min-idle: 5 # 数据库连接池的最小维持连接数
      initial-size: 5 # 初始化连接数
      max-total: 5 # 最大连接数
      max-wait-millis: 200 # 等待连接获取的最大超时时间

eureka:
  client: # 将当前工程作为 Eureka 客户端
    service-url:
      # 单机版
      # defaultZone: http://localhost:7001/eureka # Eureka 服务端地址
      defaultZone: http://www.eurekaserver1.com:7001/eureka,http://www.eurekaserver2.com:7002/eureka,http://www.eurekaserver3.com:7003/eureka
  instance:
    instance-id: microservicecloud-provider-dept-8002
    prefer-ip-address: true # 访问路径显示 IP

info:
  host: ${java.rmi.server.hostname}
  port: ${server.port}
  app.name: microservicecloud-provider-dept-8002
  build.artifactId: ${project.artifactId}
  build.version: ${project.version}
application.yml#8002
server:
  port: 8003

mybatis:
  config-location: classpath:mybatis/mybatis.cfg.xml # mybatis 配置文件路径
  type-aliases-package: zze.springcloud.entities # 所有 Entity 别名类所在包
  mapper-locations:
    - classpath:mybatis/mapper/**/*.xml # mapper 映射文件

spring:
  application:
    name: microservicecloud-provider-dept # 当前微服务名称
  datasource:
    type: com.alibaba.druid.pool.DruidDataSource # 数据源操作类型
    driver-class-name: org.gjt.mm.mysql.Driver # mysql 驱动包
    url: jdbc:mysql:///springcloud_8003 # 数据库连接 root
    username: root
    password: root
    dbcp2:
      min-idle: 5 # 数据库连接池的最小维持连接数
      initial-size: 5 # 初始化连接数
      max-total: 5 # 最大连接数
      max-wait-millis: 200 # 等待连接获取的最大超时时间

eureka:
  client: # 将当前工程作为 Eureka 客户端
    service-url:
      # 单机版
      # defaultZone: http://localhost:7001/eureka # Eureka 服务端地址
      defaultZone: http://www.eurekaserver1.com:7001/eureka,http://www.eurekaserver2.com:7002/eureka,http://www.eurekaserver3.com:7003/eureka
  instance:
    instance-id: microservicecloud-provider-dept-8003
    prefer-ip-address: true # 访问路径显示 IP

info:
  host: ${java.rmi.server.hostname}
  port: ${server.port}
  app.name: microservicecloud-provider-dept-8003
  build.artifactId: ${project.artifactId}
  build.version: ${project.version}
application.yml#8003
8、测试:
先启动占用端口 7001、7002、7003 的 EurekaServer 服务,
再启动占用端口 8001、8002、8003 的 Provider 服务,
最后启动占用端口 80 的消费者服务,随便访问一个 EurekaServer 的 WebUI 页面:

会发现消费者服务与提供者服务都注册到了 EurekaServer,并且提供者服务有三个实例分别占用端口 8001、8002、8003,
多次访问 http://localhost/consumer/dept/list,会发现每次访问返回的数据都是从不同的数据库返回,即负载均衡环境搭建成功。
test
Ribbon 在工作时分为两步走:
1、选择 EurekaServer,它优先选择在同一个区域内负载较少的 Server。
2、根据用户指定的策略,从 EurekaServer 取到的服务注册列表中选择一个服务。
其中 Ribbon 提供了多种策略,例如轮询(默认)、随机和根据响应时间加权。
若测试机器内存不足,则可以只启动一部分服务测试,例如可以只启动一个 EurekaServer,因为在 EurekaServer 集群中每一个 EurekaServer 都是平等的,还可以只启动两个提供者服务,能看到返回数据的不同即可,内存没有 16G 有点 hold 不住。
核心组件IRule
因为 Ribbon 使用的是客户端负载均衡,所以下面的操作都是在占用 80 端口的消费者服务工程下。
默认提供的Rule
通过上面的使用测试会发现 Ribbon 默认的负载均衡策略是依次轮询访问每个微服务,如果我们需要修改它默认的负载均衡策略,则可以使用 IRule 组件。
IRule:实际上是一个接口,它的实现类需要能够根据特定算法从服务列表中选取一个要访问的服务,默认提供的实现有如下:
IRule
    AbstractLoadBalancerRule (com.netflix.loadbalancer)
        ClientConfigEnabledRoundRobinRule (com.netflix.loadbalancer)
            BestAvailableRule (com.netflix.loadbalancer) // 先过滤掉由于多次访问故障而处于断路器跳闸状态的服务,然后选择一个并发量最小的服务
            PredicateBasedRule (com.netflix.loadbalancer)
                ZoneAvoidanceRule (com.netflix.loadbalancer) // 默认规则,综合判断 Server 所在区域的性能和 server 的可用性选择服务器
                AvailabilityFilteringRule (com.netflix.loadbalancer) // 先过滤掉由于多次访问故障而处于断路器跳闸状态的服务,还有并发的链接数量超过阈值的服务,然后对剩余的服务按照轮询策略进行选择
        RoundRobinRule (com.netflix.loadbalancer) // 轮询
            WeightedResponseTimeRule (com.netflix.loadbalancer) // 根据平均响应时间计算所有服务的权重,响应时间越快服务权重越大,被选择的几率越高。刚启动的时候如果统计信息不足,则使用 RoundRobinRule,等统计信息完善时会自动切换到当前策略
            ResponseTimeWeightedRule (com.netflix.loadbalancer)
        RandomRule (com.netflix.loadbalancer) // 随机
        RetryRule (com.netflix.loadbalancer) // 先按照 RoundRobinRule 策略获取服务,如果获取服务失败则在指定时间内会重试,如果依旧失败则会获取其它可用的服务
如果要修改负载均衡策略,只需要将实现 IRule 接口的 bean 注册到 IoC 容器即可,如:
package zze.springcloud.cfgbeans;

import com.netflix.loadbalancer.IRule;
import com.netflix.loadbalancer.RandomRule;
import org.springframework.cloud.client.loadbalancer.LoadBalanced;
import org.springframework.context.annotation.Bean;
import org.springframework.context.annotation.Configuration;
import org.springframework.web.client.RestTemplate;

@Configuration
public class ConfigBean {
    @Bean
    @LoadBalanced // 客户端负载均衡
    public RestTemplate restTemplate() {
        return new RestTemplate();
    }

    @Bean // 负载均衡策略使用随机访问
    public IRule randomRule(){
        return new RandomRule();
    }
}
zze.springcloud.cfgbeans.ConfigBean
自定义Rule
上面说过我们只需要将实现 IRule 接口的 bean 注册到 IoC 容器规则就可以生效,所以我们可以自定义一个 IRule 的实现类,比如要定制一个每个服务依次访问 5 次的规则:
package zze.springcloud.cfgbeans;

import java.util.List;

import com.netflix.client.config.IClientConfig;
import com.netflix.loadbalancer.AbstractLoadBalancerRule;
import com.netflix.loadbalancer.ILoadBalancer;
import com.netflix.loadbalancer.Server;

/**
 * 参考 RandomRule 源码自定义 Rule,每个服务访问 5 次
 */
public class MyRandomRule extends AbstractLoadBalancerRule
{
    private int total = 0;             // 总共被调用的次数,目前要求每台被调用5次
    private int currentIndex = 0;    // 当前提供服务的机器号

    public Server choose(ILoadBalancer lb, Object key)
    {
        if (lb == null) {
            return null;
        }
        Server server = null;

        while (server == null) {
            if (Thread.interrupted()) {
                return null;
            }
            List<Server> upList = lb.getReachableServers();
            List<Server> allList = lb.getAllServers();

            int serverCount = allList.size();
            if (serverCount == 0) {
                /*
                 * No servers. End regardless of pass, because subsequent passes only get more
                 * restrictive.
                 */
                return null;
            }

//            int index = rand.nextInt(serverCount);// java.util.Random().nextInt(3);
//            server = upList.get(index);

//            private int total = 0;             // 总共被调用的次数,目前要求每台被调用5次
//            private int currentIndex = 0;    // 当前提供服务的机器号
            if(total < 5)
            {
                server = upList.get(currentIndex);
                total++;
            }else {
                total = 0;
                currentIndex++;
                if(currentIndex >= upList.size())
                {
                  currentIndex = 0;
                }
            }

            if (server == null) {
                /*
                 * The only time this should happen is if the server list were somehow trimmed.
                 * This is a transient condition. Retry after yielding.
                 */
                Thread.yield();
                continue;
            }

            if (server.isAlive()) {
                return (server);
            }

            // Shouldn't actually happen.. but must be transient or a bug.
            server = null;
            Thread.yield();
        }

        return server;

    }

    @Override
    public Server choose(Object key)
    {
        return choose(getLoadBalancer(), key);
    }

    @Override
    public void initWithNiwsConfig(IClientConfig clientConfig)
    {
        // TODO Auto-generated method stub

    }
}
zze.springcloud.cfgbeans.MyRandomRule
除了将 IRule 实例直接注册到 IoC 容器这种方式,我们还可以自定义一个规则配置类:
package zze.config;

import org.springframework.context.annotation.Bean;

import com.netflix.loadbalancer.IRule;
import org.springframework.context.annotation.Configuration;
import zze.springcloud.cfgbeans.MyRandomRule;

/*
注意,官方文档表示该类要定义在 @ComponentScan 注解扫描范围之外
 */
@Configuration
public class MySelfRuleCofnig
{
    @Bean
    public IRule myRule()
    {
        return new MyRandomRule();
    }
}
zze.config.MySelfRuleCofnig
接下来可以通过在主启动类上通过指定注解让配置类对指定服务生效:
package zze.springcloud;

import org.springframework.boot.SpringApplication;
import org.springframework.boot.autoconfigure.SpringBootApplication;
import org.springframework.cloud.netflix.eureka.EnableEurekaClient;
import org.springframework.cloud.netflix.ribbon.RibbonClient;
import zze.config.MySelfRuleCofnig;

@SpringBootApplication
@EnableEurekaClient
@RibbonClient(name = "MICROSERVICECLOUD-PROVIDER-DEPT",configuration = MySelfRuleCofnig.class) // 针对 MICROSERVICECLOUD-PROVIDER-DEPT 服务实例采用的负载均衡策略配置类为 MySelfRuleCofnig
public class Application_80 {

    public static void main(String[] args) {
        SpringApplication.run(Application_80.class, args);
    }
}
zze.springcloud.Application_80
Feign负载均衡
介绍
Feign 是一个声明式 WebService 客户端。使用 Feign 能够让编写 WebService 客户端更加简单,它的使用方法是定义一个接口,然后在上面添加注解,同时也支持 JAX-RS 标准的注解。Feign 也支持可拔插式的编码器和解码器。SpringCloud 对 Feign 进行了封装,使其支持了 SpringMVC 标准注解和 HttpMessageConverters。Feign 可以与 Eureka 和 Ribbon 组合使用以支持负载均衡。
Feign 能干什么?
前面在使用 Ribbon+RestTemplate,利用 RestTemplate 对 httpClient 封装,形成了一套模板化的调用方法。但是在实际开发中,由于对服务依赖的调用可能不止一处,往往一个接口会被多处调用,所以通常都会针对每个微服务自行封装一些客户端类来包装这些依赖服务的调用。而 Feign 就是在这个基础上做了进一步封装,由他来帮助我们实现依赖服务接口。在 Feign 的实现下,我们只需要创建一个接口并使用注解的方式来配置它(类似于 MyBatis 的 Mapper 类使用 @Mapper 注解),即可完成对服务提供方的接口绑定,简化了使用 SpringCloud Ribbon 时,自动封装服务调用客户端的开发量。也可以说 Feign 就是对 Ribbon 的进一步封装的实现。
使用
1、复制 "microservicecloud-consumer-dept-80" 子工程改名为 "microservicecloud-consumer-dept-feign",新增依赖:
<dependency>
    <groupId>org.springframework.cloud</groupId>
    <artifactId>spring-cloud-starter-feign</artifactId>
</dependency>
2、新建接口,使用 Feign 提供的注解标识该接口为 Feign 客户端:
package zze.springcloud.service;

import org.springframework.cloud.netflix.feign.FeignClient;
import org.springframework.web.bind.annotation.GetMapping;
import org.springframework.web.bind.annotation.PathVariable;
import org.springframework.web.bind.annotation.PostMapping;
import org.springframework.web.bind.annotation.RequestMapping;
import zze.springcloud.entities.Dept;

import java.util.List;

@FeignClient(value = "microservicecloud-provider-dept") // 标识调用哪个微服务
@RequestMapping("/dept")
public interface DeptClientService {
    @GetMapping("/get/{id}")
    public Dept get(@PathVariable Long id);

    @GetMapping("/list")
    public List<Dept> list();

    @PostMapping("/add")
    public boolean add(Dept dept);
}
zze.springcloud.service.DeptClientService
3、修改主启动类,使用注解启用 Feign:
package zze.springcloud;

import org.springframework.boot.SpringApplication;
import org.springframework.boot.autoconfigure.SpringBootApplication;
import org.springframework.cloud.netflix.eureka.EnableEurekaClient;
import org.springframework.cloud.netflix.feign.EnableFeignClients;

@SpringBootApplication
@EnableEurekaClient
@EnableFeignClients(basePackages = {"zze.springcloud.service"}) // 指定 Feign 客户端的扫描包
public class Application_80 {

    public static void main(String[] args) {
        SpringApplication.run(Application_80.class, args);
    }
}
zze.springcloud.Application_80
4、修改 Controller,使用 Feign 客户端:
package zze.springcloud.controller;

import org.springframework.beans.factory.annotation.Autowired;
import org.springframework.cloud.client.ServiceInstance;
import org.springframework.cloud.client.discovery.DiscoveryClient;
import org.springframework.web.bind.annotation.*;
import org.springframework.web.client.RestTemplate;
import zze.springcloud.entities.Dept;
import zze.springcloud.service.DeptClientService;

import java.util.List;

@RestController
@RequestMapping("/consumer/dept")
public class DeptController {

    @Autowired
    private DeptClientService deptService;

    @PostMapping("/add")
    public boolean add(@RequestBody Dept dept) {
        return deptService.add(dept);
    }

    @GetMapping("/get/{id}")
    public Dept get(@PathVariable Long id) {
        return deptService.get(id);
    }

    @GetMapping("/list")
    public List<Dept> list() {
        return deptService.list();
    }
}
zze.springcloud.controller.DeptController
5、测试:
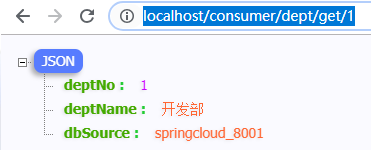
1、启动 Eureka 集群 7001、7002、7003
2、启动 Provider 集群 8001、8002、8003
3、启动 microservicecloud-consumer-dept-feign,访问 http://localhost/consumer/dept/get/1,返回结果,成功。
test
java框架之SpringCloud(4)-Ribbon&Feign负载均衡的更多相关文章
- springcloud 之Ribbon客户端负载均衡配置使用
pom.xml添加配置说明:这里服务注册与发现用的是Eureka,所以消费者端需要引入eureka,使用EurekaClient来调用服务 <dependency> <groupId ...
- SpringCloud学习(5)——Feign负载均衡
Feign概述 Feign是声明式的Web服务客户端, 使得编写Web服务客户端变的非常容易, 只需要创建一个接口, 然后在上面添加注解即可. Feign旨在使编写Java Http客户端变的更容易. ...
- SpringCloud之Ribbon:负载均衡
Spring Cloud集成了Ribbon,结合Eureka,可实现客户端的负载均衡. 下面实现一个例子,结构下图所示. 一.服务器端 1.创建项目 开发工具:IntelliJ IDEA 2019.2 ...
- SpringCloud Netflix Ribbon(负载均衡)
⒈Ribbon是什么? Spring Cloud Ribbon是基于Netflix Ribbon实现的一套客户端负载均衡工具. Ribbon是Netflix发布的开源项目,主要功能是提供客户端的软件负 ...
- SpringCloud的Ribbon自定义负载均衡算法
1.Ribbon默认使用RoundRobinRule策略轮询选择server 策略名 策略声明 策略描述 实现说明 BestAvailableRule public class BestAvailab ...
- SpringCloud实战-Ribbon客户端负载均衡
前面我们已经完成了注册中心和服务提供者两个基础组件.接着介绍使用Spring Cloud Ribbon在客户端负载均衡的调用服务. ribbon 是一个客户端负载均衡器,可以简单的理解成类似于 ngi ...
- SpringCloud之Feign 负载均衡请求超时时间
版本声明: SpringCloud:Greenwich.SR4 SpringBoot:2.1.9.RELEASE Feign调用服务的默认时长是1秒钟,也就是如果超过1秒没连接上或者超过1秒没响应,那 ...
- SpringCloud 进阶之Ribbon和Feign(负载均衡)
1. Ribbon 负载均衡 Spring Cloud Ribbon是基于Netflix Ribbon实现的一套客户端,负载均衡的工具; 1.1 Ribbon 配置初步 1.1.1 修改 micros ...
- SpringCloud学习笔记:负载均衡Ribbon(3)
1. RestTemplate简介 RestTemplate是Spring Resource中一个访问第三方RESTful API接口的网络请求框架. RestTemplate是用来消费REST服务的 ...
随机推荐
- 【iCore1S 双核心板_ARM】例程十九:SD_IAP_ARM实验——更新升级STM32
实验现象及操作说明: 1.本例程共有两个代码包,APP和IAP,IAP程序功能实现将APP程序升级至STM32中. 2.直接上电或烧写程序将执行升级的APP应用程序. 3.按下按键上电或写程序将进行升 ...
- 【css】垂直居中的几种写法
结构 <div class="vam"> <div class="vam-body">垂直居中</div> </div ...
- Geoserver GeoWebCache 切图失败 This requested used more time than allowed and has been forcefully stopped. Max rendering time is 60.0s
错误信息: This requested used more time than allowed and has been forcefully stopped. Max rendering time ...
- SpringBoot 推荐博客
http://412887952-qq-com.iteye.com/category/356333
- 81For全栈技术网
你想了解前端吗? 你想了解后端吗? 你想了解设计吗? 81For全栈技术这里包含了互联网所有内容,81For.com是全栈技术网,包括:前端.后端.全栈.jquery.vue.react.router ...
- ZOJ 3886 Nico Number(筛素数+Love(线)Live(段)树)
problemCode=3886">ZOJ 3886 题意: 定义一种NicoNico数x,x有下面特征: 全部不大于x且与x互质的数成等差数列,如x = 5 ,与5互素且不大于5的数 ...
- Linux------使用Xfpt6连接阿里云ECS服务器
1.安装Xftp6,直接下一步到安装完成就可以了 2.新建文件传输 3.新建会话 4.填写会话信息 5.点击“连接”即可
- Android基础开发归档
一.Android 基本组件汇总 1. Android中PackageManager使用示例 : http://blog.csdn.net/qinjuning/article/details/686 ...
- docker 应用-2(Dockerfile 编写以及镜像保存提交)
我们可以从docker hub上pull别人的镜像,也可以将容器进行修改,然后commit镜像,并把镜像push到docker hub上被被人使用.但是,直接pull或者push镜像的方式太过笨重,尤 ...
- 用SUMIF对超15位的代码进行条件求和,出错了,原因是....
用SUMIF对超15位的代码进行条件求和,出错了,原因是.... 2017-10-29 23:01 一.问题 有读者朋友问: 用SUMIF进行条件求和时,如果统计的条件是超15位的代码,就会出错,比如 ...