人脸检测MTCNN的训练过程(PRO网络)
以下学习均由此:https://github.com/AITTSMD/MTCNN-Tensorflow
数据集
WIDER Face for face detection and Celeba for landmark detection
WIDER Face


总共62个场景的文件夹,每个文件夹中多张图片

文件中保存的是每个图片中所有人脸框的位置,表示意义如下:

Celeba
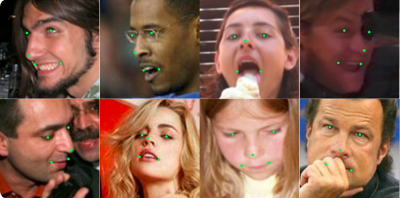
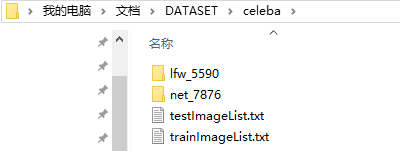
两个文件夹分别表示来源不同的图片。It contains 5,590 LFW images and 7,876 other images downloaded from the web. The training set and validation set are defined in trainImageList.txt and testImageList.txt

每张图片有对应的人脸框和5个关键点坐标
基础问题
a.样本问题,mtcnn训练时,会把训练的原图样本,通过目标所在区域进行裁剪,得到三类训练样本,即:正样本、负样本、部分(part)样本
裁剪方式——对目标区域,做平移、缩放等变换得到裁剪区域(Since the training data for landmark is less.I use transform,random rotate and random flip to conduct data augment)
IoU——目标区域和裁剪区域的重合度
此时三类样本如下定义:
正样本:IoU >= 0.65,标签为1
负样本:IoU < 0.3,标签为0
部分(part)样本:0.65 > IoU >= 0.4,标签为-1
Since MTCNN is a Multi-task Network,we should pay attention to the format of training data.The format is:
[path to image][cls_label][bbox_label][landmark_label]
For pos sample,cls_label=1,bbox_label(calculate),landmark_label=[0,0,0,0,0,0,0,0,0,0].
For part sample,cls_label=-1,bbox_label(calculate),landmark_label=[0,0,0,0,0,0,0,0,0,0].
For landmark sample,cls_label=-2,bbox_label=[0,0,0,0],landmark_label(calculate).
For neg sample,cls_label=0,bbox_label=[0,0,0,0],landmark_label=[0,0,0,0,0,0,0,0,0,0].
b.网络问题,mtcnn分为三个小网络,分别是PNet、RNet、ONet,新版多了一个关键点回归的Net(这个不谈)。
PNet:12 x 12,负责粗选得到候选框,功能有:分类、回归
RNet:24 x 24,负责筛选PNet的粗筛结果,并微调box使得更加准确,功能有:分类、回归
ONet:48 x 48,负责最后的筛选判定,并微调box,回归得到keypoint的位置,功能有:分类、回归、关键点
c.网络大小的问题,训练时输入图像大小为网络指定的大小,例如12 x 12,而因为PNet没有全连接层,是全卷积的网络,所以预测识别的时候是没有尺寸要求的,那么PNet可以对任意输入尺寸进行预测得到k个boundingbox和置信度,通过阈值过滤即可完成候选框提取过程,而该网络因为结构小,所以效率非常高。
PNet
- Run
prepare_data/gen_12net_data.pyto generate training data(Face Detection Part) for PNet. - Run
gen_landmark_aug_12.pyto generate training data(Face Landmark Detection Part) for PNet. - Run
gen_imglist_pnet.pyto merge two parts of training data. - Run
gen_PNet_tfrecords.pyto generate tfrecord for PNet.
生成数据(for Face Detection)
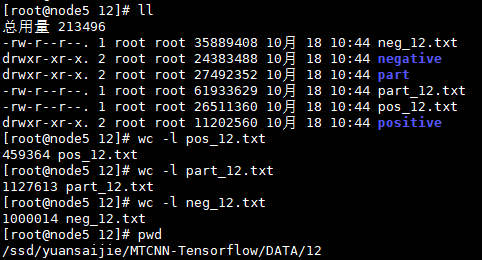
运行结果:
12880 pics in total

...

12800 images done, pos: 458655 part: 1125289 neg: 995342
以一张图片为例,讲解三类样本的生成过程:
1.在原图基础上,随机取50个样本,保留IoU<0.3的剪裁图作为负样本
2.针对图片中的每个人脸框的位置:
a.循环5次,取人脸框附近的IoU < 0.3的剪裁图像作为负样本,若剪裁图中的坐标超过原图大小,则抛弃
b.循环20次,取人脸框附近的剪裁图,IoU >= 0.65作为正样本,0.65 > IoU >= 0.4作为部分样本
上述所有样本都要以(12,12)的大小保存
txt中部分内容:
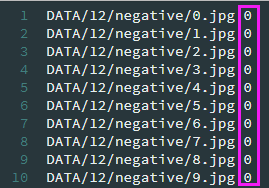
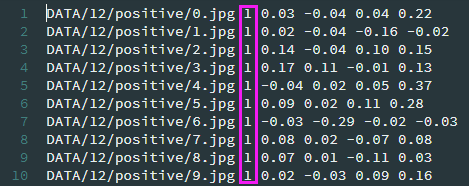

prepare_data/gen_12net_data.py部分代码:
1.生成50个负样本
import numpy.random as npr

neg_num = 0

#1---->50

# keep crop random parts, until have 50 negative examples

# get 50 negative sample from every image

while neg_num < 50:

        #neg_num's size [40,min(width, height) / 2],min_size:40

        # size is a random number between 12 and min(width,height)

        size = npr.randint(12, min(width, height) / 2)

        #top_left coordinate

        nx = npr.randint(0, width - size)

        ny = npr.randint(0, height - size)

        #random crop

        crop_box = np.array([nx, ny, nx + size, ny + size])

        #calculate iou

        Iou = IoU(crop_box, boxes)

        #crop a part from inital image

        cropped_im = img[ny : ny + size, nx : nx + size, :]

        #resize the cropped image to size 12*12

        resized_im = cv2.resize(cropped_im, (12, 12), interpolation=cv2.INTER_LINEAR)

        if np.max(Iou) < 0.3:

            # Iou with all gts must below 0.3

            save_file = os.path.join(neg_save_dir, "%s.jpg"%n_idx)

            f2.write("DATA/12/negative/%s.jpg"%n_idx + ' 0\n')

            cv2.imwrite(save_file, resized_im)

            n_idx += 1

            neg_num += 1
2.对于每个box生成三类样本
#for every bounding boxes

for box in boxes:

    # box (x_left, y_top, x_right, y_bottom)

    x1, y1, x2, y2 = box

    #gt's width

    w = x2 - x1 + 1

    #gt's height

    h = y2 - y1 + 1

    # ignore small faces and those faces has left-top corner out of the image

    # in case the ground truth boxes of small faces are not accurate

    if max(w, h) < 20 or x1 < 0 or y1 < 0:

        continue

    # crop another 5 images near the bounding box if IoU less than 0.5, save as negative samples

    for i in range(5):

        #size of the image to be cropped

        size = npr.randint(12, min(width, height) / 2)

        # delta_x and delta_y are offsets of (x1, y1)

        # max can make sure if the delta is a negative number , x1+delta_x >0

        # parameter high of randint make sure there will be intersection between bbox and cropped_box

        delta_x = npr.randint(max(-size, -x1), w)

        delta_y = npr.randint(max(-size, -y1), h)

        # max here not really necessary

        nx1 = int(max(0, x1 + delta_x))

        ny1 = int(max(0, y1 + delta_y))

        # if the right bottom point is out of image then skip

        if nx1 + size > width or ny1 + size > height:

            continue

        crop_box = np.array([nx1, ny1, nx1 + size, ny1 + size])

        Iou = IoU(crop_box, boxes)

        cropped_im = img[ny1: ny1 + size, nx1: nx1 + size, :]

        #rexize cropped image to be 12 * 12

        resized_im = cv2.resize(cropped_im, (12, 12), interpolation=cv2.INTER_LINEAR)

        if np.max(Iou) < 0.3:

            # Iou with all gts must below 0.3

            save_file = os.path.join(neg_save_dir, "%s.jpg" % n_idx)

            f2.write("DATA/12/negative/%s.jpg" % n_idx + ' 0\n')

            cv2.imwrite(save_file, resized_im)

            n_idx += 1

    #generate positive examples and part faces

    for i in range(20):

        # pos and part face size [minsize*0.8,maxsize*1.25]

        size = npr.randint(int(min(w, h) * 0.8), np.ceil(1.25 * max(w, h)))

        # delta here is the offset of box center

        if w<5:

            print (w)

            continue

        delta_x = npr.randint(-w * 0.2, w * 0.2)

        delta_y = npr.randint(-h * 0.2, h * 0.2)

        #show this way: nx1 = max(x1+w/2-size/2+delta_x)

        # x1+ w/2 is the central point, then add offset , then deduct size/2

        # deduct size/2 to make sure that the right bottom corner will be out of

        nx1 = int(max(x1 + w / 2 + delta_x - size / 2, 0))

        #show this way: ny1 = max(y1+h/2-size/2+delta_y)

        ny1 = int(max(y1 + h / 2 + delta_y - size / 2, 0))

        nx2 = nx1 + size

        ny2 = ny1 + size

        if nx2 > width or ny2 > height:

            continue

        crop_box = np.array([nx1, ny1, nx2, ny2])

        #yu gt de offset

        offset_x1 = (x1 - nx1) / float(size)

        offset_y1 = (y1 - ny1) / float(size)

        offset_x2 = (x2 - nx2) / float(size)

        offset_y2 = (y2 - ny2) / float(size)

        #crop

        cropped_im = img[ny1 : ny2, nx1 : nx2, :]

        #resize

        resized_im = cv2.resize(cropped_im, (12, 12), interpolation=cv2.INTER_LINEAR)

        box_ = box.reshape(1, -1)

        iou = IoU(crop_box, box_)

        if iou  >= 0.65:

            save_file = os.path.join(pos_save_dir, "%s.jpg"%p_idx)

            f1.write("DATA/12/positive/%s.jpg"%p_idx + ' 1 %.2f %.2f %.2f %.2f\n'%(offset_x1, offset_y1, offset_x2, offset_y2))

            cv2.imwrite(save_file, resized_im)

            p_idx += 1

        elif iou >= 0.4:

            save_file = os.path.join(part_save_dir, "%s.jpg"%d_idx)

            f3.write("DATA/12/part/%s.jpg"%d_idx + ' -1 %.2f %.2f %.2f %.2f\n'%(offset_x1, offset_y1, offset_x2, offset_y2))

            cv2.imwrite(save_file, resized_im)

            d_idx += 1
生成数据(for Landmark)
针对Celeba提供的数据生成训练数据(生成结果共1w条)
1.调整特征点的坐标
调整方式代码:
#gt_box为bounding_box的坐标点

gt_box = np.array([bbox.left,bbox.top,bbox.right,bbox.bottom])

#initialize the landmark

landmark = np.zeros((5, 2))

for index, one in enumerate(landmarkGt):

    # (( x - bbox.left)/ width of bounding box, (y - bbox.top)/ height of bounding box特征点调整

    rv = ((one[0]-gt_box[0])/(gt_box[2]-gt_box[0]), (one[1]-gt_box[1])/(gt_box[3]-gt_box[1]))

    # put the normalized value into the new list landmark

    landmark[index] = rv
2.对数据进行拓展(旋转,翻转等,具体内容参考 prepare_data/gen_landmark_aug_12.py )
运行结果

变为

合并数据
运行结果:


When training PNet,I merge four parts of data(pos,part,landmark,neg) into one tfrecord,since their total number radio is almost 1:1:1:3
转换数据成tfrecord
运行结果:

生成文件:

prepare_data目录下read_tfrecord_v2.py/tfrecord_utils.py用于读取tfrecord数据,并对其解析
可以自行关心下怎么写成tfrecord文件的
'''

dataset是个数组类型,读取的是合并之后的文件,把文件中的每行信息解析成字典形式

tf_filename是要写入的tfrecord文件

'''

with tf.python_io.TFRecordWriter(tf_filename) as tfrecord_writer:

        for i, image_example in enumerate(dataset):

            if (i+1) % 100 == 0:

                sys.stdout.write('\r>> %d/%d images has been converted' % (i+1, len(dataset)))

                #sys.stdout.write('\r>> Converting image %d/%d' % (i + 1, len(dataset)))

            sys.stdout.flush()

            filename = image_example['filename']

            _add_to_tfrecord(filename, image_example, tfrecord_writer)

def _add_to_tfrecord(filename, image_example, tfrecord_writer):

    """Loads data from image and annotations files and add them to a TFRecord.

    Args:

      filename: Dataset directory;

      name: Image name to add to the TFRecord;

      tfrecord_writer: The TFRecord writer to use for writing.

    """

    # 其中的_process_image_withoutcoder,_convert_to_example_simple两个函数在tfrecord_utils.py文件中

    image_data, height, width = _process_image_withoutcoder(filename)

    example = _convert_to_example_simple(image_example, image_data)

    tfrecord_writer.write(example.SerializeToString())
prepare_data/tfrecord_utils.py
def _process_image_withoutcoder(filename):

    #print(filename)

    image = cv2.imread(filename)

    #print(type(image))

    # transform data into string format

    image_data = image.tostring()

    assert len(image.shape) == 3

    height = image.shape[0]

    width = image.shape[1]

    assert image.shape[2] == 3

    # return string data and initial height and width of the image

    return image_data, height, width

def _convert_to_example_simple(image_example, image_buffer):

    """

    covert to tfrecord file

    :param image_example: dict, an image example

    :param image_buffer: string, JPEG encoding of RGB image

    :param colorspace:

    :param channels:

    :param image_format:

    :return:

    Example proto

    """

    # filename = str(image_example['filename'])

    # class label for the whole image

    class_label = image_example['label']

    bbox = image_example['bbox']

    roi = [bbox['xmin'],bbox['ymin'],bbox['xmax'],bbox['ymax']]

    landmark = [bbox['xlefteye'],bbox['ylefteye'],bbox['xrighteye'],bbox['yrighteye'],bbox['xnose'],bbox['ynose'],

                bbox['xleftmouth'],bbox['yleftmouth'],bbox['xrightmouth'],bbox['yrightmouth']]

    example = tf.train.Example(features=tf.train.Features(feature={

        'image/encoded': _bytes_feature(image_buffer),

        'image/label': _int64_feature(class_label),

        'image/roi': _float_feature(roi),

        'image/landmark': _float_feature(landmark)

    }))

    return example

def _int64_feature(value):

    """Wrapper for insert int64 feature into Example proto."""

    if not isinstance(value, list):

        value = [value]

    return tf.train.Feature(int64_list=tf.train.Int64List(value=value))

def _float_feature(value):

    """Wrapper for insert float features into Example proto."""

    if not isinstance(value, list):

        value = [value]

    return tf.train.Feature(float_list=tf.train.FloatList(value=value))

def _bytes_feature(value):

    """Wrapper for insert bytes features into Example proto."""

    if not isinstance(value, list):

        value = [value]

    return tf.train.Feature(bytes_list=tf.train.BytesList(value=value))
prepare_data/read_tfrecord_v2.py 在训练的时候需要解析tfrecord文件
def read_single_tfrecord(tfrecord_file, batch_size, net):

    # generate a input queue

    # each epoch shuffle

    filename_queue = tf.train.string_input_producer([tfrecord_file],shuffle=True)

    # read tfrecord

    reader = tf.TFRecordReader()

    _, serialized_example = reader.read(filename_queue)

    image_features = tf.parse_single_example(

        serialized_example,

        features={

            'image/encoded': tf.FixedLenFeature([], tf.string),#one image  one record

            'image/label': tf.FixedLenFeature([], tf.int64),

            'image/roi': tf.FixedLenFeature([4], tf.float32),

            'image/landmark': tf.FixedLenFeature([10],tf.float32)

        }

    )

    if net == 'PNet':

        image_size = 12

    elif net == 'RNet':

        image_size = 24

    else:

        image_size = 48

    image = tf.decode_raw(image_features['image/encoded'], tf.uint8)

    image = tf.reshape(image, [image_size, image_size, 3])

    image = (tf.cast(image, tf.float32)-127.5) / 128

    # image = tf.image.per_image_standardization(image)

    label = tf.cast(image_features['image/label'], tf.float32)

    roi = tf.cast(image_features['image/roi'],tf.float32)

    landmark = tf.cast(image_features['image/landmark'],tf.float32)

    image, label,roi,landmark = tf.train.batch(

        [image, label,roi,landmark],

        batch_size=batch_size,

        num_threads=2,

        capacity=1 * batch_size

    )

    label = tf.reshape(label, [batch_size])

    roi = tf.reshape(roi,[batch_size,4])

    landmark = tf.reshape(landmark,[batch_size,10])

    return image, label, roi,landmark
训练
三个网络的训练代码在train_models文件夹下:
MTCNN_config.py——参数的配置
mtcnn_model.py——模型的定义,包含Pnet,Rnet,Onet的网络结构
train.py——训练模型,mtcnn_model.py包含的是网络结构和损失函数的计算,本文件中加入优化器,和对应的训练代码,并将结果保存到tensorboard中
train_?net.py——真正需要被执行的文件,训练各个网络
运行结果如下
[root@node5 MTCNN-Tensorflow]# python train_models/train_PNet.py

['/ssd/yuansaijie/MTCNN-Tensorflow/train_models', '/ssd/yuansaijie/MTCNN-Tensorflow', '/usr/lib64/python27.zip', '/usr/lib64/python2.7', '/usr/lib64/python2.7/plat-linux2', '/usr/lib64/python2.7/lib-tk', '/usr/lib64/python2.7/lib-old', '/usr/lib64/python2.7/lib-dynload', '/usr/lib64/python2.7/site-packages', '/usr/lib/python2.7/site-packages', '/usr/lib/python2.7/site-packages/pika-0.9.14-py2.7.egg', '/usr/lib/python2.7/site-packages/elasticsearch-1.4.0-py2.7.egg', '../prepare_data']

DATA/imglists/PNet/train_PNet_landmark.txt

('Total size of the dataset is: ', 1260000)

mymodel/MTCNN_model/PNet_landmark/PNet

('dataset dir is:', 'DATA/imglists/PNet/train_PNet_landmark.tfrecord_shuffle')

(384, 12, 12, 3)

('load summary for : ', u'conv1/add')

(384, 10, 10, 10)

('load summary for : ', u'pool1/MaxPool')

(384, 5, 5, 10)

('load summary for : ', u'conv2/add')

(384, 3, 3, 16)

('load summary for : ', u'conv3/add')

(384, 1, 1, 32)

('load summary for : ', u'conv4_1/Reshape_1')

(384, 1, 1, 2)

('load summary for : ', u'conv4_2/BiasAdd')

(384, 1, 1, 4)

('load summary for : ', u'conv4_3/BiasAdd')

(384, 1, 1, 10)

WARNING:tensorflow:From /ssd/yuansaijie/MTCNN-Tensorflow/train_models/mtcnn_model.py:235: get_regularization_losses (from tensorflow.contrib.losses.python.losses.loss_ops) is deprecated and will be removed after 2016-12-30.

Instructions for updating:

Use tf.losses.get_regularization_losses instead.

2018-10-19 11:44:15.160774: I tensorflow/core/platform/cpu_feature_guard.cc:137] Your CPU supports instructions that this TensorFlow binary was not compiled t.......................................

。。。。。。

2018-10-19 10:23:49.778847 : Step: 97900/98460, accuracy: 0.934169, cls loss: 0.223913, bbox loss: 0.065459,Landmark loss :0.018630,L2 loss: 0.016533, Total Loss: 0.282490 ,lr:0.000001

2018-10-19 10:23:52.010314 : Step: 98000/98460, accuracy: 0.916667, cls loss: 0.278652, bbox loss: 0.075655,Landmark loss :0.016387,L2 loss: 0.016533, Total Loss: 0.341207 ,lr:0.000001

2018-10-19 10:23:54.169109 : Step: 98100/98460, accuracy: 0.961039, cls loss: 0.175593, bbox loss: 0.071169,Landmark loss :0.032753,L2 loss: 0.016533, Total Loss: 0.244087 ,lr:0.000001

2018-10-19 10:23:56.376758 : Step: 98200/98460, accuracy: 0.890365, cls loss: 0.327316, bbox loss: 0.073061,Landmark loss :0.018354,L2 loss: 0.016533, Total Loss: 0.389556 ,lr:0.000001

2018-10-19 10:23:58.548301 : Step: 98300/98460, accuracy: 0.918919, cls loss: 0.286136, bbox loss: 0.072269,Landmark loss :0.030357,L2 loss: 0.016533, Total Loss: 0.353982 ,lr:0.000001

2018-10-19 10:24:00.754086 : Step: 98400/98460, accuracy: 0.920000, cls loss: 0.247473, bbox loss: 0.062291,Landmark loss :0.030228,L2 loss: 0.016533, Total Loss: 0.310266 ,lr:0.000001

('path prefix is :', 'mymodel/MTCNN_model/PNet_landmark/PNet-30')

#用tensorboard查看,具体使用方法可结合代码和手册

#https://www.tensorflow.org/guide/summaries_and_tensorboard

[root@node5 MTCNN-Tensorflow]# tensorboard --logdir=logs/

TensorBoard 0.4.0rc3 at http://node5:6006 (Press CTRL+C to quit)
重点代码理解
def train(net_factory, prefix, end_epoch, base_dir,

          display=200, base_lr=0.01):

    """

    train PNet/RNet/ONet

    :param net_factory: 即mtcnn_model.py中定义的三个网络结构

    :param prefix: model path  模型保存路径

    :param end_epoch:

    :param dataset:   base_dir表示训练数据所在的位置

    :param display:

    :param base_lr:

    :return:

    """

    net = prefix.split('/')[-1]

    #label file

    label_file = os.path.join(base_dir,'train_%s_landmark.txt' % net)

    #label_file = os.path.join(base_dir,'landmark_12_few.txt')

    print(label_file)

    f = open(label_file, 'r')

    # get number of training examples

    num = len(f.readlines())

    print("Total size of the dataset is: ", num)

    print(prefix)

    #PNet use this method to get data读取训练数据

    if net == 'PNet':

        #dataset_dir = os.path.join(base_dir,'train_%s_ALL.tfrecord_shuffle' % net)

        dataset_dir = os.path.join(base_dir,'train_%s_landmark.tfrecord_shuffle' % net)

        print('dataset dir is:',dataset_dir)

        image_batch, label_batch, bbox_batch,landmark_batch = read_single_tfrecord(dataset_dir, config.BATCH_SIZE, net)

    #RNet use 3 tfrecords to get data

    else:

        pos_dir = os.path.join(base_dir,'pos_landmark.tfrecord_shuffle')

        part_dir = os.path.join(base_dir,'part_landmark.tfrecord_shuffle')

        neg_dir = os.path.join(base_dir,'neg_landmark.tfrecord_shuffle')

        #landmark_dir = os.path.join(base_dir,'landmark_landmark.tfrecord_shuffle')

        landmark_dir = os.path.join('DATA/imglists/RNet','landmark_landmark.tfrecord_shuffle')

        dataset_dirs = [pos_dir,part_dir,neg_dir,landmark_dir]

        pos_radio = 1.0/6;part_radio = 1.0/6;landmark_radio=1.0/6;neg_radio=3.0/6

        pos_batch_size = int(np.ceil(config.BATCH_SIZE*pos_radio))

        assert pos_batch_size != 0,"Batch Size Error "

        part_batch_size = int(np.ceil(config.BATCH_SIZE*part_radio))

        assert part_batch_size != 0,"Batch Size Error "

        neg_batch_size = int(np.ceil(config.BATCH_SIZE*neg_radio))

        assert neg_batch_size != 0,"Batch Size Error "

        landmark_batch_size = int(np.ceil(config.BATCH_SIZE*landmark_radio))

        assert landmark_batch_size != 0,"Batch Size Error "

        batch_sizes = [pos_batch_size,part_batch_size,neg_batch_size,landmark_batch_size]

        #print('batch_size is:', batch_sizes)

        image_batch, label_batch, bbox_batch,landmark_batch = read_multi_tfrecords(dataset_dirs,batch_sizes, net)

    #landmark_dir    定义损失函数比重,毕竟是三个任务损失的结合

    if net == 'PNet':

        image_size = 12

        radio_cls_loss = 1.0;radio_bbox_loss = 0.5;radio_landmark_loss = 0.5;

    elif net == 'RNet':

        image_size = 24

        radio_cls_loss = 1.0;radio_bbox_loss = 0.5;radio_landmark_loss = 0.5;

    else:

        radio_cls_loss = 1.0;radio_bbox_loss = 0.5;radio_landmark_loss = 1;

        image_size = 48

    #define placeholder为数据输入和label定义占位符

    input_image = tf.placeholder(tf.float32, shape=[config.BATCH_SIZE, image_size, image_size, 3], name='input_image')

    label = tf.placeholder(tf.float32, shape=[config.BATCH_SIZE], name='label')

    bbox_target = tf.placeholder(tf.float32, shape=[config.BATCH_SIZE, 4], name='bbox_target')

    landmark_target = tf.placeholder(tf.float32,shape=[config.BATCH_SIZE,10],name='landmark_target')

    #get loss and accuracy

    input_image = image_color_distort(input_image)

    cls_loss_op,bbox_loss_op,landmark_loss_op,L2_loss_op,accuracy_op = net_factory(input_image, label, bbox_target,landmark_target,training=True)   #此处net_factory为Pnet,得到各个部分的损失值

    #train,update learning rate(3 loss)

    total_loss_op  = radio_cls_loss*cls_loss_op + radio_bbox_loss*bbox_loss_op + radio_landmark_loss*landmark_loss_op + L2_loss_op

    #训练模型,train_model函数中定义了优化器tf.train.MomentumOptimizer

    train_op, lr_op = train_model(base_lr,

                                  total_loss_op,

                                  num)

    # init

    init = tf.global_variables_initializer()

    sess = tf.Session()

    #save model

    saver = tf.train.Saver(max_to_keep=0)

    sess.run(init)

    #visualize some variables

    tf.summary.scalar("cls_loss",cls_loss_op)#cls_loss

    tf.summary.scalar("bbox_loss",bbox_loss_op)#bbox_loss

    tf.summary.scalar("landmark_loss",landmark_loss_op)#landmark_loss

    tf.summary.scalar("cls_accuracy",accuracy_op)#cls_acc

    tf.summary.scalar("total_loss",total_loss_op)#cls_loss, bbox loss, landmark loss and L2 loss add together

    summary_op = tf.summary.merge_all()

    logs_dir = "logs/%s" %(net)

    if os.path.exists(logs_dir) == False:

        os.mkdir(logs_dir)

    writer = tf.summary.FileWriter(logs_dir,sess.graph)

    projector_config = projector.ProjectorConfig()

    projector.visualize_embeddings(writer,projector_config)

    #begin

    coord = tf.train.Coordinator()

    #begin enqueue thread

    threads = tf.train.start_queue_runners(sess=sess, coord=coord)

    i = 0

    #total steps

    MAX_STEP = int(num / config.BATCH_SIZE + 1) * end_epoch

    epoch = 0

    sess.graph.finalize()

    #正式开始训练

    try:

        for step in range(MAX_STEP):

            i = i + 1

            if coord.should_stop():

                break

            image_batch_array, label_batch_array, bbox_batch_array,landmark_batch_array = sess.run([image_batch, label_batch, bbox_batch,landmark_batch])

            #random flip

            image_batch_array,landmark_batch_array = random_flip_images(image_batch_array,label_batch_array,landmark_batch_array)

            '''

            print(image_batch_array.shape)

            print(label_batch_array.shape)

            print(bbox_batch_array.shape)

            print(landmark_batch_array.shape)

            print(label_batch_array[0])

            print(bbox_batch_array[0])

            print(landmark_batch_array[0])

            '''

            _,_,summary = sess.run([train_op, lr_op ,summary_op], feed_dict={input_image: image_batch_array, label: label_batch_array, bbox_target: bbox_batch_array,landmark_target:landmark_batch_array})

            if (step+1) % display == 0:

                #acc = accuracy(cls_pred, labels_batch)

                cls_loss, bbox_loss,landmark_loss,L2_loss,lr,acc = sess.run([cls_loss_op, bbox_loss_op,landmark_loss_op,L2_loss_op,lr_op,accuracy_op],

                                                             feed_dict={input_image: image_batch_array, label: label_batch_array, bbox_target: bbox_batch_array, landmark_target: landmark_batch_array})

                total_loss = radio_cls_loss*cls_loss + radio_bbox_loss*bbox_loss + radio_landmark_loss*landmark_loss + L2_loss

                # landmark loss: %4f,

                print("%s : Step: %d/%d, accuracy: %3f, cls loss: %4f, bbox loss: %4f,Landmark loss :%4f,L2 loss: %4f, Total Loss: %4f ,lr:%f " % (

                datetime.now(), step+1,MAX_STEP, acc, cls_loss, bbox_loss,landmark_loss, L2_loss,total_loss, lr))

            #save every two epochs

            if i * config.BATCH_SIZE > num*2:

                epoch = epoch + 1

                i = 0

                path_prefix = saver.save(sess, prefix, global_step=epoch*2)

                print('path prefix is :', path_prefix)

            writer.add_summary(summary,global_step=step)

    except tf.errors.OutOfRangeError:

        print("完成!!!")

    finally:

        coord.request_stop()

        writer.close()

    coord.join(threads)

    sess.close()
RNet
- After training PNet, run
gen_hard_exampleto generate training data(Face Detection Part) for RNet. - Run
gen_landmark_aug_24.pyto generate training data(Face Landmark Detection Part) for RNet. - Run
gen_imglist_rnet.pyto merge two parts of training data. - Run
gen_RNet_tfrecords.pyto generate tfrecords for RNet.(you should run this script four times to generate tfrecords of neg,pos,part and landmark respectively)
生成数据(for Face Detection)
运行结果如下
[root@node5 MTCNN-Tensorflow]# python prepare_data/gen_hard_example.py

Called with argument:

Namespace(batch_size=[2048, 256, 16], epoch=[18, 14, 16], min_face=20, prefix=['data/MTCNN_model/PNet_landmark/PNet', 'data/MTCNN_model/RNet_No_Landmark/RNet', 'data/MTCNN_model/ONet_No_Landmark/ONet'], shuffle=False, slide_window=False, stride=2, test_mode='PNet', thresh=[0.3, 0.1, 0.7], vis=False)

('Test model: ', 'PNet')

data/MTCNN_model/PNet_landmark/PNet-18

(1, ?, ?, 3)

('load summary for : ', u'conv1/add')

(1, ?, ?, 10)

('load summary for : ', u'pool1/MaxPool')

(1, ?, ?, 10)

('load summary for : ', u'conv2/add')

(1, ?, ?, 16)

('load summary for : ', u'conv3/add')

(1, ?, ?, 32)

('load summary for : ', u'conv4_1/Reshape_1')

(1, ?, ?, 2)

('load summary for : ', u'conv4_2/BiasAdd')

(1, ?, ?, 4)

('load summary for : ', u'conv4_3/BiasAdd')

(1, ?, ?, 10)

2018-10-19 14:55:32.129731: I tensorflow/core/platform/cpu_feature_guard.cc:137] Your CPU supports instructions that this TensorFlow binary was not compiled to use: SSE4.1 SSE4.2 AVX AVX2 FMA

data/MTCNN_model/PNet_landmark/PNet-18

restore models' param

==================================

load test data

finish loading

start detecting....

100 out of 12880 images done

0.735359 seconds for each image

200 out of 12880 images done

0.703251 seconds for each image

300 out of 12880 images done

........

12700 out of 12880 images done

0.733344 seconds for each image

12800 out of 12880 images done

0.669486 seconds for each image

('num of images', 12880)

time cost in average0.637  pnet 0.637  rnet 0.000  onet 0.000

('boxes length:', 12880)

finish detecting ----------------------------------------以上都是在完成Pnet的预测,预测结果保存为detections.pkl

save_path is :

DATA/no_LM24/RNet

24测试完成开始OHEM

processing 12880 images in total  -----------------------对比预测和真实结果,生成Rnet的三类训练样本

12880

12880

0 images done

100 images done

200 images done

......
Detection文件夹下是测试过程的代码(此处不讲解,后续用facenet中的代码学习如何预测),RNet训练数据的生成需要利用上一步中PNet模型进行预测,根据模型的预测结果与真实结果比较,生成对应的三类样本,此处生成图片无随机因素,完全是由上一个网络(PNet)的预测结果与真实结果对比整理得到。
核心代码
 # im_idx_list,gt_boxes_list是原训练集的图片和bounding_box数据,det_boxes是上一个网络的测试结果

 for im_idx, dets, gts in zip(im_idx_list, det_boxes, gt_boxes_list):

     gts = np.array(gts, dtype=np.float32).reshape(-1, 4)

     if dets.shape[0] == 0:

         continue

     img = cv2.imread(im_idx)

     #change to square

     dets = convert_to_square(dets)

     dets[:, 0:4] = np.round(dets[:, 0:4])

     neg_num = 0

     for box in dets:

         x_left, y_top, x_right, y_bottom, _ = box.astype(int)

         width = x_right - x_left + 1

         height = y_bottom - y_top + 1

         # ignore box that is too small or beyond image border

         if width < 20 or x_left < 0 or y_top < 0 or x_right > img.shape[1] - 1 or y_bottom > img.shape[0] - 1:

             continue

         # compute intersection over union(IoU) between current box and all gt boxes

         Iou = IoU(box, gts)

         cropped_im = img[y_top:y_bottom + 1, x_left:x_right + 1, :]

         resized_im = cv2.resize(cropped_im, (image_size, image_size), interpolation=cv2.INTER_LINEAR)

         # save negative images and write label

         # Iou with all gts must below 0.3

         if np.max(Iou) < 0.3 and neg_num < 60:

             #save the examples

             save_file = get_path(neg_dir, "%s.jpg" % n_idx)

             # print(save_file)

             neg_file.write(save_file + ' 0\n')

             cv2.imwrite(save_file, resized_im)

             n_idx += 1

             neg_num += 1

         else:

             # find gt_box with the highest iou

             idx = np.argmax(Iou)

             assigned_gt = gts[idx]

             x1, y1, x2, y2 = assigned_gt

             # compute bbox reg label

             offset_x1 = (x1 - x_left) / float(width)

             offset_y1 = (y1 - y_top) / float(height)

             offset_x2 = (x2 - x_right) / float(width)

             offset_y2 = (y2 - y_bottom) / float(height)

             # save positive and part-face images and write labels

             if np.max(Iou) >= 0.65:

                 save_file = get_path(pos_dir, "%s.jpg" % p_idx)

                 pos_file.write(save_file + ' 1 %.2f %.2f %.2f %.2f\n' % (offset_x1, offset_y1, offset_x2, offset_y2))

                 cv2.imwrite(save_file, resized_im)

                 p_idx += 1

             elif np.max(Iou) >= 0.4:

                 save_file = os.path.join(part_dir, "%s.jpg" % d_idx)

                 part_file.write(save_file + ' -1 %.2f %.2f %.2f %.2f\n' % (offset_x1, offset_y1, offset_x2, offset_y2))

                 cv2.imwrite(save_file, resized_im)

                 d_idx += 1
生成数据(for Landmark)
与PNet类似,只是转换的size变成24,运行结果如下:

调整结果未变,resize大小变为24.

合并数据
与PNet类似,运行结果如下:

分别是neg,pos,part,landmark的样本数
转换数据成tfrecord
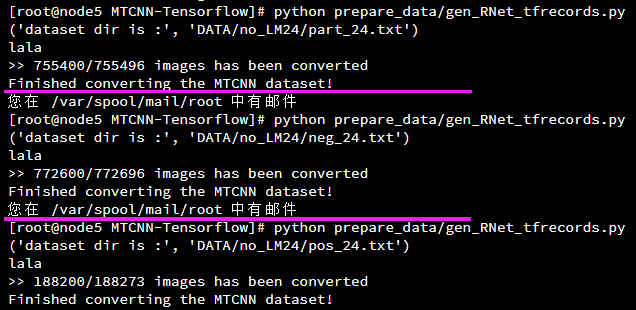
需要运行四次:将main函数中的name分别修改成pos,neg,part,landmark

训练
运行结果如下
[root@node5 MTCNN-Tensorflow]# python train_models/train_RNet.py

['/ssd/yuansaijie/MTCNN-Tensorflow/train_models', '/ssd/yuansaijie/MTCNN-Tensorflow', '/usr/lib64/pyth

on27.zip', '/usr/lib64/python2.7', '/usr/lib64/python2.7/plat-linux2', '/usr/lib64/python2.7/lib-tk',

'/usr/lib64/python2.7/lib-old', '/usr/lib64/python2.7/lib-dynload', '/usr/lib64/python2.7/site-package

s', '/usr/lib/python2.7/site-packages', '/usr/lib/python2.7/site-packages/pika-0.9.14-py2.7.egg', '/us

r/lib/python2.7/site-packages/elasticsearch-1.4.0-py2.7.egg', '../prepare_data']

DATA/imglists_noLM/RNet/train_RNet_landmark.txt

('Total size of the dataset is: ', 1895256)

mymodel/MTCNN_model/RNet_landmark/RNet

(64, 24, 24, 3)

(64, 24, 24, 3)

(192, 24, 24, 3)

(64, 24, 24, 3)

(384, 24, 24, 3)

(384, 4)

(384, 24, 24, 3)

(384, 22, 22, 28)

(384, 11, 11, 28)

(384, 9, 9, 48)

(384, 4, 4, 48)

(384, 3, 3, 64)

(384, 576)

(384, 128)

(384, 2)

(384, 4)

(384, 10)

WARNING:tensorflow:From /ssd/yuansaijie/MTCNN-Tensorflow/train_models/mtcnn_model.py:282: get_regularization_losses (from tensorflow.contrib.losses.python.losses.loss_ops) is deprecated and will be removed after 2016-12-30.

Instructions for updating:

Use tf.losses.get_regularization_losses instead.

2018-10-22 11:00:52.810807: I tensorflow/core/platform/cpu_feature_guard.cc:137] Your CPU supports instructions that this TensorFlow binary was not compiled to use: SSE4.1 SSE4.2 AVX AVX2 FMA

2018-10-22 11:01:05.694332 : Step: 100/108592, accuracy: 0.750000, cls loss: 0.657524, bbox loss: 0.112904,Landmark loss :0.150184,L2 loss: 0.023872, Total Loss: 0.812940 ,lr:0.001000

2018-10-22 11:01:17.431871 : Step: 200/108592, accuracy: 0.750000, cls loss: 0.648712, bbox loss: 0.093683,Landmark loss :0.141217,L2 loss: 0.023827, Total Loss: 0.789989 ,lr:0.001000

。。。

。。。

2018-10-22 14:33:03.275786 : Step: 108500/108592, accuracy: 0.976562, cls loss: 0.130488, bbox loss: 0.086588,Landmark loss :0.023444,L2 loss: 0.024208, Total Loss: 0.209711 ,lr:0.000001

('path prefix is :', 'mymodel/MTCNN_model/RNet_landmark/RNet-22')
ONet
- After training RNet, run
gen_hard_exampleto generate training data(Face Detection Part) for ONet. - Run
gen_landmark_aug_48.pyto generate training data(Face Landmark Detection Part) for ONet. - Run
gen_imglist_onet.pyto merge two parts of training data. - Run
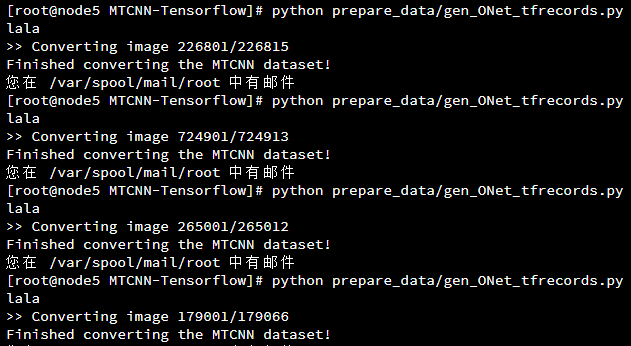
gen_ONet_tfrecords.pyto generate tfrecords for ONet.(you should run this script four times to generate tfrecords of neg,pos,part and landmark respectively)
生成数据(for Face Detection)
根据前两步训练的模型做预测,对比真实数据集得到Onet的训练数据,运行结果如下:
[root@node5 MTCNN-Tensorflow]# python prepare_data/gen_hard_example.py

Called with argument:

Namespace(batch_size=[2048, 256, 16], epoch=[18, 14, 16], min_face=20, prefix=['data/MTCNN_model/PNet_landmark/PNet', 'data/MTCNN_model/RNet_landmark/RNet', 'data/MTCNN_model/ONet_No_Landmark/ONet'], shuf

fle=False, slide_window=False, stride=2, test_mode='RNet', thresh=[0.3, 0.1, 0.7], vis=False)

('Test model: ', 'RNet')

data/MTCNN_model/PNet_landmark/PNet-18

(1, ?, ?, 3)

('load summary for : ', u'conv1/add')

(1, ?, ?, 10)

('load summary for : ', u'pool1/MaxPool')

(1, ?, ?, 10)

('load summary for : ', u'conv2/add')

(1, ?, ?, 16)

('load summary for : ', u'conv3/add')

(1, ?, ?, 32)

('load summary for : ', u'conv4_1/Reshape_1')

(1, ?, ?, 2)

('load summary for : ', u'conv4_2/BiasAdd')

(1, ?, ?, 4)

('load summary for : ', u'conv4_3/BiasAdd')

(1, ?, ?, 10)

2018-10-22 14:56:35.504447: I tensorflow/core/platform/cpu_feature_guard.cc:137] Your CPU supports ins

tructions that this TensorFlow binary was not compiled to use: SSE4.1 SSE4.2 AVX AVX2 FMA

data/MTCNN_model/PNet_landmark/PNet-18

restore models' param

('==================================', 'RNet')

(256, 24, 24, 3)

(256, 22, 22, 28)

(256, 11, 11, 28)

(256, 9, 9, 48)

(256, 4, 4, 48)

(256, 3, 3, 64)

(256, 576)

(256, 128)

(256, 2)

(256, 4)

(256, 10)

data/MTCNN_model/RNet_landmark/RNet-14

restore models' param

==================================

load test data

finish loading

start detecting....

100 out of 12880 images done

0.969146 seconds for each image

200 out of 12880 images done

0.954468 seconds for each image

300 out of 12880 images done

0.880505 seconds for each image

400 out of 12880 images done

。。。

。。。

12800 out of 12880 images done

0.826616 seconds for each image

('num of images', 12880)

time cost in average0.839  pnet 0.598  rnet 0.240  onet 0.000

('boxes length:', 12880)

finish detecting

save_path is :

DATA/no_LM48/ONet

48测试完成开始OHEM

processing 12880 images in total

12880

12880

0 images done

100 images done

200 images done

300 images done

400 images done

。。。
生成数据(for Landmark)
与PNet,RNet类似,只是转换的size变成48,运行结果如下:

调整结果未变,resize大小变为48.

合并数据

转换数据成tfrecord
训练
[root@node5 MTCNN-Tensorflow]# python train_models/train_ONet.py

['/ssd/yuansaijie/MTCNN-Tensorflow/train_models', '/ssd/yuansaijie/MTCNN-Tensorflow', '/usr/lib64/python27.zip', '/usr/lib64/python2.7', '/usr/lib64/python2.7/plat-linux2', '/usr/lib64/python2.7/lib-tk','/usr/lib64/python2.7/lib-old', '/usr/lib64/python2.7/lib-dynload', '/usr/lib64/python2.7/site-packages', '/usr/lib/python2.7/site-packages', '/usr/lib/python2.7/site-packages/pika-0.9.14-py2.7.egg', '/usr/lib/python2.7/site-packages/elasticsearch-1.4.0-py2.7.egg', '../prepare_data']

DATA/imglists/ONet/train_ONet_landmark.txt

('Total size of the dataset is: ', 1395806)

mymodel/MTCNN_model/ONet_landmark/ONet

(64, 48, 48, 3)

(64, 48, 48, 3)

(192, 48, 48, 3)

(64, 48, 48, 3)

(384, 48, 48, 3)

(384, 4)

(384, 48, 48, 3)

(384, 46, 46, 32)

(384, 23, 23, 32)

(384, 21, 21, 64)

(384, 10, 10, 64)

(384, 8, 8, 64)

(384, 4, 4, 64)

(384, 3, 3, 128)

(384, 1152)

(384, 256)

(384, 2)

(384, 4)

(384, 10)

WARNING:tensorflow:From /ssd/yuansaijie/MTCNN-Tensorflow/train_models/mtcnn_model.py:328: get_regularization_losses (from tensorflow.contrib.losses.python.losses.loss_ops) is deprecated and will be removed after 2016-12-30.

Instructions for updating:

Use tf.losses.get_regularization_losses instead.

2018-10-23 09:44:37.292322: I tensorflow/core/platform/cpu_feature_guard.cc:137] Your CPU supports instructions that this TensorFlow binary was not compiled to use: SSE4.1 SSE4.2 AVX AVX2 FMA

2018-10-23 09:44:44.016103 : Step: 10/79970, accuracy: 0.746094, cls loss: 0.683990, bbox loss: 0.171421,Landmark loss :0.382090,L2 loss: 0.049354, Total Loss: 1.201144 ,lr:0.001000

2018-10-23 09:44:50.052537 : Step: 20/79970, accuracy: 0.750000, cls loss: 0.663642, bbox loss: 0.098265,Landmark loss :0.368318,L2 loss: 0.049314, Total Loss: 1.130407 ,lr:0.001000

...

...

2018-10-24 06:15:42.631526 : Step: 79970/79970, accuracy: 0.972656, cls loss: 0.115991, bbox loss: 0.059060,Landmark loss :0.017580,L2 loss: 0.043284, Total Loss: 0.206384 ,lr:0.000001

('path prefix is :', 'mymodel/MTCNN_model/ONet_landmark/ONet-22')

# 此处训练时长已经不对了,因为是半夜重新跑的,大概是花了12h左右吧
人脸检测MTCNN的训练过程(PRO网络)的更多相关文章
- 人脸检测——MTCNN
人脸检测——MTCNN .
- opencv_人脸检测、模型训练、人脸识别
人脸检测.模型训练.人脸识别 2018-08-15 今天给大家带来一套人脸识别一个小案例,主要是帮助小伙伴们解决如何入门OpenCV人脸识别的问题,现在的AI行业比较火热,AI技术的使用比较广泛.就拿 ...
- 第三十七节、人脸检测MTCNN和人脸识别Facenet(附源码)
在说到人脸检测我们首先会想到利用Harr特征提取和Adaboost分类器进行人脸检测(有兴趣的可以去一看这篇博客第九节.人脸检测之Haar分类器),其检测效果也是不错的,但是目前人脸检测的应用场景逐渐 ...
- 用caffe一步一步实现人脸检测
学习深度学习已有一段时间了,总想着拿它做点什么,今天终于完成了一个基于caffe的人脸检测,这篇博文将告诉你怎样通过caffe一步步实现人脸检测.本文主要参考唐宇迪老师的教程,在这里感谢老师的辛勤付出 ...
- OpenCV&Qt学习之四——OpenCV 实现人脸检测与相关知识整理
开发配置 OpenCV的例程中已经带有了人脸检测的例程,位置在:OpenCV\samples\facedetect.cpp文件,OpenCV的安装与这个例子的测试可以参考我之前的博文Linux 下编译 ...
- 基于MATLAB的adaboost级联形式的人脸检测实现
很早之前就做过一些关于人脸检测和目标检测的课题,一直都没有好好总结出来,趁着这个机会,写个总结,希望所写的内容能给研究同类问题的博友一些见解和启发!!博客里面涉及的公式太繁琐了,直接截图了. 转载请注 ...
- 深度学习基础(CNN详解以及训练过程1)
深度学习是一个框架,包含多个重要算法: Convolutional Neural Networks(CNN)卷积神经网络 AutoEncoder自动编码器 Sparse Coding稀疏编码 Rest ...
- 使用TensorRT对人脸检测网络MTCNN进行加速
前言 最近在做人脸比对的工作,需要用到人脸关键点检测的算法,比较成熟和通用的一种算法是 MTCNN,可以同时进行人脸框选和关键点检测,对于每张脸输出 5 个关键点,可以用来进行人脸对齐. 问题 刚开始 ...
- MTCNN算法与代码理解—人脸检测和人脸对齐联合学习
目录 写在前面 算法Pipeline详解 如何训练 损失函数 训练数据准备 多任务学习与在线困难样本挖掘 预测过程 参考 博客:blog.shinelee.me | 博客园 | CSDN 写在前面 主 ...
随机推荐
- Leetcode872.Leaf-Similar Trees叶子相似的树
请考虑一颗二叉树上所有的叶子,这些叶子的值按从左到右的顺序排列形成一个 叶值序列 . 举个例子,如上图所示,给定一颗叶值序列为 (6, 7, 4, 9, 8) 的树. 如果有两颗二叉树的叶值序列是相同 ...
- 【水滴石穿】bstmy-blend-app
这个项目是一个简单的底部导航切换页面 项目的地址为:https://github.com/Bstmy/bstmy-blend-app 先看效果 点击首页是首页面,点击个人中心是个人中心页面 先看代码 ...
- 【python练手】获取城市天气质量
#!/usr/bin/python # -*- coding: utf-8 -*- # get city pm2.5 and ranking # python2.7 import sys import ...
- LaTeX Error: File `slashbox.sty' not found. 解决办法
从这里下载对应的文件,解压后把文件放在C:\Latex\2018\texmf-dist\tex\latex 中. 再打开cmd命令窗口,输入texhash刷新!
- mysql自定义function 写递归查询子节点
#存储文本信息表 CREATE TABLE WordInfoEntity( word_id ) PRIMARY KEY NOT NULL, # 主键ID UUID word_greda :正文文本 , ...
- Validation异常:No validator could be found for constraint '.....' validating type 'java.lang.Integer'.
javax.validation.UnexpectedTypeException: HV000030: No validator could be found for constraint 'java ...
- InteractiveHtmlBom 在手机上无法显示 BOM List 和装配图的问题
InteractiveHtmlBom 在手机上无法显示 BOM List 和装配图的问题 InteractiveHtmlBom 插件是一款用于 KiCad BOM 装配图生成插件. 最近新生成的 文件 ...
- 搜索docker镜像
docker最简单的方式莫过于从现有的容器镜像开始. Docker官方网站专门有一个页面来存储所有可用的镜像,网址是:index.docker.io. 可以通过浏览这个网页来查找你想要使用的镜像,或者 ...
- phpexcel使用说明1
<?php /** * PHPEXCEL生成excel文件 * @author:firmy * @desc 支持任意行列数据生成excel文件,暂未添加单元格样式和对齐 */ require_o ...
- Python--day69--ORM查询的13种方法
ORM查询的13种方法: 必知必会13条 <1> all(): 查询所有结果 <2> filter(**kwargs): 它包含了与所给筛选条件相匹配的对象 <3> ...
