Web API开发实例——对产品Product进行增删改查
1.WebApi是什么
ASP.NET Web API 是一种框架,用于轻松构建可以由多种客户端(包括浏览器和移动设备)访问的 HTTP 服务。ASP.NET Web API 是一种用于在 .NET Framework 上构建 RESTful 应用程序的理想平台。
可以把WebApi看成Asp.Net项目类型中的一种,其他项目类型诸如我们熟知的WebForm项目,Windows窗体项目,控制台应用程序等。
WebApi类型项目的最大优势就是,开发者再也不用担心客户端和服务器之间传输的数据的序列化和反序列化问题,因为WebApi是强类型的,可以自动进行序列化和反序列化,一会儿项目中会见到。
下面我们建立了一个WebApi类型的项目,项目中对产品Product进行增删改查,Product的数据存放在List<>列表(即内存)中。
2.页面运行效果
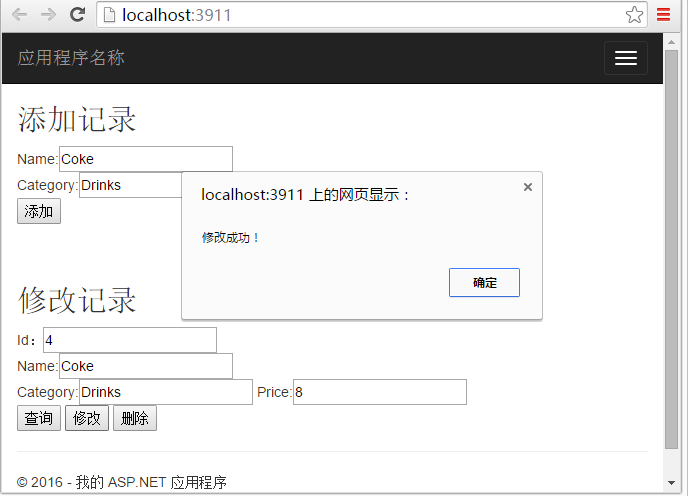
如图所示,可以添加一条记录; 输入记录的Id,查询出该记录的其它信息; 修改该Id的记录; 删除该Id的记录。

3.二话不说,开始建项目
1)新建一个“ASP.NET MVC 4 Web 应用程序”项目,命名为“ProductStore”,点击确定
2)选择模板“Web API”,点击确定
3)和MVC类型的项目相似,构建程序的过程是先建立数据模型(Model)用于存取数据, 再建立控制器层(Controller)用于处理发来的Http请求,最后构造显示层(View)用于接收用户的输入和用户进行直接交互。
3)和MVC类型的项目相似,构建程序的过程是先建立数据模型(Model)用于存取数据, 再建立控制器层(Controller)用于处理发来的Http请求,最后构造显示层(View)用于接收用户的输入和用户进行直接交互。
这里我们先在Models文件夹中建立产品Product类: Product.cs,如下:
namespace ProductStore.Models

{

    public class Product

    {

        public int Id { get; set; }

        public string Name { get; set; }

        public string Category { get; set; }

        public decimal Price { get; set; }

    }

}
4)试想,我们目前只有一个Product类型的对象,我们要编写一个类对其实现增删改查,以后我们可能会增加其他的类型的对象,再需要编写一个对新类型的对象进行增删改查的类,为了便于拓展和调用,我们在Product之上构造一个接口,使这个接口约定增删改查的方法名称和参数,所以我们在Models文件夹中新建一个接口: IProductRepository.cs ,如下:
using System.Collections.Generic;

namespace ProductStore.Models

{

    interface IProductRepository

    {

        IEnumerable<Product> GetAll();

        Product Get(int id);

        Product Add(Product item);

        void Remove(int id);

        bool Update(Product item);

    }

}
5)然后,我们实现这个接口,在Models文件夹中新建一个类,具体针对Product类型的对象进行增删改查存取数据,并在该类的构造方法中,向List<Product>列表中存入几条数据,这个类叫:ProductRepository.cs,如下:
using System;

using System.Collections.Generic;

namespace ProductStore.Models

{

    public class ProductRepository

    {

        private List<Product> products = new List<Product>();

        private int _nextId = ;

        public ProductRepository()

        {

            Add(new Product { Name = "Tomato soup", Category = "Groceries", Price = 1.39M });

            Add(new Product { Name = "Yo-yo", Category = "Toys", Price = 3.75M });

            Add(new Product { Name = "Hammer", Category = "Hardware", Price = 16.99M });

        }

        public IEnumerable<Product> GetAll()

        {

            return products;

        }

        public Product Get(int id)

        {

            return products.Find(p => p.Id == id);

        }

        public Product Add(Product item)

        {

            if (item == null)

            {

                throw new ArgumentNullException("item");

            }

            item.Id = _nextId++;

            products.Add(item);

            return item;

        }

        public void Remove(int id)

        {

            products.RemoveAll(p => p.Id == id);

        }

        public bool Update(Product item)

        {

            if (item == null)

            {

                throw new ArgumentNullException("item");

            }

            int index = products.FindIndex(p => p.Id == item.Id);

            if (index == -)

            {

                return false;

            }

            products.RemoveAt(index);

            products.Add(item);

            return true;

        }

    }

}
此时,Model层就构建好了。
6)下面,我们要构建Controller层,在此之前,先回顾一下Http中几种请求类型,如下
|
get 类型 |
用于从服务器端获取数据,且不应该对服务器端有任何操作和影响 |
|
post 类型 |
用于发送数据到服务器端,创建一条新的数据,对服务器端产生影响 |
|
put 类型 |
用于向服务器端更新一条数据,对服务器端产生影响 (也可创建一条新的数据但不推荐这样用) |
|
delete 类型 |
用于删除一条数据,对服务器端产生影响 |
这样,四种请求类型刚好可对应于对数据的查询,添加,修改,删除。WebApi也推荐如此使用。在WebApi项目中,我们请求的不再是一个具体页面,而是各个控制器中的方法(控制器也是一种类,默认放在Controllers文件夹中)。下面我们将要建立一个ProductController.cs控制器类,其中的方法都是以“Get Post Put Delete”中的任一一个开头的,这样的开头使得Get类型的请求发送给以Get开头的方法去处理,Post类型的请求交给Post开头的方法去处理,Put和Delete同理。
而以Get开头的方法有好几个也是可以的,此时如何区分到底交给哪个方法执行呢?这就取决于Get开头的方法们的传入参数了,一会儿在代码中可以分辨。
构建Controller层,在Controllers文件夹中建立一个ProductController.cs控制器类,如下:
using System;

using System.Collections.Generic;

using System.Linq;

using ProductStore.Models;

using System.Web.Http;

using System.Net;

using System.Net.Http;

namespace ProductStore.Controllers

{

    public class ProductController : ApiController

    {

        static readonly ProductRepository repository = new ProductRepository();

        //GET:  /api/products

        public IEnumerable<Product> GetAllProducts()

        {

            return repository.GetAll();

        }

        //GET: /api/products/id

        public Product GetProduct(int id)

        {

            Product item = repository.Get(id);

            if (item == null)

            {

                throw new HttpResponseException(HttpStatusCode.NotFound);

            }

            return item;

        }

        //GET: /api/products?category=category

        public IEnumerable<Product> GetProductsByCategory(string category)

        {

            return repository.GetAll().Where(p => string.Equals(p.Category, category, StringComparison.OrdinalIgnoreCase));

        }

        //POST: /api/products

        public HttpResponseMessage PostProduct(Product item)

        {

            item = repository.Add(item);

            var response = Request.CreateResponse<Product>(HttpStatusCode.Created, item);

            string uri = Url.Link("DefaultApi", new { id = item.Id });

            response.Headers.Location = new Uri(uri);

            return response;

        }

        //PUT: /api/products/id

        public void PutProduct(int id, Product product)

        {

            product.Id = id;

            if (!repository.Update(product))

            {

                throw new HttpResponseException(HttpStatusCode.NotFound);

            }

        }

        //Delete: /api/products/id

        public void DeleteProduct(int id)

        {

            Product item = repository.Get(id);

            if (item == null)

            {

                throw new HttpResponseException(HttpStatusCode.NotFound);

            }

            repository.Remove(id);

        }

    }

}
使该类继承于ApiController类,在其中实现处理各种Get,Post,Put,Delete类型Http请求的方法。每一个方法前都有一句注释,标识了该方法的针对的请求的类型(取决于方法的开头),以及要请求到该方法,需要使用的url。
这些url是有规律的,见下:
|
Action |
HTTP method |
Relative URI |
|
Get a list of all products |
GET |
/api/products |
|
Get a product by ID |
GET |
/api/products/id |
|
Get a product by category |
GET |
/api/products?category=category |
|
Create a new product |
POST |
/api/products |
|
Update a product |
PUT |
/api/products/id |
|
Delete a product |
DELETE |
/api/products/id |
api是必须的,products对应的是ProductsControllers控制器,然后又Http请求的类型和url的后边地址决定。
这里,我们除了第三个“Get a product by category”,其他方法都实现了。
7)最后,我们来构建View视图层,我们更改Views文件夹中的Home文件夹下的Index.cshtml文件,这个文件是项目启动页,如下:
<div id="body">

    <script src="~/Scripts/jquery-1.10.2.min.js"></script>

    <section>

        <h2>添加记录</h2>

        Name:<input id="name" type="text" /><br />

        Category:<input id="category" type="text" />

        Price:<input id="price" type="text" /><br />

        <input id="addItem" type="button" value="添加" />

    </section>

    <section>

        <br />

        <br />

        <h2>修改记录</h2>

        Id:<input id="id2" type="text" /><br />

        Name:<input id="name2" type="text" /><br />

        Category:<input id="category2" type="text" />

        Price:<input id="price2" type="text" /><br />

        <input id="showItem" type="button" value="查询" />

        <input id="editItem" type="button" value="修改" />

        <input id="removeItem" type="button" value="删除" />

    </section>

</div>
8)然后我们给页面添加js代码,对应上面的按钮事件,用来发起Http请求,如下:
<script>

    //用于保存用户输入数据

    var Product = {

        create: function () {

            Id: "";

            Name: "";

            Category: "";

            Price: "";

            return Product;

        }

    }

    //添加一条记录 请求类型:POST  请求url:  /api/Products

    //请求到ProductsController.cs中的 public HttpResponseMessage PostProduct(Product item) 方法

    $("#addItem").click(function () {

        var newProduct = Product.create();

        newProduct.Name = $("#name").val();

        newProduct.Category = $("#category").val();

        newProduct.Price = $("#price").val();

        $.ajax({

            url: "/api/Product",

            type: "POST",

            contentType: "application/json; charset=utf-8",

            data: JSON.stringify(newProduct),

            success: function () {

                alert("添加成功!");

            },

            error: function (XMLHttpRequest, textStatus, errorThrown) {

                alert("请求失败,消息:" + textStatus + "  " + errorThrown);

            }

        });

    });

    //先根据Id查询记录  请求类型:GET  请求url:  /api/Products/Id

    //请求到ProductsController.cs中的 public Product GetProduct(int id) 方法

    $("#showItem").click(function () {

        var inputId = $("#id2").val();

        $("#name2").val("");

        $("#category2").val("");

        $("#price2").val("");

        $.ajax({

            url: "/api/Product/" + inputId,

            type: "GET",

            contentType: "application/json; charset=urf-8",

            success: function (data) {

                $("#name2").val(data.Name);

                $("#category2").val(data.Category);

                $("#price2").val(data.Price);

            },

            error: function (XMLHttpRequest, textStatus, errorThrown) {

                alert("请求失败,消息:" + textStatus + "  " + errorThrown);

            }

        });

    });

    //修改该Id的记录 请求类型:PUT  请求url:  /api/Products/Id

    //请求到ProductsController.cs中的 public void PutProduct(int id, Product product) 方法

    $("#editItem").click(function () {

        var inputId = $("#id2").val();

        var newProduct = Product.create();

        newProduct.Name = $("#name2").val();

        newProduct.Category = $("#category2").val();

        newProduct.Price = $("#price2").val();

        $.ajax({

            url: "/api/Product/" + inputId,

            type: "PUT",

            data: JSON.stringify(newProduct),

            contentType: "application/json; charset=urf-8",

            success: function () {

                alert("修改成功! ");

            },

            error: function (XMLHttpRequest, textStatus, errorThrown) {

                alert("请求失败,消息:" + textStatus + "  " + errorThrown);

            }

        });

    });

    //删除输入Id的记录  请求类型:DELETE  请求url:  /api/Products/Id

    //请求到ProductsController.cs中的  public void DeleteProduct(int id) 方法

    $("#removeItem").click(function () {

        var inputId = $("#id2").val();

        $.ajax({

            url: "/api/Product/" + inputId,

            type: "DELETE",

            contentType: "application/json; charset=uft-8",

            success: function (data) {

                alert("Id为 " + inputId + " 的记录删除成功!");

            },

            error: function (XMLHttpRequest, textStatus, errorThrown) {

                alert("请求失败,消息:" + textStatus + "  " + errorThrown);

            }

        });

    });

</script>
这里,WebApi的一个简单的增删改查项目就完成了,选择执行项目即可测试。注意到,其中用ajax发起请求时,发送到服务器端的数据直接是一个json字符串,当然这个json字符串中每个字段要和Product.cs类中的每个字段同名对应,在服务器端接收数据的时候,我们并没有对接收到的数据进行序列化,而返回数据给客户端的时候也并没有对数据进行反序列化,大大节省了以前开发中不停地进行序列化和反序列化的时间。
Web API开发实例——对产品Product进行增删改查的更多相关文章
- 初入码田--ASP.NET MVC4 Web应用开发之二 实现简单的增删改查
初入码田--ASP.NET MVC4 Web应用之创建一个空白的MVC应用程序 初入码田--ASP.NET MVC4 Web应用开发之一 实现简单的登录 2016-07-29 一.创建M002Adm ...
- 基于SpringBoot开发一个Restful服务,实现增删改查功能
前言 在去年的时候,在各种渠道中略微的了解了SpringBoot,在开发web项目的时候是如何的方便.快捷.但是当时并没有认真的去学习下,毕竟感觉自己在Struts和SpringMVC都用得不太熟练. ...
- salesforce 零基础学习(五十一)使用 Salesforce.com SOAP API 实现用户登录以及简单的增删改查(JAVA访问salesforce)
此篇请参看:https://resources.docs.salesforce.com/202/latest/en-us/sfdc/pdf/salesforce_developer_environme ...
- 【共享单车】—— React后台管理系统开发手记:员工管理之增删改查
前言:以下内容基于React全家桶+AntD实战课程的学习实践过程记录.最终成果github地址:https://github.com/66Web/react-antd-manager,欢迎star. ...
- abp vnext 开发快速入门 2 实现基本增删改查
上篇说了abp vnext 的大体框架结构,本篇说下如何实现基础的增删改查.实现增删改查有以下几个步骤: 1.配置数据库连接 2.领域层(Domain)创建实体,Ef core 层配置Dbset( 用 ...
- 使用Java api对HBase 2.4.5进行增删改查
1.运行hbase 2.新建maven项目 2.将hbase-site.xml放在项目的resources文件夹下 3.修改pom.xml文件,引入hbase相关资源 <repositories ...
- C#设计模式总结 C#设计模式(22)——访问者模式(Vistor Pattern) C#设计模式总结 .NET Core launch.json 简介 利用Bootstrap Paginator插件和knockout.js完成分页功能 图片在线裁剪和图片上传总结 循序渐进学.Net Core Web Api开发系列【2】:利用Swagger调试WebApi
C#设计模式总结 一. 设计原则 使用设计模式的根本原因是适应变化,提高代码复用率,使软件更具有可维护性和可扩展性.并且,在进行设计的时候,也需要遵循以下几个原则:单一职责原则.开放封闭原则.里氏代替 ...
- 循序渐进学.Net Core Web Api开发系列【9】:常用的数据库操作
系列目录 循序渐进学.Net Core Web Api开发系列目录 本系列涉及到的源码下载地址:https://github.com/seabluescn/Blog_WebApi 一.概述 本篇描述一 ...
- 循序渐进学.Net Core Web Api开发系列【8】:访问数据库(基本功能)
系列目录 循序渐进学.Net Core Web Api开发系列目录 本系列涉及到的源码下载地址:https://github.com/seabluescn/Blog_WebApi 一.概述 本篇讨论如 ...
随机推荐
- ThinkPHP3.2.3 Nginx 下 URL_MODEL 的配置
ThinkPHP3.2.3 的 URL_MODEL 包括普通模式(0).PATHINFO 模式(1).REWRITE 模式(2).兼容模式(3)等 4 种 URL 模式.在 Apache 下只要在配置 ...
- C#对泛型List<T>系列化与反系列化
练习一个小例子,在C#中,怎样对泛型List<T>数据集进行系列化与反系列化.我们先了解msdn提供的JavaScriptSerializer类: JavaScriptSerializer ...
- iOS图片压缩处理
理解概念 首先,我们必须明确图片的压缩其实是两个概念: “压” 是指文件体积变小,但是像素数不变,长宽尺寸不变,那么质量可能下降. “缩” 是指文件的尺寸变小,也就是像素数减少,而长宽尺寸变小,文件体 ...
- JMeter学习-007-JMeter 断言实例之一 - 响应断言
之前的文章中已经对如何录制 web 的请求进行了详细的描述,敬请参阅:JMeter学习-004-WEB脚本入门实战 同时,我们的手机应用(例如:京东.天猫.唯品会.携程.易迅 等等 App)所发出的请 ...
- Progressive Scanning (逐行扫描) vs Interlaced Scanning (隔行扫描)
source: http://sh.sina.com.cn/20041207/231443445.shtml 逐行扫描每一帧图像均是由电子束顺序地一行接着一行连续扫描而成.要得到稳定的逐行扫描图像,每 ...
- docker images之间相互通信 link
同一个host上的两个container 首先启动一个nginx. container起名叫netease_nginx docker run --detach --name netease_nginx ...
- leetcode 257
查找二叉树中根节点到叶子节点的所有路径: 本题有两种解法:递归解法和非递归解法,递归解法请参考:http://blog.csdn.net/booirror/article/details/477331 ...
- java 笔试题 字符串旋转
package com.shb.java; /** * 取出第一个重复的字符 * @author shaobn * @date 2016-9-28 * @package_name com.shb.ja ...
- MVC视图中读取ViewBag传递过来的HashTable表数据
视图中头部添加 @using System.Collections; 循环读取哈希表数据 <ul id="AccessView" class="sys_spec_t ...
- Linux之netstat命令详解
简介 Netstat 命令用于显示各种网络相关信息,如网络连接,路由表,接口状态 (Interface Statistics),masquerade 连接,多播成员 (Multicast Member ...