[iOS基础控件 - 4.5] 猜图游戏
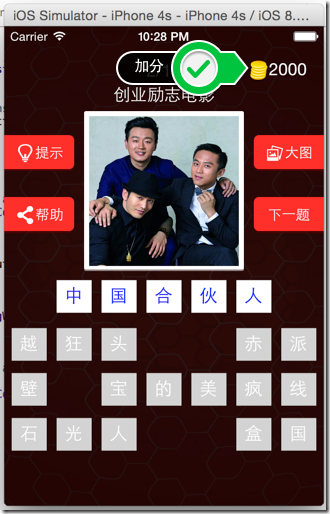
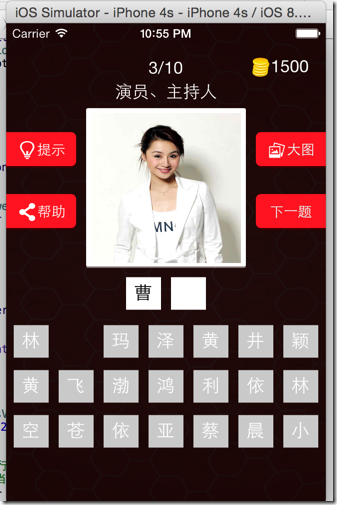
2.搭建UI界面
* 文本标签
* 4个按钮
* 中间的图片
3.设置状态栏样式
4.监听下一题按钮的点击
5.延迟加载数据
* 加载plist
* 字典转模型
* KVC的引入
6.切换下一题的序号、图片、标题,下一题按钮的可用性
7.默认显示第1条题目
8.显示大图
* 监听中间图片点击
* 添加遮盖
* 移动图片(注意头像图片的层级顺序)
* 监听“大图按钮”
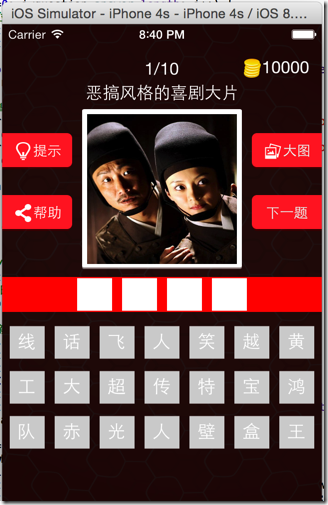
9.展示答案的个数
10.展示待选答案
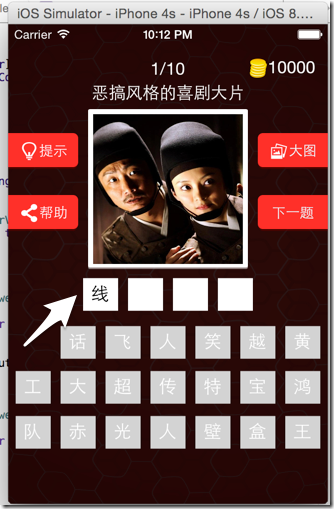
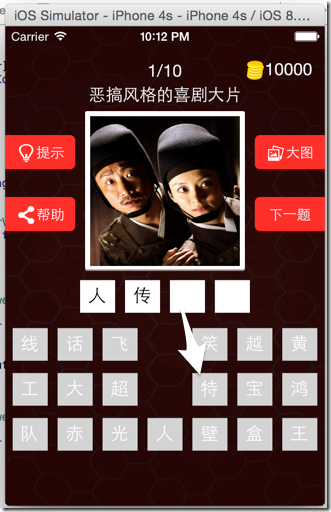
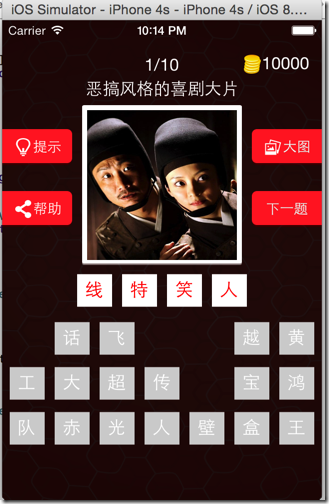
11.答案处理
12.提示功能
 // 设置状态栏是否隐藏

 - (BOOL)prefersStatusBarHidden {

     return NO;

 }

 // 设置状态栏

 - (UIStatusBarStyle)preferredStatusBarStyle {

     // 设置状态栏字体为白色

     return UIStatusBarStyleLightContent;

 }


- Default.png:非retina-iPhone屏幕,320x480
- Default@2x.png:retina-iPhone屏幕,640x960
- Default-568h@2x.png:4inch的retina-iPhone屏幕,640x1136
- Default-Portrait~ipad.png:非retain-iPad竖屏屏幕,768x1024
- Default-Portrait~ipad@2x.png:retain-iPad竖屏屏幕,1536x2048
- Default-Landscape~ipad.png:非retain-iPad横屏屏幕,1024x768
- Default-Landscape~ipad@2x.png:retain-iPad横屏屏幕,2048x1536
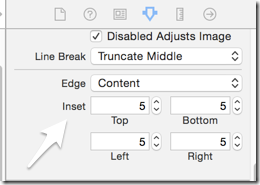

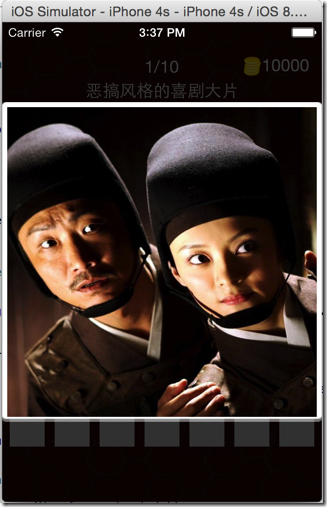

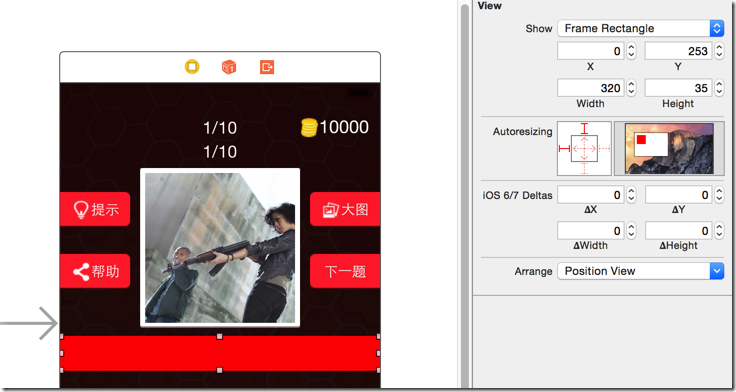
     // 5.1 删除全部旧答案的button

     [self.answerView.subviews makeObjectsPerformSelector:@selector(removeFromSuperview)];
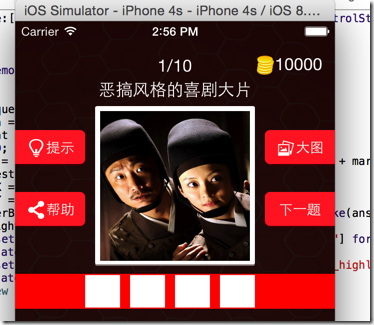
     // 6.1 删除旧选项

     [self.optionsView.subviews makeObjectsPerformSelector:@selector(removeFromSuperview)];

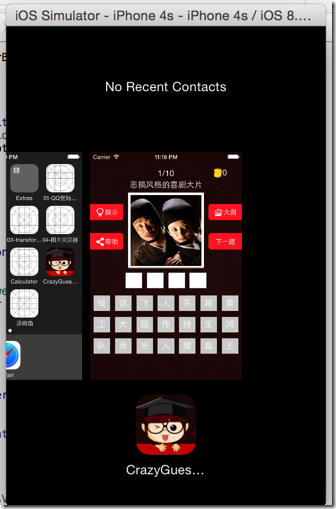
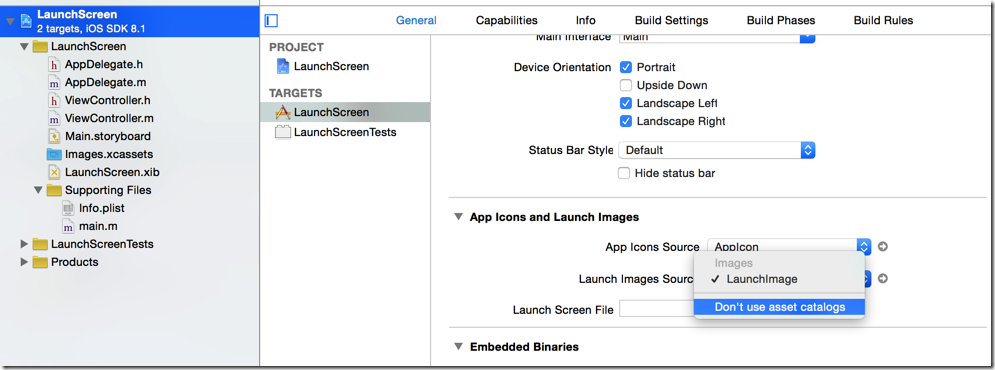
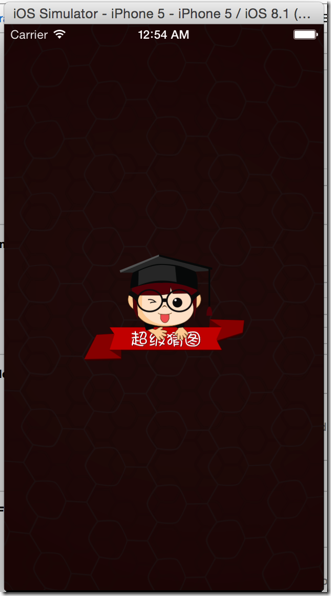
- 使用 xib (LaunchScreen)
- 使用 LaunchImage


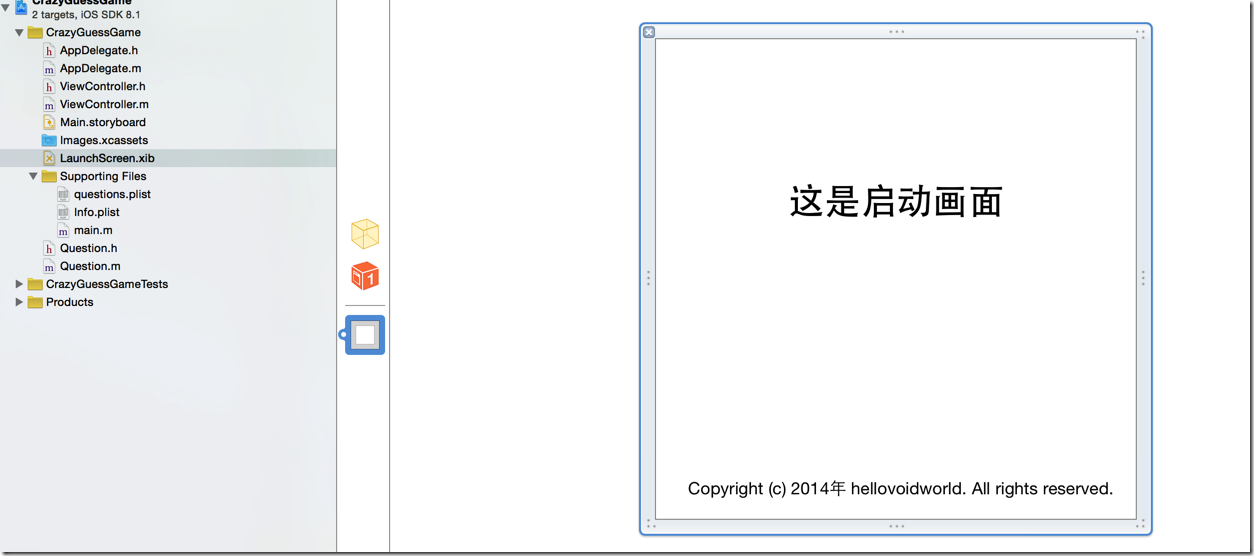
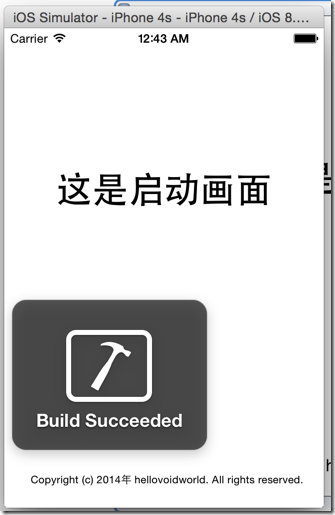
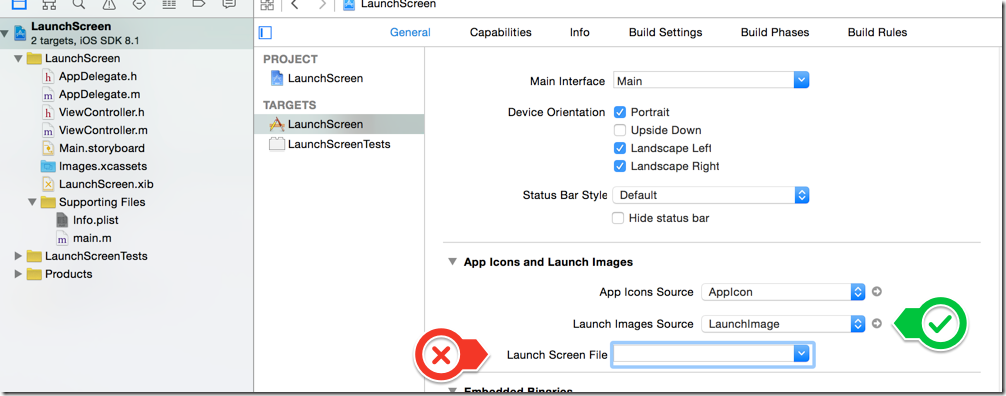

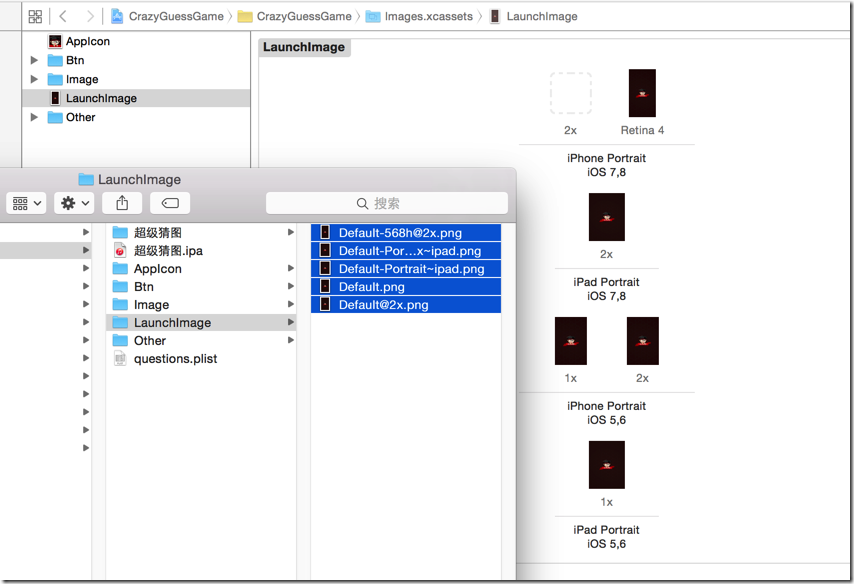
 //

 //  ViewController.m

 //  CrazyGuessGame

 //

 //  Created by hellovoidworld on 14/11/26.

 //  Copyright (c) 2014年 hellovoidworld. All rights reserved.

 //

 #import "ViewController.h"

 #import "Question.h"

 @interface ViewController ()

 @property (weak, nonatomic) IBOutlet UILabel *noLabel; // 序号

 @property (weak, nonatomic) IBOutlet UILabel *titleLabel; // 标题

 @property (weak, nonatomic) IBOutlet UIButton *icon;

 @property (weak, nonatomic) IBOutlet UIButton *nextImageButton;

 @property (weak, nonatomic) IBOutlet UIView *answerView;

 @property (weak, nonatomic) IBOutlet UIView *optionsView;

 @property (weak, nonatomic) IBOutlet UIButton *scoreButton;

 - (IBAction)onTipsButtonClicked;

 - (IBAction)onHelpButtonClicked;

 - (IBAction)onEnlargeImgButtonClicked;

 - (IBAction)onNextImgButtonClicked;

 - (IBAction)onImageClicked;

 /** 所有题目 */

 @property(nonatomic, strong) NSArray *questions;

 /** 当前题目序号 */

 @property(nonatomic, assign) int index;

 /** 遮盖阴影 */

 @property(nonatomic, weak) UIButton *cover;

 /** 原始图片位置、尺寸 */

 @property(nonatomic, assign) CGRect imageOriginalFrame;

 /** 答案是否已经填满标识 */

 @property(nonatomic, assign) BOOL isAnswerCompleted;

 /** 得分 */

 @property(nonatomic, assign) int score;

 @end

 @implementation ViewController

 - (void)viewDidLoad {

     [super viewDidLoad];

     // Do any additional setup after loading the view, typically from a nib.

     //存储原始图片的位置、尺寸信息

     self.imageOriginalFrame = self.icon.frame;

     self.index = -;

     [self onNextImgButtonClicked]; // 初次加载,index是0

 }

 - (void)didReceiveMemoryWarning {

     [super didReceiveMemoryWarning];

     // Dispose of any resources that can be recreated.

 }

 // 改写getter, 延迟加载,此处不要使用self.questions来取得questions,否则陷入死循环

 - (NSArray *)questions {

     if (nil == _questions) {

         // 1.加载plist数据

         NSArray *questionDictArray = [NSArray arrayWithContentsOfFile:[[NSBundle mainBundle] pathForResource:@"questions" ofType:@"plist"]];

         NSMutableArray *questionsArray = [NSMutableArray array];

         for (NSDictionary *questionDict in questionDictArray) {

             // 2.将数据封装到Model "Question"

             Question *question = [Question initWithDictionary:questionDict];

             [questionsArray addObject:question];

         }

         // 3.赋值

         _questions = questionsArray;

     }

     return _questions;

 }

 // 设置状态栏是否隐藏

 - (BOOL)prefersStatusBarHidden {

     return NO;

 }

 // 设置状态栏

 - (UIStatusBarStyle)preferredStatusBarStyle {

     // 设置状态栏字体为白色

     return UIStatusBarStyleLightContent;

 }

 // 点击“提示”按钮

 - (IBAction)onTipsButtonClicked {

     // 1.清除现有的答案

     for (UIButton *currentAnswerButton in self.answerView.subviews) {

         [self onAnswerClicked:currentAnswerButton];

     }

     // 2.取出正确答案片段

     Question *question = self.questions[self.index];

     NSString *partOfCorrectAnswer = [question.answer substringToIndex:];

     // 3.填充到答案区

     for (UIButton *optionButton in self.optionsView.subviews) {

         if ([partOfCorrectAnswer isEqualToString:optionButton.currentTitle]) {

             [self onOptionClicked:optionButton];

         }

     }

     // 5.扣取相应分数

     [self calScore:-];

 }

 // 点击“帮助”按钮

 - (IBAction)onHelpButtonClicked {

 }

 // 点击“大图”按钮

 - (IBAction)onEnlargeImgButtonClicked {

     // 1.1添加阴影

     UIButton *cover = [[UIButton alloc] init];

     cover.frame = self.view.bounds;

     cover.backgroundColor = [UIColor blackColor];

     cover.alpha = ;

     // 1.2给阴影添加变回小图的触发事件

     [cover addTarget:self action:@selector(smallImg) forControlEvents:UIControlEventTouchUpInside];

     self.cover = cover;

     [self.view addSubview:cover];

     // 2.更换阴影和图片的位置

     [self.view bringSubviewToFront:self.icon];

     // 3.更改图像大小,显示阴影

     [UIView animateWithDuration: animations:^{

         cover.alpha = 0.7;

         CGFloat iconWidth = self.view.frame.size.width;

         CGFloat iconHeight = iconWidth;

         CGFloat iconX = ;

         CGFloat iconY = (self.view.frame.size.height / ) - (iconHeight / );

         self.icon.frame = CGRectMake(iconX, iconY, iconWidth, iconHeight);

     }];

 }

 /** 缩小图片 */

 - (void) smallImg {

     [UIView animateWithDuration: animations:^{

         // 1.删除阴影

         self.cover.alpha = ;

         // 2.恢复图片

         self.icon.frame = self.imageOriginalFrame;

     } completion:^(BOOL finished) {

         // 动画执行完成后

         [self.cover removeFromSuperview];

         self.cover = nil;

     }];

 }

 // 点击“下一题”按钮

 - (IBAction)onNextImgButtonClicked {

     self.index++;

     // 1.取出相应地Model数据

     Question *question = self.questions[self.index];

     // 2.设置控件

     [self setControls:question];

     // 3.设置答案

     [self addAnswer:question];

     // 4.设置选项

     [self addOptions:question];

 }

 /** 设置控件 */

 - (void) setControls:(Question *) question {

     // 1.答案是否已经填满

     self.isAnswerCompleted = NO;

     // 2.得分

     [self.scoreButton setTitle:[NSString stringWithFormat:@"%d", self.score] forState:UIControlStateNormal];

     // 2.设置序号

     self.noLabel.text = [NSString stringWithFormat:@"%d/%d", self.index + , self.questions.count];

     // 3.设置标题

     self.titleLabel.text = question.title;

     // 4.设置图片

     [self.icon setImage:[UIImage imageNamed:question.icon] forState:UIControlStateNormal];

     // 5.设置“下一题”按钮

     self.nextImageButton.enabled = (self.index + ) != self.questions.count;

 }

 /** 加入答案区 */

 - (void) addAnswer:(Question *) question {

     // 5.1 删除全部旧答案的button

     [self.answerView.subviews makeObjectsPerformSelector:@selector(removeFromSuperview)];

     // 5.1 加入新答案

     int answerCount = question.answer.length; // 答案字数

     // 初始化尺寸信息

     CGFloat answerWidth = ;

     CGFloat answerHeight = self.answerView.frame.size.height;

     CGFloat answerMargin = ;

     CGFloat answerMarginLeft = (self.answerView.frame.size.width - answerWidth * answerCount - answerMargin * (answerCount - ) ) / ;

     for (int i=; i<question.answer.length; i++) {

         // 计算位置

         CGFloat answerX = answerMarginLeft + i * (answerWidth + answerMargin);

         CGFloat answerY = ;

         UIButton *answerButton = [[UIButton alloc] initWithFrame:CGRectMake(answerX, answerY, answerWidth, answerHeight)];

         // 设置背景

         [answerButton setBackgroundImage:[UIImage imageNamed:@"btn_answer"] forState: UIControlStateNormal];

         [answerButton setBackgroundImage:[UIImage imageNamed:@"btn_answer_highlighted"] forState: UIControlStateHighlighted];

         // 设置按钮点击事件,让按钮文字消失,相应的选项恢复

         [answerButton addTarget:self action:@selector(onAnswerClicked:) forControlEvents:UIControlEventTouchUpInside];

         [self.answerView addSubview:answerButton];

     }

     [self.view addSubview:self.answerView];

 }

 /**

     设置按钮点击事件,让按钮文字消失,相应的选项恢复

 */

 - (void) onAnswerClicked:(UIButton *) answerButton {

     // 1.设置答案标识

     self.isAnswerCompleted = NO;

     // 2.恢复相应的选项

     NSString *answerTitle = [answerButton titleForState:UIControlStateNormal];

     for (UIButton *optionButton in self.optionsView.subviews) {

         if ([answerTitle isEqualToString:[optionButton titleForState:UIControlStateNormal]]

             && optionButton.isHidden) {

             optionButton.hidden = NO;

             break;

         }

     }

     // 3.清除按钮上的文字

     [answerButton setTitle:nil forState:UIControlStateNormal];

     // 4.恢复答案文字颜色

     for (UIButton *answerButton in self.answerView.subviews) {

         [answerButton setTitleColor:[UIColor blackColor] forState:UIControlStateNormal];

     }

 }

 /** 加入选项区 */

 - (void) addOptions:(Question *) question {

     // 6.1 删除旧选项

     [self.optionsView.subviews makeObjectsPerformSelector:@selector(removeFromSuperview)];

     // 6.2 加入新选项

     int optionsCount = question.options.count;

     CGFloat optionWidth = ;

     CGFloat optionHeight = ;

     int columnCount = ;

     CGFloat optionMargin = ;

     CGFloat optionMarginLeft = (self.optionsView.frame.size.width - optionWidth * columnCount - optionMargin * (columnCount - )) / ;

     for (int i=; i<optionsCount; i++) {

         int rowNo = i / columnCount; // 当前行号,从0开始

         int columnNo = i % columnCount; // 当前列号,从0开始

         CGFloat optionX = optionMarginLeft + columnNo * (optionWidth + optionMargin);

         CGFloat optionY = rowNo * (optionHeight + optionMargin);

         UIButton *optionButton = [[UIButton alloc] initWithFrame:CGRectMake(optionX, optionY, optionWidth, optionHeight)];

         [optionButton setBackgroundImage:[UIImage imageNamed:@"btn_option"] forState:UIControlStateNormal];

         [optionButton setBackgroundImage:[UIImage imageNamed:@"btn_option_highlighted"] forState:UIControlStateHighlighted];

         [optionButton setTitle:question.options[i] forState:UIControlStateNormal];

         [optionButton addTarget:self action:@selector(onOptionClicked:) forControlEvents:UIControlEventTouchUpInside];

         [self.optionsView addSubview:optionButton];

     }

     [self.view addSubview:self.optionsView];

 }

 // 使点击到的选项消失

 - (void) onOptionClicked:(UIButton *) optionButton {

     // 1.如果答案尚未填满,使选中的选项消失

     if (self.isAnswerCompleted) {

         return;

     }

     optionButton.hidden = YES;

     // 2.使消失的文字出现在答案区上,判断是否已经完成

     NSString *optionTitle = [optionButton titleForState:UIControlStateNormal];

     // 遍历答案按钮

     for (int i=; i<self.answerView.subviews.count; i++) {

         // 已经遍历到了最后一个答案按钮,证明已经完成了所有答案

         if (i == self.answerView.subviews.count - ) {

             self.isAnswerCompleted = YES;

         }

         UIButton *answerButton = self.answerView.subviews[i];

         NSString *answerTitle = [answerButton titleForState:UIControlStateNormal];

         // 如果该答案按钮上没有文字,则是空,填入文字

         if (answerTitle.length == ) {

             // 按钮默认的字体颜色是白色, 手动设为黑色

             [answerButton setTitleColor:[UIColor blackColor] forState:UIControlStateNormal];

             [answerButton setTitle:optionTitle forState:UIControlStateNormal];

             break;

         }

     }

     [self dealWithAnswer];

 }

 /** 处理答案 */

 - (void) dealWithAnswer {

     if (self.isAnswerCompleted) {

         Question *question = self.questions[self.index];

         NSMutableString *answerStr = [NSMutableString string];

         // 拼接已经完成的答案

         for (UIButton *completedAnswerButton in self.answerView.subviews) {

             [answerStr appendString:[completedAnswerButton titleForState:UIControlStateNormal]];

         }

         // 如果答对了

         if ([answerStr isEqualToString:question.answer]) {

             // 答案字体转换称为蓝色

             for (UIButton *correctAnswerButton in self.answerView.subviews) {

                 [correctAnswerButton setTitleColor:[UIColor blueColor] forState:UIControlStateNormal];

             }

             // 延迟指定时间后跳入下一题

             [self performSelector:@selector(onNextImgButtonClicked) withObject:nil afterDelay:0.5];

             // 加分

             [self calScore:];

         }

         else {

             for (UIButton *correctAnswerButton in self.answerView.subviews) {

                 // 答案字体转换称为红色

                 [correctAnswerButton setTitleColor:[UIColor redColor] forState:UIControlStateNormal];

             }

         }

     }

 }

 /** 原图状态点击放大,大图状态点击恢复原状 */

 - (IBAction)onImageClicked {

     // 使用遮盖是否存在判断图片状态

     // 1.遮盖不存在,放大图片

     if (nil == self.cover) {

         [self onEnlargeImgButtonClicked];

     }

     else {

     // 2.遮盖存在,恢复图片

         [self smallImg];

     }

 }

 /** 计算分数 */

 - (void) calScore:(int) score {

     self.score += score;

     [self.scoreButton setTitle:[NSString stringWithFormat:@"%d", self.score] forState:UIControlStateNormal];

 }

 @end
 //

 //  Question.h

 //  CrazyGuessGame

 //

 //  Created by hellovoidworld on 14/11/26.

 //  Copyright (c) 2014年 hellovoidworld. All rights reserved.

 //

 #import <Foundation/Foundation.h>

 @interface Question : NSObject

 @property(nonatomic, copy) NSString *answer;

 @property(nonatomic, copy) NSString *title;

 @property(nonatomic, copy) NSString *icon;

 @property(nonatomic, strong) NSArray *options;

 - (instancetype) initWithDictionary:(NSDictionary *) dictionary;

 + (instancetype) initWithDictionary:(NSDictionary *) dictionary;

 @end
 //

 //  Question.m

 //  CrazyGuessGame

 //

 //  Created by hellovoidworld on 14/11/26.

 //  Copyright (c) 2014年 hellovoidworld. All rights reserved.

 //

 #import "Question.h"

 @implementation Question

 - (instancetype) initWithDictionary:(NSDictionary *) dictionary {

     if (self = [super init]) {

         self.title = dictionary[@"title"];

         self.icon = dictionary[@"icon"];

         self.answer = dictionary[@"answer"];

         self.options = dictionary[@"options"];

     }

     return self;

 }

 + (instancetype) initWithDictionary:(NSDictionary *) dictionary {

     return [[self alloc] initWithDictionary:dictionary];

 }

 @end
[iOS基础控件 - 4.5] 猜图游戏的更多相关文章
- [iOS基础控件 - 5.5] 代理设计模式 (基于”APP列表"练习)
A.概述 在"[iOS基础控件 - 4.4] APP列表 进一步封装,初见MVC模式”上进一步改进,给“下载”按钮加上效果.功能 1.按钮点击后,显示为“已下载”,并且不 ...
- iOS 基础控件(下)
上篇介绍了UIButton.UILabel.UIImageView和UITextField,这篇就简短一点介绍UIScrollView和UIAlertView. UIScrollView 顾名思义也知 ...
- [iOS基础控件 - 7.0] UIWebView
A.基本使用 1.概念 iOS内置的浏览器控件 Safari浏览器就是通过UIWebView实现的 2.用途:制作简易浏览器 (1)基本请求 创建请求 加载请求 (2)代理监听webView加载, ...
- [iOS基础控件 - 6.11.3] 私人通讯录Demo 控制器的数据传递、存储
A.需求 1.搭建一个"私人通讯录"Demo 2.模拟登陆界面 账号 密码 记住密码开关 自动登陆开关 登陆按钮 3.退出注销 4.增删改查 5.恢复数据(取消修改) 这个代码 ...
- [iOS基础控件 - 6.10.2] PickerView 自定义row内容 国家选择Demo
A.需求 1.自定义一个UIView和xib,包含国家名和国旗显示 2.学习row的重用 B.实现步骤 1.准备plist文件和国旗图片 2.创建模型 // // Flag.h // Co ...
- [iOS基础控件 - 6.9] 聊天界面Demo
A.需求 做出一个类似于QQ.微信的聊天界面 1.每个cell包含发送时间.发送人(头像).发送信息 2.使用对方头像放在左边,我方头像在右边 3.对方信息使用白色背景对话框,我方信息使用蓝色背景对话 ...
- [iOS基础控件 - 5.1] UIScrollView
A.需要掌握 UIScrollView 是一个能够滚动的视图控件,可以用来展示大量内容,如手机的“设置” 1.常见属性 2.常用代理方法 3.缩放 4.UIScrollView和UIPageContr ...
- iOS基础 - 控件属性
一.控件的属性 1.CGRect frame 1> 表示控件的位置和尺寸(以父控件的左上角为坐标原点(0, 0)) 2> 修改这个属性,可以调整控件的位置和尺寸 2.CGPoint cen ...
- [iOS基础控件 - 6.12.3] @property属性 strong weak copy
A.概念 @property 的修饰词 strong: 强指针/强引用(iOS6及之前是retain) weak: 弱智真/弱引用(iOS6及之前是assign) 默认情况所有指针都是强指针 ...
随机推荐
- linux查看在线用户 who命令参数及用法
linux who 命令 详解 Linux最常用命令之一 功能说明:显示目前登入系统的用户信息. 语 法:who [-Himqsw][--help][--version][am i][记录文件] 补充 ...
- C/C++语言参数传递----函数/方法 参数的指针引用传递
int m_value = 1; void func(int *p) { p = &m_value; } int main(int argc, char *argv[]) { int n = ...
- 看文档要看仔细,英语要加强啊... cocos2d-x 的 API 和 对应版本的 cocos2d-js 的 API 没有完全对应
/** * Sets the X rotation (angle) of the node in degrees which performs a horizontal rotational skew ...
- c++ 基础学习: 左值 概念cocos2d-x3.0的实际应用
左值:概念baidu 1.2.6.2 与Cocos2d-x内存管理的结合 在2.x的使用场景中,CCArray和CCDictionary通常被分配在堆上,我们不得不需要考虑在适当的地方释放其内存.新的 ...
- [itint5]直角路线遍历棋盘
http://www.itint5.com/oj/#22 这题一开始直接用暴力的DFS来做,果然到25的规模就挂了. vector<bool> visited(50, false); ve ...
- HeadFirst设计模式之装饰者模式
一. 1.The Decorator Pattern attaches additional responsibilities to an object dynamically.Decorators ...
- Android安全问题 钓鱼程序
导读:文本介绍一种钓鱼应用,讲述如何骗取用户的用户名和密码,无须root 这个话题是继续android安全问题(二) 程序锁延伸的 之前我已经展示了如何制作程序锁.当打开指定应用的时候,弹出一个密码页 ...
- Extension Method[下篇]
四.Extension Method的本质 通过上面一节的介绍,我们知道了在C#中如何去定义一个Extension Method:它是定义在一个Static class中的.第一个Parameter标 ...
- 【HDOJ】4358 Boring counting
基本思路是将树形结构转线性结构,因为查询的是从任意结点到叶子结点的路径.从而将每个查询转换成区间,表示从该结点到叶子结点的路径.离线做,按照右边界升序排序.利用树状数组区间修改.树状数组表示有K个数据 ...
- C++中巧妙的位运算
位运算要多想到与预算和异或运算,并常常将两个数对应位上相同和不同分开处理 一.x&(x-1)消除x二进制中最右边的一个1. 这个比较厉害,比如统计某个 二.与和异或的巧妙结合的思想 与运算可以 ...
