【爬虫系列】1. 无事,Python验证码识别入门
最近在导入某站数据(正经需求),看到他们的登录需要验证码,
本来并不想折腾的,然而Cookie有效期只有一天。

已经收到了几次夜间报警推送之后,实在忍不住。
得嘞,还是得研究下模拟登录。
于是,秃头了两个小时gang出来了。
预警
- 二值化、普通降噪、8邻域降噪
- tesseract、tesserocr、PIL
如果都了解这些东西,这文章就不用看了,直接跳到参考文献咯。
代码地址:https://github.com/liguobao/python-verify-code-ocr
开始搞事
批量下载验证码图片
import shutil

import requests

from loguru import logger

for i in range(100):

    url = 'http://xxxx/create/validate/image'

    response = requests.get(url, stream=True)

    with open(f'./imgs/{i}.png', 'wb') as out_file:

        response.raw.decode_content = True

        shutil.copyfileobj(response.raw, out_file)

        logger.info(f"download {i}.png successfully.")

    del response
第一步,直接上识别代码看看效果。
from PIL import Image

import tesserocr

img = Image.open("./imgs/98.png")

img.show()

img_l = img.convert("L")# 灰阶图

img_l.show()

verify_code1 = tesserocr.image_to_text(img)

verify_code2 = tesserocr.image_to_text(img_l)

print(f"verify_code1:{verify_code1}")

print(f"verify_code2:{verify_code2}")
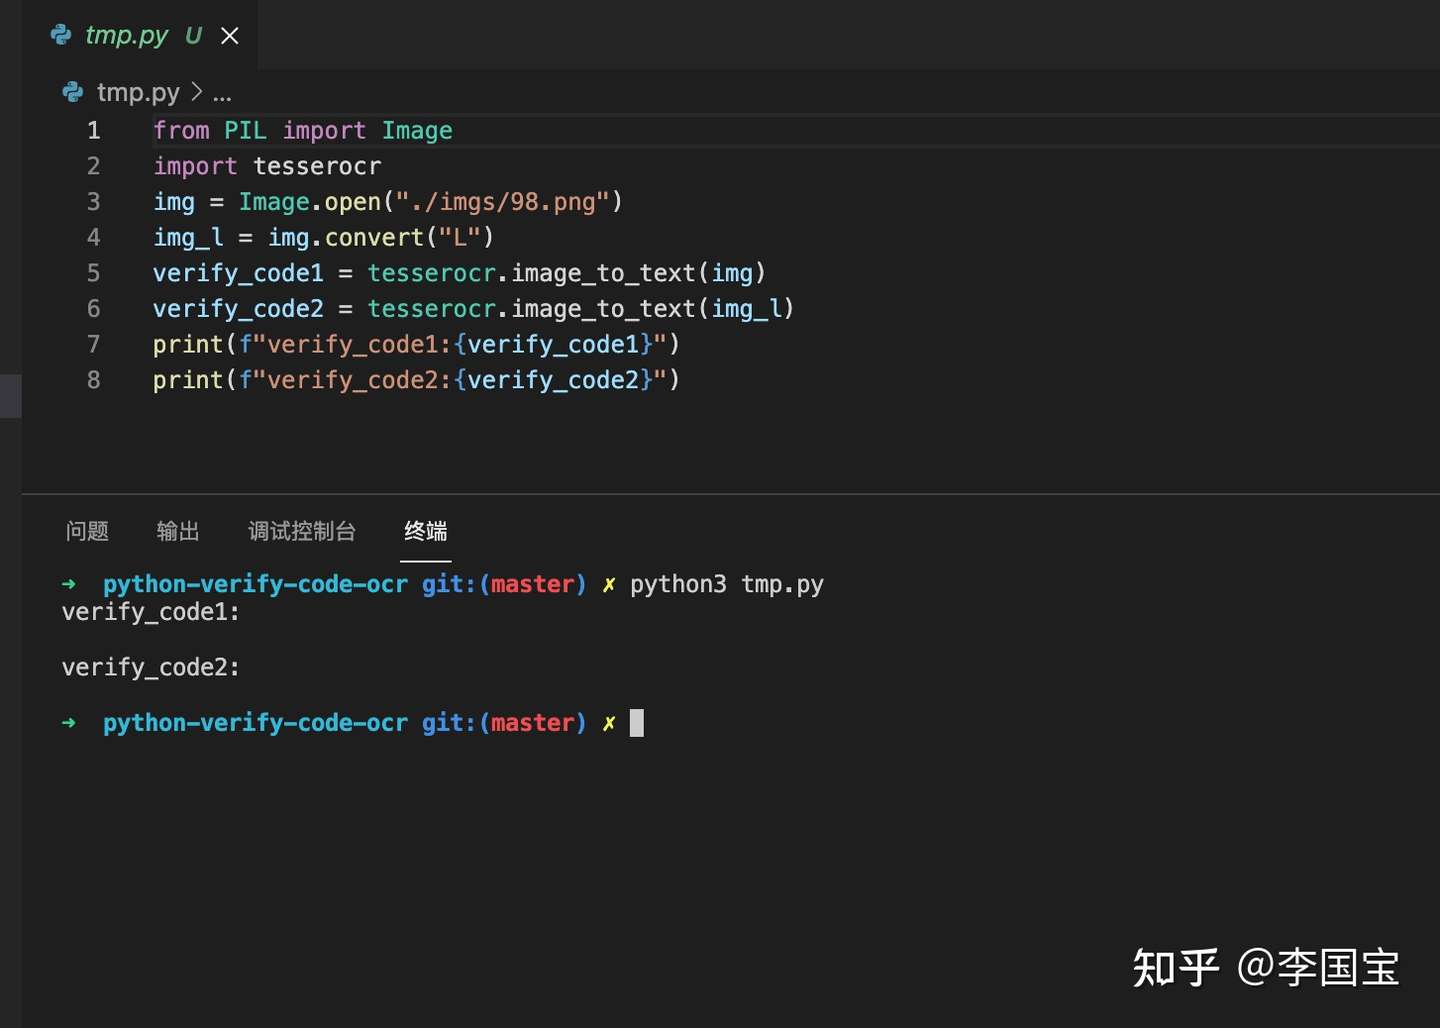
毫无疑问,无论是原图还是灰阶图,一无所有。
折腾降噪、去干扰
第一个找到有用的文章是这个,没记错的话几年前也看到过。
from PIL import Image

# https://www.cnblogs.com/jhao/p/10345853.html Python图片验证码降噪 — 8邻域降噪

def noise_remove_pil(image_name, k):

    """

    8邻域降噪

    Args:

        image_name: 图片文件命名

        k: 判断阈值

    Returns:

    """

    def calculate_noise_count(img_obj, w, h):

        """

        计算邻域非白色的个数

        Args:

            img_obj: img obj

            w: width

            h: height

        Returns:

            count (int)

        """

        count = 0

        width, height = img_obj.size

        for _w_ in [w - 1, w, w + 1]:

            for _h_ in [h - 1, h, h + 1]:

                if _w_ > width - 1:

                    continue

                if _h_ > height - 1:

                    continue

                if _w_ == w and _h_ == h:

                    continue

                if img_obj.getpixel((_w_, _h_)) < 230:  # 这里因为是灰度图像,设置小于230为非白色

                    count += 1

        return count

    img = Image.open(image_name)

    # 灰度

    gray_img = img.convert('L')

    w, h = gray_img.size

    for _w in range(w):

        for _h in range(h):

            if _w == 0 or _h == 0:

                gray_img.putpixel((_w, _h), 255)

                continue

            # 计算邻域非白色的个数

            pixel = gray_img.getpixel((_w, _h))

            if pixel == 255:

                continue

            if calculate_noise_count(gray_img, _w, _h) < k:

                gray_img.putpixel((_w, _h), 255)

    return gray_img

if __name__ == '__main__':

    image = noise_remove_pil("./imgs/1.png", 4)

    image.show()
跑起来看下效果。
啧啧啧,很是可以。
不过扔过去识别...
依旧不太行。
研读了一下代码,有了思路。
新思路
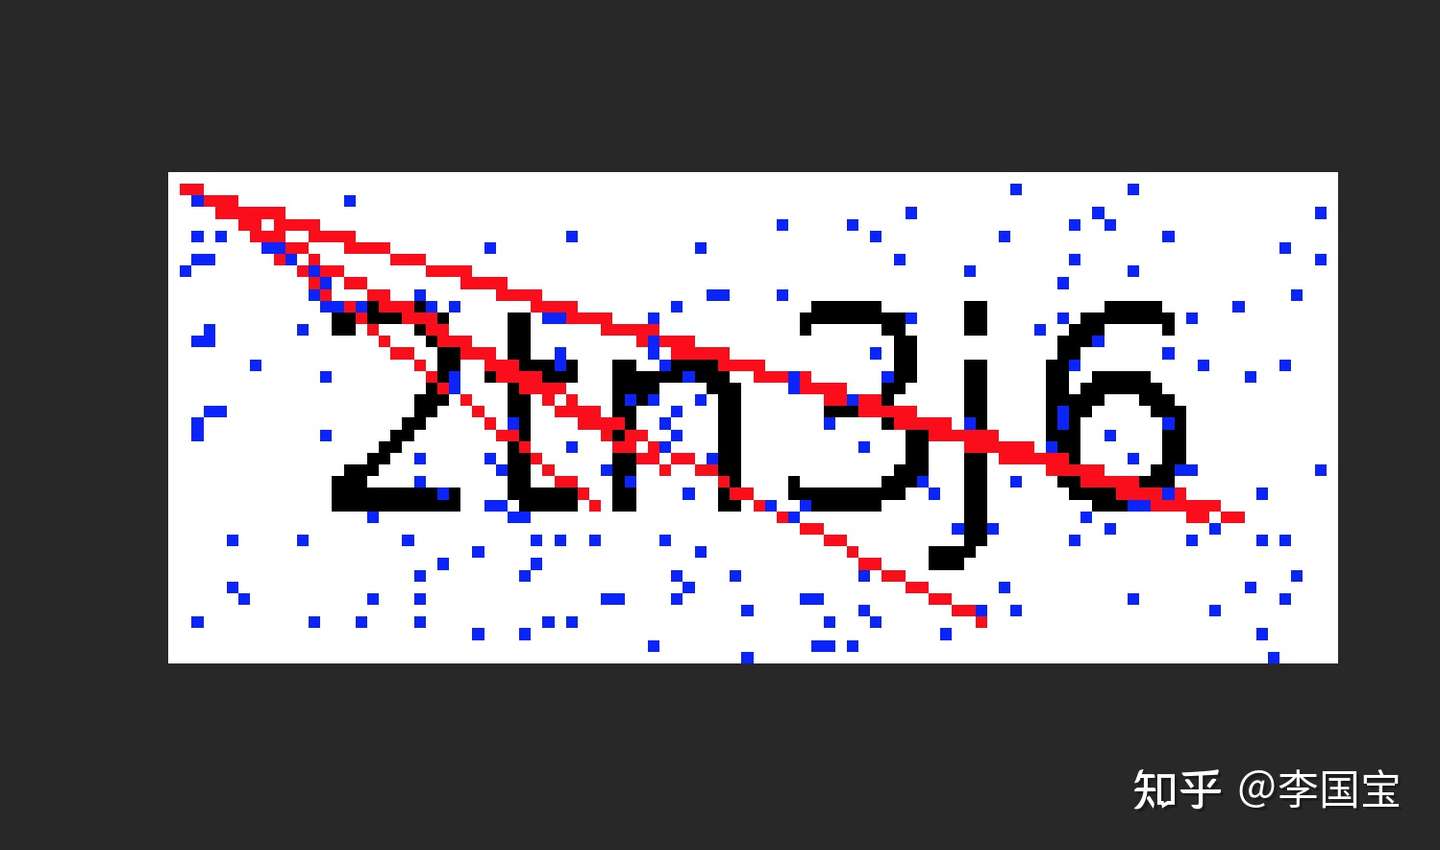
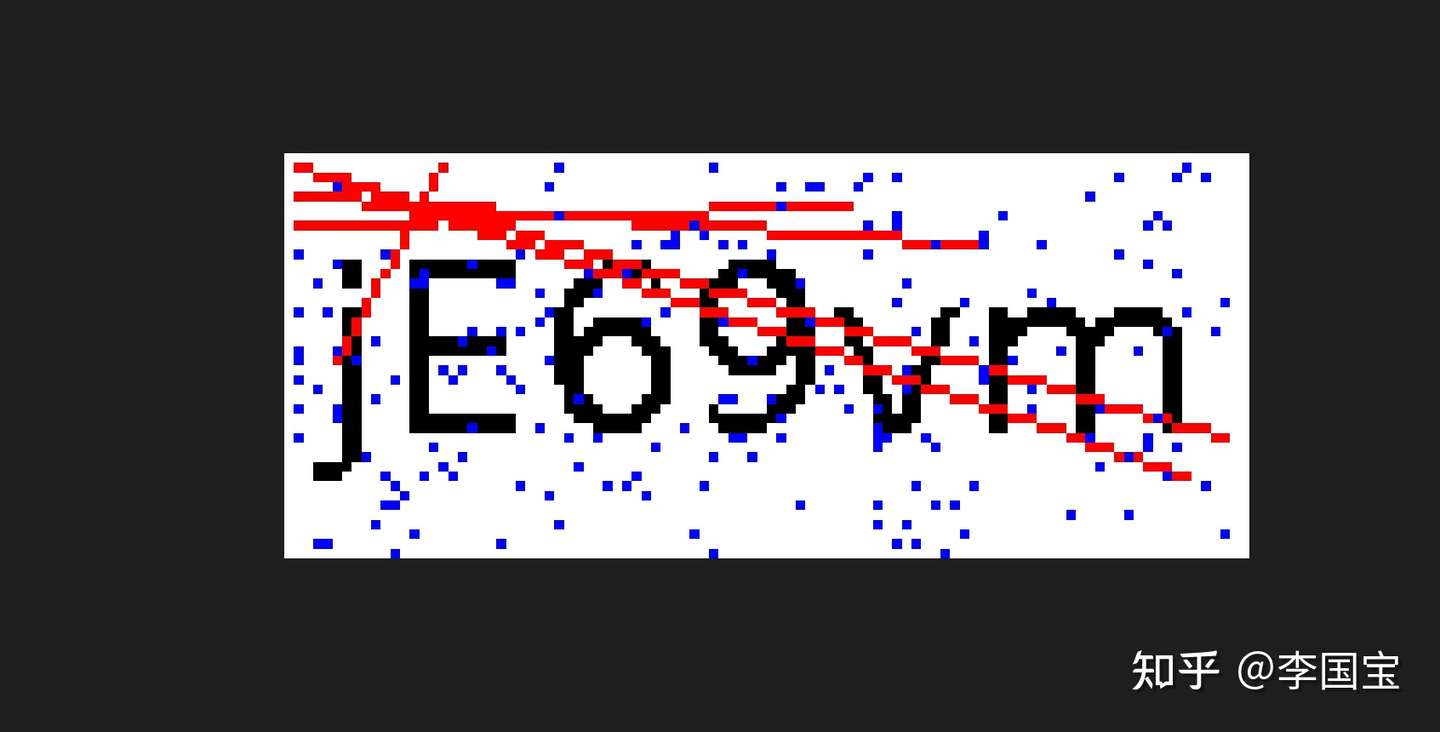
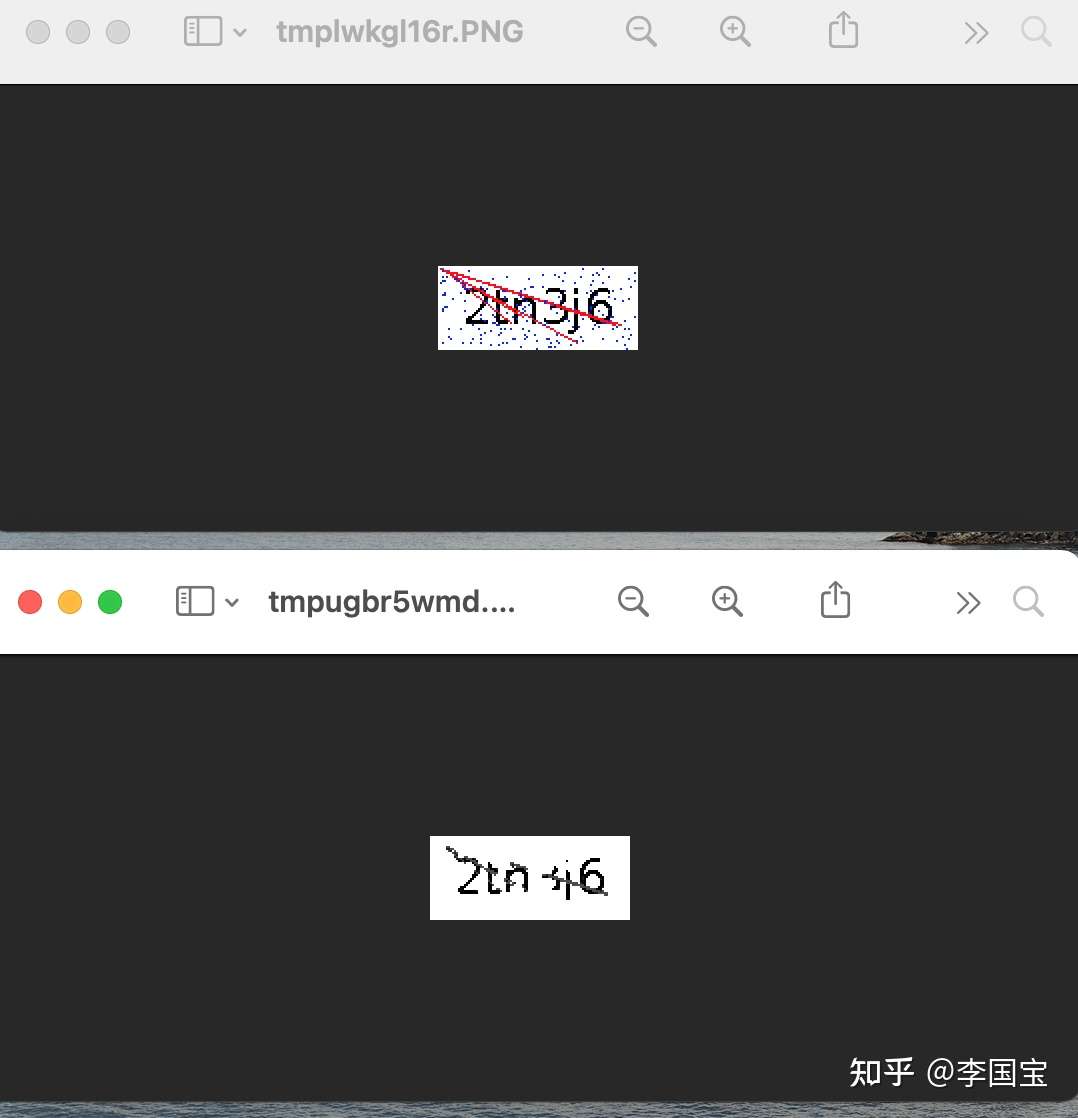
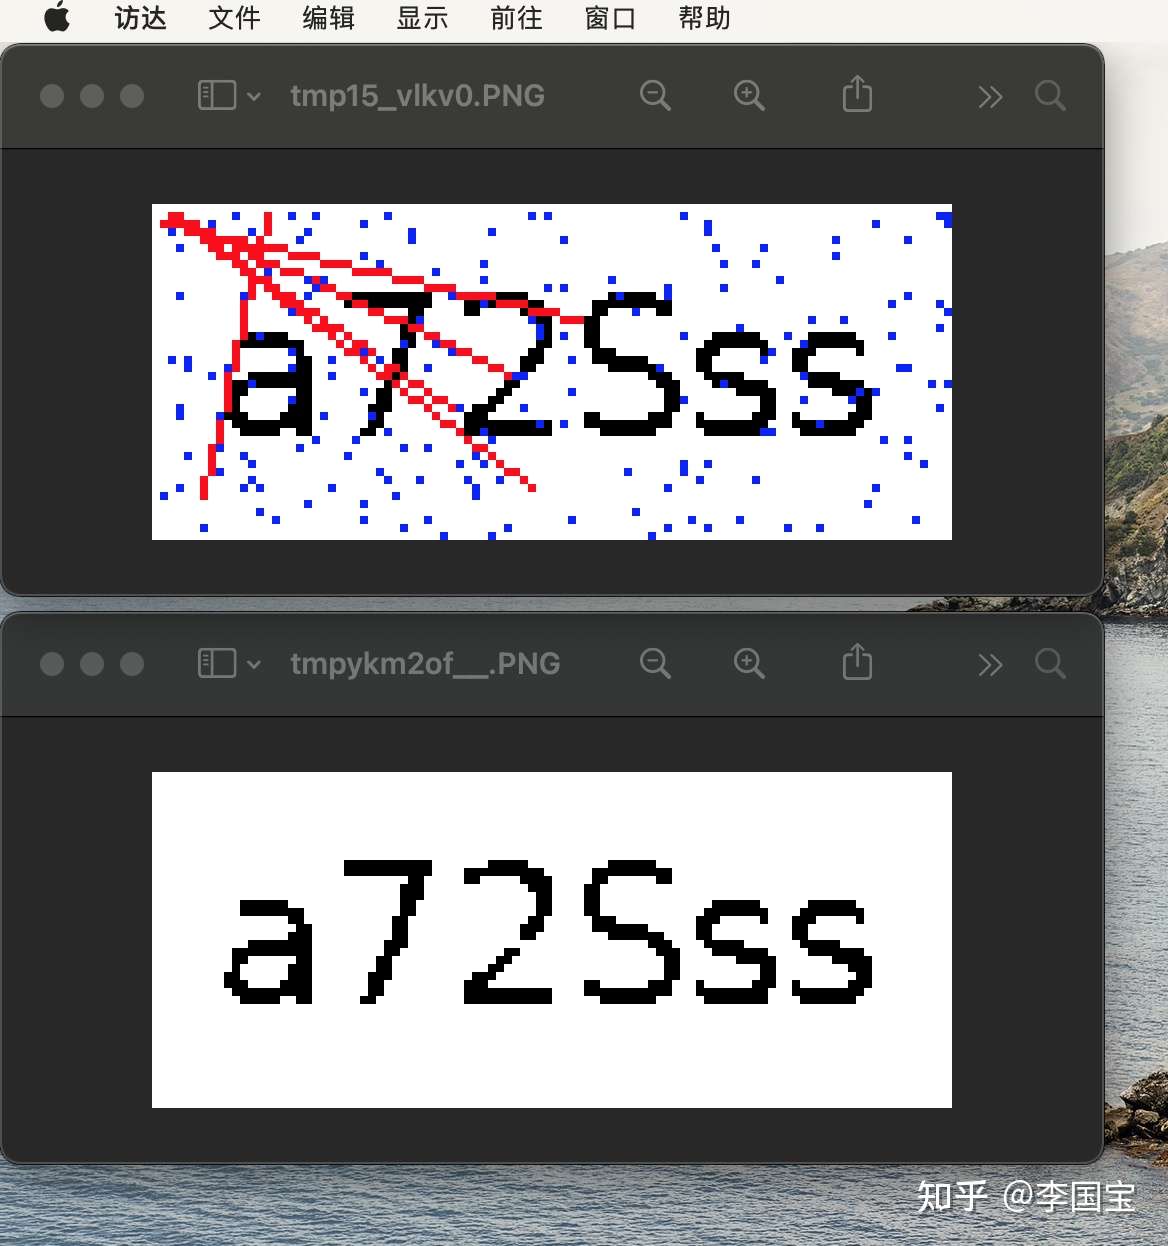
这边的干扰线是从某个点发出来的红色线条,
其实我只需要把红色的像素点都干掉,这个线条也会被去掉。
from PIL import Image

import tesserocr

img = Image.open("./imgs/98.png")

img.show()

# 尝试去掉红像素点

w, h = img.size

for _w in range(w):

    for _h in range(h):

        o_pixel = img.getpixel((_w, _h))

        if o_pixel == (255, 0, 0):

            img.putpixel((_w, _h), (255, 255, 255))

img.show()

img_l = img.convert("L")

# img_l.show()

verify_code1 = tesserocr.image_to_text(img)

verify_code2 = tesserocr.image_to_text(img_l)

print(f"verify_code1:{verify_code1}")

print(f"verify_code2:{verify_code2}")
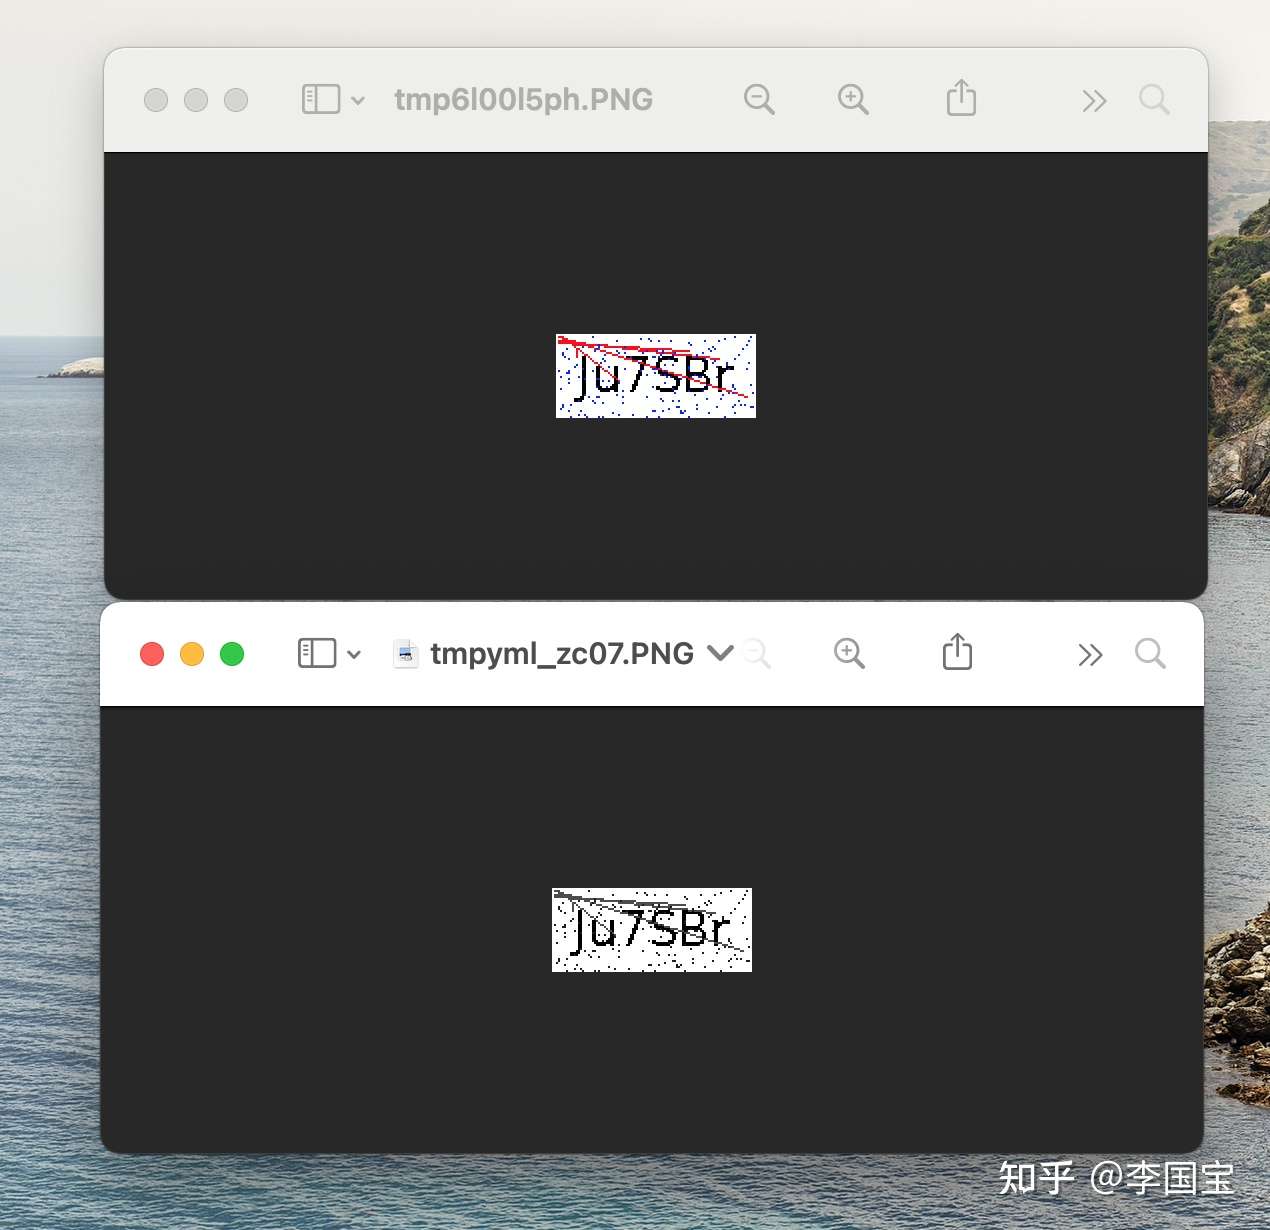
看起来OK,上面还有零星的蓝色像素掉,也可以用同样的方法一起去掉。

甚至OCR都直接出效果了。
好了,完结撒花。
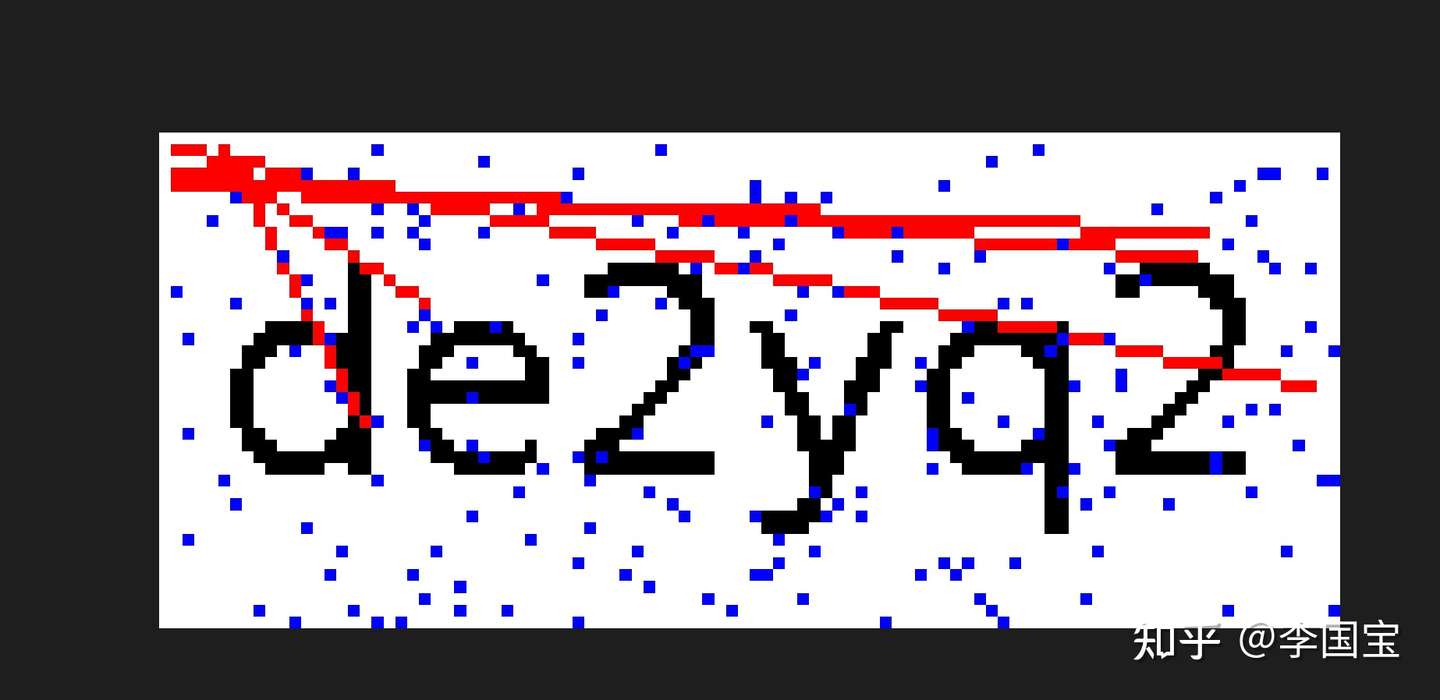
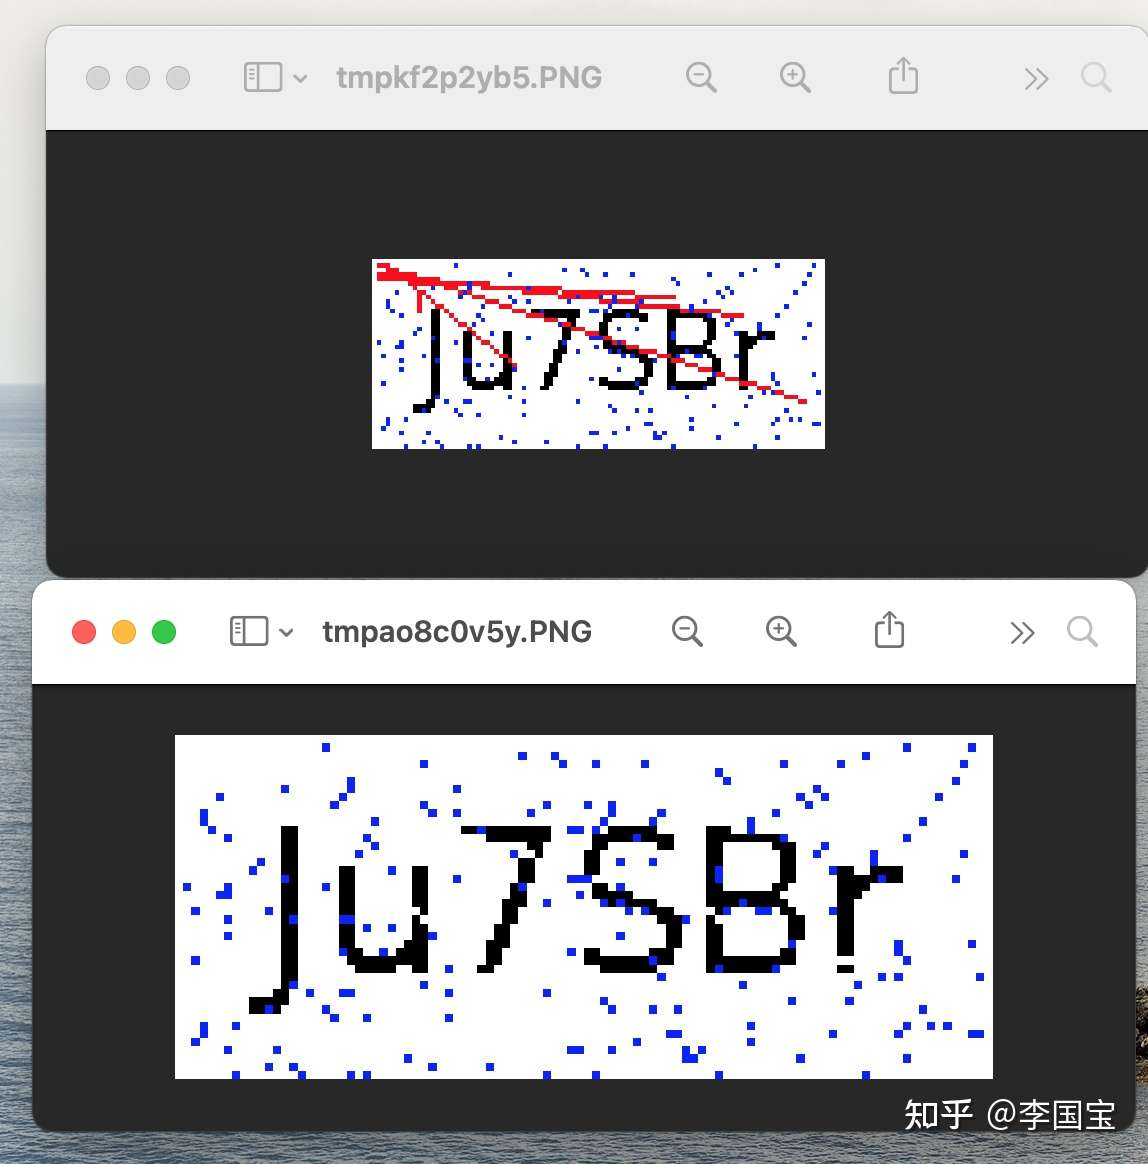
不过,后面发现,有些红色线段和蓝色点,是和验证码重合的。
这个时候,如果直接填成白色,就容易把字母切开,导致识别效果变差。
想起这个文章的做法,所以改进了一下:
当前点是红色或者蓝色,判断周围点是不是超过两个像素点是黑色。
是,填充为黑色。
否,填充成白色。
最终完整代码:
from PIL import Image
import tesserocr
from loguru import logger
class VerfyCodeOCR():
def __init__(self) -> None:
pass
def ocr(self, img):
""" 验证码OCR
Args:
img (img): imgObject/imgPath
Returns:
[string]: 识别结果
"""
img_obj = Image.open(img) if type(img) == str else img
self._remove_pil(img_obj)
verify_code = tesserocr.image_to_text(img_obj)
return verify_code.replace("\n", "").strip()
def _get_p_black_count(self, img: Image, _w: int, _h: int):
""" 获取当前位置周围像素点中黑色元素的个数
Args:
img (img): 图像信息
_w (int): w坐标
_h (int): h坐标
Returns:
int: 个数
"""
w, h = img.size
p_round_items = []
# 超过了横纵坐标
if _w == 0 or _w == w-1 or 0 == _h or _h == h-1:
return 0
p_round_items = [img.getpixel(
(_w, _h-1)), img.getpixel((_w, _h+1)), img.getpixel((_w-1, _h)), img.getpixel((_w+1, _h))]
p_black_count = 0
for p_item in p_round_items:
if p_item == (0, 0, 0):
p_black_count = p_black_count+1
return p_black_count
def _remove_pil(self, img: Image):
"""清理干扰识别的线条和噪点
Args:
img (img): 图像对象
Returns:
[img]: 被清理过的图像对象
"""
w, h = img.size
for _w in range(w):
for _h in range(h):
o_pixel = img.getpixel((_w, _h))
# 当前像素点是红色(线段) 或者 绿色(噪点)
if o_pixel == (255, 0, 0) or o_pixel == (0, 0, 255):
# 周围黑色数量大于2,则把当前像素点填成黑色;否则用白色覆盖
p_black_count = self._get_p_black_count(img, _w, _h)
if p_black_count >= 2:
img.putpixel((_w, _h), (0, 0, 0))
else:
img.putpixel((_w, _h), (255, 255, 255))
logger.info(f"_remove_pil finish.")
# img.show()
return img
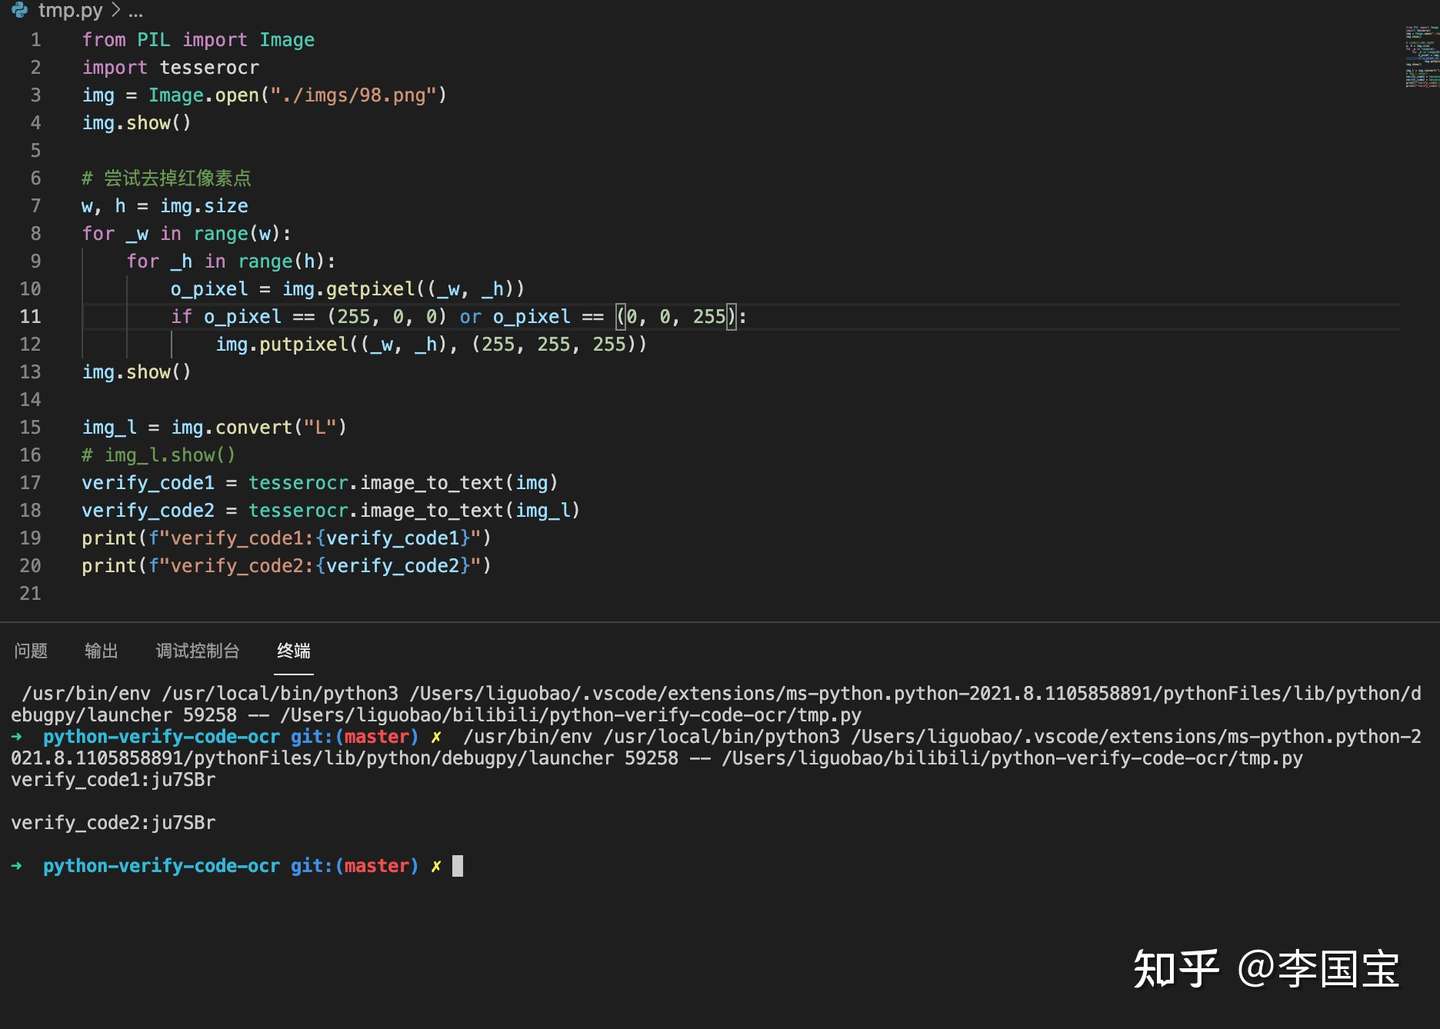
if __name__ == '__main__':
verfyCodeOCR = VerfyCodeOCR()
img_path = "./imgs/51.png"
img= Image.open(img_path)
img.show()
ocr_result = verfyCodeOCR.ocr(img)
img.show()
logger.info(ocr_result)
总结:
- 识别率大概是80%左右,部分连起来的字符会被识别错误,需要切割字符后单独识别
- 降噪算法只适用于当前图片,其他场景需要自行适配
代码地址:https://github.com/liguobao/python-verify-code-ocr
参考文章:
【爬虫系列】1. 无事,Python验证码识别入门的更多相关文章
- python人工智能爬虫系列:怎么查看python版本_电脑计算机编程入门教程自学
首发于:python人工智能爬虫系列:怎么查看python版本_电脑计算机编程入门教程自学 http://jianma123.com/viewthread.aardio?threadid=431 本文 ...
- python验证码识别
关于利用python进行验证码识别的一些想法 用python加“验证码”为关键词在baidu里搜一下,可以找到很多关于验证码识别的文章.我大体看了一下,主要方法有几类:一类是通过对图片进行处 理,然后 ...
- Python 验证码识别-- tesserocr
Python 验证码识别-- tesserocr tesserocr 是 Python 的一个 OCR 识别库 ,但其实是对 tesseract 做的一 层 Python API 封装,所以它的核心是 ...
- 【转】Python验证码识别处理实例
原文出处: 林炳文(@林炳文Evankaka) 一.准备工作与代码实例 1.PIL.pytesser.tesseract (1)安装PIL:下载地址:http://www.pythonware.com ...
- Python 验证码识别(别干坏事哦...)
关于python验证码识别库,网上主要介绍的为pytesser及pytesseract,其实pytesser的安装有一点点麻烦,所以这里我不考虑,直接使用后一种库. python验证码识别库安装 要安 ...
- Windows平台python验证码识别
参考: http://oatest.dragonbravo.com/Authenticate/SignIn?returnUrl=%2f http://drops.wooyun.org/tips/631 ...
- python验证码识别(2)极验滑动验证码识别
目录 一:极验滑动验证码简介 二:极验滑动验证码识别思路 三:极验验证码识别 一:极验滑动验证码简介 近些年来出现了一些新型验证码,不想旧的验证码对人类不友好,但是这种验证码对于代码来说识别难度上 ...
- Python验证码识别处理实例(转载)
版权声明:本文为博主林炳文Evankaka原创文章,转载请注明出处http://blog.csdn.net/evankaka 一.准备工作与代码实例 1.PIL.pytesser.tesseract ...
- Python验证码识别处理实例(转)
一.准备工作与代码实例 1.PIL.pytesser.tesseract (1)安装PIL:下载地址:http://www.pythonware.com/products/pil/(CSDN下载) 下 ...
随机推荐
- 2、SpringBoot整合之SpringBoot整合servlet
SpringBoot整合servlet 一.创建SpringBoot项目,仅选择Web模块即可 二.在POM文件中添加依赖 <!-- 添加servlet依赖模块 --> <depen ...
- vsftpd.conf配置文件详解
1.默认配置: 1>允许匿名用户和本地用户登陆. anonymous_enable=YES local_enable=YES 2>匿名用户使用的登陆名为ftp或anonymous,口令为空 ...
- 一分钟了解JDBC的构成和原理
JDBC(一组接口组成) : 形式如下: 1:JDBC-ODBC桥接技术(100%不用) 在Windows中有ODBC技术,ODBC指的是开放数据库链接 是由微软提供的数据库连接应用,而Java可以利 ...
- Docker安装MySQL8.0
环境 CentOS 7.5 Docker 1.13.1 MySQL 8.0.16 安装 拉取镜像 默认拉取最新版本的镜像 $ docker pull mysql 如果要指定版本,使用下面的命令 $ d ...
- Defense:MS08067漏洞攻防渗透实验
实验环境 Windows XP SP3 IP:172.16.211.129 百度网盘:https://pan.baidu.com/s/1dbBGdkM6aDzXcKajV47zBw 靶机环境 ...
- Springboot:Springboot+Swagger2集成服务
Swagger是一个规范和完整的框架,用于生成.描述.调用和可视化 RESTful 风格的 Web 服务.总体目标是使客户端和文件系统作为服务器以同样的速度来更新.文件的方法,参数和模型紧密集成到服务 ...
- java:替换List集合中的某个任意值(对象)
定义replaceAll方法,将传入的新值替换集合中的老值(list,old,new) private static <E> void replaceAll(List<E> l ...
- iOS基于AVFoundation实现朗读文字
iOS基于AVFoundation实现朗读文字 1.心理建设 众所周知AVFoundation的朗读是个智障语气,所以想不花钱就只能忍着. 2.speechManager @import AVFoun ...
- 华为交换机5855设置ssh
配置思路 配置交换机密钥对 #生成RSA密钥对 设置vty登陆用户界面的认证方式为AAA认证 #设置远程认证方式 设置aaa用户信息 #本地用户名和密码 #本地用户服务类型 #本地用户授权等级 设置s ...
- 访问其他人的vue项目
本地git拉取项目 git clone git@git路径 项目clone到本地后 1.工具命令行切换到此项目路径下 cd 路径名称 2.首先要下载项目所需要的资源包 npm install 这里会 ...