html css+div+jquery实现图片轮播
一直想自己动手做一个图片轮播的控件,查查网上的资料大多引用已经做好的组件,其原理算法不是很清楚,于是自己用jquery写了一个.先看下效果图:

主要界面实现思路如下:
1.新建一个div宽度为100%,flex布局,主要是为了网页主体内容居中,和留白部分的进一步处理
2.新建div,为网页的内容宽度,设置为1200px
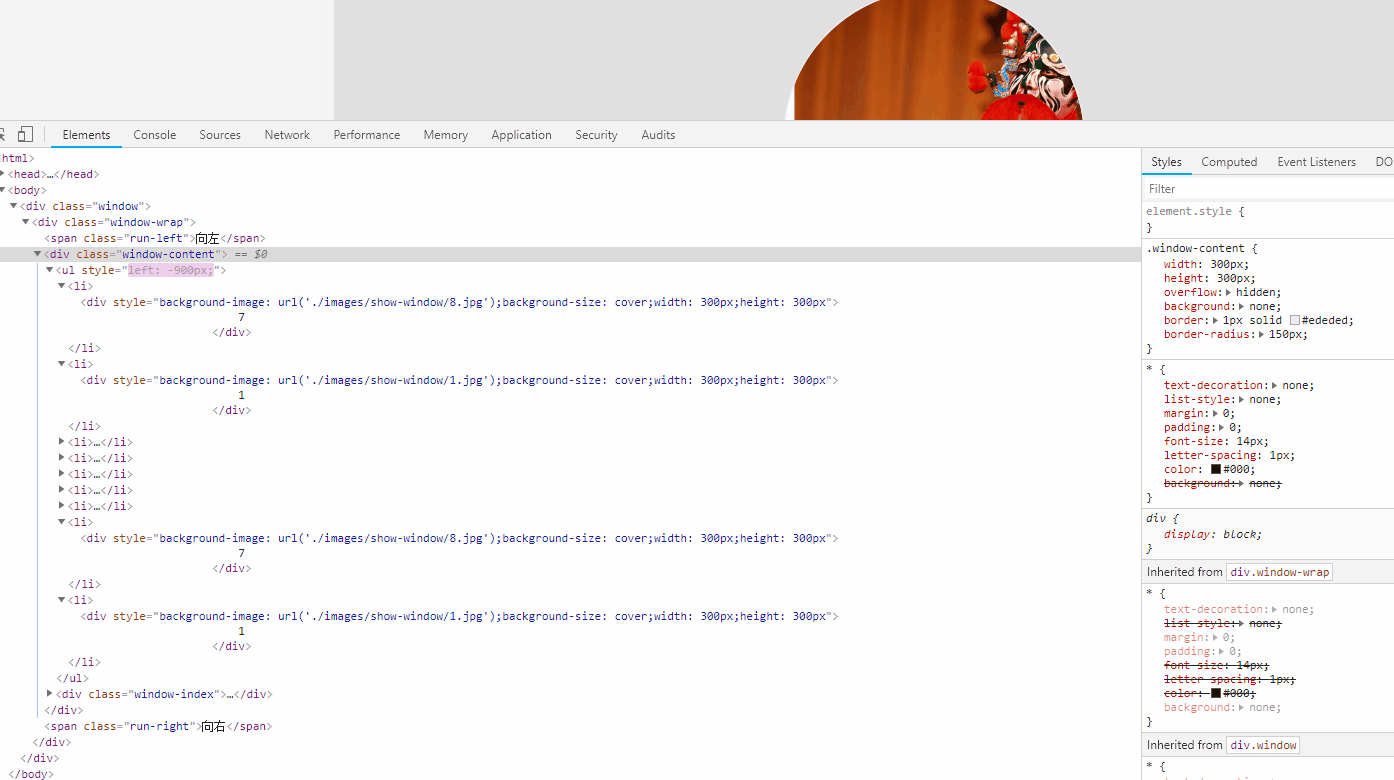
3.图片轮播窗口,宽度,高度为300px,overflow:hidden
4.轮播窗口新建ul>li>img,ul采用position:relative
5.li样式 border-radius:150px主要是制作圆形视图
6.同ul同级,新建div>span 当前图片页码,position:relative,span border-radius:10px,圆形
7.将当前图片页码定位到图片视窗内
图片轮播设计思路:
   1.在录播窗口以jq动画 animate移动ul

   2.在ul的起始位置插入(insertBefore)最后一个元素的clone,$('ul li:nth-child(7)').clone(),在ul的最后一个追加(insetAfter)

     第一个元素$('ul li:nth-child(7)').clone(),这时比如,list中有7个元素,经过追加之后,有9个元素,(这么做主要是为了ul在向左或

     者向右移动之后,视觉上一连续切换到最后一个,或者第一个)

   3.点击向左/向右,向左向右每次移动一个img的宽度(300px)

   3.如果当前展示的img是第一个,再向左移动一个,连续展示我们插入的最后一个元素,然后迅速将ul定位到img的倒数第二个元素,反之定位到第二

     个元素,这样就实现了一个循环轮播

   4.最后设置,展示的图片和图片页码对应的样式

   5.设计逻辑,比如点击了向左,每隔5秒自动播放的时候,也是向左播放,页码切换的时候是向左切换,自动播放也将切到向左,反之亦然
下面是页面代码:
<html>

<head>

    <meta http-equiv="content-type" content="text/html;charset=utf-8"/>

    <title>图片轮播</title>

    <script src="./javascript/jquery.min.js"></script>

    <style type="text/css">

        * {

            text-decoration: none;

            list-style: none;

            margin: 0;

            padding: 0;

            font-size: 14px;

            letter-spacing: 1px;

            color: #000;

            background: none;

        }

        .window-content ul {

            width: 5000px;

            display: flex;

            text-wrap: none;

            white-space: nowrap;

            position: relative;

        }

        .window-content ul li div {

            line-height: 300px;

        }

        .window-content ul li {

            float: left;

            border-radius: 150px 150px 150px 150px;

            overflow: hidden;

        }

        .window-content {

            width: 300px;

            height: 300px;

            overflow: hidden;

            background: none;

            border: 1px solid #ededed;

            border-radius: 150px;

        }

        .window {

            width: 100%;

            height: 340px;

            display: flex;

            align-items: center;

            justify-content: center;

            flex-direction: column;

            background: #f4f4f4;

        }

        .window-wrap {

            flex: 1;

            width: 1200px;

            display: flex;

            align-items: center;

            justify-content: center;

            flex-direction: row;

            background: #e0e0e0;

        }

        .window-index

        {

            position: relative;

            top: -19px;

            left: 101px;

            margin: -20px;

        }

        .window-index .content-index

        {

            text-align: center;

            line-height: 20px;

            font-size: 12px;

            width: 20px;

            height: 20px;

            color: black;

            display: inline-block;

            border: 1px solid antiquewhite;

            background: white;

            margin:-3px;

            border-radius: 10px;

        }

        .window-index .content-index:hover

        {

            cursor: pointer;

        }

        .selected:hover

        {

            cursor: pointer;

        }

        .selected

        {

            text-align: center;

            line-height: 20px;

            font-size: 12px;

            width: 20px;

            height: 20px;

            display: inline-block;

            border: 1px solid antiquewhite;

            margin:-3px;

            border-radius: 10px;

            background: #9e0909;

            color: white;

        }

    </style>

    <script>

        class PicMove {

            constructor() {

                //录播图片容器

                this._parent = $('.window-content ul');

                //容器中图片的起始个数

                this._elmentcount = this._parent.children().length;

                //起始第一个元素

                this._head = this._parent.children(':nth-child(1)');

                //起始最后一个元素,nth-child下标是从1开始的

                this._tail = this._parent.children(':nth-child(' + this._elmentcount + ')');

                //当前轮播窗口,图片的下标(页码)

                this._arrowflag = 1;

                //播放的方向,默认是向右

                this.isRunRight = true;

                //主要是成员函数中用到了this,为了防止发生异常,对成员函数中的this进行绑定

                this.RunLeft = this.RunLeft.bind(this);

                this.RunRight = this.RunRight.bind(this);

                this.LeftStop=this.LeftStop.bind(this);

                this.RightStop=this.RightStop.bind(this);

                this.Move=this.Move.bind(this);

                this.autoMove=this.autoMove.bind(this);

                this.auToRun=this.auToRun.bind(this);

                this.showIndex=this.showIndex.bind(this);

                //自动轮播的计时器

                this.Interval=null;

            }

            //启动自动播放

            autoMove()

            {

                //启动自动播放之前,清除掉历史的,要不然播放的速度或者次序可能会乱,整个界面只保留一个有效的计时器

                if(this.Interval) {

                    clearInterval(this.Interval);

                }

                //设置每隔5秒,左播放,或者右播放

                this.Interval=setInterval(this.auToRun,5000);

            }

            //执行向左或者向右轮播动作

            auToRun()

            {

                if(this.isRunRight===true)

                {

                    this._parent.animate({'left': '-=300px'}, 300, ()=>{

                     //动画执行完成的,回调函数使用箭头函数,主要是里面也有this,并且this期望指向当前类的实例,而不是调用环境,和在构造中bind成员函数的效果是一样的

                        //页码加

                        this._arrowflag++;

                        if (this._arrowflag > this._elmentcount) {

                            //右播放到最后一个,应该从第一个开始,所以这里瞬间定位到第二张图片的位置(第一张图片是克隆的最后一站图片),图片都是一样的,感官没有觉察

                            this._parent.css({'left': '-300px'});

                            this._arrowflag = 1;

                        }

                        //播放完成设置页码样式

                        this.showIndex();

                    });

                }

                else

                {

                       this._parent.animate({'left': '+=300px'}, 300, ()=>{

                        this._arrowflag--;

                        if (this._arrowflag < 1) {

                            this._parent.css({'left': -(300 * this._elmentcount) + 'px'});

                            this._arrowflag = this._elmentcount;

                        }

                        this.showIndex();

                    });

                }

            }

            //设置页码样式

            showIndex()

            {

                $(".selected").removeClass("selected").addClass("content-index");

                $(".content-index:nth-child("+ this._arrowflag+")").removeClass("content-index").addClass("selected");

            }

            //页面加载完成初始化,图片轮播控件

            init() {

                this._tail.clone().insertBefore(this._head);

                this._head.clone().insertAfter(this._tail);

                //初始定位到this.head元素的位置,这个是起始位置

                this._parent.css('left', '-300px');

                //向右按钮事件

                $('.run-right').click(this.RunRight);

                $('.run-left').click(this.RunLeft);

                //页码被hove,时执行的操作

                $('.content-index').hover((e)=>{

                     let thisEle=$(e.target);

                     let index=Number.parseInt(thisEle.html());

                   //这里,主要是为了测试在鼠标hover的时候,响应函数被执行了几次

                    //console.log(`${this._arrowflag}-->${index}`);

                     //视窗图片,展示指定页码的图片

                     this.Move(index);

                     //thisEle.removeClass("content-index")

                     //thisEle.addClass("selected");

                     this.showIndex();

                });

                this.showIndex();

               this.autoMove();

            }

            //这个函数主要是,向左移动一次之后,回调设置成员的值,设置初始化循环播放

            LeftStop() {

                this._arrowflag--;

                this.isRunRight = false;

                if (this._arrowflag < 1) {

                    this._parent.css({'left': -(300 * this._elmentcount) + 'px'});

                    this._arrowflag = this._elmentcount;

                }

                this.showIndex();

                this.autoMove();

            }

            //向左按钮事件,函数

            RunLeft() {

                clearInterval(this.Interval);

                this._parent.stop(true,true);

                this._parent.animate({'left': '+=300px'}, 300, this.LeftStop)

            }

//这个函数主要是,向右移动一次之后,回调设置成员的值,设置初始化循环播放,由于有this,所以这么定义

            RightStop() {

                this._arrowflag++;

                this.isRunRight = true;

                if (this._arrowflag > this._elmentcount) {

                    this._parent.css({'left': '-300px'});

                    this._arrowflag = 1;

                }

                this.autoMove();

                this.showIndex();

            }

          //向右按钮事件

            RunRight() {

                clearInterval(this.Interval);

                //鼠标hover,很快可能定义的动画还没执行完,就开始响应下一次移动,会造成混乱,这里提前结束每个动画,并且停在动画的终点

                this._parent.stop(true,true);

                this._parent.animate({'left': '-=300px'}, 300, this.RightStop)

            }

            //页码hover的时候,移动的函数

            Move(index) {

                let current=this._arrowflag;

                this._arrowflag=index;

                  if (index<current)//左移

                  {

                      this.isRunRight = false;

                      var count=current-index;

                      this._parent.stop(true,true);

                     this._parent.animate({'left': '+='+(300*count)+'px'}, 300, ()=>{

                          this.autoMove();

                      });

                      this.showIndex();

                  }

                  else if(index>current)//右移

                  {

                      this.isRunRight = true;

                      var count=index-current;

                      this._parent.stop(true,true);

                      this._parent.animate({'left': '-='+(300*count)+'px'}, 300, ()=>{

                          this.autoMove();

                          this.showIndex();

                      });

                  }

            }

        }

        $(function () {

            //页面加载完成,初始化图片轮播控件

            let picmove = new PicMove();

            picmove.init();

        });

    </script>

    <script src="javascript/jquery.transit.js"></script>

</head>

<body>

<div class="window">

    <div class="window-wrap">

        <span class="run-left">向左</span>

        <div class="window-content">

            <ul>

                <li>

                    <div style="background-image: url('./images/show-window/1.jpg');background-size: cover;width: 300px;height: 300px">

                        1

                    </div>

                </li>

                <li>

                    <div style="background-image: url('./images/show-window/3.jpg');background-size: cover;width: 300px;height: 300px">

                        2

                    </div>

                </li>

                <li>

                    <div style="background-image: url('./images/show-window/4.jpg');background-size: cover;width: 300px;height: 300px">

                        3

                    </div>

                </li>

                <li>

                    <div style="background-image: url('./images/show-window/5.jpg');background-size: cover;width: 300px;height: 300px">

                        4

                    </div>

                </li>

                <li>

                    <div style="background-image: url('./images/show-window/6.jpg');background-size: cover;width: 300px;height: 300px">

                        5

                    </div>

                </li>

                <li>

                    <div style="background-image: url('./images/show-window/7.jpg');background-size: cover;width: 300px;height: 300px">

                        6

                    </div>

                </li>

                <li>

                    <div style="background-image: url('./images/show-window/8.jpg');background-size: cover;width: 300px;height: 300px">

                        7

                    </div>

                </li>

            </ul>

            <div class="window-index">

                <span class="content-index">1</span>

                <span class="content-index">2</span>

                <span class="content-index">3</span>

                <span class="content-index">4</span>

                <span class="content-index">5</span>

                <span class="content-index">6</span>

                <span class="content-index">7</span>

            </div>

        </div>

        <span class="run-right">向右</span>

    </div>

</div>

</body>

</html>
才开是学习前端,代码有需要重构的地方,比如页码hover的逻辑,也向左向右按钮的事件代码有重复,自动轮播的时间间隔,可以拎出来单独配置,以后要改时间就改一个变量的值就可以了,flex布局在IE上不支持,没有做浏览器适配等
希望指正!
html css+div+jquery实现图片轮播的更多相关文章
- jQuery个性化图片轮播效果
jQuery个性化图片轮播效果 购物产品展示:图片轮播器<效果如下所示> 思路说明: 每隔一段时间,实现图片的自动切换及选项卡选中效果,鼠标划入图片动画停止,划出或离开动画开始 两个区域: ...
- (转)jquery实现图片轮播
<!DOCTYPE html PUBLIC "-//W3C//DTD XHTML 1.0 Transitional//EN" "http://www.w3.org/ ...
- PgwSlideshow-基于Jquery的图片轮播插件
0 PgwSlideshow简介 PgwSlideshow是一款基于Jquery的图片轮播插件,基本布局分为上下结构,上方为大图轮播区域,用户可自定义图片轮播切换的间隔时间,也可以通过单击左右方向按键 ...
- jQuery.YesShow - 图片轮播插件(带图片放大功能)
jQuery.YesShow - 图片轮播插件(带图片放大功能) 使用简单,原文件只要这样就可以了:<div id="yes"> <ul> ...
- jQuery实现图片轮播
之前有碰到过jQuery实现列表自动滚动,这次的图片轮播在原理上与之相同,只有一些细微的差别,就是需要在图片的右下角显示当前图片的序号,效果如下: 先看一看html代码,以及对应的css代码: < ...
- Javascript和jQuery WordPress 图片轮播插件, 内容滚动插件,前后切换幻灯片形式显示
用于在有限的网页空间内展示一组产品图片或者照片,同时还有非常吸引人的动画效果.本文向大家推荐12款实用的 jQuery 图片轮播效果插件,帮助你在你的项目中加入一些效果精美的图片轮播效果,希望这些插件 ...
- 原生js和jquery实现图片轮播特效
本文给大家分享的是使用原生JS和JQ两种方法分别实现相同的图片轮播特效,十分的实用,也非常方便大家对比学习原生js和jQuery,有需要的小伙伴可以参考下. 1)首先是页面的结构部分对于我这种左右切换 ...
- 原生js和jquery实现图片轮播特效(转)
本文给大家分享的是使用原生JS和JQ两种方法分别实现相同的图片轮播特效,十分的实用,也非常方便大家对比学习原生js和jQuery,有需要的小伙伴可以参考下. 1)首先是页面的结构部分对于我这种左右切换 ...
- [转]jQuery实现图片轮播效果,jQuery实现焦点新闻
本文转自:http://blog.csdn.net/tsyj810883979/article/details/8986157 效果图: 实现代码: <!DOCTYPE html> < ...
随机推荐
- WCF服务无法访问DateTime类型的解决方法
在WCF服务中,如果entity类含有DateTime类型的字段,那么接口将会被执行两次,从而出现无法访问的情况.如下图所示: 原因是WCF中DateTime无法转换成序列化JSON字符串,DateT ...
- PDF 补丁丁 0.6.0.3383 版发布(修复书签编辑器坐标定位错误的问题)
新的测试版本修复了书签编辑器坐标定位错误的问题. 另外,增加了鼠标双击关闭功能标签的功能.
- 软件测试第一次试验JUnit
一.Junit, hamcrest以及eclemma的安装 对于Junit和hamcrest的安装,我并没有从下载Junit和hamcrest相关的jar包然后通过build path导入到项目中,而 ...
- Java 自增原理
很多人都知道 i++ 和 ++i 的区别 a = i++: a = i; i = i+1; a = ++ i; i = i + 1; a = i; 但碰到 i = i ++;的时候很多人就懵了? i是 ...
- week4_1
---恢复内容开始--- _________________________________列表生成式_____________________ a = [a*2 for a in range(10) ...
- week2
三元函数: a,b,c = 1,2,3 d = a if a>b else c print(d) #list 用法: lst = [1,2,3,4,5] print(lst[0:3]) prin ...
- JavaWeb+SVN+Maven+Tomcat +jenkins实现自动化部署
网址:https://blog.csdn.net/liyong1028826685/article/details/88289218 在日常开发项目中常见的开发模式是使用代码库来存放我们的项目例如:S ...
- java多线程面试中常见知识点
1.进程和线程 (1)进程是资源分配的最小单位,线程是程序执行的最小单位. (2)进程有自己的独立地址空间,每启动一个进程,系统就会为它分配地址空间,建立数据表来维护代码段.堆栈段和数据段,这种操作非 ...
- 【算法】单源最短路——Dijkstra
对于固定起点的最短路算法,我们称之为单源最短路算法.单源最短路算法很多,最常见的就是dijkstra算法. dijkstra主要用的是一种贪心的思想,就是说如果i...s...t...j是最短路,那么 ...
- gridview单击选中勾选框
1.Dev2005版本: gridView1.OptionsBehavior.ShowEditorOnMouseUp = false;2.Dev2013版本: gridView1.OptionsBeh ...