Gitlab完美安装【CentOS6.5安装gitlab-6.9.2】
摘要: 拆腾了几天,终于在今天找到了快速安装Gitlab的方法。CentOS6.5安装gitlab-6.9.2
参考网址:https://gitlab.com/gitlab-org/omnibus-gitlab/blob/master/README.md#installation
安装gitlab版:6.9.2
rpm发行文件名:gitlab-6.9.2_omnibus.1-1.el6.x86_64.rpm
安装步骤代码:
#sudo yum install openssh-server
#sudo yum install postfix # sendmail or exim is also OK
#sudo rpm -i gitlab-6.9.2_omnibus.1-1.el6.x86_64.rpm # this is the .rpm you downloaded
#sudo gitlab-ctl reconfigure
#sudo lokkit -s http -s ssh # open up the firewall for HTTP and SSH requests
ok!
#sudo gitlab-ctl status; #查看安装后的程序运行情况!输出如下:
run: nginx: (pid 3012) 53s; run: log: (pid 3011) 53s
run: postgresql: (pid 2857) 87s; run: log: (pid 2856) 87s
run: redis: (pid 2759) 98s; run: log: (pid 2758) 98s
run: sidekiq: (pid 2967) 60s; run: log: (pid 2966) 60s
run: unicorn: (pid 2938) 66s; run: log: (pid 2937) 66s
说明安装成功。
通过浏览器访问:http://localhost 或者 http://ip
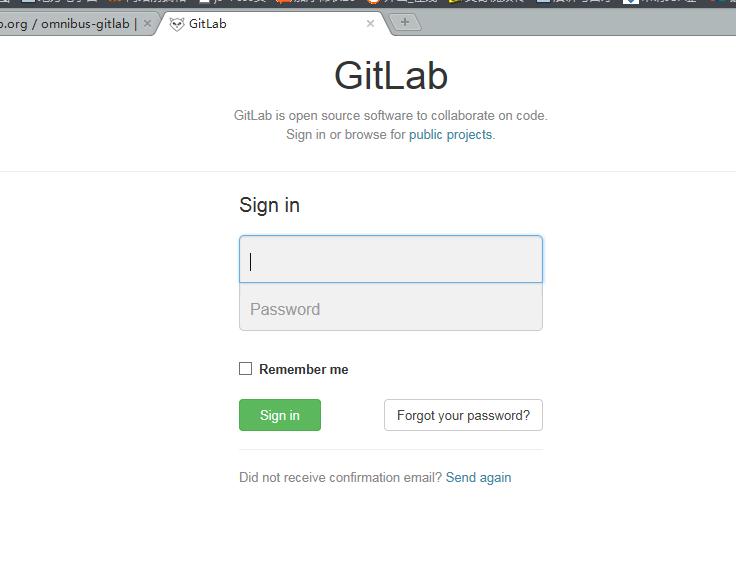
输入:root/5iveL!fe 登录!
ok,登录成功,首次登录需修改密码,我修改为:12345678,然后重新登录,就可以开始gitlab之旅了。
配置:
sudo mkdir -p /etc/gitlab
sudo touch /etc/gitlab/gitlab.rb
sudo chmod 600 /etc/gitlab/gitlab.rb
Configuring the external URL for GitLab:
向:/etc/gitlab/gitlab.rb 文件中添加:
external_url "http://gitlab.example.com"
更改配置后,执行如下命令(加载配置生效):
sudo gitlab-ctl reconfigure
服务打开、关闭、重启:
# Start all GitLab components
sudo gitlab-ctl start
# Stop all GitLab components
sudo gitlab-ctl stop
# Restart all GitLab components
sudo gitlab-ctl restart
启动好了,注意防火墙。
卸载:
# Stop gitlab and remove its supervision process
sudo gitlab-ctl uninstall
# Debian/Ubuntu
sudo dpkg -r gitlab
# Redhat/Centos
sudo rpm -e gitlab
=============================================================================================================================
官方完整安装指南:
=============================================================================================================================
GitLab Omnibus project
This project creates full-stack platform-specific downloadable packages for GitLab. For other installation options please see the GitLab project README.
Documentation version
Please make sure you are viewing the documentation for the version of omnibus-gitlab you are using. In most cases this should be the highest numbered stable branch (example shown below).
Installation
Please download the package and follow the steps below.
Ubuntu 12.04
sudo apt-get install openssh-server
sudo apt-get install postfix # sendmail or exim is also OK
sudo dpkg -i gitlab_x.y.z-omnibus-x.ubuntu.12.04_amd64.deb # this is the .deb you downloaded
sudo gitlab-ctl reconfigure
Debian 7.4
sudo apt-get install openssh-server
sudo apt-get install exim4-daemon-light
sudo dpkg -i gitlab-x.y.z.deb # this is the .deb you downloaded
sudo gitlab-ctl reconfigure
during the exim installation you may follow http://alexatnet.com/references/server-setup-debian/send-only-mail-server-with-exim to ensure you get a secure mailserver
CentOS 6.5
sudo yum install openssh-server
sudo yum install postfix # sendmail or exim is also OK
sudo rpm -i gitlab-x.y.z_omnibus-x.el6.x86_64.rpm # this is the .rpm you downloaded
sudo gitlab-ctl reconfigure
sudo lokkit -s http -s ssh # open up the firewall for HTTP and SSH requests
After installation
Run sudo gitlab-ctl status; the output should look like this:
run: nginx: (pid 972) 7s; run: log: (pid 971) 7s
run: postgresql: (pid 962) 7s; run: log: (pid 959) 7s
run: redis: (pid 964) 7s; run: log: (pid 963) 7s
run: sidekiq: (pid 967) 7s; run: log: (pid 966) 7s
run: unicorn: (pid 961) 7s; run: log: (pid 960) 7s
Your GitLab instance should reachable over HTTP at the IP or hostname of your server. You can login as an admin user with username root and password 5iveL!fe.
Common installation problems
GitLab is unreachable in my browser
Try specifying an external_url in /etc/gitlab/gitlab.rb. Also check your firewall settings; port 80 (HTTP) or 443 (HTTPS) might be closed on your GitLab server.
Reconfigure freezes at ruby_block[supervise_redis_sleep] action run
This happens when Runit has not been installed succesfully during gitlab-ctl reconfigure. The most common cause for a failed Runit installation is installing omnibus-gitlab on an unsupported platform. Solution: double check on the download page whether you downloaded a package for the correct operating system.
TCP ports for GitLab services are already taken
By default, the services in omnibus-gitlab are using the following TCP ports: Redis (6379), PostgreSQL (5432) and Unicorn (8080) listen on 127.0.0.1. Nginx listens on port 80 (HTTP) and/or 443 (HTTPS) on all interfaces.
The ports for Redis, PostgreSQL and Unicorn can be overriden in /etc/gitlab/gitlab.rb as follows:
redis['port'] = 1234
postgresql['port'] = 2345
# due to a bug https://gitlab.com/gitlab-org/omnibus-gitlab/issues/141
# you have to provide the port for gitlab shell as well,
# so the 2 following lines have to point to the same port
unicorn['port'] = 3456
gitlab_rails['internal_api_url'] = 'http://localhost:3456'
For Nginx port changes please see the section on enabling HTTPS below.
Uninstalling omnibus-gitlab
To uninstall omnibus-gitlab, preserving your data (repositories, database, configuration), run the following commands.
# Stop gitlab and remove its supervision process
sudo gitlab-ctl uninstall
# Debian/Ubuntu
sudo dpkg -r gitlab
# Redhat/Centos
sudo rpm -e gitlab
Updating
Instructions for updating your Omnibus installation and upgrading from a manual installation are in the update doc.
Starting and stopping
After omnibus-gitlab is installed and configured, your server will have a Runit service directory (runsvdir) process running that gets started at boot via /etc/inittab or the /etc/init/gitlab-runsvdir.conf Upstart resource. You should not have to deal with the runsvdir process directly; you can use the gitlab-ctl front-end instead.
You can start, stop or restart GitLab and all of its components with the following commands.
# Start all GitLab components
sudo gitlab-ctl start
# Stop all GitLab components
sudo gitlab-ctl stop
# Restart all GitLab components
sudo gitlab-ctl restart
Note that on a single-core server it may take up to a minute to restart Unicorn and Sidekiq. Your GitLab instance will give a 502 error until Unicorn is up again.
It is also possible to start, stop or restart individual components.
sudo gitlab-ctl restart sidekiq
Unicorn supports zero-downtime reloads. These can be triggered as follows:
sudo gitlab-ctl hup unicorn
Note that you cannot use a Unicorn reload to update the Ruby runtime.
Configuration
Creating the gitlab.rb configuration file
sudo mkdir -p /etc/gitlab
sudo touch /etc/gitlab/gitlab.rb
sudo chmod 600 /etc/gitlab/gitlab.rb
Below several examples are given for settings in /etc/gitlab/gitlab.rb. Please restart each time you made a change.
Configuring the external URL for GitLab
In order for GitLab to display correct repository clone links to your users it needs to know the URL under which it is reached by your users, e.g. http://gitlab.example.com. Add the following line to /etc/gitlab/gitlab.rb:
external_url "http://gitlab.example.com"
Run sudo gitlab-ctl reconfigure for the change to take effect.
Storing Git data in an alternative directory
By default, omnibus-gitlab stores Git repository data in /var/opt/gitlab/git-data. You can change this location by adding the following line to /etc/gitlab/gitlab.rb.
git_data_dir "/mnt/nas/git-data"
Run sudo gitlab-ctl reconfigure for the change to take effect.
Changing the name of the Git user / group
By default, omnibus-gitlab uses the user name git for Git gitlab-shell login, ownership of the Git data itself, and SSH URL generation on the web interface. Similarly, git group is used for group ownership of the Git data. You can change the user and group by adding the following lines to /etc/gitlab/gitlab.rb.
user['username'] = "gitlab"
user['group'] = "gitlab"
Run sudo gitlab-ctl reconfigure for the change to take effect.
Setting up LDAP sign-in
If you have an LDAP directory service such as Active Directory, you can configure GitLab so that your users can sign in with their LDAP credentials. Add the following to /etc/gitlab/gitlab.rb, edited for your server.
# These settings are documented in more detail at
# https://gitlab.com/gitlab-org/gitlab-ce/blob/master/config/gitlab.yml.example#L118
gitlab_rails['ldap_enabled'] = true
gitlab_rails['ldap_host'] = 'hostname of LDAP server'
gitlab_rails['ldap_port'] = 389
gitlab_rails['ldap_uid'] = 'sAMAccountName'
gitlab_rails['ldap_method'] = 'plain' # 'ssl' or 'plain'
gitlab_rails['ldap_bind_dn'] = 'CN=query user,CN=Users,DC=mycorp,DC=com'
gitlab_rails['ldap_password'] = 'query user password'
gitlab_rails['ldap_allow_username_or_email_login'] = true
gitlab_rails['ldap_base'] = 'DC=mycorp,DC=com'
# GitLab Enterprise Edition only
gitlab_rails['ldap_group_base'] = '' # Example: 'OU=groups,DC=mycorp,DC=com'
gitlab_rails['ldap_user_filter'] = '' # Example: '(memberOf=CN=my department,OU=groups,DC=mycorp,DC=com)'
Run sudo gitlab-ctl reconfigure for the LDAP settings to take effect.
Enable HTTPS
By default, omnibus-gitlab runs does not use HTTPS. If you want to enable HTTPS you can add the following line to /etc/gitlab/gitlab.rb.
external_url "https://gitlab.example.com"
Redirect HTTP requests to HTTPS.
external_url "https://gitlab.example.com"
nginx['redirect_http_to_https'] = true
Change the default port and the ssl certificate locations.
external_url "https://gitlab.example.com:2443"
nginx['ssl_certificate'] = "/etc/gitlab/ssl/gitlab.crt"
nginx['ssl_certificate_key'] = "/etc/gitlab/ssl/gitlab.key"
Create the default ssl certifcate directory and add the files:
sudo mkdir -p /etc/gitlab/ssl && sudo chmod 700 /etc/gitlab/ssl
sudo cp gitlab.example.com.crt gitlab.example.com.key /etc/gitlab/ssl/
# run lokkit to open https on the firewall
sudo lokkit -s https
# if you are using a non standard https port
sudo lokkit -p 2443:tcp
Run sudo gitlab-ctl reconfigure for the change to take effect.
Changing gitlab.yml settings
Some of GitLab's features can be customized through gitlab.yml. If you want to change a gitlab.yml setting with omnibus-gitlab, you need to do so via /etc/gitlab/gitlab.rb. The translation works as follows.
In gitlab.yml, you will find structure like this:
production: &base
gitlab:
default_projects_limit: 10
In gitlab.rb, this translates to:
gitlab_rails['gitlab_default_projects_limit'] = 10
What happens here is that we forget about production: &base, and join gitlab: with default_projects_limit: into gitlab_default_projects_limit. Note that not all gitlab.yml settings can be changed via gitlab.rb yet; see the gitlab.yml ERB template. If you think an attribute is missing please create a merge request on the omnibus-gitlab repository.
Run sudo gitlab-ctl reconfigure for changes in gitlab.rb to take effect.
Do not edit the generated file in /var/opt/gitlab/gitlab-rails/etc/gitlab.yml since it will be overwritten on the next gitlab-ctl reconfigure run.
Specify numeric user and group identifiers
Omnibus-gitlab creates users for GitLab, PostgreSQL and Redis. You can specify the numeric identifiers for these users in /etc/gitlab/gitlab.rb as follows.
user['uid'] = 1234
user['gid'] = 1234
postgresql['uid'] = 1235
postgresql['gid'] = 1235
redis['uid'] = 1236
redis['gid'] = 1236
Storing user attachments on Amazon S3
Instead of using local storage you can also store the user attachments for your GitLab instance on Amazon S3.
This currently only works if you are packaging a forked version of GitLab.
# /etc/gitlab/gitlab.rb
gitlab_rails['aws_enable'] = true
gitlab_rails['aws_access_key_id'] = 'AKIA1111111111111UA'
gitlab_rails['aws_secret_access_key'] = 'secret'
gitlab_rails['aws_bucket'] = 'my_gitlab_bucket'
gitlab_rails['aws_region'] = 'us-east-1'
Sending application email via SMTP
If you would rather send email via an SMTP server instead of via Sendmail, add the following configuration information to /etc/gitlab/gitlab.rb and run gitlab-ctl reconfigure.
gitlab_rails['smtp_enable'] = true
gitlab_rails['smtp_address'] = "smtp.server"
gitlab_rails['smtp_port'] = 456
gitlab_rails['smtp_user_name'] = "smtp user"
gitlab_rails['smtp_password'] = "smtp password"
gitlab_rails['smtp_domain'] = "example.com"
gitlab_rails['smtp_authentication'] = "login"
gitlab_rails['smtp_enable_starttls_auto'] = true
Omniauth (Google, Twitter, GitHub login)
Omniauth configuration is documented on doc.gitlab.com. To effect the necessary changes in gitlab.yml, use the following syntax in /etc/gitlab/gitlab.rb. Note that the providers are specified as an array of Ruby hashes.
gitlab_rails['omniauth_enabled'] = true
gitlab_rails['omniauth_providers'] = [
{
"name" => "google_oauth2",
"app_id" => "YOUR APP ID",
"app_secret" => "YOUR APP SECRET",
"args" => { "access_type" => "offline", "approval_prompt" => "" }
}
]
Backups
Creating an application backup
To create a backup of your repositories and GitLab metadata, run the following command.
sudo gitlab-rake gitlab:backup:create
This will store a tar file in /var/opt/gitlab/backups. The filename will look like 1393513186_gitlab_backup.tar, where 1393513186 is a timestamp.
Scheduling a backup
To schedule a cron job that backs up your repositories and GitLab metadata, use the root user:
sudo su -
crontab -e
There, add the following line to schedule the backup for everyday at 2 AM:
0 2 * * * /opt/gitlab/bin/gitlab-rake gitlab:backup:create
Restoring an application backup
We will assume that you have installed GitLab from an omnibus package and run sudo gitlab-ctl reconfigure at least once.
First make sure your backup tar file is in /var/opt/gitlab/backups.
sudo cp 1393513186_gitlab_backup.tar /var/opt/gitlab/backups/
Next, restore the backup by running the restore command. You need to specify the timestamp of the backup you are restoring.
# Stop processes that are connected to the database
sudo gitlab-ctl stop unicorn
sudo gitlab-ctl stop sidekiq
# DROP THE CURRENT DATABASE; workaround for a Postgres backup restore bug in GitLab 6.6
sudo -u gitlab-psql /opt/gitlab/embedded/bin/dropdb gitlabhq_production
# This command will overwrite the contents of your GitLab database!
sudo gitlab-rake gitlab:backup:restore BACKUP=1393513186
# Start GitLab
sudo gitlab-ctl start
If there is a GitLab version mismatch between your backup tar file and the installed version of GitLab, the restore command will abort with an error. Install a package for the required version and try again.
Invoking Rake tasks
To invoke a GitLab Rake task, use gitlab-rake. For example:
sudo gitlab-rake gitlab:check
Contrary to with a traditional GitLab installation, there is no need to change the user or the RAILS_ENV environment variable; this is taken care of by the gitlab-rake wrapper script.
Directory structure
Omnibus-gitlab uses four different directories.
/opt/gitlab holds application code for GitLab and its dependencies.
/var/opt/gitlab holds application data and configuration files that gitlab-ctl reconfigure writes to.
/etc/gitlab holds configuration files for omnibus-gitlab. These are the only files that you should ever have to edit manually.
/var/log/gitlab contains all log data generated by components of omnibus-gitlab.
Starting a Rails console session
If you need access to a Rails production console for your GitLab installation you can start one with the command below. Please be warned that it is very easy to inadvertently modify, corrupt or destroy data from the console.
sudo /opt/gitlab/bin/gitlab-rails console
This will only work after you have run gitlab-ctl reconfigure at least once.
Using a MySQL database management server (Enterprise Edition only)
If you want to use MySQL and are using the GitLab Enterprise Edition packages please do the following:
Important note: if you are connecting omnibus-gitlab to an existing GitLab database you should create a backup before attempting this procedure.
Create a user and database for GitLab
First, set up your database server according to the upstream GitLab instructions. If you want to keep using an existing GitLab database you can skip this step.
Configure omnibus-gitlab to connect to it
Next, we add the following settings to /etc/gitlab/gitlab.rb.
# Disable the built-in Postgres
postgresql['enable'] = false
# Fill in the values for database.yml
gitlab_rails['db_adapter'] = 'mysql2'
gitlab_rails['db_encoding'] = 'utf8'
gitlab_rails['db_host'] = '127.0.0.1'
gitlab_rails['db_port'] = '3306'
gitlab_rails['db_username'] = 'git'
gitlab_rails['db_password'] = 'password'
Parameters such as db_adapter correspond to adapter in database.yml; see the upstream GitLab for a MySQL configuration example. We remind you that /etc/gitlab/gitlab.rb should have file permissions 0600 because it contains plaintext passwords.
Run sudo gitlab-ctl reconfigure for the change to take effect.
Seed the database (fresh installs only)
Omnibus-gitlab will not automatically seed your external database. Run the following command to import the schema and create the first admin user:
sudo gitlab-rake gitlab:setup
This is a destructive command; do not run it on an existing database!
Using a non-packaged PostgreSQL database management server
If you do do not want to use the packaged Postgres server you can configure an external one similar to configuring a MySQL server (shown above). Configuring a PostgreSQL server is possible both with GitLab Community Edition and Enterprise Edition packages. Please see the upstream GitLab for a PostgreSQL configuration example.
Building your own package
See the separate build documentation.
Running a custom GitLab version
It is not recommended to make changes to any of the files in /opt/gitlab after installing omnibus-gitlab: they will either conflict with or be overwritten by future updates. If you want to run a custom version of GitLab you can build your own package or use another installation method.
Acknowledgments
Gitlab完美安装【CentOS6.5安装gitlab-6.9.2】的更多相关文章
- 安装centos6及安装redhat6后的配置
一.安装centos6 在引导到镜像后,选择: 我选择第二个,使用基本的显卡驱动安装系统 #第一个也是可以选的(安装或升级现有的系统) 之后,与 RHEL5 同样,使用光盘引导安装,系统会提示我们是否 ...
- 转:VmWare下安装CentOS6图文安装教程
文章来自于:http://www.cnblogs.com/seesea125/archive/2012/02/25/2368255.html 查看文章索引请通过http://www.cnblogs.c ...
- (转)VmWare下安装CentOS6图文安装教程
转自:http://www.cnblogs.com/seesea125/archive/2012/02/25/2368255.html 第一次使用VmWare和CentOS6,中间遇到不少问题,记性不 ...
- VmWare下安装CentOS6图文安装教程
本教程使用的liunx系统(CentOS6)下载地址:http://download.csdn.net/download/yichen01010/10016202 一 先安装VMware. 双击安装文 ...
- CentOS6.8 安装 Oracle11.2.0.4
1. 安装操作系统 安装的时候选择中文+英文支持 注意分区: swap sda盘做系统盘 sdb盘做数据盘 配置完成后的服务器分区路径信息: [root@dbserver ~]# df -h File ...
- git\CentOS6.5中gitlab安装教程
一.Git 起源: Git是一个开源的分布式版本控制系统,用于敏捷高效地处理任何或小或大的项目. Git 是 Linus Torvalds 为了帮助管理 Linux 内核开发而开发的一个开放源码的版本 ...
- Centos6.5 安装gitlab 并使用自带的nginx
Centos6.5 安装gitlab 并使用自带的nginx 1.安装依赖 yum -y install policycoreutils openssh-server openssh-clients ...
- CentOS6.5 安装gitlab以及gitolite迁移gitlab
CentOS6.5 安装gitlab以及gitolite迁移gitlab gitlab 的安装使用以及数据结构 安装 环境: CentOS6.5 基于 nignx + unicorn 搭建的应用环境, ...
- centos6.8 安装gitlab记录
sudo yum install -y curl policycoreutils-python openssh-server cronie sudo lokkit -s http -s ssh sud ...
随机推荐
- IO多路复用概念性
sellect.poll.epoll三者的区别 先来了解一下什么是进程切换 为了控制进程的执行,内核必须有能力挂起正在CPU上运行的进程,并恢复以前挂起的某个进程的执行,这种行为为进程的切换,任务切换 ...
- Android自定义九宫格图案解锁
转自: http://blog.csdn.net/shineflowers/article/details/50408350
- 以 Console 方式运行、调试、编译 .Net 编写的 Windows 服务
经常看到一些人在调试 Windows 服务时,很执著的在附加进程后调试!其实 .Net 编写的 Windows 应用程序,包括 Windows 服务都可以编译成 Console 程序!甚至于 ASP. ...
- windows server 2008 各版本号下载地址(微软官网)
前言: 微软官网上下载系统的镜像文件要远比百度网盘下载起来得更快. Windows Server 2008 32-bit Standard(标准版)
- 基于Visual Studio Code搭建Golang开发调试环境【非转载】
由于对Docker+kubernetes的使用及持续关注,要理解这个平台的原理,势必需要对golang有一定的理解,基于此开始利用业余时间学习go,基础语法看完之后,搭建开发环境肯定是第一步,虽然能g ...
- 小公司0成本基于Pythony的单元\GUI\Web自动化\性能的几个开源软件测试工具
以下是当前流行的几款适合小公司0成本的几个开源软件测试解决方案: 1.单元测试 a.unittest :Python自带的单元测试框架 b.pyunit:Junit的Python版本 2.使用Pyho ...
- Flyout中ComboBox失效
参见这篇文章:https://blogs.msdn.microsoft.com/wsdevsol/2016/09/14/combobox-from-an-appbarbutton-loses-mous ...
- js 中关联数组
以前都不知道这种写法叫做关联数组. 何为关联数组呢.通常的数组在填充时会隐式或者显示指定数组下标,但JS中数组可以以名字的形式为元素赋值,这就形成了关联数组. 例子 var p={ name:'dai ...
- Java中如何把一下字符串转换成map
首先,你先确认你的字符串是否是json格式的,如果是json格式,那你可以使用Gson.jar或json-lib-xx-jdk.jar两个包来自动解析解析. 使用Gson更简单些,只需要导入一个包就可 ...
- 数字与字母混合生成流水号规则--ASP实现
最近遇到一个比较奇葩的事情,自己所负责的一个系统出现一个流水号用完的问题:正常情况下,流水号用完应该增加多位来解决这个问题.鉴于各种因素,最后决定:位数不变,增加字母进去,当数字用完后,会出现字母,而 ...