snowflake机器标识自动绑定
首先附上snowflake源码
package com.yunyihenkey.common.idworker;

/**

 * Twitter_Snowflake<br>

 * SnowFlake的结构如下(每部分用-分开):<br>

 * 0 - 0000000000 0000000000 0000000000 0000000000 0 - 00000 - 00000 -

 * 000000000000 <br>

 * 1位标识,由于long基本类型在Java中是带符号的,最高位是符号位,正数是0,负数是1,所以id一般是正数,最高位是0<br>

 * 41位时间截(毫秒级),注意,41位时间截不是存储当前时间的时间截,而是存储时间截的差值(当前时间截 - 开始时间截)

 * 得到的值),这里的的开始时间截,一般是我们的id生成器开始使用的时间,由我们程序来指定的(如下下面程序IdWorker类的startTime属性)。41位的时间截,可以使用69年,年T

 * = (1L << 41) / (1000L * 60 * 60 * 24 * 365) = 69<br>

 * 10位的数据机器位,可以部署在1024个节点,包括5位datacenterId和5位workerId<br>

 * 12位序列,毫秒内的计数,12位的计数顺序号支持每个节点每毫秒(同一机器,同一时间截)产生4096个ID序号<br>

 * 加起来刚好64位,为一个Long型。<br>

 * SnowFlake的优点是,整体上按照时间自增排序,并且整个分布式系统内不会产生ID碰撞(由数据中心ID和机器ID作区分),并且效率较高,经测试,SnowFlake每秒能够产生26万ID左右。

 */

public class SnowflakeIdWorker {

    /** 开始时间截 (2018-01-01) */

    public static final long twepoch = 1514736000000L;

    /** 机器id所占的位数 */

    public static final long workerIdBits = 5L;

    /** 数据标识id所占的位数 */

    public static final long datacenterIdBits = 5L;

    /** 支持的最大机器id,结果是31 (这个移位算法可以很快的计算出几位二进制数所能表示的最大十进制数) */

    public static final long maxWorkerId = -1L ^ (-1L << workerIdBits);

    /** 支持的最大数据标识id,结果是31 */

    public static final long maxDatacenterId = -1L ^ (-1L << datacenterIdBits);

    /** 序列在id中占的位数 */

    public static final long sequenceBits = 12L;

    /** 机器ID向左移12位 */

    public static final long workerIdShift = sequenceBits;

    /** 数据标识id向左移17位(12+5) */

    public static final long datacenterIdShift = sequenceBits + workerIdBits;

    /** 时间截向左移22位(5+5+12) */

    public static final long timestampLeftShift = sequenceBits + workerIdBits + datacenterIdBits;

    /** 生成序列的掩码,这里为4095 (0b111111111111=0xfff=4095) */

    public static final long sequenceMask = -1L ^ (-1L << sequenceBits);

    // ==============================Fields===========================================

    /** 工作机器ID(0~31) */

    private long workerId;

    /** 数据中心ID(0~31) */

    private long datacenterId;

    /** 毫秒内序列(0~4095) */

    private long sequence = 0L;

    /** 上次生成ID的时间截 */

    private long lastTimestamp = -1L;

    // ==============================Constructors=====================================

    /**

     * 构造函数

     *

     * @param workerId

     *            工作ID (0~31)

     * @param datacenterId

     *            数据中心ID (0~31)

     */

    public SnowflakeIdWorker(long workerId, long datacenterId) {

        if (workerId > maxWorkerId || workerId < 0) {

            throw new IllegalArgumentException(

                    String.format("worker Id can't be greater than %d or less than 0", maxWorkerId));

        }

        if (datacenterId > maxDatacenterId || datacenterId < 0) {

            throw new IllegalArgumentException(

                    String.format("datacenter Id can't be greater than %d or less than 0", maxDatacenterId));

        }

        this.workerId = workerId;

        this.datacenterId = datacenterId;

    }

    // ==============================Methods==========================================

    /**

     * 获得下一个ID (该方法是线程安全的)

     *

     * @return SnowflakeId

     */

    public synchronized long nextId() {

        long timestamp = timeGen();

        // 如果当前时间小于上一次ID生成的时间戳,说明系统时钟回退过这个时候应当抛出异常

        if (timestamp < lastTimestamp) {

            throw new RuntimeException(String.format(

                    "Clock moved backwards.  Refusing to generate id for %d milliseconds", lastTimestamp - timestamp));

        }

        // 如果是同一时间生成的,则进行毫秒内序列

        if (lastTimestamp == timestamp) {

            sequence = (sequence + 1) & sequenceMask;

            // 毫秒内序列溢出

            if (sequence == 0) {

                // 阻塞到下一个毫秒,获得新的时间戳

                timestamp = tilNextMillis(lastTimestamp);

            }

        }

        // 时间戳改变,毫秒内序列重置

        else {

            sequence = 0L;

        }

        // 上次生成ID的时间截

        lastTimestamp = timestamp;

        // 移位并通过或运算拼到一起组成64位的ID

        return ((timestamp - twepoch) << timestampLeftShift) //

                | (datacenterId << datacenterIdShift) //

                | (workerId << workerIdShift) //

                | sequence;

    }

    /**

     * 阻塞到下一个毫秒,直到获得新的时间戳

     *

     * @param lastTimestamp

     *            上次生成ID的时间截

     * @return 当前时间戳

     */

    protected long tilNextMillis(long lastTimestamp) {

        long timestamp = timeGen();

        while (timestamp <= lastTimestamp) {

            timestamp = timeGen();

        }

        return timestamp;

    }

    /**

     * 返回以毫秒为单位的当前时间

     *

     * @return 当前时间(毫秒)

     */

    protected long timeGen() {

        return System.currentTimeMillis();

    }

    // ==============================RegistrationCodeUtil=============================================

    /** 测试 */

    public static void main(String[] args) {

        SnowflakeIdWorker idWorker = new SnowflakeIdWorker(0, 0);

        for (int i = 0; i < 1000; i++) {

            long id = idWorker.nextId();

            // System.out.println(Long.toBinaryString(id));

            System.out.println(id);

        }

    }

}
SnowflakeIdWorker.java
SnowflakeIdWorker的实例化需要两个参数。构造方法为SnowflakeIdWorker(long workerId, long datacenterId) ,在分布式环境下需要去实例化该对象的时候,那么就需要进行配置机器对应的workerId和datacenterId。通过数据库建立绑定关系是很好的解决办法,网上又有人说用可以用zookeeper实现。这里我只讲一下数据库绑定workerId和datacenterId。最初是通过手动配置数据库来绑定机器,现在已经使用自动化绑定机器。
以下是自动绑定的配置
package com.yunyihenkey.auth.service.util.springvo;

import java.net.Inet4Address;

import java.net.InetAddress;

import java.net.NetworkInterface;

import java.util.Date;

import java.util.Enumeration;

import java.util.LinkedHashSet;

import java.util.List;

import javax.annotation.PostConstruct;

import javax.xml.bind.DatatypeConverter;

import org.apache.commons.lang3.StringUtils;

import org.springframework.beans.factory.annotation.Autowired;

import org.springframework.beans.factory.annotation.Value;

import org.springframework.context.annotation.Bean;

import org.springframework.context.annotation.Configuration;

import org.springframework.data.redis.core.RedisTemplate;

import com.yunyihenkey.basedao.malldb.basemapper.MallSnowflakeDatacenterBaseMapper;

import com.yunyihenkey.basedao.malldb.basevo.MallSnowflakeDatacenter;

import com.yunyihenkey.basedao.malldb.commonMapper.MallSnowflakeDatacenterMapper;

import com.yunyihenkey.common.constant.redis.BaseRedisConstants;

import com.yunyihenkey.common.idworker.SnowflakeIdWorker;

import com.yunyihenkey.common.utils.LogUtils;

import com.yunyihenkey.framework.redis.base.config.utils.RedisLock;

@Configuration

public class IdWorkerConfig {

    /** workerId和datacenterId最大长度,(注意这里不是下标) */

    private static final long WORKERID_MAX_SIZE = 32;

    /** id绑定最大容量 */

    private static final long ID_ALL_SIZE = WORKERID_MAX_SIZE * WORKERID_MAX_SIZE;

    /** 应用名,避免同一台服务器两个app都是用id生成器导致冲突 */

    private @Value("${server.servlet.context-path}") String contextPath;

    @Autowired

    private MallSnowflakeDatacenterBaseMapper mallSnowflakeDatacenterBaseMapper;

    @Autowired

    private MallSnowflakeDatacenterMapper mallSnowflakeDatacenterMapper;

    @Autowired

    private RedisTemplate<Object, Object> redisTemplate;

    @PostConstruct

    private void init() {

        // 去除首尾的/

        contextPath = StringUtils.strip(contextPath, "/");

    }

    @Bean

    public SnowflakeIdWorker configIdWorker() throws Exception {

        // 0-31

        Long workerId = null;

        Long datacenterId = null;

        LinkedHashSet<String> localMacAddrIPv4Set = getLocalMacAddrIPv4AppendStr(contextPath);

        // 查询绑定的mac地址

        MallSnowflakeDatacenter mallSnowflakeDatacenter = mallSnowflakeDatacenterMapper

                .selectOneByMacAddress(localMacAddrIPv4Set);

        if (mallSnowflakeDatacenter != null) {

            long[] workerIdAndDatecenterId = idToWorkerIdAndDatecenterId(mallSnowflakeDatacenter.getId());

            workerId = workerIdAndDatecenterId[0];

            datacenterId = workerIdAndDatecenterId[1];

            String macAddress = mallSnowflakeDatacenter.getMacUniqueAddress();

            LogUtils.getLogger()

                    .warn(LogUtils.getString("******************************************id生成器已经绑定mac地址=", macAddress,

                            "******************************************将使用workerId=", workerId, ",datacenterId=",

                            datacenterId));

            mallSnowflakeDatacenterBaseMapper.updateByPrimaryKeySelective(new MallSnowflakeDatacenter(

                    mallSnowflakeDatacenter.getId(), null, InetAddress.getLocalHost().getHostName(), null, new Date()));

        }

        if (workerId == null || datacenterId == null) {

            // 未绑定到数据中心!!!!!!!!!!!!自动注册绑定机器//加锁

            // 获取锁

            RedisLock lock = new RedisLock(redisTemplate, BaseRedisConstants.getInsertSnowflakeLockKey());

            try {

                if (lock.lock()) {

                    // 需要加锁的代码

                    List<Long> allIds = mallSnowflakeDatacenterMapper.selectAllId();

                    // 找出空闲位置id

                    Long insertId = null;

                    if (allIds == null || allIds.isEmpty()) {

                        insertId = 1L;

                    } else {

                        for (int i = 1; i <= ID_ALL_SIZE; i++) {

                            if (allIds.size() >= i && allIds.get(i - 1) == i) {

                                continue;

                            } else {

                                insertId = (long) i;

                                break;

                            }

                        }

                    }

                    if (insertId == null) {

                        throw new RuntimeException("Snowflake!!!机器绑定已被占满!!!!");

                    }

                    long[] workerIdAndDatecenterId = idToWorkerIdAndDatecenterId(insertId);

                    // 绑定机器id

                    mallSnowflakeDatacenterBaseMapper

                            .insert(new MallSnowflakeDatacenter(insertId, localMacAddrIPv4Set.iterator().next(),

                                    InetAddress.getLocalHost().getHostName(), "", new Date()));

                    workerId = workerIdAndDatecenterId[0];

                    datacenterId = workerIdAndDatecenterId[1];

                } else {

                    throw new RuntimeException("获取redis锁超时,超时!!!key=" + BaseRedisConstants.getInsertSnowflakeLockKey());

                }

            } catch (InterruptedException e) {

                throw new RuntimeException("获取id生成器插入锁异常!!!", e);

            } finally {

                lock.unlock();

            }

        }

        return new SnowflakeIdWorker(workerId, datacenterId);

    }

    private long[] idToWorkerIdAndDatecenterId(Long id) {

        long workerId;

        long datacenterId;

        workerId = id / WORKERID_MAX_SIZE;

        datacenterId = id - workerId * WORKERID_MAX_SIZE - 1;

        return new long[] { workerId, datacenterId };

    }

    /**

     *

     * @desc 获取本机所有IPV4的mac地址

     * @auth wulm

     * @date 2018年5月14日 下午2:34:10

     * @return

     * @throws Exception

     */

    public static LinkedHashSet<String> getLocalMacAddrIPv4AppendStr(String appName) throws Exception {

        LinkedHashSet<String> macSet = new LinkedHashSet<>();

        LinkedHashSet<String> ipSet = new LinkedHashSet<>();

        Enumeration<NetworkInterface> networkInterfaces = NetworkInterface.getNetworkInterfaces();

        while (networkInterfaces.hasMoreElements()) {

            NetworkInterface networkInterface = networkInterfaces.nextElement();

            Enumeration<InetAddress> inetAddresses = networkInterface.getInetAddresses();

            byte[] mac = networkInterface.getHardwareAddress();

            if (mac != null && mac.length > 0) {

                while (inetAddresses.hasMoreElements()) {

                    InetAddress inetAddress = inetAddresses.nextElement();

                    if (inetAddress != null && inetAddress instanceof Inet4Address) {// IPV4

                        macSet.add(DatatypeConverter.printHexBinary(mac) + "-" + appName);

                        ipSet.add(inetAddress.getHostAddress());

                        break;

                    }

                }

            }

        }

        LogUtils.getLogger().warn(LogUtils.getString("******************************************本机所有IPV4网卡mac地址为",

                macSet, "******************************************mac地址对应ip地址为", ipSet));

        return macSet;

    }

}
IdWorkerConfig.java
所需的文件:
package com.yunyihenkey.basedao.malldb.commonMapper;

import java.util.LinkedHashSet;

import java.util.List;

import org.apache.ibatis.annotations.Param;

import com.yunyihenkey.basedao.malldb.basevo.MallSnowflakeDatacenter;

public interface MallSnowflakeDatacenterMapper {

    MallSnowflakeDatacenter selectOneByMacAddress(@Param("macStrSet") LinkedHashSet<String> macStrSet);

    List<Long> selectAllId();

    List<List<Object>> testList();

}
MallSnowflakeDatacenterMapper.java
<?xml version="1.0" encoding="UTF-8"?>

<!DOCTYPE mapper PUBLIC "-//mybatis.org//DTD Mapper 3.0//EN" "http://mybatis.org/dtd/mybatis-3-mapper.dtd">

<mapper

    namespace="com.yunyihenkey.basedao.malldb.commonMapper.MallSnowflakeDatacenterMapper">

    <select id="selectOneByMacAddress"

        resultMap="com.yunyihenkey.basedao.malldb.basemapper.MallSnowflakeDatacenterBaseMapper.BaseResultMap">

        SELECT

        *

        FROM

        mall_snowflake_datacenter

        WHERE

        mac_unique_address in

        <foreach collection="macStrSet" item="item" open="(" close=")"

            separator=",">

            #{item}

        </foreach>

        LIMIT 1

    </select>

    <select id="selectAllId" resultType="long">

        SELECT

        id

        FROM

        mall_snowflake_datacenter

        ORDER BY

        id ASC

    </select>

    <select id="testList" resultType="list">

        SELECT * FROM seller_role_perm

    </select>

</mapper>
MallSnowflakeDatacenterMapper.xml
package com.yunyihenkey.framework.redis.base.config.utils;

import org.slf4j.Logger;

import org.slf4j.LoggerFactory;

import org.springframework.dao.DataAccessException;

import org.springframework.data.redis.connection.RedisConnection;

import org.springframework.data.redis.core.RedisCallback;

import org.springframework.data.redis.core.RedisTemplate;

import org.springframework.data.redis.serializer.StringRedisSerializer;

/**

 * redis分布式锁

 *

 * @Author SunQ

 * @Date 2018/6/15 10:55

 */

public class RedisLock {

    private static Logger logger = LoggerFactory.getLogger(RedisLock.class);

    private RedisTemplate<Object, Object> redisTemplate;

    private static final int DEFAULT_ACQUIRY_RESOLUTION_MILLIS = 100;

    /**

     * Lock key path.

     */

    private String lockKey;

    /**

     * 锁超时时间,防止线程在入锁以后,无限的执行等待

     */

    private int expireMsecs = 60 * 1000;

    /**

     * 锁等待时间,防止线程饥饿

     */

    private int timeoutMsecs = 10 * 1000;

    private volatile boolean locked = false;

    /**

     * Detailed constructor with default acquire timeout 10000 msecs and lock

     * expiration of 60000 msecs.

     *

     * @param lockKey

     *            lock key (ex. account:1, ...)

     */

    public RedisLock(RedisTemplate<Object, Object> redisTemplate, String lockKey) {

        this.redisTemplate = redisTemplate;

        this.lockKey = lockKey + "_lock";

    }

    /**

     * Detailed constructor with default lock expiration of 60000 msecs.

     *

     */

    public RedisLock(RedisTemplate<Object, Object> redisTemplate, String lockKey, int timeoutMsecs) {

        this(redisTemplate, lockKey);

        this.timeoutMsecs = timeoutMsecs;

    }

    /**

     * Detailed constructor.

     *

     */

    public RedisLock(RedisTemplate<Object, Object> redisTemplate, String lockKey, int timeoutMsecs, int expireMsecs) {

        this(redisTemplate, lockKey, timeoutMsecs);

        this.expireMsecs = expireMsecs;

    }

    /**

     * @return lock key

     */

    public String getLockKey() {

        return lockKey;

    }

    private String get(final String key) {

        Object obj = null;

        try {

            obj = redisTemplate.execute(new RedisCallback<Object>() {

                @Override

                public Object doInRedis(RedisConnection connection) throws DataAccessException {

                    StringRedisSerializer serializer = new StringRedisSerializer();

                    byte[] data = connection.get(serializer.serialize(key));

                    connection.close();

                    if (data == null) {

                        return null;

                    }

                    return serializer.deserialize(data);

                }

            });

        } catch (Exception e) {

            logger.error("get redis error, key : {}", key);

        }

        return obj != null ? obj.toString() : null;

    }

    private boolean setNX(final String key, final String value) {

        Object obj = null;

        try {

            obj = redisTemplate.execute(new RedisCallback<Object>() {

                @Override

                public Object doInRedis(RedisConnection connection) throws DataAccessException {

                    StringRedisSerializer serializer = new StringRedisSerializer();

                    Boolean success = connection.setNX(serializer.serialize(key), serializer.serialize(value));

                    connection.close();

                    return success;

                }

            });

        } catch (Exception e) {

            logger.error("setNX redis error, key : {}", key);

        }

        return obj != null ? (Boolean) obj : false;

    }

    private String getSet(final String key, final String value) {

        Object obj = null;

        try {

            obj = redisTemplate.execute(new RedisCallback<Object>() {

                @Override

                public Object doInRedis(RedisConnection connection) throws DataAccessException {

                    StringRedisSerializer serializer = new StringRedisSerializer();

                    byte[] ret = connection.getSet(serializer.serialize(key), serializer.serialize(value));

                    connection.close();

                    return serializer.deserialize(ret);

                }

            });

        } catch (Exception e) {

            logger.error("setNX redis error, key : {}", key);

        }

        return obj != null ? (String) obj : null;

    }

    /**

     * 获得 lock. 实现思路: 主要是使用了redis 的setnx命令,缓存了锁. reids缓存的key是锁的key,所有的共享,

     * value是锁的到期时间(注意:这里把过期时间放在value了,没有时间上设置其超时时间) 执行过程:

     * 1.通过setnx尝试设置某个key的值,成功(当前没有这个锁)则返回,成功获得锁

     * 2.锁已经存在则获取锁的到期时间,和当前时间比较,超时的话,则设置新的值

     *

     * @return true if lock is acquired, false acquire timeouted

     * @throws InterruptedException

     *             in case of thread interruption

     */

    public synchronized boolean lock() throws InterruptedException {

        int timeout = timeoutMsecs;

        while (timeout >= 0) {

            long expires = System.currentTimeMillis() + expireMsecs + 1;

            String expiresStr = String.valueOf(expires); // 锁到期时间

            if (this.setNX(lockKey, expiresStr)) {

                // lock acquired

                locked = true;

                return true;

            }

            String currentValueStr = this.get(lockKey); // redis里的时间

            if (currentValueStr != null && Long.parseLong(currentValueStr) < System.currentTimeMillis()) {

                // 判断是否为空,不为空的情况下,如果被其他线程设置了值,则第二个条件判断是过不去的

                // lock is expired

                String oldValueStr = this.getSet(lockKey, expiresStr);

                // 获取上一个锁到期时间,并设置现在的锁到期时间,

                // 只有一个线程才能获取上一个线上的设置时间,因为jedis.getSet是同步的

                if (oldValueStr != null && oldValueStr.equals(currentValueStr)) {

                    // 防止误删(覆盖,因为key是相同的)了他人的锁——这里达不到效果,这里值会被覆盖,但是因为什么相差了很少的时间,所以可以接受

                    // [分布式的情况下]:如过这个时候,多个线程恰好都到了这里,但是只有一个线程的设置值和当前值相同,他才有权利获取锁

                    // lock acquired

                    locked = true;

                    return true;

                }

            }

            timeout -= DEFAULT_ACQUIRY_RESOLUTION_MILLIS;

            /*

             * 延迟100 毫秒, 这里使用随机时间可能会好一点,可以防止饥饿进程的出现,即,当同时到达多个进程,

             * 只会有一个进程获得锁,其他的都用同样的频率进行尝试,后面有来了一些进行,也以同样的频率申请锁,这将可能导致前面来的锁得不到满足.

             * 使用随机的等待时间可以一定程度上保证公平性

             */

            Thread.sleep(DEFAULT_ACQUIRY_RESOLUTION_MILLIS);

        }

        return false;

    }

    /**

     * Acqurired lock release.

     */

    public synchronized void unlock() {

        if (locked) {

            redisTemplate.delete(lockKey);

            locked = false;

        }

    }

}
RedisLock.java
数据库脚本:
CREATE TABLE `mall_snowflake_datacenter` (

  `id` bigint(20) NOT NULL COMMENT '工作机器ID(1~1024)',

  `mac_unique_address` varchar(50) NOT NULL COMMENT 'mac网卡地址',

  `host_name` varchar(50) DEFAULT NULL COMMENT '主机名',

  `remark` varchar(255) DEFAULT NULL COMMENT '描述',

  `touch_time` datetime DEFAULT NULL COMMENT '使用开始时间',

  PRIMARY KEY (`id`),

  UNIQUE KEY `mac_unique_address` (`mac_unique_address`) USING BTREE

) ENGINE=InnoDB DEFAULT CHARSET=utf8 COMMENT='主键id生成器---绑定机器';
建表语句
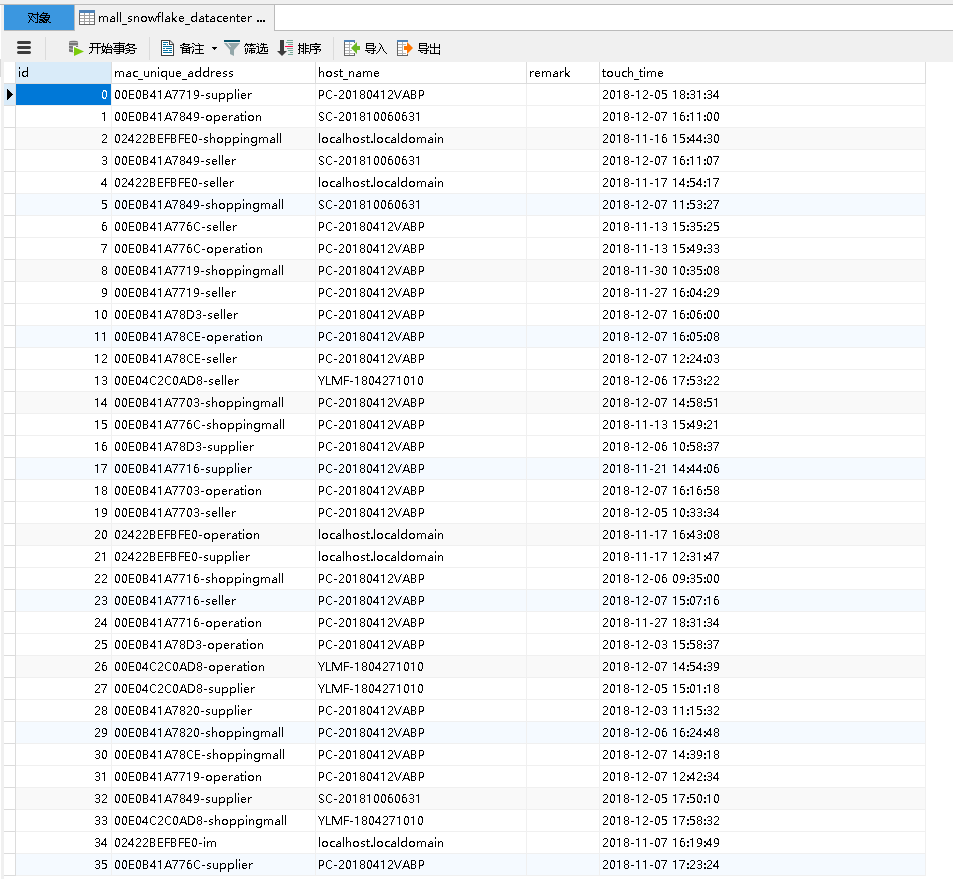
效果图:
snowflake机器标识自动绑定的更多相关文章
- 最新iOS 6 in Xcode4.5新特性——Storyboard和属性自动绑定
最新iOS 6 in Xcode4.5新特性编程之二(上)——Storyboard和属性自动绑定 从Xcode 4.3开始,Storyboard 就是iOS 5和iOS 6中令人兴奋的一个新特性,他将 ...
- jQuery插件:Ajax将Json数据自动绑定到Form表单
jQuery注册方法的两种常用方式: //jQuery静态方法注册 //调用方法$.a1() $.extend({ a1: function () { console.log("a1&quo ...
- FlexiGrid 使用 全选、自动绑定
1.介绍 Flexigrid是一个类似于Ext Gird,但基于jQuery开发的Grid.它具有的功能包括:可以调整列宽,合并列标题,分页,排序,显示/隐藏表格等.Flexigrid显示的数据能够通 ...
- WinForm开发-界面控件到实体,实体到界面控件自动绑定
在WinForm开发中,我们是不是为绑定界面控件的数据而每个控件每个控件的赋值?在保存修改时是不是也是每个控件每个控件的赋值到实体中?字段一多,那简直就是噩梦.有没有像Web中那样方便的方法直接就自动 ...
- php 自动绑定di容器实现
<?php class Bim { public function doSth() { echo __METHOD__.PHP_EOL; } } class Bar { protected $b ...
- paip.提升效率---request自动绑定domain object
paip.提升效率---request自动绑定domain object #.keyword,subtitle关键字,子标题 ------------------------- 复制request属性 ...
- 基于jquery的表格动态创建,自动绑定,自动获取值
最近刚加入GUT项目,学习了很多其他同事写的代码,感觉受益匪浅. 在GUT项目中,经常会碰到这样一个问题:动态生成表格,包括从数据库中读取数据,并绑定在表格中,以及从在页面上通过jQuery新增删除表 ...
- EntityFramework Core 自动绑定模型映射
笔者最近在和同事共同开发项目时,需要从他们提供的包含数据库实体类型的类库中读取实体信息绑定到自己的项目中(但是都在同一个解决方案里),所以很直接的一种方式就是把项目中所有的实体都以 public Db ...
- Winform开发常用控件之DataGridView的简单数据绑定——自动绑定
DataGridView控件可谓是Winform开发的重点控件,对于数据的呈现和操作非常方便,DataGridView可谓是既简单又复杂.简单在于其已经集成了很多方法,复杂在于可以使用其实现复杂的数据 ...
随机推荐
- hdu1026(bfs+优先队列+打印路径)
Ignatius and the Princess I Time Limit: 2000/1000 MS (Java/Others) Memory Limit: 65536/32768 K (J ...
- IJ:IJ来了
ylbtech-IJ:IJ来了 1.返回顶部 1. 2. 2.2. 3. 4. 2.返回顶部 1. 2. 3. 3. Welcome to IntelliJ IDEA返回顶部 1. 2.2. 2.2. ...
- vue 子组件 索引 ref
尽管有props和events,但是有时任然需要在javascript中直接访问子组件.为此可是使用ref为子组件指定一个索引ID. <div id="parent"> ...
- EF7学习资料整理
EntityFramework 7 开发纪录 http://www.cnblogs.com/xishuai/archive/2014/11/28/ef7-develop-note.html Entit ...
- [App Store Connect帮助]七、在 App Store 上发行(5)手动发布版
如果在您提交您的 App 以供审核时选择手动发布某个版本,您可以在它被批准且状态更改为“等待开发者发布”后发布该版本.如果您的某个 App 处于“等待开发者发布”状态超过 30 天,您会收到来自 Ap ...
- C. Timofey and a tree 观察题 + dfs模拟
http://codeforces.com/contest/764/problem/C 题意:在n个顶点中随便删除一个,然后分成若干个连通子图,要求这若干个连通子图的颜色都只有一种. 记得边是双向的, ...
- AJPFX理解反射及反射的应用
怎么理解反射,反射的应用 反射就是把Java类中的各种成分映射成相应的Java类. 一般情况下我们要解决某个问题,先找到相关的类,创建该类的对象,然后通过该对象调用对应的方 ...
- 冒泡排序算法和简单选择排序算法的js实现
之前已经介绍过冒泡排序算法和简单选择排序算法和原理,现在有Js实现. 冒泡排序算法 let dat=[5, 8, 10, 3, 2, 18, 17, 9]; function bubbleSort(d ...
- 实现上下全屏幕屏滚动效果js
---恢复内容开始--- 详情见代码 第一步:首先添加3个js文件: 1.http://cdn.staticfile.org/jquery/1.8.3/jquery.min.js 2.http://c ...
- ajax跨域上传图片
前台页面 var data = new FormData(); data.append('file', file); data.append('app', 'goods'); $.ajax({ url ...