【原创】《从0开始学RocketMQ》—集群搭建
用两台服务器,搭建出一个双master双slave、无单点故障的高可用 RocketMQ 集群。此处假设两台服务器的物理 IP 分别为:192.168.50.1、192.168.50.2。
内容目录
1. 启动 NameServer 集群
2. 启动 Broker 集群
3. RocketMQ 可视化管理控制台:rocketmq-console
4. 集群测试
1. 启动 NameServer 集群
在两台服务器上分别启动 NameServer,可以得到一个无单点故障的 NameServer 服务,服务地址分别为:192.168.50.1:9876、192.168.50.2:9876。
2. 启动 Broker 集群
修改 Broker 配置文件,以使每台服务器上都可以启动一个 Master 角色 的 Broker 和 一个Slave 角色的 Broker。
首先找到 Broker 配置文件,此处我们搭建一个同步双写模式的集群,所以需要修改 2m-2s-sync 目录下的 broker 配置文件:
[root@- ~]# cd /usr/local/rocketmq-all-4.3.-bin-release/conf/

[root@- conf]# ls

2m-2s-async  2m-2s-sync  2m-noslave  broker.conf  logback_broker.xml  logback_namesrv.xml  logback_tools.xml

[root@- conf]# cd 2m-2s-sync/

[root@- 2m-2s-sync]# ls

broker-a.properties  broker-a-s.properties  broker-b.properties  broker-b-s.properties
1) 修改 192.168.50.1 服务器上的 broker-a.properties 为 Master 角色的 Broker:
namesrvAddr=192.168.50.1:;192.168.50.2:

brokerClusterName=rocketMqCluster

brokerIP1=192.168.50.1

brokerName=broker-a

brokerId=

deleteWhen=

fileReservedTime=

mapedFileSizeConsumeQueue=

brokerRole=SYNC_MASTER

flushDiskType=ASYNC_FLUSH

listenPort=

autoCreateTopicEnable=true

autoCreateSubscriptionGroup=true

storePathRootDir=/usr/local/rocketmq-all-4.3.-bin-release/data/broker-a

storePathCommitLog=/usr/local/rocketmq-all-4.3.-bin-release/data/broker-a/commitlog

storePathConsumeQueue=/usr/local/rocketmq-all-4.3.-bin-release/data/broker-a/consumequeue

storePathIndex=/usr/local/rocketmq-all-4.3.-bin-release/data/broker-a/index

storeCheckpoint=/usr/local/rocketmq-all-4.3.-bin-release/data/broker-a/checkpoint

abortFile=/usr/local/rocketmq-all-4.3.-bin-release/data/broker-a/abort
2) 修改 192.168.50.2 服务器上的 broker-b.properties 为 Master 角色的 Broker:
namesrvAddr=192.168.50.1:;192.168.50.2:

brokerClusterName=rocketMqCluster

brokerIP1=192.168.50.2

brokerName=broker-b

brokerId=

deleteWhen=

fileReservedTime=

mapedFileSizeConsumeQueue=

brokerRole=SYNC_MASTER

flushDiskType=ASYNC_FLUSH

listenPort=

autoCreateTopicEnable=true

autoCreateSubscriptionGroup=true

storePathRootDir=/usr/local/rocketmq-all-4.3.-bin-release/data/broker-b

storePathCommitLog=/usr/local/rocketmq-all-4.3.-bin-release/data/broker-b/commitlog

storePathConsumeQueue=/usr/local/rocketmq-all-4.3.-bin-release/data/broker-b/consumequeue

storePathIndex=/usr/local/rocketmq-all-4.3.-bin-release/data/broker-b/index

storeCheckpoint=/usr/local/rocketmq-all-4.3.-bin-release/data/broker-b/checkpoint

abortFile=/usr/local/rocketmq-all-4.3.-bin-release/data/broker-b/abort
3) 修改 192.168.50.1 服务器上的 broker-b-s.properties 为 Slave 角色的 Broker:
namesrvAddr=192.168.50.1:;192.168.50.2:

brokerClusterName=rocketMqCluster

brokerIP1=192.168.50.1

brokerName=broker-b

brokerId=

deleteWhen=

fileReservedTime=

mapedFileSizeConsumeQueue=

brokerRole=SLAVE

flushDiskType=ASYNC_FLUSH

listenPort=

autoCreateTopicEnable=true

autoCreateSubscriptionGroup=true

storePathRootDir=/usr/local/rocketmq-all-4.3.-bin-release/data/broker-b-s

storePathCommitLog=/usr/local/rocketmq-all-4.3.-bin-release/data/broker-b-s/commitlog

storePathConsumeQueue=/usr/local/rocketmq-all-4.3.-bin-release/data/broker-b-s/consumequeue

storePathIndex=/usr/local/rocketmq-all-4.3.-bin-release/data/broker-b-s/index

storeCheckpoint=/usr/local/rocketmq-all-4.3.-bin-release/data/broker-b-s/checkpoint

abortFile=/usr/local/rocketmq-all-4.3.-bin-release/data/broker-b-s/abort
4) 修改 192.168.50.2 服务器上的 broker-a-s.properties 为 Slave 角色的 Broker:
namesrvAddr=192.168.50.1:;192.168.50.2:

brokerClusterName=rocketMqCluster

brokerIP1=192.168.50.2

brokerName=broker-a

brokerId=

deleteWhen=

fileReservedTime=

brokerRole=SLAVE

flushDiskType=ASYNC_FLUSH

listenPort=

autoCreateTopicEnable=true

autoCreateSubscriptionGroup=true

storePathRootDir=/usr/local/rocketmq-all-4.3.-bin-release/data/broker-a-s

storePathCommitLog=/usr/local/rocketmq-all-4.3.-bin-release/data/broker-a-s/commitlog

storePathConsumeQueue=/usr/local/rocketmq-all-4.3.-bin-release/data/broker-a-s/consumequeue

storePathIndex=/usr/local/rocketmq-all-4.3.-bin-release/data/broker-a-s/index

storeCheckpoint=/usr/local/rocketmq-all-4.3.-bin-release/data/broker-a-s/checkpoint

abortFile=/usr/local/rocketmq-all-4.3.-bin-release/data/broker-a-s/abort
一台服务器上启动多个Broker 时,需指定不同的端口号,记得防火墙放开 NameServer 和 Broker 中用到的端口号哦~
分别启动四个 Broker:
nohup sh bin/mqbroker -c broker_config_file &
3. RocketMQ 可视化管理控制台:rocketmq-console
在服务器 192.168.50.1 上安装即可,无需集群
[root@- local]# git clone https://github.com/apache/rocketmq-externals.git

Cloning into 'rocketmq-externals'...

remote: Enumerating objects: , done.

remote: Counting objects: % (/), done.

remote: Compressing objects: % (/), done.

remote: Total  (delta ), reused  (delta ), pack-reused

Receiving objects: % (/), 11.86 MiB | 232.00 KiB/s, done.

Resolving deltas: % (/), done.

[root@- local]# cd rocketmq-externals/

[root@- rocketmq-externals]# ls

dev  README.md  rocketmq-console  rocketmq-docker  rocketmq-flink  rocketmq-flume  rocketmq-hbase  rocketmq-iot-bridge  rocketmq-jms  rocketmq-mysql  rocketmq-php  rocketmq-redis  rocketmq-sentinel  rocketmq-serializer  rocketmq-spark

[root@- rocketmq-externals]# git branch

* master

[root@- rocketmq-externals]# git fetch origin release-rocketmq-console-1.0.

From https://github.com/apache/rocketmq-externals

 * branch            release-rocketmq-console-1.0. -> FETCH_HEAD

[root@- rocketmq-externals]# git checkout -b release-1.0. origin/release-rocketmq-console-1.0.

Branch 'release-1.0.0' set up to track remote branch 'release-rocketmq-console-1.0.0' from 'origin'.

Switched to a new branch 'release-1.0.0'

[root@- rocketmq-externals]# ls

README.md  rocketmq-console

[root@- rocketmq-externals]# ls rocketmq-console/

doc  LICENSE  NOTICE  pom.xml  README.md  src  style

[root@- rocketmq-externals]# vim rocketmq-console/src/main/resources/application.properties
编辑 application.properties:
server.contextPath=/rocketmq

server.port=

#spring.application.index=true

spring.application.name=rocketmq-console

spring.http.encoding.charset=UTF-

spring.http.encoding.enabled=true

spring.http.encoding.force=true

logging.config=classpath:logback.xml

#if this value is empty,use env value rocketmq.config.namesrvAddr  NAMESRV_ADDR | now, you can set it in ops page.default localhost:9876

rocketmq.config.namesrvAddr=192.168.50.1:;192.168.50.2:

#if you use rocketmq version < 3.5.8, rocketmq.config.isVIPChannel should be false.default true

rocketmq.config.isVIPChannel=

#rocketmq-console's data path:dashboard/monitor

rocketmq.config.dataPath=/tmp/rocketmq-console/data

#set it false if you don't want use dashboard.default true

rocketmq.config.enableDashBoardCollect=true
移动 rocketmq-console 所在目录,编译并启动 rocketmq-console:
[root@- rocketmq-console]# mv /usr/local/rocketmq-externals/rocketmq-console /usr/local/rocketmq-console

[root@- rocketmq-console]# cd /usr/local/rocketmq-console/

[root@- rocketmq-console]# ls

doc  LICENSE  NOTICE  pom.xml  README.md  src  style

[root@- rocketmq-console]# mvn clean package -Dmaven.test.skip=true

........

[INFO] Building jar: /usr/local/rocketmq-console/target/rocketmq-console-ng-1.0.-sources.jar

[INFO] ------------------------------------------------------------------------

[INFO] BUILD SUCCESS

[INFO] ------------------------------------------------------------------------

[INFO] Total time: : min

[INFO] Finished at: --11T17::+:

[INFO] ------------------------------------------------------------------------

[root@- rocketmq-console]# ls

doc  LICENSE  NOTICE  pom.xml  README.md  src  style  target

[root@- rocketmq-console]# ls target/

checkstyle-cachefile  checkstyle-checker.xml  checkstyle-result.xml  classes  generated-sources  maven-archiver  maven-status  rocketmq-console-ng-1.0..jar  rocketmq-console-ng-1.0..jar.original  rocketmq-console-ng-1.0.-sources.jar

[root@- rocketmq-console]# java -jar target/rocketmq-console-ng-1.0..jar

.......

[-- ::15.980]  INFO Initializing ProtocolHandler ["http-nio-8080"]

[-- ::15.991]  INFO Starting ProtocolHandler [http-nio-]

[-- ::16.232]  INFO Using a shared selector for servlet write/read

[-- ::16.251]  INFO Tomcat started on port(s):  (http)

[-- ::16.257]  INFO Started App in 6.594 seconds (JVM running for 7.239)
4. 集群测试
Producer 测试代码:
public class SyncProducerTest {

    public static void main(String[] args) {

        DefaultMQProducer producer = new DefaultMQProducer("producer_test_group");

        producer.setNamesrvAddr("39.107.153.215:9876;39.107.157.89:9876");

        try{

            producer.start();

            for(int i=0;i<100;i++){

                Message message = new Message("topic_test", "tag_test", ("Hello World" + 1).getBytes("UTF-8"));

                SendResult sendResult = producer.send(message);

                System.out.println(JSON.toJSON(sendResult));

            }

            producer.shutdown();

        }catch (Exception e){

            e.printStackTrace();

        }

    }

}
Consumer 测试代码:
public class SyncConsumerTest {

    public static void main(String[] args) {

        DefaultMQPushConsumer consumer = new DefaultMQPushConsumer("consumer_test_group");

        consumer.setNamesrvAddr("39.107.153.215:9876;39.107.157.89:9876");

        consumer.setConsumeFromWhere(ConsumeFromWhere.CONSUME_FROM_FIRST_OFFSET);

        try {

            consumer.subscribe("topic_test", "*");

            consumer.registerMessageListener((MessageListenerConcurrently) (messageList, context) -> {

                System.out.println(Thread.currentThread().getName() + " Receive New Message:" + messageList);

                return ConsumeConcurrentlyStatus.CONSUME_SUCCESS;

            });

            consumer.start();

        }catch (Exception e){

            e.printStackTrace();

        }

    }

}
SyncProducerTest 运行日志:

SyncConsumerTest 运行日志:
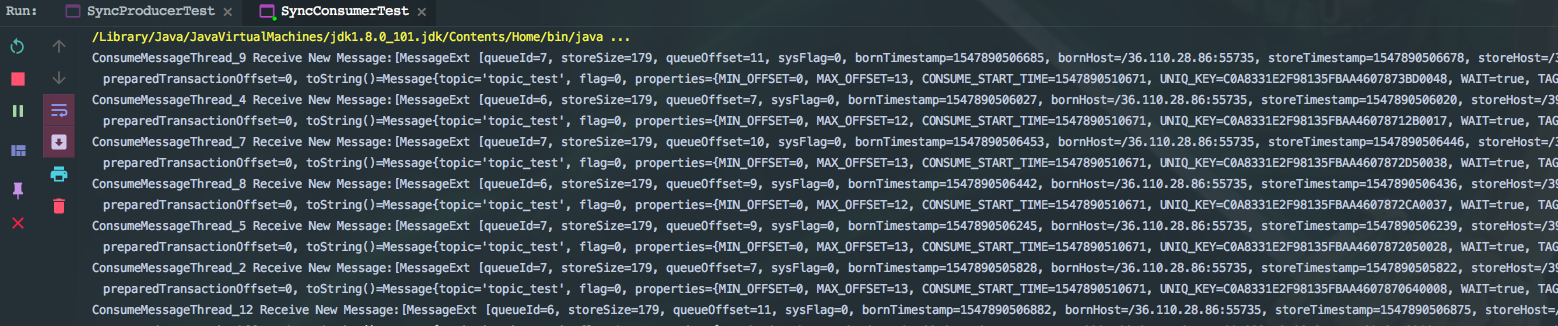
通过日志可以看到,消费者、生产者收发消息都是正常的,我们去可视化管理控制台查看下 http://192.168.50.1:8080/rocketmq:

通过管控台可以看到,双 master 双 slave 的 broker 集群一切正常,并可进一步看到每个 broker 处理消息的情况。
【原创】《从0开始学RocketMQ》—集群搭建的更多相关文章
- RocketMQ集群搭建(3m-3s-async)
RocketMQ集群搭建(3m-3s-async) 各角色介绍 角色 作用 Producer 消息发送者,将消息发送到 Broker.无状态,其与NameServer集群中的一个节点建立长连接,定期从 ...
- Hadoop 3.1.2(HA)+Zookeeper3.4.13+Hbase1.4.9(HA)+Hive2.3.4+Spark2.4.0(HA)高可用集群搭建
目录 目录 1.前言 1.1.什么是 Hadoop? 1.1.1.什么是 YARN? 1.2.什么是 Zookeeper? 1.3.什么是 Hbase? 1.4.什么是 Hive 1.5.什么是 Sp ...
- redis 5.0.3 讲解、集群搭建
REDIS 一 .redis 介绍 不管你是从事Python.Java.Go.PHP.Ruby等等... Redis都应该是一个比较熟悉的中间件.而大部分经常写业务代码的程序员,实际工作中或许只用到了 ...
- RocketMQ集群搭建
1.RocketMQ介绍 1.1. 简介 RocketMQ 是一款分布式.队列模型的消息中间件,具有以下特点: 能够保证严格的消息顺序 提供丰富的消息拉取模式 高效的订阅者水平扩展能力 实时的消息订阅 ...
- hadoop2.2.0的ha分布式集群搭建
hadoop2.2.0 ha集群搭建 使用的文件如下: jdk-6u45-linux-x64.bin hadoop-2.2.0.x86_64.tar zookeeper-3.4.5. ...
- mongodb之 3.4.0 mongodb sharing 副本集群搭建
系统系统 centos6.5三台服务器:10.100.25.42/43/44安装包: mongodb-linux-x86_64-rhel62-3.4.0.tgz 服务器规划:mongos mongos ...
- 4 种高可用 RocketMQ 集群搭建方案!
背景 笔者所在的业务线,最初化分为三个服务,由于业务初期业务复杂度相对简单,三个业务服务都能很好的独立完成业务功能. 随着产品迭代,业务功能越来越多后慢慢也要面对高并发.业务解耦.分布式事务等问题,所 ...
- RocketMQ集群搭建方式
各角色介绍 Producer:消息的发送者:举例:发信者 Consumer:消息接收者:举例:收信者 Broker:暂存和传输消息:举例:邮局 NameServer:管理Broker:举例:各个邮局的 ...
- RocketMq 集群搭建 部署
原文链接:https://blog.csdn.net/weixin_40533111/article/details/84451219 作者小太阳^_^,转载请注明出处,谢谢 前言本文基于最新版roc ...
- RocketMQ 集群搭建--双Master方案
安装环境 jdk1.7 alibaba-rocketmq-3.2.6.tar.gz VM虚拟机redhat6.5-x64:192.168.1.201 192.168.1.202 Xshell4 部署 ...
随机推荐
- Java中的重写
以下内容引用自http://wiki.jikexueyuan.com/project/java/overriding.html: 如果一个类从它的父类继承了一个方法,如果这个方法没有被标记为final ...
- Python的环境变量设置
python安装完成后,它的配置很简单,只需要配置下环境变量就可以了. 具体来讲,就是将python的安装目录加入到系统的path中即可.
- 系统性能不够原因可能是cpu不够,内存不够等等
1.Linux系统可以通过top命令查看系统的CPU.内存.运行时间.交换分区.执行的线程等信息. 通过top命令可以有效的发现系统的缺陷出在哪里.是内存不够.CPU处理能力不够.IO读写过高. 2. ...
- 机器学习技法总结(五)Adaptive Boosting, AdaBoost-Stump,决策树
上一讲主要利用不同模型计算出来的g.採用aggregation来实现更好的g.假设还没有做出来g.我们能够採用bootstrap的方法来做出一系列的"diversity"的data ...
- 【转载】TCP,IP,HTTP,SOCKET区别和联系
网络由下往上分为: 对应 物理层-- 数据链路层-- 网络层-- IP协议 传输层-- TCP协议 ...
- 【转载】COM文件与EXE文件的区别与联系
COM文件是一种可执行程序的内存映象文件,它与只有16位地址线的8位机上的CP/M操作系统下的可执行程序结构相似.在COM程序执行过程中,除了调用DOS功能和 ROM BIOS 功能,以及用户特意安排 ...
- 扩展HtmlHelper
eg3:扩展HtmlHelper 扩展方法类 1 public static class HtmlExtension 2 { 3 /// ...
- Deep Learning 27:Batch normalization理解——读论文“Batch normalization: Accelerating deep network training by reducing internal covariate shift ”——ICML 2015
这篇经典论文,甚至可以说是2015年最牛的一篇论文,早就有很多人解读,不需要自己着摸,但是看了论文原文Batch normalization: Accelerating deep network tr ...
- 设计模式-(6)适配器 (swift版)
用来解决接口适配问题的三种模式:适配器模式,桥接模式,外观模式. 一,概念 适配器模式,将一个类的结构转换成用户希望的另一个接口,使得原本接口不兼容的类能在一起工作.换句话说,适配器模式就是链接两种不 ...
- scikit-learn 机器学习工具
1.http://scikit-learn.org/stable/ 官网:关于scikit-learn介绍等 2. http://stackoverflow.com/questions/ ...