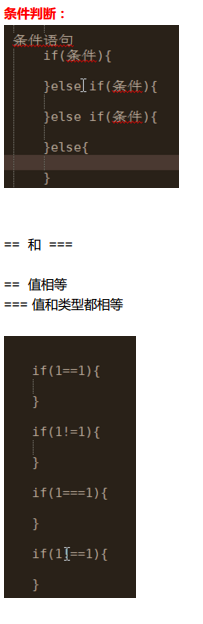
day15 CSS JS DOM初探
2 写动作JS
写一个悬浮菜单:
- <!DOCTYPE html>
- <html lang="en">
- <head>
- <meta charset="UTF-8">
- <title>Title</title>
- <style>
- .pg-header{
- margin: 0 auto;
- height: 48px;
- width:980px;
- background-color: aquamarine;
- color: coral;
- position: fixed;
- top: 0;
- left: 20px;
- right: 20px;
- line-height: 48px;
- text-align: center;
- }
- .pg-body{
- margin: 0 auto;
- background-color: #dddddd;
- width:980px;
- height: 5000px;
- margin-top: 50px;
- }
- </style>
- </head>
- <body>
- <div class="pg-header">此处为菜单</div>
- <div class="pg-body">此处为内容</div>
- </body>
- </html>
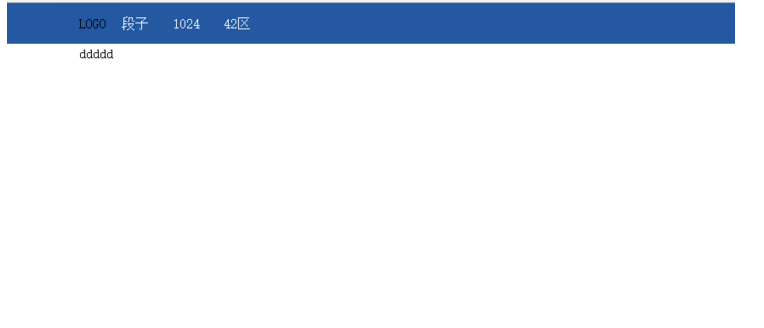
效果:
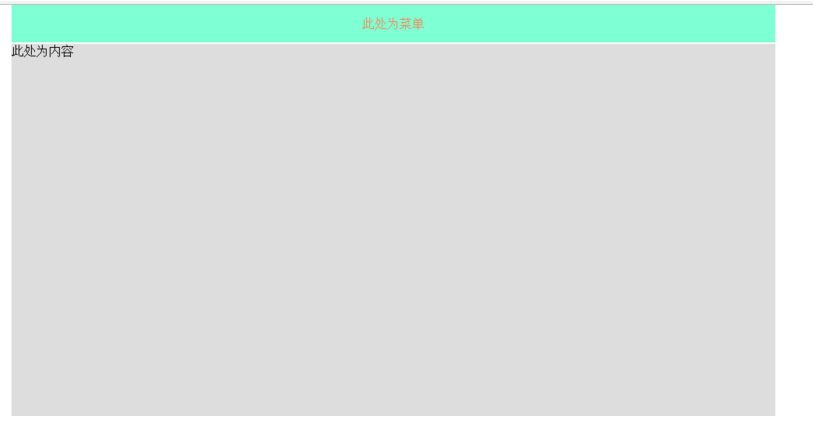
上下滚动菜单始终固定在顶部
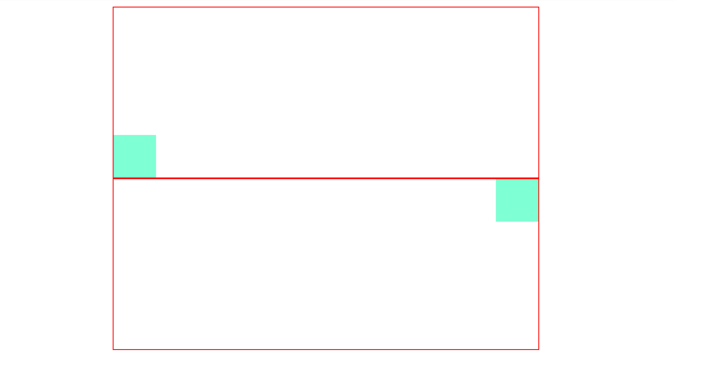
实现一个点赞按钮的效果:
- <!DOCTYPE html>
- <html lang="en">
- <head>
- <meta charset="UTF-8">
- <title>Title</title>
- </head>
- <body>
- <div style="position: relative;width: 500px;height: 200px;border: 1px solid red; margin: 0 auto;">
- <div style="position: absolute;left: 0;bottom: 0;width: 50px;height: 50px;background-color: aquamarine"></div>
- </div>
- <div style="position: relative;width: 500px;height: 200px;border: 1px solid red; margin: 0 auto;">
- <div style="position: absolute;right: 0;top: 0;width: 50px;height: 50px;background-color: aquamarine"></div>
- </div>
- </body>
- </html>
效果:
实现一个遮罩层,就是平时的弹出选择框,即模态框:
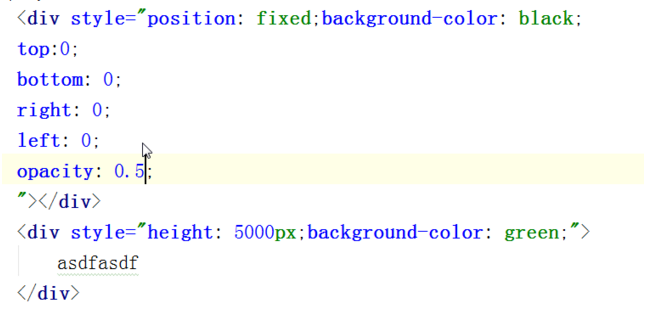
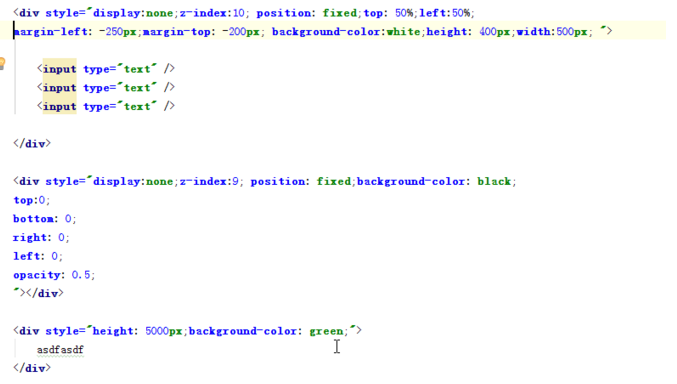
实践:
- <!DOCTYPE html>
- <html lang="en">
- <head>
- <meta charset="UTF-8">
- <title>Title</title>
- </head>
- <body>
- <div style="background-color: white;
- /*display: none;*/
- z-index: 10;
- position: fixed;
- height: 400px;
- width: 500px;
- top: 50%;
- left: 50%;
- margin-left: -250px;
- margin-top: -200px;
- border: 1px brown;
- ">
- <div style="display: inline">姓名</div><input type="text"/>
- <div style="display: inline">密码</div><input type="text"/>
- </div>
- <div style="background-color: blue;
- /*display: none;*/
- position: fixed;
- z-index: 9;
- top:0;
- bottom: 0;
- left: 0;
- right: 0;
- opacity: 0.5;"></div>
- <div style="height: 5000px;background-color: coral;"> hehhehhehe</div>
- </body>
- </html>
效果:
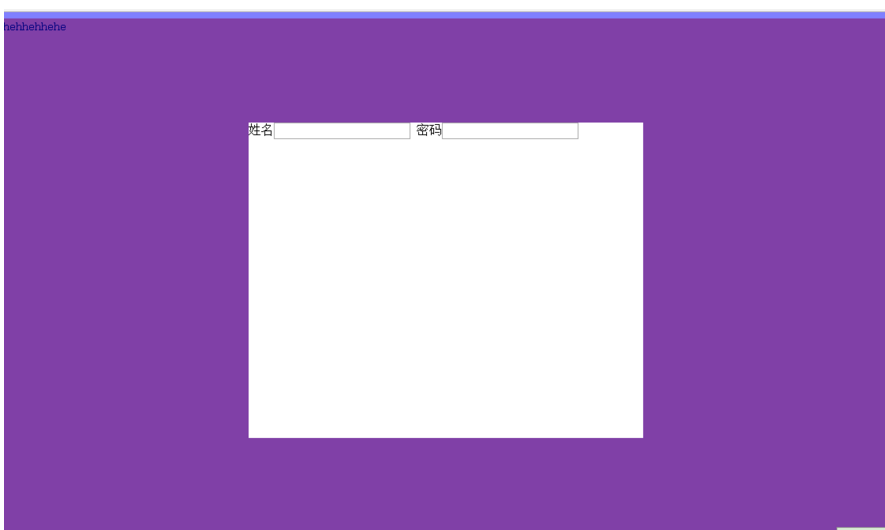
设置上右下左的间隔:
伪类:
实践:
- <!DOCTYPE html>
- <html lang="en">
- <head>
- <meta charset="UTF-8">
- <title>Title</title>
- <style>
- .pg-header{
- position: fixed; /* 设置为固定位置*/
- right: 0; /*距离右边0*/
- left: 0; /*距离左边0*/
- top: 0; /*距离上边0*/
- height: 48px; /*高度为48像素*/
- background-color: #2459a2; /*背景颜色*/
- line-height: 48px; /*设置上下居中,和高度一样才能居中*/
- }
- .pg-body{
- margin-top: 50px; /*设置距离顶部50像素,避免menu挡住body*/
- }
- .w{
- width: 980px; /*全局宽度 980像素*/
- margin: 0 auto; /*自动居中*/
- }
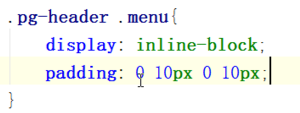
- .pg-header .menu{
- display: inline-block; /*设置标签为行内块级混合标签,可以设置高度和宽度*/
- padding: 0 10px 0 10px; /*设置标签上下左右的距离*/
- color: white; /*字体颜色*/
- }
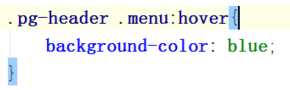
- .pg-header .menu:hover{ /*此属性是当鼠标移动到此时应用*/
- background-color: dodgerblue; /*背景颜色*/
- }
- </style>
- </head>
- <body>
- <div class="pg-header">
- <div class="w">
- <a class="logo">LOGO</a>
- <a class="menu">段子</a>
- <a class="menu">1024</a>
- <a class="menu">42区</a>
- </div>
- </div>
- <div class="pg-body">
- <div class="w">ddddd</div>
- </div>
- </body>
- </html>

渐变色 就是一个非常细的图片一直自动堆叠

其实图标都是只用一个图,然后通过调整
就能显示一个图片不同的位置
实践:
- <body>
- <div style="height: 100px;"></div>
- <div style="height: 20px;width:20px;background-image: url(icon_18_118.png);border: 1px solid red"></div>
- </body>
显示不同位置:
- <body>
- <div style="height: 100px;"></div>
- <div style="height: 20px;
- width:20px;
- background-image: url(icon_18_118.png);
- background-position-x: 0px;
- background-position-y: -58px;
- border: 1px solid red"></div>
- </body>

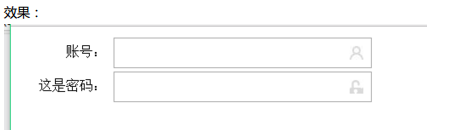
相对的位置,如点赞的图案:
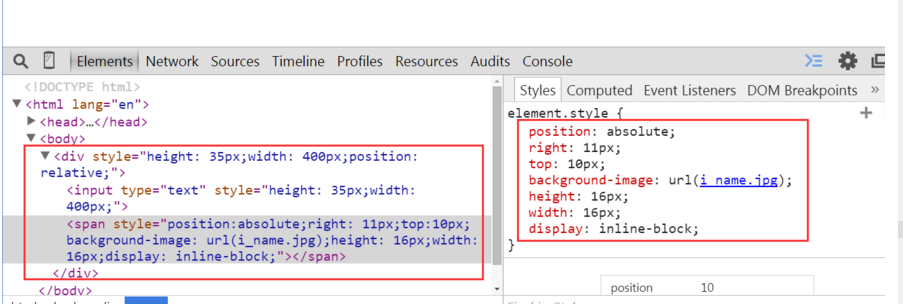
有个问题,图片会挡住输入,修改后就好了

实践:
- <!DOCTYPE html>
- <html lang="en">
- <head>
- <meta charset="UTF-8">
- <title>Title</title>
- </head>
- <body>
- <div class="user-input" style="padding: 5px;">
- <div style="display: inline-block;width: 100px;text-align: right;">账号:</div>
- <div style="display: inline-block;width: 300px;height:30px;position: relative;">
- <input type="text" style="height: 30px;
- width: 270px;
- padding-right: 30px"></input>
- <span style="position:absolute;
- right: 6px;
- top:10px;
- background-image: url(user.jpg);
- height: 16px;
- width: 16px;
- display: inline-block"></span>
- </div>
- </div>
- <div class="passwd-input" style="padding: 5px;">
- <div style="display: inline-block;width: 100px;text-align: right;">这是密码:</div>
- <div style="display: inline-block;width: 300px;height:30px;position: relative;">
- <input type="text" style="height: 30px;
- width: 270px;
- padding-right: 30px"></input>
- <span style="position:absolute;
- right: 6px;
- top:10px;
- background-image: url(i_pwd.jpg);
- height: 16px;
- width: 16px;
- display: inline-block"></span>
- </div>
- </div>
- </body>
- </html>
开始 javascript
helloworld
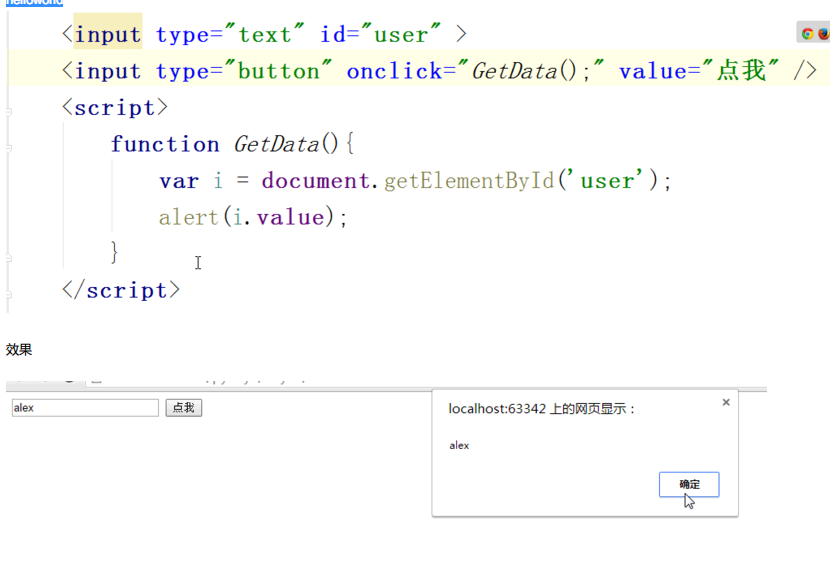
写代码的位置,两种形式:
1在html 文件中:
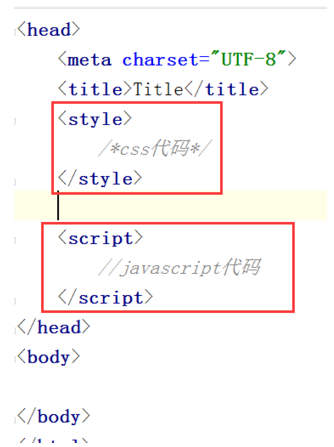
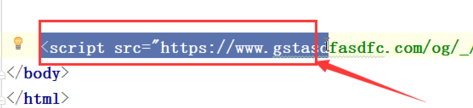
2 单独文件,引入到html文件中:


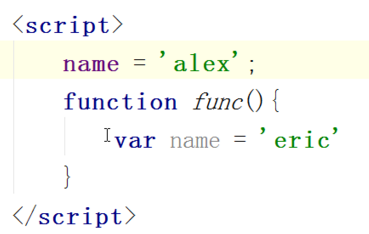
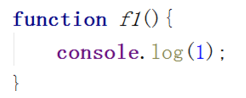
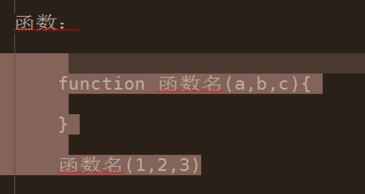
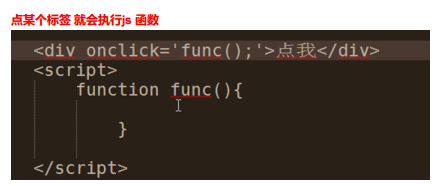
定义函数:
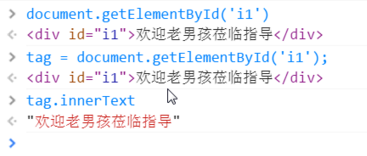
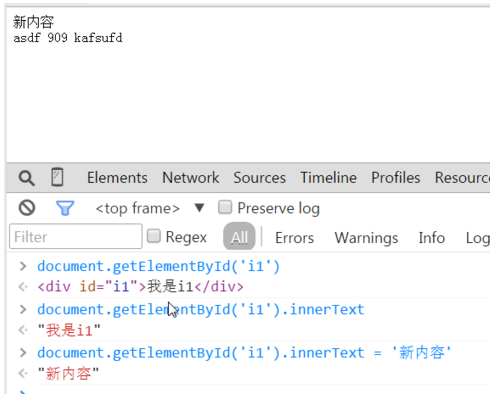
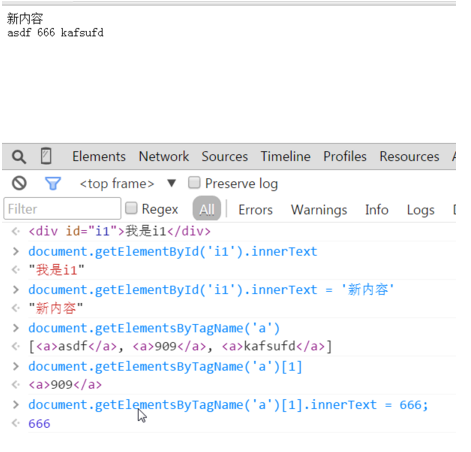
根据id找到内容:
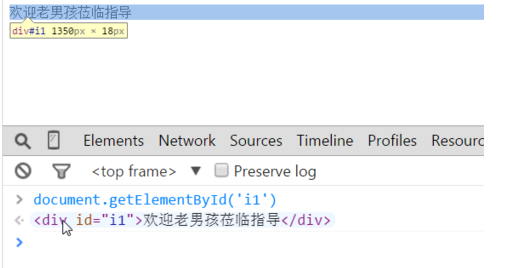
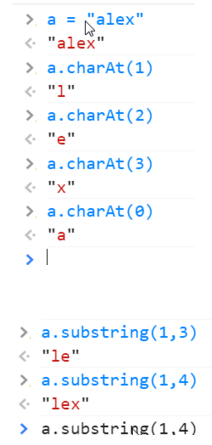
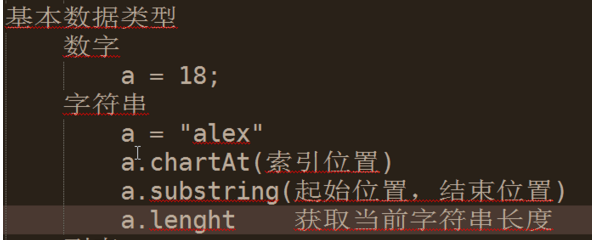
获取内容:
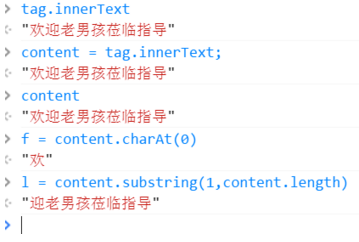
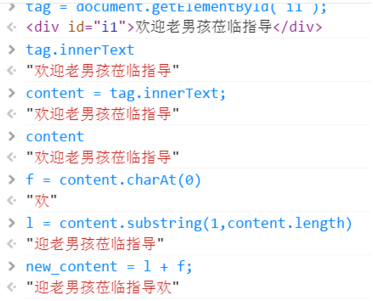
拼接字符串:
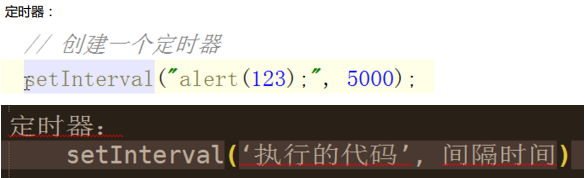
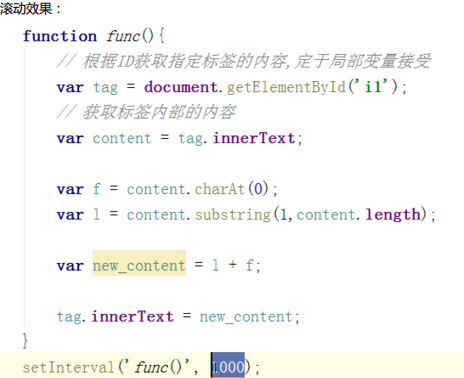
做一个滚动条效果:

实践:
- <!DOCTYPE html>
- <html lang="en">
- <head>
- <meta charset="UTF-8">
- <title>Title</title>
- <script>
- function func() {
- var tag = document.getElementById('i1');
- var content = tag.innerText;
- var f = content.charAt(0);
- var l = content.substring(1,content.length)
- var new_content = l + f;
- tag.innerText = new_content;
- }
- setInterval('func()',500);
- </script>
- </head>
- <body>
- <div id="i1">欢迎老男孩莅临指导 </div>
- </body>
- </html>
效果:


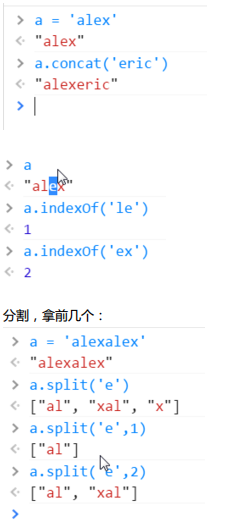
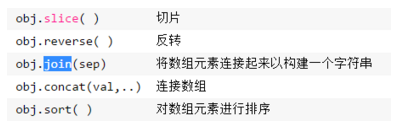
join 添加分隔符
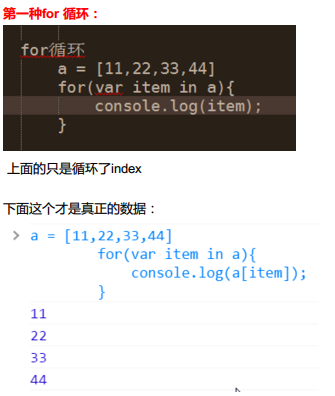
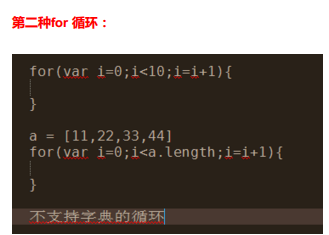
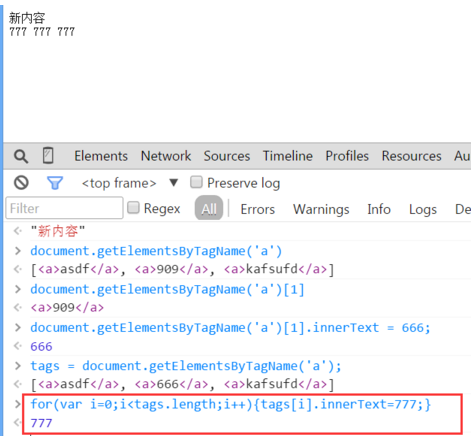
循环:


实现模态框:
- <!DOCTYPE html>
- <html lang="en">
- <head>
- <meta charset="UTF-8">
- <title>Title</title>
- <style>
- .hide{
- display: none;
- }
- .c1{
- position: fixed;
- left: 0;
- right: 0;
- top: 0;
- bottom: 0;
- background-color: black;
- opacity: 0.6;
- z-index: 9;
- }
- .c2{
- width: 500px;
- height: 400px;
- background-color: white;
- position: fixed;
- left: 50%;
- right: 50%;
- top: 50%;
- margin-left: -250px;
- margin-top: -100px;
- z-index: 10;
- }
- </style>
- </head>
- <body>
- <div>
- <input type="button" value="添加" onclick="ShowModel();"/>
- </div>
- <!--遮罩层 -->
- <div id="i1" class="c1 hide"></div>
- <!-- 弹出窗-->
- <div id="i2" class="c2 hide">
- <p>
- <input type="text"/>
- <input type="text"/>
- </p>
- <p>
- <input type="button" value="取消" onclick="HideModel();"/>
- <input type="button" value="确定" onclick="HideModel();"/>
- </p>
- </div>
- <script>
- function ShowModel() {
- document.getElementById('i1').classList.remove('hide')
- document.getElementById('i2').classList.remove('hide')
- }
- function HideModel() {
- document.getElementById('i1').classList.add('hide')
- document.getElementById('i2').classList.add('hide')
- }
- </script>
- </body>
- </html>
效果:

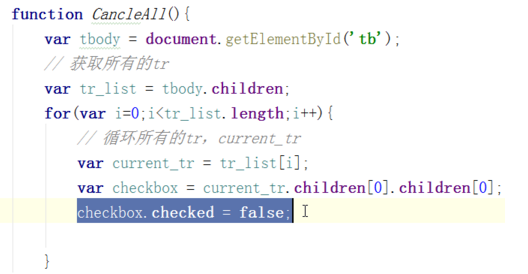
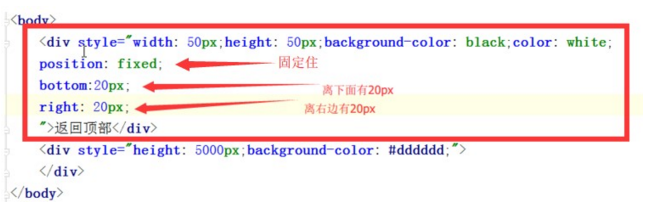
实现一个后台管理的简单页面,需要点击菜单显示菜单,可以全选,反选,可以点击有模态框效果:
- <!DOCTYPE html>
- <html lang="en">
- <head>
- <meta charset="UTF-8">
- <title>管理</title>
- <style>
- .pg-header{
- margin: 0 auto;
- height: 48px;
- /*width:980px;*/
- background-color: #2459a2;
- color: coral;
- position: fixed;
- top: 0;
- left: 0;
- right: 0;
- line-height: 48px;
- z-index: 10;
- }
- .pg-header .logo{
- display: inline-block;
- margin-left: 50px;
- }
- .pg-body{
- margin-top: 50px;
- width:1080px;
- height: 2000px;
- }
- .pg-body .menu{
- text-align: center;
- width:200px;
- border: 1px solid red;
- padding: 10px;
- background-color: aquamarine;
- float: left;
- margin: 5px;
- }
- .pg-body .menu .every-menu{
- text-align: center;
- display: inline-block;
- border: 1px solid red;
- width: 180px;
- height: 50px;
- margin: 5px;
- padding: 2px;
- line-height: 50px;
- }
- .pg-body .info{
- float: left;
- margin: 5px;
- border: 1px solid red;
- width: 800px;
- height: 500px;
- }
- .pg-body .info .info-menu{
- margin: 10px;
- }
- .pg-body .info-body{
- margin: 5px;
- /*width: 650px;*/
- height: 400px;
- border: 1px solid red;
- text-align: center;
- }
- .go-header{
- position: fixed;
- bottom:20px;
- right:20px;
- width: 80px;
- height: 80px;
- background-color: coral;
- color: white;
- z-index: 11;
- cursor: pointer;
- }
- .hide{
- display: none;
- }
- .c1{
- position: fixed;
- left: 0;
- right: 0;
- top: 0;
- bottom: 0;
- background-color: black;
- opacity: 0.6;
- z-index: 9;
- }
- .c2{
- width: 500px;
- height: 400px;
- background-color: white;
- position: fixed;
- left: 50%;
- right: 50%;
- top: 50%;
- margin-left: -250px;
- margin-top: -100px;
- z-index: 10;
- }
- .hide-menu{
- display: none;
- }
- .item .header{
- height: 35px;
- background-color: #2459a2;
- color: white;
- line-height: 35px;
- }
- </style>
- </head>
- <body>
- <div class="pg-header">
- <a class="logo">LOGO</a>
- </div>
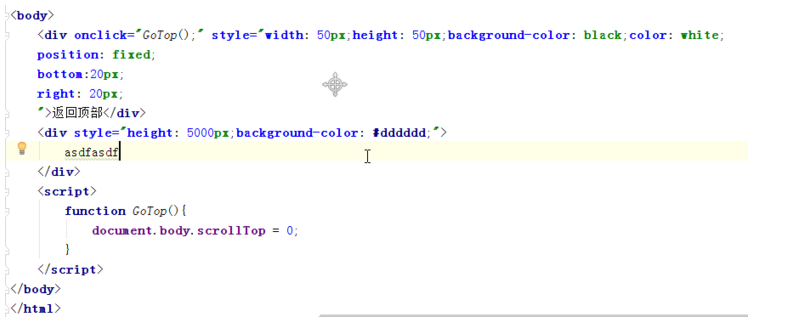
- <div class="go-header" onclick="GoTop();">
- <img src="back_top.png" alt="美女" title="返回顶部">
- </div>
- <!--遮罩层 -->
- <div id="i1" class="c1 hide"></div>
- <!-- 弹出窗-->
- <div id="i2" class="c2 hide">
- <p>
- <div style="margin: 5px;">
- <div style="display: inline-block;width: 60px;text-align: right">IP:</div>
- <input type="text"/>
- </div>
- <div style="margin: 5px;">
- <div style="display: inline-block;width: 60px;text-align: right">主机:</div>
- <input type="text"/>
- </div>
- </p>
- <p>
- <div style="display: inline-block;width: 200px;text-align: center">
- <input type="button" value="取消" onclick="HideModel();"/>
- <input type="button" value="确定" onclick="HideModel();"/>
- </div>
- </p>
- </div>
- <div class="pg-body">
- <div class="menu">
- <div class="item">
- <div id='m1' class="header" onclick="ChangeMenu('m1');">菜单1</div>
- <div class="content hide-menu">
- <div>内容1</div>
- <div>内容1</div>
- <div>内容1</div>
- </div>
- </div>
- <div class="item">
- <div id='m2' class="header" onclick="ChangeMenu('m2');">菜单2</div>
- <div class="content hide-menu">
- <div>内容2</div>
- <div>内容2</div>
- <div>内容2</div>
- </div>
- </div>
- <div class="item">
- <div id='m3' class="header" onclick="ChangeMenu('m3');">菜单3</div>
- <div class="content hide-menu">
- <div>内容3</div>
- <div>内容3</div>
- <div>内容3</div>
- </div>
- </div>
- <div class="item">
- <div id='m4' class="header" onclick="ChangeMenu('m4');">菜单4</div>
- <div class="content hide-menu">
- <div>内容4</div>
- <div>内容4</div>
- <div>内容4</div>
- </div>
- </div>
- </div>
- <div class="info">
- <div class="info-menu">
- <input type="button" value="全选" onclick="CheckAll();"> </input>
- <input type="button" value="取消" onclick="CancleAll();"> </input>
- <input type="button" value="反选" onclick="ReCheckAll();"> </input>
- <input type="button" value="添加" onclick="ShowModel();"> </input>
- </div>
- <div class="info-body">
- <div>
- <table>
- <thead>
- <tr>
- <td>选择</td>
- <td>主机</td>
- <td>IP</td>
- <td>备注</td>
- </tr>
- </thead>
- <tbody id="tb">
- <tr>
- <td><input type="checkbox"/></td>
- <td>web101</td>
- <td>192.168.8.5</td>
- <td></td>
- </tr>
- <tr>
- <td><input type="checkbox"/></td>
- <td>web102</td>
- <td>192.168.8.6</td>
- <td></td>
- </tr>
- <tr>
- <td><input type="checkbox"/></td>
- <td>web103</td>
- <td>192.168.8.7</td>
- <td></td>
- </tr>
- <tr>
- <td><input type="checkbox"/></td>
- <td>web104</td>
- <td>192.168.8.8</td>
- <td></td>
- </tr>
- <tr>
- <td><input type="checkbox"/></td>
- <td>web105</td>
- <td>192.168.8.9</td>
- <td></td>
- </tr>
- </tbody>
- </table>
- </div>
- </div>
- </div>
- <div style="clear: both;"></div>
- </div>
- <script>
- function CheckAll() {
- var tbody = document.getElementById('tb');
- var tr_list = tbody.children;
- for (var i = 0; i < tr_list.length; i++) {
- var curren_tr = tr_list[i];
- var checkbox = curren_tr.children[0].children[0];
- checkbox.checked = true;
- }
- }
- function CancleAll() {
- var tbody = document.getElementById('tb');
- var tr_list = tbody.children;
- for (var i = 0; i < tr_list.length; i++) {
- var curren_tr = tr_list[i];
- var checkbox = curren_tr.children[0].children[0];
- checkbox.checked = false;
- }
- }
- function ReCheckAll() {
- var tbody = document.getElementById('tb');
- var tr_list = tbody.children;
- for (var i = 0; i < tr_list.length; i++) {
- var curren_tr = tr_list[i];
- var checkbox = curren_tr.children[0].children[0];
- if (checkbox.checked) {
- checkbox.checked = false;
- }else{
- checkbox.checked = true;
- }
- }
- }
- function GoTop() {
- document.body.scrollTop = 0;
- }
- function ShowModel() {
- document.getElementById('i1').classList.remove('hide')
- document.getElementById('i2').classList.remove('hide')
- }
- function HideModel() {
- document.getElementById('i1').classList.add('hide')
- document.getElementById('i2').classList.add('hide')
- }
- function ChangeMenu(nid){
- var current_header = document.getElementById(nid);
- var item_list = current_header.parentElement.parentElement.children;
- for(var i=0;i<item_list.length;i++){
- var current_item = item_list[i];
- current_item.children[1].classList.add('hide-menu');
- }
- current_header.nextElementSibling.classList.remove('hide-menu');
- }
- </script>
- </body>
- </html>
效果:
day15 CSS JS DOM初探的更多相关文章
- HTML,CSS,JS,DOM,jQuery
HTML 超链接访问顺序 a:link-->a:visited-->a:hover-->a:active.(有顺序) link:表示从未访问过的链接的样式 visited:表示已经访 ...
- 转战JS(1) 初探与变量类型、运算符、常用函数与转换
转战JS(1)初探与变量类型.运算符.常用函数与转换 做为一名.NET后台开发人员,正考滤向Web前端开发转型,之前也写过一代前端代码,可是当再回头看JS,并有转向它的意愿的时候,突然发现:原来JS不 ...
- 1. web前端开发分享-css,js入门篇
关注前端这么多年,没有大的成就,就入门期间积累了不少技巧与心得,跟大家分享一下,不一定都适合每个人,毕竟人与人的教育背景与成长环境心理活动都有差别,但就别人的心得再结合自己的特点,然后探索适合自己的学 ...
- css+js+html基础知识总结
css+js+html基础知识总结 一.CSS相关 1.css的盒子模型:IE盒子模型.标准W3C盒子模型: 2.CSS优先级机制: 选择器的优先权:!important>style(内联样式) ...
- web前端开发分享-css,js入门篇(转)
转自:http://www.cnblogs.com/jikey/p/3600308.html 关注前端这么多年,没有大的成就,就入门期间积累了不少技巧与心得,跟大家分享一下,不一定都适合每个人,毕竟人 ...
- jQuery中的ready方法及实现按需加载css,js
模拟jQuery中的ready方法及实现按需加载css,js 一.ready函数的实现 经常用jQuery类库或其他类库中的ready方法,有时候想想它们到底是怎么实现的,但是看了一下jQuery中的 ...
- Js DOM 详解
DOM事件类 基本概念 DOM事件的级别 1.DOM0 element.onclick = function(){} 2.DOM2 element.addEventListener("cli ...
- 用html+css+js实现选项卡切换效果
文章转载自:http://tongling.github.io/JSCards/ 用html+css+js实现选项卡切换效果 使用之前学过的综合知识,实现一个新闻门户网站上的常见选项卡效果: 文字素材 ...
- web前端开发分享-css,js入门篇
学习没有捷径,但学习是有技巧与方法. 一,css入门篇: 推荐书籍:css哪些事儿,精通css. 理由:css那些事儿,他是一本介绍css基础类的书,是入门的经典读物. 系统的介绍了css的选 ...
随机推荐
- ubuntu安装robo3t
直接在官网下载 解压文件(使用命令 tar -zxvf robo3t-1.2.1-linux-x86_64-3e50a65.tar.gz) 打开解压后的文件,进入bin文件,直接在终端运行 ./rob ...
- (已解决)Arduino mega2560 R3插在电脑上没有反应
OK,话不多说.网上找了一些资料,感觉都说的不够清晰.自己琢磨了下,有了一个简单粗暴的方法. 步骤1:插上Arduino mega2560板子.没有反应. 步骤2:我的电脑-管理-设备管 ...
- 微信iOS端无法执行jquery on()方法
微信iOS端无法执行jquery on()方法,click方法可以, 如下代码是不会执行的: $(function(){ $('body').on('click','.cka',function(){ ...
- jquery-weui picker组件实现只选择年月
var date = new Date() var month = date.getMonth()+1 //获取当前月份 $('#selectTime').picker({ toolbarTempla ...
- webstorm下载激活汉化
下载 官方下载地址:https://www.jetbrains.com/webstorm/ 激活 参考http://blog.csdn.net/it_talk/article/details/5244 ...
- C#环形缓冲区(队列)完全实现
公司项目中经常设计到串口通信,TCP通信,而且大多都是实时的大数据的传输,然后大家都知道协议通讯肯定涉及到什么,封包.拆包.粘包.校验--什么鬼的概念一大堆,说简单点儿就是要一个高效率可复用的缓存区. ...
- HDU3874 线段树 + 离线处理
题目链接:http://acm.hdu.edu.cn/showproblem.php?pid=3874 , 线段树(或树状数组) + 离线处理 下午做了第一道离线处理的题目(HDU4417),多少有点 ...
- 打造颠覆你想象中的高性能,轻量级的webform框架-----如何替换webform的垃圾控件(第一天)
前文描述: 随着.net 推出 MVC框架以来,webform 与 mvc 的争论一直没有停止过,一直以来 mvc 的 拥护者远远高于 webform,但是webfrom的有些优势又是mvc而无法替 ...
- Objective-C try/catch异常处理机制原理。
try-catch-finaly finally在任何情况下都会执行(不管有没有异常),属于整个体系的附属. 基本思想是跳到捕获锚点,重新执行. http://www.cnblogs.com/mark ...
- 2018.5.17 oracle函数查询
--*********函数*********** --1.显示当前日期 select sysdate from dual; --2.显示当前日期,格式为****年月日,别名为hday select t ...