在Unity3D中实现安卓平台的本地通知推送
【前言】
对于手游来说,什么时候需要推送呢?玩过一些带体力限制的游戏就会发现,我的体力在恢复满后,手机会收到一个通知告诉我体力已完全恢复了。这类通知通常是由本地的客户端发起的,没有经过服务端。
在安卓应用中,本地通知推送是通过调用系统级服务NotificationManager实现的。虽然U3D本身也有NotificationServices类可以进行通知推送,但仅限于iOS平台(这篇博文讲了怎么使用它在iOS平台发起本机推送)。
而现在我们的游戏是使用U3D开发的,并不能像安卓开发一样直接在代码中调用服务。为了实现本地定时推送效果,需要自己写一个插件来实现了。
由于推送通常发生在客户端关闭的状态,这个推送应该被放在一个延时服务中,否则玩游戏玩得好好的突然跳出来一条自己的推送,太诡异了。
于是我们需要完成一个提供三个功能的模块:1、设定X秒后显示一条推送通知;2、设定X秒后显示一条通知,之后每天再显示一次;3、清除本应用的所有推送。
【解决思路】
因为U3D引擎提供了调用jar包的方法,所以我们可以在jar包中调用安卓的类库,实现消息推送,然后在jar包中留出接口供U3D使用即可,没有必要走JNI层。
【所需工具】
● eclipse
● 安卓SDK(我使用的4.4)
● Unity编辑器(我使用的5.1.3)
【开工】
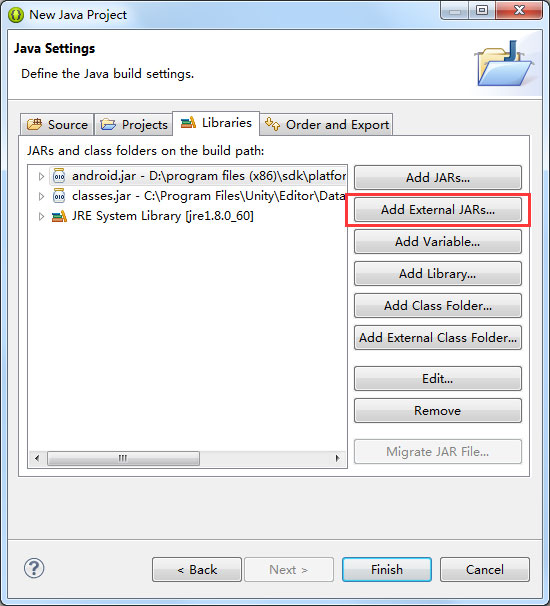
1、 创建jar包工程
创建的时候要引入两个第三方jar包。
一个是Unity的包,地址: Unity安装目录\Editor\Data\PlaybackEngines\androidplayer\release\bin\classes.jar(貌似4.x的目录和5.x不太一样,但总之就是找到androidplayer里面的classes.jar)
还有一个是安卓SDK的包,地址: 安卓SDK安装目录\platforms\安卓版本\android.jar
2、 编码
思路就是使用AlarmManager服务,在一定时间后发起广播,然后通过接收器接受展示。如果你做过安卓开发,对这段代码肯定不会陌生。如果没做过也没关系,当成一个黑盒,在需要的时候调接口就行。
首先添加一个Java类,注意父类要设为BroadcastReceiver。
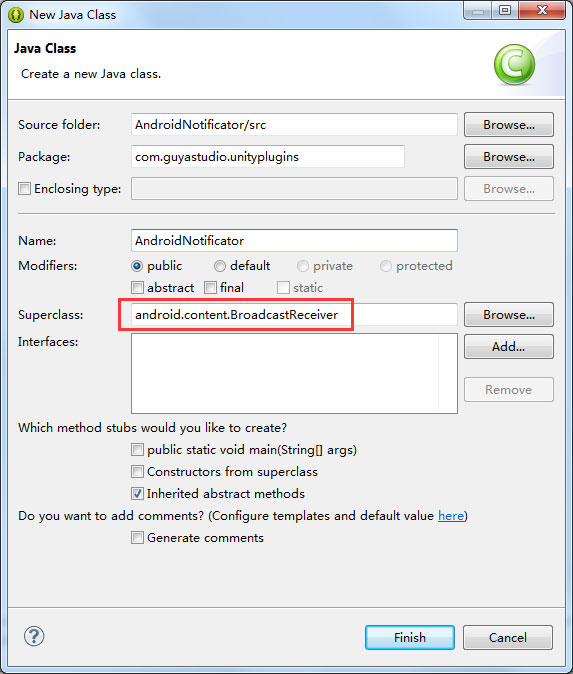
添加完成后,就可以开始写了:
package com.guyastudio.unityplugins;

import java.util.Calendar;

import android.app.Activity;

import android.app.AlarmManager;

import android.app.Notification;

import android.app.NotificationManager;

import android.app.PendingIntent;

import android.content.BroadcastReceiver;

import android.content.Context;

import android.content.Intent;

import android.content.pm.ApplicationInfo;

import android.content.pm.PackageManager;

import android.os.Bundle;

import com.unity3d.player.UnityPlayer;

/**

 * 用于生成 / 清除本地通知推送的插件

 * 仅在安卓平台有效

 *

 * @author Weiren

 *

 */

public class AndroidNotificator extends BroadcastReceiver {

    private static int m_nLastID = 0;

    /**

     * 显示数秒后的通知

     *

     * @param pAppName 应用名

     * @param pTitle 通知标题

     * @param pContent 通知内容

     * @param pDelaySecond 延迟时间

     * @param pIsDailyLoop 是否每日自动推送

     * @throws IllegalArgumentException

     */

    public static void ShowNotification(String pAppName, String pTitle, String pContent, int pDelaySecond, boolean pIsDailyLoop) throws IllegalArgumentException {

        if(pDelaySecond < 0)

        {

            throw new IllegalArgumentException("The param: pDelaySecond < 0");

        }

        Activity curActivity = UnityPlayer.currentActivity;

        Intent intent = new Intent("UNITY_NOTIFICATOR");

        intent.putExtra("appname", pAppName);

        intent.putExtra("title", pTitle);

        intent.putExtra("content", pContent);

        PendingIntent pi =  PendingIntent.getBroadcast(curActivity, 0, intent, 0);

        AlarmManager am = (AlarmManager)curActivity.getSystemService(Context.ALARM_SERVICE);

        Calendar calendar = Calendar.getInstance();

        calendar.add(Calendar.SECOND, pDelaySecond);

        long alarmTime = calendar.getTimeInMillis();

        if (pIsDailyLoop){

            am.setRepeating(

                    AlarmManager.RTC_WAKEUP,

                    alarmTime,

                    86400, // 24 hours

                    pi);

        } else {

            am.set(

                    AlarmManager.RTC_WAKEUP,

                    alarmTime,

                    pi);

        }

    }

    /**

     * 清除所有通知,包括日常通知

     */

    public static void ClearNotification() {

        Activity act = UnityPlayer.currentActivity;

        NotificationManager nManager = (NotificationManager)act.getSystemService(Context.NOTIFICATION_SERVICE);

        for(int i = m_nLastID; i >= 0; i--) {

            nManager.cancel(i);

        }

        m_nLastID = 0;

    }

    @SuppressWarnings("deprecation")

    public void onReceive(Context pContext, Intent pIntent) {

        Class<?> unityActivity = null;

        try {

            unityActivity = pContext.getClassLoader().loadClass("com.unity3d.player.UnityPlayerProxyActivity");

        } catch (Exception ex) {

            ex.printStackTrace();

            return;

        }

        ApplicationInfo applicationInfo = null;

        PackageManager pm = pContext.getPackageManager();

        try {

            applicationInfo = pm.getApplicationInfo(pContext.getPackageName(), PackageManager.GET_META_DATA);

        } catch (Exception ex) {

            ex.printStackTrace();

            return;

        }

        Bundle bundle = pIntent.getExtras();

        Notification notification = new Notification(

                applicationInfo.icon,

                (String)bundle.get("appname"),

                System.currentTimeMillis());

        PendingIntent contentIntent = PendingIntent.getActivity(

                pContext,

                m_nLastID,

                new Intent(pContext, unityActivity),

                0);

        notification.setLatestEventInfo(

                pContext,

                (String)bundle.get("title"),

                (String)bundle.get("content"),

                contentIntent);

        NotificationManager nm = (NotificationManager)pContext.getSystemService(Context.NOTIFICATION_SERVICE);

        nm.notify(m_nLastID, notification);

        m_nLastID++;

    }

}
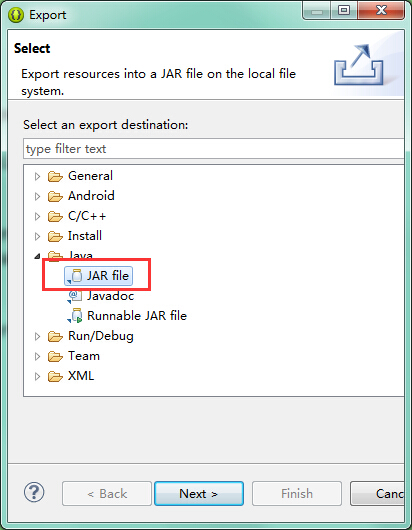
3、 导出jar包
在项目上右键——Export,导出为jar格式。
4、添加AndroidManifest.xml
安卓应用中如果要让应用收到广播,还需要在AndroidManifest.xml中加入receiver标签。我们创建的项目是一个Java项目,不会自动生成AndroidManifest,所以需要手动写一个:
<?xml version="1.0" encoding="utf-8"?>

<manifest xmlns:android="http://schemas.android.com/apk/res/android" android:installLocation="preferExternal" android:theme="@android:style/Theme.NoTitleBar" android:versionName="1.0" android:versionCode="10">

  <supports-screens android:smallScreens="true" android:normalScreens="true" android:largeScreens="true" android:xlargeScreens="true" android:anyDensity="true" />

  <application android:icon="@drawable/app_icon" android:label="@string/app_name" android:debuggable="false">

    <receiver android:process=":remote" android:name="com.macaronics.notification.AlarmReceiver"></receiver>

    <activity android:name="com.unity3d.player.UnityPlayerProxyActivity" android:label="@string/app_name" android:configChanges="fontScale|keyboard|keyboardHidden|locale|mnc|mcc|navigation|orientation|screenLayout|screenSize|smallestScreenSize|uiMode|touchscreen" >

      <intent-filter>

        <action android:name="android.intent.action.MAIN" />

        <category android:name="android.intent.category.LAUNCHER" />

      </intent-filter>

    </activity>

    <activity android:name="com.unity3d.player.UnityPlayerActivity" android:label="@string/app_name" android:configChanges="fontScale|keyboard|keyboardHidden|locale|mnc|mcc|navigation|orientation|screenLayout|screenSize|smallestScreenSize|uiMode|touchscreen" >

    </activity>

    <receiver android:name="com.guyastudio.unityplugins.AndroidNotificator" >

      <intent-filter>

        <action android:name="UNITY_NOTIFICATOR" />

      </intent-filter>

    </receiver>

  </application>

  <uses-feature android:glEsVersion="0x00020000" />

  <uses-sdk android:minSdkVersion="8" android:targetSdkVersion="17" />

</manifest>
● 注意“<action android:name="UNITY_NOTIFICATOR" />”这里名字要和前面Java代码中的一致。
4、 在U3D项目中调用
创建一个新的U3D项目,在界面上放一个Text和两个Button(为节约时间我用的源生UI):

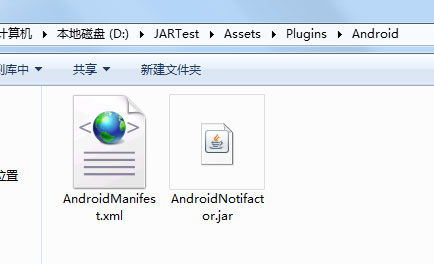
然后将导出的jar文件和AndroidManifest.xml文件移动到 U3D项目目录\Assets\Plugins\Android下:
在几个UI的父节点上加一个脚本,内容如下:
using UnityEngine;
using UnityEngine.UI; public class JARTest : MonoBehaviour { public Text Text_Message; #if UNITY_ANDROID
private AndroidJavaObject m_ANObj = null;
#endif // Use this for initialization
void Start () { } // Update is called once per frame
void Update () { } public void Button_1_Clicked()
{
#if UNITY_ANDROID
if(InitNotificator())
{
m_ANObj.CallStatic(
"ShowNotification",
Application.productName,
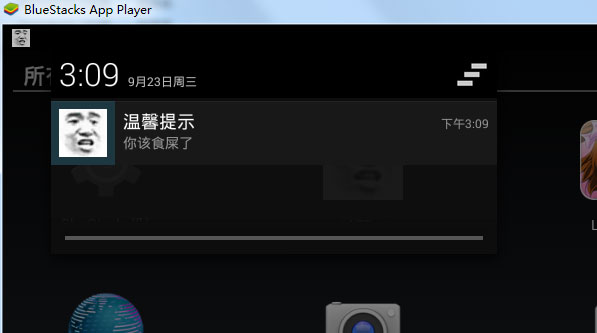
"温馨提示",
"你该食屎了",
10,
false);
this.Text_Message.text = "Notification will show in 10 sec.";
}
#endif
} public void Button_2_Clicked()
{
#if UNITY_ANDROID
if(InitNotificator())
{
m_ANObj.CallStatic("ClearNotification");
this.Text_Message.text = "Notification has been cleaned";
}
#endif
} #if UNITY_ANDROID
private bool InitNotificator()
{
if (m_ANObj == null)
{
try
{
m_ANObj = new AndroidJavaObject("com.guyastudio.unityplugins.AndroidNotificator");
}
catch
{
this.Text_Message.text = "Init AndroidNotificator Fail";
return false;
}
} if (m_ANObj == null)
{
this.Text_Message.text = "AndroidNotificator Not Found.";
return false;
} return true;
}
#endif
}
● 注意实例化AndroidJavaObject的参数名字要和Java工程的包名类名一致。
然后绑定控件和事件方法。绑定好后先编译一下,如果通过了,就可以导出一个apk包了。将这个包安装到安卓设备上。我手头没有安卓设备,就用模拟器来测试:
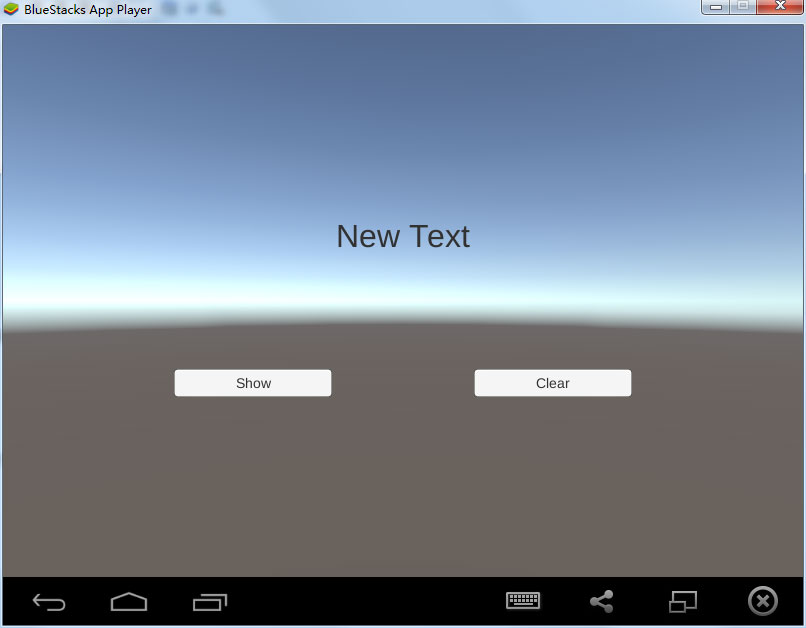
点击“Show”按钮,10秒后会收到通知(点击后可将应用至后台,或杀掉):
而点击“Clean”按钮,通知都会被清除。
至此,这个通知插件就完成了。
【后记】
最近两个月经历了辞职,以休息的名义玩(主要是肝夏活,你懂的),苦逼地找工作,意外地入职这一系列过程,心情比较复杂,博客这一块也一直没上。直到今天在项目中搞了个这个模块,才意识到可以稍微更新一下。
我知道你们想要谱面编辑器教程(
好吧,完整的制作过程我看来是没时间写出来了,这周末讲一下核心部分的逻辑,核心搞懂了其他都很简单了。不发直播拆大和,我是认真的!

在Unity3D中实现安卓平台的本地通知推送的更多相关文章
- xamarin.ios 本地通知推送
由于ios10版本以后UILocalNotification被标为弃用了,所以要添加新的本地通知推送功能,下面提供一些代码参考. 一.先在AppDelegate.cs上注册本地通知推送功能. publ ...
- IOS 本地通知推送消息
在现在的移动设备中,好多应用性的APP都用到了推送服务,但是有好多推送的内容,比如有的只是单纯的进行推送一个闹钟类型的,起了提醒作 用,有的则是推送的实质性的内容,这就分为推送的内容来区别用什么推送, ...
- Docker 本地镜像推送到阿里云(五)
最近在学习Docker,从安装Docker开始,到自定义制作镜像mycentos,但是怎么把它推送到阿里云,一直是困扰我的问题.后面有时间了解了一下,根据本地镜像推动到阿里云其实并没有我们想象中那么难 ...
- Git总结笔记3-把本地仓库推送到github
说明:此笔记在centos 7 上完成 1.配置公钥 [root@kangvcar ~]# ssh-keygen -t rsa -C "kangvcar@126.com" [roo ...
- git将本地项目推送到远程仓库
一.三个基本配置: Git全局设置 git config --global user.name "账户名称" git config --global user.email &quo ...
- 将本地项目推送至gitee或者github
将本地项目推送到Git github上的版本和本地版本冲突的解决方法 初始化项目时,在git中新建项目. 在Github中创建了一个Repository之后,会给你列出如何将自己本地项目Push到Gi ...
- ZH奶酪:基于ionic.io平台的ionic消息推送功能实现
Hybrid App越来越火,Ionic的框架也逐渐被更多的人熟知. 在mobile app中,消息推送是很必要的一个功能. 国内很多ionic应用的推送都是用的极光推送,最近研究了一下Ionic自己 ...
- git 本地项目推送至远程仓库
1 在本地文件夹下创建一个 Git 仓库(如test目录下) git init 2 此时test文件夹即是你的maste主分支,你可以在改文件夹下写自己的项目 3 将test文件夹下的内容提交至暂存区 ...
- 如何将本地项目推送到Github
如何将本地项目推送到Github Tip:在本地要安装好Git,官网:https://git-scm.com/ 一个学习Git的好地方:https://try.github.io/ 在线闯关实战,边练 ...
随机推荐
- pycharm 安装venv的依赖包
(venv)$ pip install -r requirements.txt
- (poj 3660) Cow Contest (floyd算法+传递闭包)
题目链接:http://poj.org/problem?id=3660 Description N ( ≤ N ≤ ) cows, conveniently numbered ..N, are par ...
- js优化原则
首先,与其他语言不同,JS的效率很大程度是取决于JS engine的效率.除了引擎实现的优劣外,引擎自己也会为一些特殊的代码模式采取一些优化的策略.例如FF.Opera和Safari的JS引擎,都对字 ...
- HDU 5176 The Experience of Love 带权并查集
The Experience of Love Time Limit: 4000/2000 MS (Java/Others) Memory Limit: 65536/65536 K (Java/O ...
- (困难) CF 484E Sign on Fence,整体二分+线段树
Bizon the Champion has recently finished painting his wood fence. The fence consists of a sequence o ...
- jetty compile
lifecycle cant been covered, 需要m2e-extra,在elcipse marcketplace找,不是叫做这个名. <parent>上有lifecycle问题 ...
- 初始化时查看combox的文本内容
string sql = string.Format("select field_name from pt_temp_field where pt_name = '{0}' and temp ...
- away3d 汽车路线编辑器
2012年的时候,跟朋友去到一个公司,打算用away3d做一个赛车模拟养成游戏,后来由于种种原因,立项未成,由于朋友已经转行,自己也想对自己做过的事情有一些交代,所以将我负责的部分,赛道编辑器的源码公 ...
- Blog开始
好久没更新Blog了,去看了下之前的csdn的blog感觉特别的乱,为此决心重开blog,记录工作及学习中的一些事 2013-10-28 ymc ...
- iOS开发之圆角指定
如果需要将UIView的4个角全部都为圆角,做法相当简单,只需设置其Layer的cornerRadius属性即可(项目需要使用QuartzCore框架).而若要指定某几个角(小于4)为圆角而别的不变时 ...