微信授权就是这个原理,Spring Cloud OAuth2 授权码模式
上一篇文章Spring Cloud OAuth2 实现单点登录介绍了使用 password 模式进行身份认证和单点登录。本篇介绍 Spring Cloud OAuth2 的另外一种授权模式-授权码模式。
授权码模式的认证过程是这样的:
1、用户客户端请求认证服务器的认证接口,并附上回调地址;
2、认证服务接口接收到认证请求后调整到自身的登录界面;
3、用户输入用户名和密码,点击确认,跳转到授权、拒绝提示页面(也可省略);
4、用户点击授权或者默认授权后,跳转到微服务客户端的回调地址,并传入参数 code;
5、回调地址一般是一个 RESTful 接口,此接口拿到 code 参数后,再次请求认证服务器的 token 获取接口,用来换取 access_token 等信息;
6、获取到 access_token 后,拿着 token 去请求各个微服务客户端的接口。
注意上面所说的用户客户端可以理解为浏览器、app 端,微服务客户端就是我们系统中的例如订单服务、用户服务等微服务,认证服务端就是用来做认证授权的服务,相对于认证服务端来说,各个业务微服务也可以称作是它的客户端。
认证服务端配置
认证服务端继续用上一篇文章的配置,代码不需要任何改变,只需要在数据库里加一条记录,来支持新加的微服务客户端的认证
我们要创建的客户端的 client-id 为 code-client,client-secret 为 code-secret-8888,但是同样需要加密,可以用如下代码获取:
System.out.println(new BCryptPasswordEncoder().encode("code-secret-8888"));
除了以上这两个参数,要将 authorized_grant_types 设置为 authorization_code,refresh_token,web_server_redirect_uri 设置为回调地址,稍后微服务客户端会创建这个接口。
然后将这条记录组织好插入数据库中。
INSERT INTO oauth_client_details

    (client_id, client_secret, scope, authorized_grant_types,

    web_server_redirect_uri, authorities, access_token_validity,

    refresh_token_validity, additional_information, autoapprove)

VALUES

    ('code-client', '$2a$10$jENDQZRtqqdr6sXGQK.L0OBADGIpyhtaRfaRDTeLKI76I/Ir1FDn6', 'all',

    'authorization_code,refresh_token', 'http://localhost:6102/client-authcode/login', null, 3600, 36000, null, true);
创建授权模式的微服务
引入 maven 包
<dependency>

    <groupId>org.springframework.boot</groupId>

    <artifactId>spring-boot-starter-web</artifactId>

</dependency>

<dependency>

    <groupId>org.springframework.cloud</groupId>

    <artifactId>spring-cloud-starter-oauth2</artifactId>

</dependency>

<dependency>

    <groupId>org.springframework.boot</groupId>

    <artifactId>spring-boot-starter-data-redis</artifactId>

</dependency>

<dependency>

    <groupId>io.jsonwebtoken</groupId>

    <artifactId>jjwt</artifactId>

    <version>0.9.1</version>

</dependency>

<dependency>

    <groupId>com.squareup.okhttp3</groupId>

    <artifactId>okhttp</artifactId>

    <version>3.14.2</version>

</dependency>

<dependency>

    <groupId>org.springframework.boot</groupId>

    <artifactId>spring-boot-starter-thymeleaf</artifactId>

</dependency>
引入 okhttp 和 thymeleaf 是因为要做一个简单的页面并模拟正常的认证过程。
配置文件 application.yml
spring:

  application:

    name: client-authcode

server:

  port: 6102

  servlet:

    context-path: /client-authcode

security:

  oauth2:

    client:

      client-id: code-client

      client-secret: code-secret-8888

      user-authorization-uri: http://localhost:6001/oauth/authorize

      access-token-uri: http://localhost:6001/oauth/token

    resource:

      jwt:

        key-uri: http://localhost:6001/oauth/token_key

        key-value: dev

    authorization:

      check-token-access: http://localhost:6001/oauth/check_token
**创建 resourceConfig **
@Configuration

@EnableResourceServer

@EnableGlobalMethodSecurity(prePostEnabled = true)

public class ResourceServerConfig extends ResourceServerConfigurerAdapter {

    @Bean

    public TokenStore jwtTokenStore() {

        return new JwtTokenStore(jwtAccessTokenConverter());

    }

    @Bean

    public JwtAccessTokenConverter jwtAccessTokenConverter() {

        JwtAccessTokenConverter accessTokenConverter = new JwtAccessTokenConverter();

        accessTokenConverter.setSigningKey("dev");

        accessTokenConverter.setVerifierKey("dev");

        return accessTokenConverter;

    }

    @Autowired

    private TokenStore jwtTokenStore;

    @Override

    public void configure(ResourceServerSecurityConfigurer resources) throws Exception {

        resources.tokenStore(jwtTokenStore);

    }

    @Override

    public void configure(HttpSecurity http) throws Exception {

        http.authorizeRequests().antMatchers("/login").permitAll();

    }

}
使用 jwt 作为 token 的存储,注意允许 /login 接口无授权访问,这个地址是认证的回调地址,会返回 code 参数。
创建 application.java启动类
@SpringBootApplication

public class Application {

    public static void main(String[] args) {

        SpringApplication.run(Application.class, args);

    }

}
到这步可以先停一下了。我们把认证服务端和刚刚创建的认证客户端启动起来,就可以手工测试一下了。回调接口不是还没创建呢吗,没关系,我们权当那个地址现在就是为了接收 code 参数的。
1、在浏览器访问 /oauth/authorize 授权接口,接口地址为:
http://localhost:6001/oauth/authorize?client_id=code-client&response_type=code&redirect_uri=http://localhost:6102/client-authcode/login
注意 response_type 参数设置为 code,redirect_uri 设置为数据库中插入的回调地址。
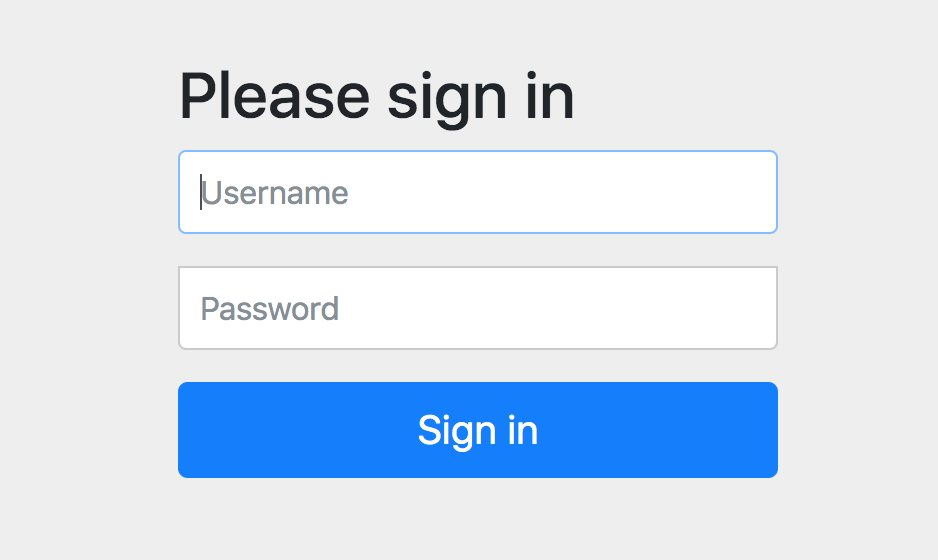
2、输入上面地址后,会自动跳转到认证服务端的登录页面,输入用户名、密码,这里用户名是 admin,密码是 123456
3、点击确定后,来到授权确认页面,页面上有 Authorize 和 Deny (授权和拒绝)两个按钮。可通过将 autoapprove 字段设置为 0 来取消此页面的展示,默认直接同意授权。
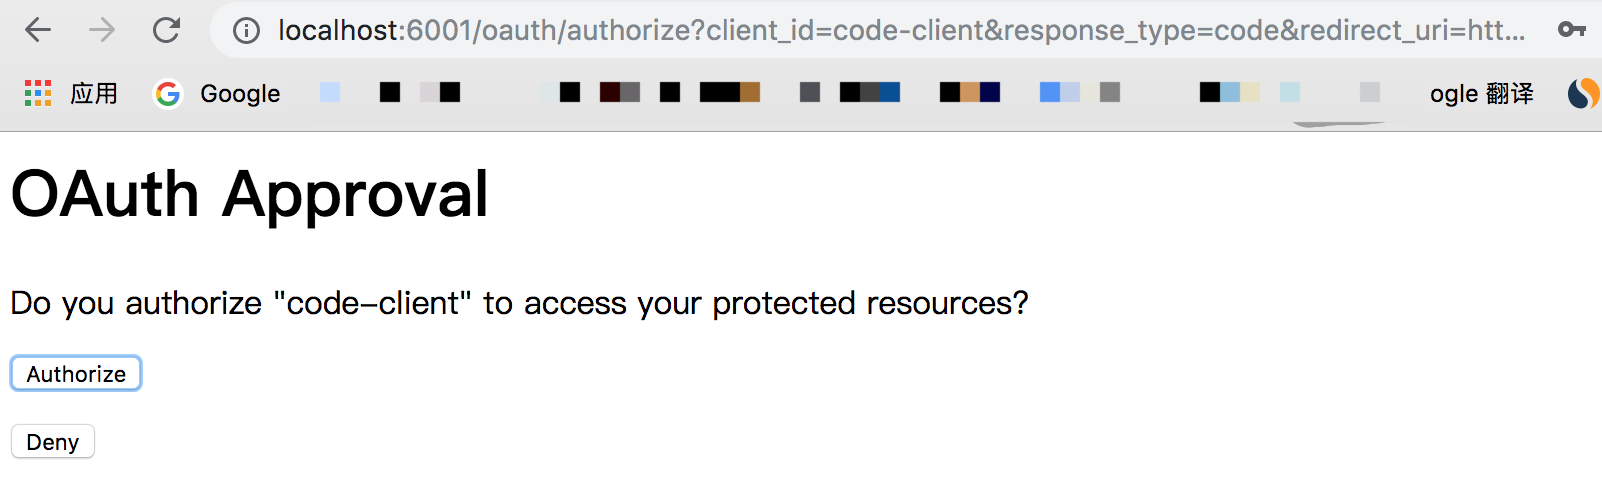
4、点击同意授权后,跳转到了回调地址,虽然是 404 ,但是我们只是为了拿到 code 参数,注意地址后面的 code 参数。

5、拿到这个 code 参数是为了向认证服务器 /oauth/token 接口请求 access_token ,继续用 REST Client 发送请求,同样的,你也可以用 postman 等工具测试。
注意 grant_type 参数设置为 authorization_code,code 就是上一步回调地址中加上的,redirect_uri 仍然要带上,回作为验证条件,如果不带或者与前面设置的不一致,会出现错误。
请求头 Authorization ,仍然是 Basic + 空格 + base64(client_id:client_secret),可以通过 https://www.sojson.com/base64.html 网站在线做 base64 编码。
code-client:code-secret-8888 通过 base64 编码后结果为 Y29kZS1jbGllbnQ6Y29kZS1zZWNyZXQtODg4OA==
POST http://localhost:6001/oauth/token?grant_type=authorization_code&client=code-client&code=BbCE34&redirect_uri=http://localhost:6102/client-authcode/login

Accept: */*

Cache-Control: no-cache

Authorization: Basic Y29kZS1jbGllbnQ6Y29kZS1zZWNyZXQtODg4OA==
发送请求后,返回的 json 内容如下:
{

  "access_token": "eyJhbGciOiJIUzI1NiIsInR5cCI6IkpXVCJ9.eyJ1c2VyX25hbWUiOiJhZG1pbiIsImp3dC1leHQiOiJKV1Qg5omp5bGV5L-h5oGvIiwic2NvcGUiOlsiYWxsIl0sImV4cCI6MTU3MjYwMTMzMiwiYXV0aG9yaXRpZXMiOlsiUk9MRV9BRE1JTiJdLCJqdGkiOiI2OWRmY2M4Yy1iZmZiLTRiNDItYTZhZi1hN2IzZWUyZjI1ZTMiLCJjbGllbnRfaWQiOiJjb2RlLWNsaWVudCJ9.WlgGnBkNdg2PwKqjbZWo6QmUmq0QluZLgIWJXaZahSU",

  "token_type": "bearer",

  "refresh_token": "eyJhbGciOiJIUzI1NiIsInR5cCI6IkpXVCJ9.eyJ1c2VyX25hbWUiOiJhZG1pbiIsImp3dC1leHQiOiJKV1Qg5omp5bGV5L-h5oGvIiwic2NvcGUiOlsiYWxsIl0sImF0aSI6IjY5ZGZjYzhjLWJmZmItNGI0Mi1hNmFmLWE3YjNlZTJmMjVlMyIsImV4cCI6MTU3MjYzMzczMiwiYXV0aG9yaXRpZXMiOlsiUk9MRV9BRE1JTiJdLCJqdGkiOiJkNzk2OWRhMS04NTg4LTQ2YzMtYjdlNS1jMGM5NzcxNTM5Y2YiLCJjbGllbnRfaWQiOiJjb2RlLWNsaWVudCJ9.TEz0pQOhST9-ozdoJWm6cf1SoWvPC6W-5JW9yjZJXek",

  "expires_in": 3599,

  "scope": "all",

  "jwt-ext": "JWT 扩展信息",

  "jti": "69dfcc8c-bffb-4b42-a6af-a7b3ee2f25e3"

}
和上一篇文章 password 模式拿到的 token 内容是一致的,接下来的请求都需要带上 access_token 。
6、把获取到的 access_token 代入到下面的请求中 ${access_token} 的位置,就可以请求微服务中的需要授权访问的接口了。
GET http://localhost:6102/client-authcode/get

Accept: */*

Cache-Control: no-cache

Authorization: bearer ${access_token}
接口内容如下:
@org.springframework.web.bind.annotation.ResponseBody

@GetMapping(value = "get")

@PreAuthorize("hasAnyRole('ROLE_ADMIN')")

public Object get(Authentication authentication)

{

    //Authentication authentication = SecurityContextHolder.getContext().getAuthentication();

    authentication.getCredentials();

    OAuth2AuthenticationDetails details = (OAuth2AuthenticationDetails) authentication.getDetails();

    String token = details.getTokenValue();

    return token;

}
经过以上的手工测试,证明此过程是通的,但是还没有达到自动化。如果你集成过微信登录,那你一定知道我们在回调地址中做了什么,拿到返回的 code 参数去 token 接口换取 access_token 对不对,没错,思路都是一样的,我们的回调接口中同样要拿 code 去换取 access_token。
为此,我做了一个简单的页面,并且在回调接口中请求获取 token 的接口。
创建简单的登录页面
在 resources 目录下创建 templates 目录,用来存放 thymeleaf 的模板,不做样式,只做最简单的演示,创建 index.html 模板,内容如下:
<!DOCTYPE html>

<html lang="en" xmlns:th="http://www.thymeleaf.org">

<head>

    <meta charset="UTF-8">

    <title>古时的风筝-OAuth2 Client</title>

</head>

<body>

<div>

    <a href="http://localhost:6001/oauth/authorize?client_id=code-client&response_type=code&redirect_uri=http://localhost:6102/client-authcode/login">登录</a>

    <span th:text="'当前认证用户:' + ${username}"></span>

    <span th:text="${accessToken}"></span>

</div>

</body>

</html>
回调接口及其他接口
@Slf4j

@Controller

public class CodeClientController {

    /**

     * 用来展示index.html 模板

     * @return

     */

    @GetMapping(value = "index")

    public String index(){

        return "index";

    }

    @GetMapping(value = "login")

    public Object login(String code,Model model) {

        String tokenUrl = "http://localhost:6001/oauth/token";

        OkHttpClient httpClient = new OkHttpClient();

        RequestBody body = new FormBody.Builder()

                .add("grant_type", "authorization_code")

                .add("client", "code-client")

                .add("redirect_uri","http://localhost:6102/client-authcode/login")

                .add("code", code)

                .build();

        Request request = new Request.Builder()

                .url(tokenUrl)

                .post(body)

                .addHeader("Authorization", "Basic Y29kZS1jbGllbnQ6Y29kZS1zZWNyZXQtODg4OA==")

                .build();

        try {

            Response response = httpClient.newCall(request).execute();

            String result = response.body().string();

            ObjectMapper objectMapper = new ObjectMapper();

            Map tokenMap = objectMapper.readValue(result,Map.class);

            String accessToken = tokenMap.get("access_token").toString();

            Claims claims = Jwts.parser()

                    .setSigningKey("dev".getBytes(StandardCharsets.UTF_8))

                    .parseClaimsJws(accessToken)

                    .getBody();

            String userName = claims.get("user_name").toString();

            model.addAttribute("username", userName);

            model.addAttribute("accessToken", result);

            return "index";

        } catch (Exception e) {

            e.printStackTrace();

        }

        return null;

    }

    @org.springframework.web.bind.annotation.ResponseBody

    @GetMapping(value = "get")

    @PreAuthorize("hasAnyRole('ROLE_ADMIN')")

    public Object get(Authentication authentication) {

        //Authentication authentication = SecurityContextHolder.getContext().getAuthentication();

        authentication.getCredentials();

        OAuth2AuthenticationDetails details = (OAuth2AuthenticationDetails) authentication.getDetails();

        String token = details.getTokenValue();

        return token;

    }

}
其中 index() 方法是为了展示 thymeleaf 模板,login 方法就是回调接口,这里用了 okhttp3 用作接口请求,请求认证服务端的 /oauth/token 接口来换取 access_token,只是把我们手工测试的步骤自动化了。
访问 index.html 页面
我们假设这个页面就是一个网站的首页,未登录的用户会在网站上看到登录按钮,我们访问这个页面:http://localhost:6102/client-authcode/index,看到的页面是这样的

接下来,点击登录按钮,通过上面的模板代码看出,点击后其实就是跳转到了我们手工测试第一步访问的那个地址,之后的操作和上面手工测试的是一致的,输入用户名密码、点击同意授权。
接下来,页面跳转回回调地址<http://localhost:6102/client-authcode/login?code=xxx 的时候,login 方法拿到 code 参数,开始构造 post 请求体,并把 Authorization 加入请求头,然后请求 oauth/token 接口,最后将拿到的 token 和 通过 token 解析后的 username 返回给前端,最后呈现的效果如下:
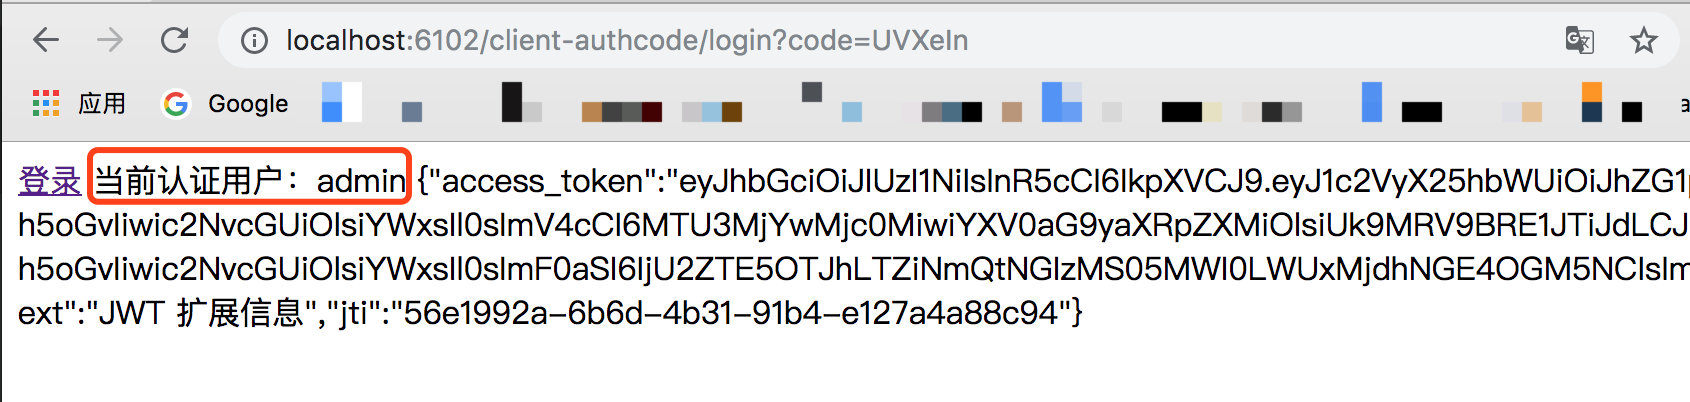
最后,拿到 token 后的客户端,就可以将 token 加入到请求头后,去访问需要授权的接口了。
结合上一篇文章,我们就实现了 password 和 授权码两种模式的 oauth2 认证。
本篇源码微服务客户端对应的源码地址为: 点击查看 github 源码
相关阅读
不要吝惜你的「推荐」呦
欢迎关注,不定期更新本系列和其他文章
古时的风筝 ,进入公众号可以加入交流群
微信授权就是这个原理,Spring Cloud OAuth2 授权码模式的更多相关文章
- vue+uni-app商城实战 | 第一篇:【有来小店】微信小程序快速开发接入Spring Cloud OAuth2认证中心完成授权登录
一. 前言 本篇通过实战来讲述如何使用uni-app快速进行商城微信小程序的开发以及小程序如何接入后台Spring Cloud微服务. 有来商城 youlai-mall 项目是一套全栈商城系统,技术栈 ...
- Spring Cloud OAuth2.0 微服务中配置 Jwt Token 签名/验证
关于 Jwt Token 的签名与安全性前面已经做了几篇介绍,在 IdentityServer4 中定义了 Jwt Token 与 Reference Token 两种验证方式(https://www ...
- Spring Security 解析(七) —— Spring Security Oauth2 源码解析
Spring Security 解析(七) -- Spring Security Oauth2 源码解析 在学习Spring Cloud 时,遇到了授权服务oauth 相关内容时,总是一知半解,因 ...
- Feign 系列(05)Spring Cloud OpenFeign 源码解析
Feign 系列(05)Spring Cloud OpenFeign 源码解析 [TOC] Spring Cloud 系列目录(https://www.cnblogs.com/binarylei/p/ ...
- OAuth2密码模式已死,最先进的Spring Cloud认证授权方案在这里
旧的Spring Security OAuth2停止维护已经有一段时间了,99%的Spring Cloud微服务项目还在使用这些旧的体系,严重青黄不接.很多同学都在寻找新的解决方案,甚至还有念念不忘密 ...
- Spring Cloud OAuth2(一) 搭建授权服务
概要 本文内容主要为spring cloud 授权服务的搭建,采用jwt认证. GitHub 地址:https://github.com/fp2952/spring-cloud-base/tree/m ...
- 微服务下前后端分离的统一认证授权服务,基于Spring Security OAuth2 + Spring Cloud Gateway实现单点登录
1. 整体架构 在这种结构中,网关就是一个资源服务器,它负责统一授权(鉴权).路由转发.保护下游微服务. 后端微服务应用完全不用考虑权限问题,也不需要引入spring security依赖,就正常的 ...
- Spring Cloud OAuth2 实现用户认证及单点登录
文章较长,建议推荐,建议转发,建议收藏,建议关注公众号哈. OAuth 2 有四种授权模式,分别是授权码模式(authorization code).简化模式(implicit).密码模式(resou ...
- SpringCloud(10)使用Spring Cloud OAuth2和JWT保护微服务
采用Spring Security AOuth2 和 JWT 的方式,避免每次请求都需要远程调度 Uaa 服务.采用Spring Security OAuth2 和 JWT 的方式,Uaa 服务只验证 ...
随机推荐
- j2ee开发之Spring2.5框架学习笔记
Spring 2.5框架学习笔记 1.是一个开源的控制反转IOC和面向切面AOP的容器框架 2.IOC控制反转 public class PersonServiceBean { private Per ...
- IDEA 学习笔记之 Web项目开发
Web项目开发: 添加新模块: 起名: 添加jars: 添加Tomcat/local: 添加项目: 启动Tomcat: 看到web页面: 修改页面: 重新部署页面:
- 使用malloc函数或new运算符为链表结点分配内存空间
目录 使用malloc函数或new运算符为链表结点分配内存空间 使用malloc函数或new运算符为链表结点分配内存空间 当我们定义链表结点类型后,如何在每次需要使用新结点时临时分配相应大小的内存空间 ...
- 学以致用,通过字节码理解:Java的内部类与外部类之私有域访问
目录: 内部类的定义及用处 打开字节码理解内部类 一.内部类的定义及用处 内部类(inner class)是定义在另一个类中的类.使用内部类,我们可以: 访问该类定义所在的作用域中的数据,包括私有的数 ...
- String的常见面试题
下面代码,是我前些天在网上搜集的一小部分String的面试题.个人觉得感触很深,希望对大家有所帮助.不好的也请大家批评指正. package com.zys.string; public class ...
- Stack Overflow 上 250W 浏览量的一个问题:你对象丢了
在逛 Stack Overflow 的时候,发现最火的问题竟然是:什么是 NullPointerException(java.lang.NullPointerException),它是由什么原因导致的 ...
- 奇淫异巧之 PHP 后门
整理大部分来源信安之路 对于隐蔽来说,有以下几点要素: 1.熟悉环境,模拟环境,适应环境,像一只变色龙一样隐藏 2.清除痕迹,避免运维发现 3.避免后门特征值被 D 盾等工具检测到 姿势 一般过狗思路 ...
- 程序员成长的四个简单技巧,你 get 了吗?
最近拜读了"阿里工程师的自我修养"手册,12 位技术专家分享生涯感悟来帮助我们这些菜鸡更好的成长,度过中年危机,我收获颇多,其中有不少的方法技巧和我正在使用的,这让我觉得我做的这些 ...
- Netty - 粘包和半包(上)
在网络传输中,粘包和半包应该是最常出现的问题,作为 Java 中最常使用的 NIO 网络框架 Netty,它又是如何解决的呢?今天就让我们来看看. 定义 TCP 传输中,客户端发送数据,实际是把数据写 ...
- java集合之Stack栈基础
Stack堆栈: 是后进先出(LIFO)的对象堆栈,继承Vector—AbstractList--AbstractCollection类,底层是通过数组实现, boolean empty() 判断堆栈 ...