QT 中Widgets-Scene3d例子学习
QT中自带的例子widgets-scene3d实现在基于Widget的应用程序中使用qml 3d场景的功能,我在此基础上,将basicshapes-cpp的例子加以嵌入:
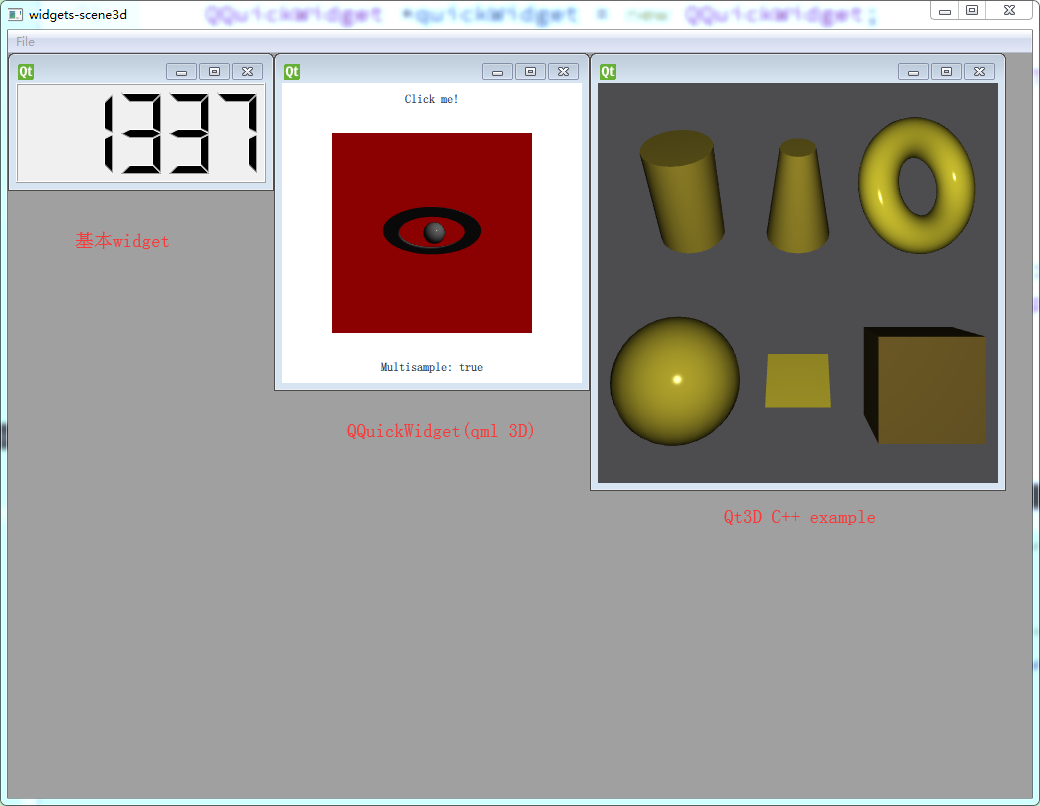
相关代码如下:
|
1
2 3 4 5 6 7 8 9 10 11 12 13 14 15 16 17 18 19 20 21 22 23 24 25 26 27 28 29 30 31 32 33 34 35 36 37 38 39 40 41 42 43 44 45 46 47 48 49 50 51 52 53 54 55 56 57 58 59 60 61 62 63 64 65 66 67 68 69 70 71 72 73 74 75 76 77 78 79 80 81 82 83 84 85 86 87 88 89 90 91 92 93 94 95 96 97 98 |
#include <QApplication>
#include <QMainWindow> #include <QQuickWidget> #include <QMdiArea> #include <QLCDNumber> #include <QMenuBar> #include "scenemodifier.h" #include <Qt3DRender/qcamera.h> #include <Qt3DCore/qentity.h> #include <Qt3DRender/qcameralens.h> #include <Qt3DInput/QInputAspect> #include <Qt3DExtras/qtorusmesh.h> #include <Qt3DCore/qtransform.h> #include <Qt3DRender/qrenderaspect.h> #include <Qt3DExtras/qt3dwindow.h> int main(int argc, char **argv) QMainWindow mainWindow; QMdiArea *centralWidget = new QMdiArea; Qt3DInput::QInputAspect *input = new Qt3DInput::QInputAspect; // Root entity Qt3DCore::QEntity *lightEntity = new Qt3DCore::QEntity(rootEntity); // For camera controls // Set root object of the scene mainWindow.setCentralWidget(centralWidget); QMenu *fileMenu = mainWindow.menuBar()->addMenu(QObject::tr("&File")); mainWindow.resize(); return app.exec(); |
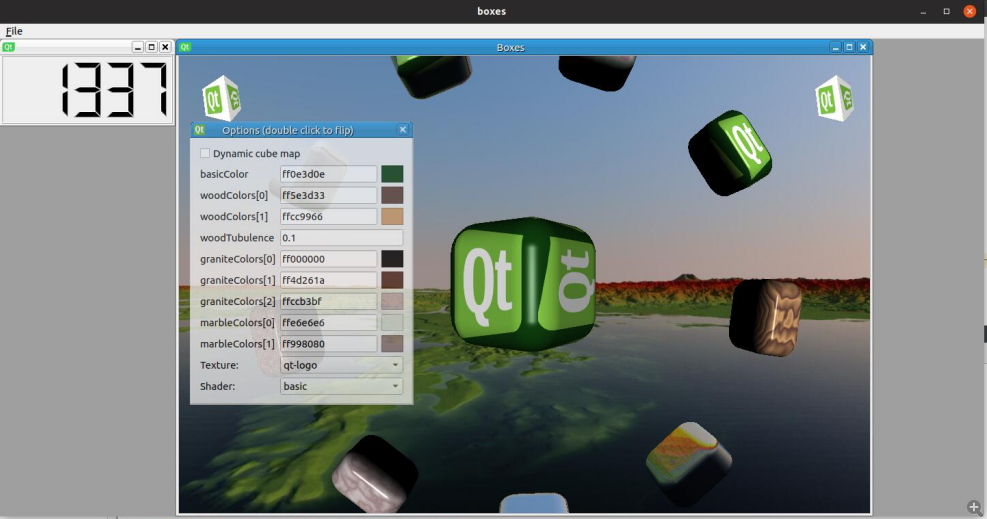
再进一步,我将QT场景视图(Graphics-View)嵌入多文档界面,下面尝试将QT自带的boxes例子(GraphicsView With OpenGL)嵌入,相关代码如下:
|
1
2 3 4 5 6 7 8 9 10 |
// 子窗口4-GraphicsView With OpenGL
QGLWidget *widget = new QGLWidget(QGLFormat(QGL::SampleBuffers)); widget->makeCurrent(); Scene scene(1024, 768, maxTextureSize);; GraphicsView view; view.setViewport(widget); view.setViewportUpdateMode(QGraphicsView::FullViewportUpdate); view.setScene(&scene); //gview.show(); centralWidget->addSubWindow(&gview); |
我在Ubuntu中测试的一个截图效果如下:
QT 中Widgets-Scene3d例子学习的更多相关文章
- PyQt学习随笔:Qt中Model/View中的怎么构造View匹配的Model
老猿Python博文目录 老猿Python博客地址 在<PyQt学习随笔:Qt中Model/View相关的主要类及继承关系>介绍了Model/View架构的主要类,在实际使用时,view相 ...
- PyQt(Python+Qt)学习随笔:快速理解Qt 中Action是什么
一.引言 Qt中Action这个词接触很久了,一直以来没去学习,今天终于准备学习了,查了些资料,初步总结为: Action为界面操作的抽象,应用程序可以通过菜单,工具栏按钮以及键盘快捷键来调用通用的命 ...
- Qt学习笔记:Qt中使用Lua
今天想在Qt中使用Lua进行数据操作 结果发现在Qt中使用Lua的文章较少,虽然很简单,但是还是写出来提供入门,顺便记录一下 我使用的是Qt Creator 3.4.2,用的是mingw4.9.2的编 ...
- OpenCV2学习笔记03:Qt中配置OpenCV环境
在Qt中开发基于OpenCV的应用时,需要配置对应函数库到环境变量,这时候我们需要使用到qmake能够识别的变量来指定环境变量. INCLUDEPATH: 用于指定搜索头文件到文件夹路径. LIBS: ...
- QT中静态库的生成与使用——创建共享库代码,附例子
一. 静态库的生成 1. 测试目录: lib 2. 源码文件名: mywindow.h, mywindow.cpp, 类MyWindow继承于QPushButton, 并将文字设置为&qu ...
- <QT之Bug制造机>QT中串口类“QSerialPort”的学习笔记
QT5中已经增加了串口类QSrialPort,可以直接调用API函数进行快速开发. 1. 获取串口信息 Dialog::Dialog(QWidget *parent) : QDialog(parent ...
- PyQt学习随笔:Qt中Model/View中的Model Index
Qt中Model/View中的Model Index是一个类,该类用于定位Model/View中数据模型中的数据. Model Index是从QAbstractItemModel派生的子类,用于在项视 ...
- PyQt(Python+Qt)学习随笔:Qt中的部分类型QString、QList和指针、引用在PyQt中的实现方式
老猿Python博文目录 老猿Python博客地址 在我们查阅Qt的文档资料时,可以看到Qt中的链表使用的是QList,字符串使用的是QString,但老猿在测试时发现这两个类型PyQt不支持,无法找 ...
- Qt学习日记篇-Qt中使用Curl和jsonCpp
1.Qt中安装并使用jsonCPP库 1.1 官网下载.https://sourceforge.net/projects/jsoncpp/ 解压文件得到 jsoncpp-src-0.5.0 文 ...
随机推荐
- Bracket 使用指南
Brackets 是一个免费.开源且跨平台的 HTML/CSS/JavaScript 前端 WEB 集成开发环境 (IDE工具).该项目由Adobe 创建和维护,根据MIT许可证发布,支持 Windo ...
- JavaScript ES6特性
ES6 核心特性 块级作用域 let : 声明的变量存在块级作用域 不会声明提前 ES5 // ES5 // 声明提前 var x = 'outer'; function test(inner) { ...
- lambda、map、reduce、filter函数讲解
# coding:utf-8 """ 几个特殊的函数: lambda lambda后面直接跟变量 变量后面是冒号 冒号后面是表达式,表达式计算结果就是本函数的返回值 作用 ...
- js实现的map方法
/** * * 描述:js实现的map方法 * @returns {Map} */ function Map(){ var struct = function(key, value) { this.k ...
- SVN clean失败解决方法【转】
原文地址:http://blog.csdn.net/victory08/article/details/42100325/ svn执行clean up后出现提示:svn cleanup failed– ...
- C++ 并发编程,std::unique_lock与std::lock_guard区别示例
背景 平时看代码时,也会使用到std::lock_guard,但是std::unique_lock用的比较少.在看并发编程,这里总结一下.方便后续使用. std::unique_lock也可以提供自动 ...
- iOS开发-UIView扩展CGRect
关于UIView的位置都会遇到,一般需要改变UIView的位置,需要先获取原有的frame位置,然后在frame上面修改,有的时候如果只是改变了一下垂直方向的位置,宽度和高度的一种,这种写法很麻烦.下 ...
- [Java] HashMap 源码简要分析
特性 * 允许null作为key/value. * 不保证按照插入的顺序输出.使用hash构造的映射一般来讲是无序的. * 非线程安全. * 内部原理与Hashtable类似. 源码简要分析 pu ...
- Global Mapper如何加载在线地图
Global Mapper是一个比较好用的GIS数据处理软件,官网:http://www.bluemarblegeo.com/products/global-mapper.php ,除使用ArcGIS ...
- Nginx关于跨域的配置
参考:https://www.cnblogs.com/sunmmi/articles/5956554.html 最终我们项目中的配置如下: upstream boss_gateway { server ...