ZBar之自定义二维码扫描
//
// YvanQRCodeViewController.m
// zBar
//
// Created by City--Online on 15/6/8.
// Copyright (c) 2015年 CYW. All rights reserved.
//
#import "YvanQRCodeViewController.h"
#import "ZBarSDK.h"
#define SCANVIEW_EdgeTop 40.0
#define SCANVIEW_EdgeLeft 50.0
#define TINTCOLOR_ALPHA 0.2 //浅色透明度
#define DARKCOLOR_ALPHA 0.5 //深色透明度
#define VIEW_WIDTH self.view.bounds.size.width
#define VIEW_HEIGHT self.view.bounds.size.height
@interface YvanQRCodeViewController ()<ZBarReaderViewDelegate>
{
UIView *_QrCodeline;
NSTimer *_timer;
//设置扫描画面
UIView *_scanView;
ZBarReaderView *_readerView;
}
@end
@implementation YvanQRCodeViewController
- (void)viewDidLoad {
[super viewDidLoad];
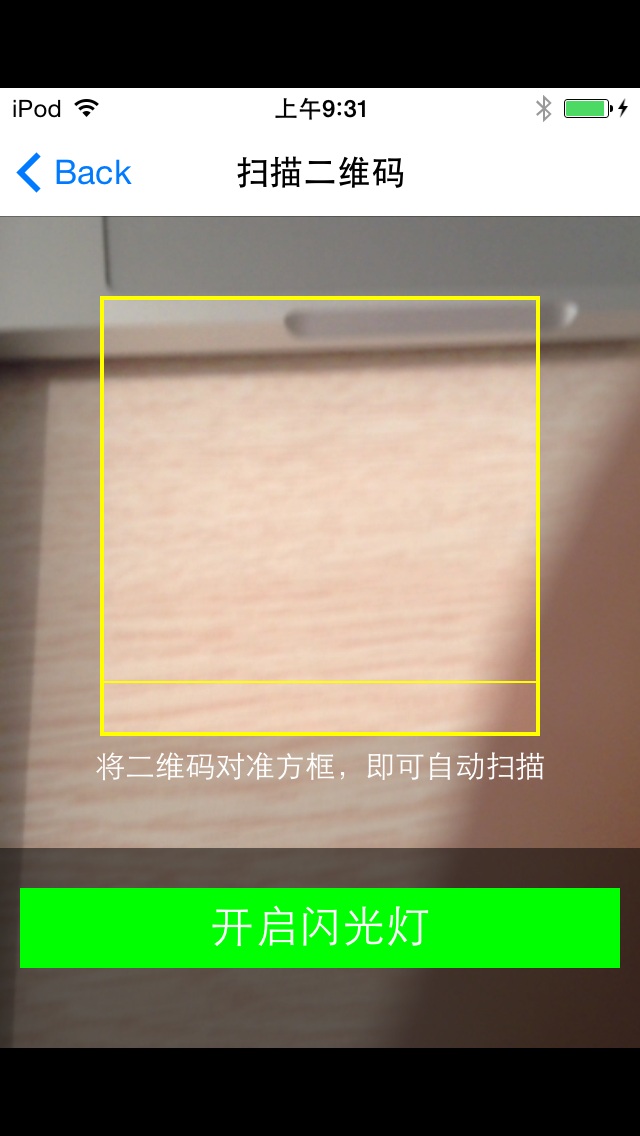
self.title = @"扫描二维码" ;
//初始化扫描界面
[ self setScanView ];
_readerView = [[ ZBarReaderView alloc ] init ];
_readerView.frame = CGRectMake ( , , VIEW_WIDTH , VIEW_HEIGHT );
_readerView.tracksSymbols = NO ;
_readerView.readerDelegate = self ;
[ _readerView addSubview : _scanView ];
//关闭闪光灯
_readerView.torchMode = ;
[ self.view addSubview : _readerView ];
//扫描区域
//readerView.scanCrop =
[ _readerView start ];
[ self createTimer ];
}
#pragma mark -- ZBarReaderViewDelegate
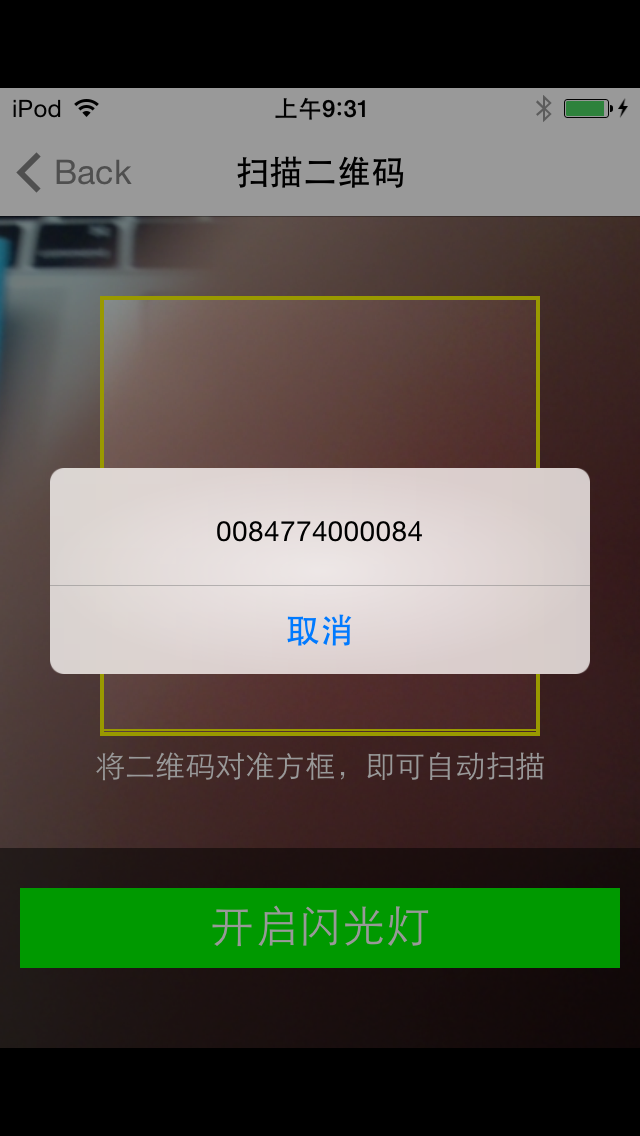
-( void )readerView:( ZBarReaderView *)readerView didReadSymbols:( ZBarSymbolSet *)symbols fromImage:( UIImage *)image
{
const zbar_symbol_t *symbol = zbar_symbol_set_first_symbol (symbols. zbarSymbolSet );
NSString *symbolStr = [ NSString stringWithUTF8String : zbar_symbol_get_data (symbol)];
//判断是否包含 头'http:'
NSString *regex = @"http+:[^//s]*" ;
NSPredicate *predicate = [ NSPredicate predicateWithFormat : @"SELF MATCHES %@" ,regex];
UIAlertView *alertView=[[ UIAlertView alloc ] initWithTitle : @"" message :symbolStr delegate : nil cancelButtonTitle : @"取消" otherButtonTitles : nil ];
[alertView show ];
//判断是否包含 头'ssid:'
NSString *ssid = @"ssid+:[^//s]*" ;
NSPredicate *ssidPre = [ NSPredicate predicateWithFormat : @"SELF MATCHES %@" ,ssid];
if ([predicate evaluateWithObject :symbolStr]) {
}
else if ([ssidPre evaluateWithObject :symbolStr]){
NSArray *arr = [symbolStr componentsSeparatedByString : @";" ];
NSArray * arrInfoHead = [[arr objectAtIndex : ] componentsSeparatedByString : @":" ];
NSArray * arrInfoFoot = [[arr objectAtIndex : ] componentsSeparatedByString : @":" ];
symbolStr = [ NSString stringWithFormat : @"ssid: %@ /n password:%@" ,
[arrInfoHead objectAtIndex : ],[arrInfoFoot objectAtIndex : ]];
UIPasteboard *pasteboard=[ UIPasteboard generalPasteboard ];
//然后,可以使用如下代码来把一个字符串放置到剪贴板上:
pasteboard. ];
}
}
- ( void )setScanView
{
_scanView =[[ UIView alloc ] initWithFrame : CGRectMake ( , , VIEW_WIDTH , VIEW_HEIGHT )];
_scanView . backgroundColor =[ UIColor clearColor ];
//最上部view
UIView * upView = [[ UIView alloc ] initWithFrame : CGRectMake ( , , VIEW_WIDTH , SCANVIEW_EdgeTop )];
upView. alpha = TINTCOLOR_ALPHA ;
upView. backgroundColor = [ UIColor blackColor ];
[ _scanView addSubview :upView];
//左侧的view
UIView *leftView = [[ UIView alloc ] initWithFrame : CGRectMake ( , SCANVIEW_EdgeTop , SCANVIEW_EdgeLeft , VIEW_WIDTH - * SCANVIEW_EdgeLeft )];
leftView. alpha = TINTCOLOR_ALPHA ;
leftView. backgroundColor = [ UIColor blackColor ];
[ _scanView addSubview :leftView];
/******************中间扫描区域****************************/
UIImageView *scanCropView=[[ UIImageView alloc ] initWithFrame : CGRectMake ( SCANVIEW_EdgeLeft , SCANVIEW_EdgeTop , VIEW_WIDTH - * SCANVIEW_EdgeLeft , VIEW_WIDTH - * SCANVIEW_EdgeLeft )];
//scanCropView.image=[UIImage imageNamed:@""];
scanCropView. layer . borderColor =[ UIColor yellowColor]. CGColor ;
scanCropView. layer . borderWidth = 2.0 ;
scanCropView. backgroundColor =[ UIColor clearColor ];
[ _scanView addSubview :scanCropView];
//右侧的view
UIView *rightView = [[ UIView alloc ] initWithFrame : CGRectMake ( VIEW_WIDTH - SCANVIEW_EdgeLeft , SCANVIEW_EdgeTop , SCANVIEW_EdgeLeft , VIEW_WIDTH - * SCANVIEW_EdgeLeft )];
rightView. alpha = TINTCOLOR_ALPHA ;
rightView. backgroundColor = [ UIColor blackColor ];
[ _scanView addSubview :rightView];
//底部view
UIView *downView = [[ UIView alloc ] initWithFrame : CGRectMake ( , VIEW_WIDTH - * SCANVIEW_EdgeLeft + SCANVIEW_EdgeTop , VIEW_WIDTH , VIEW_HEIGHT -( VIEW_WIDTH - * SCANVIEW_EdgeLeft + SCANVIEW_EdgeTop )- )];
//downView.alpha = TINTCOLOR_ALPHA;
downView. backgroundColor = [[ UIColor blackColor ] colorWithAlphaComponent : TINTCOLOR_ALPHA ];
[ _scanView addSubview :downView];
//用于说明的label
UILabel *labIntroudction= [[ UILabel alloc ] init ];
labIntroudction. backgroundColor = [ UIColor clearColor ];
labIntroudction. frame = CGRectMake ( , , VIEW_WIDTH , );
labIntroudction. numberOfLines = ;
labIntroudction. font =[ UIFont systemFontOfSize : 15.0 ];
labIntroudction. textAlignment = NSTextAlignmentCenter ;
labIntroudction. textColor =[ UIColor whiteColor ];
labIntroudction. text = @"将二维码对准方框,即可自动扫描" ;
[downView addSubview :labIntroudction];
UIView *darkView = [[ UIView alloc ] initWithFrame : CGRectMake ( , downView. frame . size . height - 100.0 , VIEW_WIDTH , 100.0 )];
darkView. backgroundColor = [[ UIColor blackColor ] colorWithAlphaComponent : DARKCOLOR_ALPHA ];
[downView addSubview :darkView];
//用于开关灯操作的button
UIButton *openButton=[[ UIButton alloc ] initWithFrame : CGRectMake ( , , 300.0 , 40.0 )];
[openButton setTitle : @"开启闪光灯" forState: UIControlStateNormal ];
[openButton setTitleColor :[ UIColor whiteColor ] forState : UIControlStateNormal ];
openButton. titleLabel . textAlignment = NSTextAlignmentCenter ;
openButton. backgroundColor =[ UIColor greenColor ];
openButton. titleLabel . font =[ UIFont systemFontOfSize : 22.0 ];
[openButton addTarget : self action : @selector (openLight) forControlEvents : UIControlEventTouchUpInside ];
[darkView addSubview :openButton];
//画中间的基准线
_QrCodeline = [[ UIView alloc ] initWithFrame : CGRectMake ( SCANVIEW_EdgeLeft , SCANVIEW_EdgeTop , VIEW_WIDTH - * SCANVIEW_EdgeLeft , )];
_QrCodeline . backgroundColor = [ UIColor yellowColor];
[ _scanView addSubview : _QrCodeline ];
}
- ( void )openLight
{
) {
_readerView.torchMode = ;
} else
{
_readerView.torchMode = ;
}
}
- ( void )viewWillDisappear:( BOOL )animated
{
[ super viewWillDisappear :animated];
) {
_readerView . torchMode = ;
}
[ self stopTimer ];
[ _readerView stop ];
}
//二维码的横线移动
- ( void )moveUpAndDownLine
{
CGFloat Y= _QrCodeline.frame.origin.y ;
//CGRectMake(SCANVIEW_EdgeLeft, SCANVIEW_EdgeTop, VIEW_WIDTH-2*SCANVIEW_EdgeLeft, 1)]
*SCANVIEW_EdgeLeft+SCANVIEW_EdgeTop==Y){
[UIView beginAnimations: @"asa" context: nil ];
[UIView setAnimationDuration: ];
_QrCodeline.frame=CGRectMake(SCANVIEW_EdgeLeft, SCANVIEW_EdgeTop, VIEW_WIDTH- *SCANVIEW_EdgeLeft, );
[UIView commitAnimations];
} else if (SCANVIEW_EdgeTop==Y){
[UIView beginAnimations: @"asa" context: nil ];
[UIView setAnimationDuration: ];
_QrCodeline.frame=CGRectMake(SCANVIEW_EdgeLeft, VIEW_WIDTH- *SCANVIEW_EdgeLeft+SCANVIEW_EdgeTop, VIEW_WIDTH- *SCANVIEW_EdgeLeft, );
[UIView commitAnimations];
}
}
- ( void )createTimer
{
//创建一个时间计数
_timer=[NSTimer scheduledTimerWithTimeInterval: 1.0 target: self selector: @selector (moveUpAndDownLine) userInfo: nil repeats: YES ];
}
- ( void )stopTimer
{
if ([_timer isValid] == YES ) {
[_timer invalidate];
_timer = nil ;
}
}
// 是否支持转屏
- (BOOL)shouldAutorotate
{
return YES;
}
// 支持的屏幕方向,此处可直接返回 UIInterfaceOrientationMask 类型
// 也可以返回多个 UIInterfaceOrientationMask 取或运算后的值
- (NSUInteger)supportedInterfaceOrientations
{
return UIInterfaceOrientationMaskPortrait;
}
- (void)didReceiveMemoryWarning {
[super didReceiveMemoryWarning];
// Dispose of any resources that can be recreated.
}
/*
#pragma mark - Navigation
// In a storyboard-based application, you will often want to do a little preparation before navigation
- (void)prepareForSegue:(UIStoryboardSegue *)segue sender:(id)sender {
// Get the new view controller using [segue destinationViewController].
// Pass the selected object to the new view controller.
}
*/
@end

ZBar之自定义二维码扫描的更多相关文章
- ios二维码扫描插件,适配当前主流扫描软件,自定义扫描界面。
二维码介绍: 二维码(QR(Quick Response)code),又称二维条码,最早起源于日本. 它是用特定的几何图形按一定规律在平面(二维方向)上分布的黑白相间的图形,是所有信息 ...
- ZBar 是款桌面电脑用条形码/二维码扫描工具
ZBar 是款桌面电脑用条形码/二维码扫描工具 windows平台python 2.7环境编译安装zbar 最近一个项目需要识别二维码,找来找去找到了zbar和zxing,中间越过无数坑,总算基本 ...
- Qt之二维码扫描
简述 二维码(QR Code)是用某种特定的几何图形按一定规律在平面(二维方向)分布的黑白相间的图形记录数据符号信息的.是所有信息数据的一把钥匙.应用十分广泛,如:产品防伪/溯源.广告推送.网站链接. ...
- Android快速实现二维码扫描--Zbar
Android中二维码扫描的最常用库是zxing和zbar,上一篇<Android快速实现二维码扫描–Zxing>介绍了Zxing.这次说Zbar,Zbar速度极快,我就比较常用,项目地址 ...
- 二维码扫描利用ZBar实现
上次是根据系统的属性自己封装的一个二维码扫描,这次给大家介绍一下基于ZBar集成的类似于QQ二维码扫描界面的二维码扫描的效果. ...
- android利用zbar二维码扫描-(解决中文乱码及扫描区域定义)
写在最前(这是对上一篇博文的问题做的更新[android利用zbar二维码扫描]) project下载 zbarLib编译project project下载0积分 bug 在2.3的系统中Hol ...
- iOS - 二维码扫描和应用跳转
序言 前面我们已经调到过怎么制作二维码,在我们能够生成二维码之后,如何对二维码进行扫描呢? 在iOS7之前,大部分应用中使用的二维码扫描是第三方的扫描框架,例如ZXing或者ZBar.使用时集成麻烦, ...
- iOS开发-二维码扫描和应用跳转
iOS开发-二维码扫描和应用跳转 序言 前面我们已经调到过怎么制作二维码,在我们能够生成二维码之后,如何对二维码进行扫描呢? 在iOS7之前,大部分应用中使用的二维码扫描是第三方的扫描框架,例如Z ...
- 【转】Android手机客户端关于二维码扫描的源码--不错
原文网址:https://github.com/SkillCollege/QrCodeScan QrCodeScan 这是Android手机客户端关于二维码扫描的源码,使用了高效的ZBar解码库,并修 ...
随机推荐
- C#读取xlsx文件Excel2007
读取Excel 2007的xlsx文件和读取老的.xls文件是一样的,都是用Oledb读取,仅仅连接字符串不同而已. 具体代码实例: public static DataTable GetExcelT ...
- PHP 文件上传服务端及客户端配置参数说明
文件上传服务器端配置: ·file_uploads = On, 支持HTTP上传 ·upload_tmp_dir = , 临时文件保存的目录 ·upload_max_filesize=2M, 允许上传 ...
- apache2下部署node.js应用程序
版本:apache2.2+node.js(v.10.25) 系统环境:ubuntu 12.04(LTS) 32位 因为有些模块并没有开启 所以需要使用以下命令开启该模块 windows下则直接在htt ...
- SIMATIC IT HISTORIAN在烟用二醋酸纤维素生产中应用
原文转载自:http://www.soft6.com/tech/5/54287.html 本文介绍了西门子MES核心产品SIMATIC IT HISTORIAN实时数据库及客户端工具在流程生产中的具体 ...
- [terry笔记]ArchiveLog归档日志激增解决思路
归档日志激增的危害是巨大的,最严重的结果就是数据库无法正常工作,导致整个系统无法正常工作,其次就算数据库可以正常工作,但激增的归档会对磁盘产生大量消耗,导致性能下降. 归档日志激增一般是因 ...
- ado.net的5个主要对象
connection 连接对象 command 命令对象,指示要执行的命令和存储过程! datareader是一个向前的只读的数据流. dataadapter是功能强大的适陪器,支持增删改查的功能 d ...
- clojure
ide http://updatesite.ccw-ide.org/stable https://cursiveclojure.com/ http://web.clojurerepl.com/ htt ...
- Linux 常见的进程调度算法
1.在介绍进程调度之前,先对进程的状态的概念应该有所了解,下面是关于进程状态的一些基本概念:进程的状态分为三种,分别为: 1).运行态:该状态表明进程在实际占用CPU 2).就绪态: 该状态下进程可以 ...
- Binder相关
Binder分析 需了解C/S还有管理这些的ServiceManager. 简单来讲你(client)有个包裹(parcel)让快递员(proxy)送到公司(server), 公司(server) ...
- 调试mvc 源码【转:http://www.cnblogs.com/wucj/archive/2013/06/09/3128698.html】
最近在研究asp.net mvc的源码,于是在想,既然提供了源码,那我们如何进入源码调试了?在网上找了一些调试的方法,试了几个都不行,于是折腾了一上午,终于弄出来了,下面看看我的操作步骤. 一:准 ...