DEEP LEARNING WITH PYTORCH: A 60 MINUTE BLITZ | TRAINING A CLASSIFIER
你已经知道怎样定义神经网络,计算损失和更新网络权重。现在你可能会想,
那么,数据呢?
通常,当你需要解决有关图像、文本或音频数据的问题,你可以使用python标准库加载数据并转换为numpy array。然后将其转换为 torch.Tensor。
- 对于图像,例如Pillow,OpenCV
- 对于音频,例如scipy和librosa
- 对于文本,原生Python或基于Cython的加载,或NLTK和SpaCy
针对视觉领域,我们创建了一个名为 torchvision 的包,拥有用于ImageNet、CIFAR10、MNIST等常见数据集加载的data loaders,以及用于图片变换的data transfomer,即,torchvision.datasets 和 torch.utils.data.DataLoader。
这提供了很大的方便,避免重复造轮子。
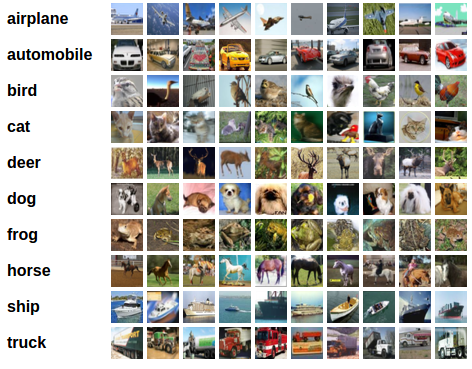
在本教程中,我们将使用CIFAR10数据集。它包括:“airplane”,“automobile”,“bird”,“cat”,“deer”,“dog”,“frog”,“horse”,“ship”,“truck”。CIFAR-10的图片大小是3x32x32,也就是3通道、大小32x32像素。

cifar10
训练一个图片分类器
我们将依次进行以下步骤
- 使用torchvision加载CIFAR10训练集和测试集,并进行标准化
- 定义一个卷积神经网络
- 定义一个损失函数
- 在训练集上训练网络
- 在测试集上测试网络
1. 加载和标准化CIFAR10
使用 torchvision,加载CIFAR10非常容易。
import torch

import torchvision

import torchvision.transforms as transforms
torchvision数据集输出的是范围[0, 1]、PILImage格式的图片。我们将其归一化到[-1, 1],并转换为Tensor。
注意:如果你在Windows上运行,并出现BrokenPipeError,尝试设置torch.utils.data.DataLoader()的num_worker为0
transform = transform.Compose(

    [transforms.ToTensor(),

    # 逐通道标准化,这里传入的mean=std=(0.5,0.5,0.5)是固定值,这一做法可以使传入的[0,1]的tensor

    # 转换为[-1,1],但可能不符合正态分布,除非传入的是根据实际数据计算的mean和std

     transforms.Normalize((0.5, 0.5, 0.5), (0.5, 0.5, 0.5))])

batch_size = 4

trainset = torchvision.datasets.CIFAR10(root='./data', train=True,

                                        download=True, transform=transform)

trainloader = torch.utils.data.DataLoader(trainset, batch_size=batch_size,

                                        shuffle=True, num_workers=2)

testset = torchvision.datasets.CIFAR10(root='./data', train=False,

                                       download=True, transform=transform)

testloader = torch.utils.data.DataLoader(testset, batch_size=batch_size,

                                         shuffle=False, num_workers=2)

classes = ('plane', 'car', 'bird', 'cat',

           'deer', 'dog', 'frog', 'horse', 'ship', 'truck')
输出:
Downloading https://www.cs.toronto.edu/~kriz/cifar-10-python.tar.gz to ./data/cifar-10-python.tar.gz

Extracting ./data/cifar-10-python.tar.gz to ./data

Files already downloaded and verified
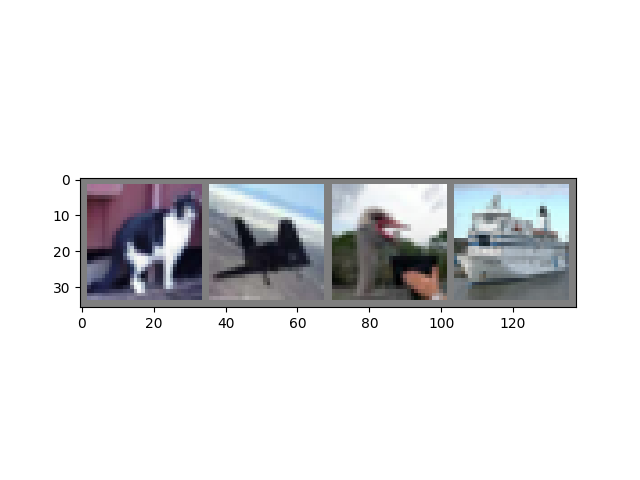
查看一些训练图片
import matplotlib.pyplot as plt

import numpy as np

# functions to show an image

def imshow(img):

    # 这里仅仅是将[-1,1]的值转换为[0,1]

    img = img / 2 + 0.5 # unnormalize

    npimg = img.numpy()

    plt.imshow(np.transpose(npimg, (1, 2, 0)))

# get some random training images

dataiter = iter(trainloader)

images, labels = dataiter.next() # 取1个batch

# show images

# .make_grid()将4D(BxCxHxW)mini-batch的Tensor或同样大小的图片list拼成一副图片

imshow(torchvision.utils.maker_grid(images))

# 打印labels

# 循环读取batch中每个图片的label(数字),并把其对应的类别打印出来(字符串)

print(' '.join('%5s' % classes[labels[j]] for j in range(batch_size)))

输出:
cat plane bird ship
2. 定义一个卷积神经网络
拷贝之前的“Neural Network”节内的神经网络,并且修改成接受3-channel的图片(代替之前定义的1-channel图片)
import torch.nn as nn

import torch.nn.functional as F

class Net(nn.Module):

    def __init__(self):

        super().__init__()

        self.conv1 = nn.Conv2d(3, 6, 5)

        self.pool = nn.MaxPool2d(2, 2)

        self.conv2 = nn.Conv2d(6, 16, 5)

        self.fc1 = nn.Linear(16 * 5 * 5, 120)

        self.fc2 = nn.Linear(120, 84)

        self.fc3 = nn.Linear(84, 10)

    def forward(self, x):

        x = self.pool(F.relu(self.conv1(x)))

        x = self.pool(F.relu(self.conv2(x)))

        x = torch.flatten(x, 1) # flatten all dimensions except batch

        x = F.relu(self.fc1(x))

        x = F.relu(self.fc2(x))

        x = self.fc3(x)

        return x

net = Net()
3. 定义损失函数和优化器
使用Classification Cross-Entropy损失函数和SGD with momentum优化器。
import torch.optim as optim

criterion = nn.CrossEntropyLoss()

optimizer = optim.SGD(net.parameters(), lr=0.001, momentum=0.9)
4. 训练网络
事情变得有趣了起来,我们只需要循环遍历数据迭代器,并将输入提供给网络进行优化即可。
for epoch in range(2): # loop over the dataset multiple times

    running_loss = 0.0

    # 沿着第一个维度(batchs)枚举

    for i, data in enumerate(trainloader, 0):

        # get the inputs; data is a list of [inputs, labels]

        inputs, labels = data

        # zero the parameter gradients

        # optimizer.zero_grad()

        # forward + backward + optimize

        outputs = net(inputs)

        loss = criterion(outputs, labels)

        loss.backward()

        optimizer.step()

        # print statistics

        running_loss += loss.item()

        if i % 2000 == 1999: # print every 2000 mini-batches

            print('[%d, %5d] loss: %.3f' %

                   (epoch + 1, i + 1, running_loss / 2000))

            running_loss = 0.0

print('Finished Training')
输出:
[1,  2000] loss: 2.128

[1,  4000] loss: 1.793

[1,  6000] loss: 1.649

[1,  8000] loss: 1.555

[1, 10000] loss: 1.504

[1, 12000] loss: 1.444

[2,  2000] loss: 1.379

[2,  4000] loss: 1.344

[2,  6000] loss: 1.336

[2,  8000] loss: 1.327

[2, 10000] loss: 1.294

[2, 12000] loss: 1.280

Finished Training
快速保存模型
PATH = './cifar_net.pth'

torch.save(net.state_dict(), PATH)
这里有关于保存PyTorch模型更多的细节。
5. Test the network on the test data
我们已经遍历2次训练集来训练网络了。但我们需要检查该网络是否已经学会了所有东西。
我们将通过对比神经网络输出预测的类别标签和真值来检查该网络的性能。如果预测是正确的,我们会将其添加到正确预测的列表中。
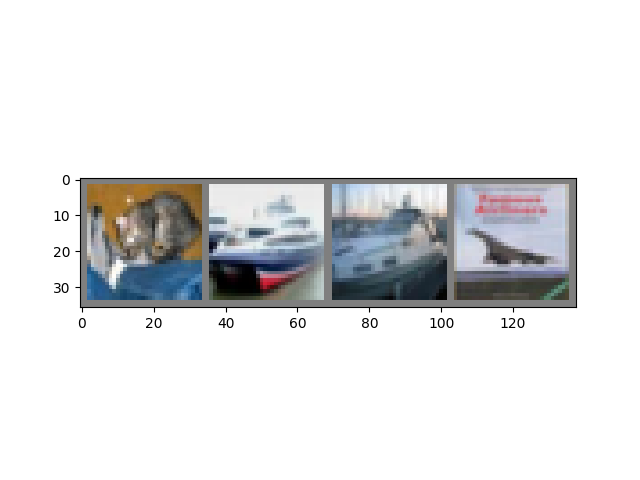
第一步,先展示测试集图片熟悉一下。
dataiter = iter(testloader)

images, labels = dataiter.next()

# print images

imshow(torchvision.utils.make_grid(images))

print('GroundTruth: ', ' '.join('%5s' % classes[labels[j] for j in range(4)]))

输出:
GroundTruth: cat ship ship plane
接下来,把我们保存的模型加载进来(注意:保存和重新加载在这里不是必须的,我们只是去展示怎么做):
net = Net()

net.load_state_dict(torch.load(PATH))
现在,让我们来看一下神经网络对以上样例是怎么判断的:
outputs = net(images)
outputs是10类对应的分数。某类的分数越高,那么网络就越认为图片对应该类。所以,让我们获取最高分数的索引:
# outputs的维度应该是4x10(4个样本,每个样本10个类别分数)

# 这里沿着第二个维度取最大值及其索引

_, predicted = torch.max(outputs, 1)

print('Predicted: ', ' '.join('%5s' % classes[predicted[j]]

                               for j in range(4)))
输出:
Predicted: frog ship ship ship
结果看起来还不错
让我们来看看网络在整个数据集上表现如何
correct = 0

total =0

# 因为我们不是训练,所以不需要计算梯度

with torch.no_grad():

    for data in testloader:

        images, labels = data

        # 将图片输入网络计算outputs

        outputs = net(images)

        # 最高分数对应的类别即为我们的预测值

        _, predicted = torch.max(outputs.data, 1)

        total += labels.size(0)

        correct += (predicted == labels).sum().item()

print('Accuracy of the network on the 10000 test images: %d %%' % (100 * correct / total))
输出:
Accuracy of the network on the 10000 test images: 54 %
看起来比随机的准确率10%(随机从10类里面选择1类)要好得多。看起来网络学到了一些东西。
Hmmm,哪些类表现得好一点,哪些类表现得不好:
# prepare to count predictions for each class

correct_pred = {classname: 0 for classname in classes}

total_pred = {classname: 0 for classname in classes}

# again no gradients needed

with torch.no_grad():

    for data in testloader:

        images, labels = data

        outputs = net(images)

        # 依然是求出最大值的索引,label也是类别的索引,所以可以直接比较

        # 并且均跟classes是对应的,所以就能找到对应的类别了

        _, predictions = torch.max(outputs, 1)

        # collect the correct predictions for each class

        for label, prediction in zip(labels, predictions):

            if label == prediction:

                correct_pred[classes[label]] += 1

            total_pred[classes[label]] += 1

for classname, correct_count in correct_pred.items():

    accuracy = 100 * float(correct_count) / total_pred[classname]

    print("Accuracy for class {:5s} is: {:.1f} %".format(classname, accuracy))
输出:
Accuracy for class plane is: 59.4 %

Accuracy for class car   is: 66.7 %

Accuracy for class bird  is: 22.7 %

Accuracy for class cat   is: 52.7 %

Accuracy for class deer  is: 59.1 %

Accuracy for class dog   is: 28.9 %

Accuracy for class frog  is: 70.8 %

Accuracy for class horse is: 57.6 %

Accuracy for class ship  is: 67.4 %

Accuracy for class truck is: 62.2 %
好的,那么接下来呢?
我们怎么将神经网络运行在GPU上嗯?
在GPU上训练
将神经网络转移到GPU上就像如何将Tensor移到GPU上一样。
如果CUDA可用,首先定义设备为第一个可见设备:
device = torch.device("cuda:0" if torch.cuda.is_available() else "cpu")

# 假设是在一个CUDA机器上,那么应该打印一个CUDA设备:

print(device)
输出:
cuda:0
本节剩下的部分假设 device 是一个CUDA设备
然后下面的方法将递归遍历模型的所有部分,并将它们的参数和缓存转换为CUDA tensors:
net.to(device)
记住你还必须把每一步的inputs和targets送到GPU上。
inputs, labels = data[0].to(device), data[1].to(device)
为什么我没有看到相比CPU有巨大的速度提升?因为网络实在太小了。
练习:尝试提高网络width(第一个 nn.Conv2d 的第二个参数,第二个 nn.Conv2d 的第一个参数,它们必须一样),观察速度提升的如何。
目标达成:
- 高度理解PyTorch的Tensor库和神经网络
- 训练一个小型神经网络分类图片
在多GPUs上训练
如果你想看到使用所有GPUs带来更多的速度提升,查看Optional:Data Parallelism
DEEP LEARNING WITH PYTORCH: A 60 MINUTE BLITZ | TRAINING A CLASSIFIER的更多相关文章
- DEEP LEARNING WITH PYTORCH: A 60 MINUTE BLITZ | TENSORS
Tensor是一种特殊的数据结构,非常类似于数组和矩阵.在PyTorch中,我们使用tensor编码模型的输入和输出,以及模型的参数. Tensor类似于Numpy的数组,除了tensor可以在GPU ...
- DEEP LEARNING WITH PYTORCH: A 60 MINUTE BLITZ | TORCH.AUTOGRAD
torch.autograd 是PyTorch的自动微分引擎,用以推动神经网络训练.在本节,你将会对autograd如何帮助神经网络训练的概念有所理解. 背景 神经网络(NNs)是在输入数据上执行的嵌 ...
- DEEP LEARNING WITH PYTORCH: A 60 MINUTE BLITZ | NEURAL NETWORKS
神经网络可以使用 torch.nn包构建. 现在你已经对autograd有所了解,nn依赖 autograd 定义模型并对其求微分.nn.Module 包括层,和一个返回 output 的方法 - f ...
- Deep learning with PyTorch: A 60 minute blitz _note(1) Tensors
Tensors 1. construst matrix 2. addition 3. slice from __future__ import print_function import torch ...
- Summary on deep learning framework --- PyTorch
Summary on deep learning framework --- PyTorch Updated on 2018-07-22 21:25:42 import osos.environ[ ...
- Neural Network Programming - Deep Learning with PyTorch with deeplizard.
PyTorch Prerequisites - Syllabus for Neural Network Programming Series PyTorch先决条件 - 神经网络编程系列教学大纲 每个 ...
- Neural Network Programming - Deep Learning with PyTorch - YouTube
百度云链接: 链接:https://pan.baidu.com/s/1xU-CxXGCvV6o5Sksryj3fA 提取码:gawn
- [C3] Andrew Ng - Neural Networks and Deep Learning
About this Course If you want to break into cutting-edge AI, this course will help you do so. Deep l ...
- (zhuan) Where can I start with Deep Learning?
Where can I start with Deep Learning? By Rotek Song, Deep Reinforcement Learning/Robotics/Computer V ...
随机推荐
- SpringBoot整合websocket简单示例
依赖 <!-- springboot整合websocket --> <dependency> <groupId>org.springframework.boot&l ...
- jquery gantt 的使用
1.引入css与js文件 <link rel="stylesheet" href="css/style.css" /> <script src ...
- 一个简单的基于epoll的udp接收
--- 1 #include <iostream> 2 #include <sys/epoll.h> 3 #include <fcntl.h> 4 #include ...
- 【LeetCode】487. Max Consecutive Ones II 解题报告 (C++)
作者: 负雪明烛 id: fuxuemingzhu 个人博客:http://fuxuemingzhu.cn/ 目录 题目描述 题目大意 解题方法 动态规划 日期 题目地址:https://leetco ...
- 【LeetCode】667. Beautiful Arrangement II 解题报告(Python & C++)
作者: 负雪明烛 id: fuxuemingzhu 个人博客: http://fuxuemingzhu.cn/ 目录 题目描述 题目大意 解题方法 日期 题目地址:https://leetcode.c ...
- 【LeetCode】456. 132 Pattern 解题报告(Python)
[LeetCode]456. 132 Pattern 解题报告(Python) 标签(空格分隔): LeetCode 作者: 负雪明烛 id: fuxuemingzhu 个人博客: http://fu ...
- Sublime Text 3菜单栏隐藏后怎么显示
Sublime Text 3如何显示菜单栏 今天在使用Sublime Text 3敲代码的时候不小心就把上侧的菜单栏隐藏了,自己鼓捣了半天才把菜单栏弄出来,下面我就给大家讲解一下我是如何操作的 键盘按 ...
- Git从远程仓库克隆
首先,登陆GitHub,创建一个新的仓库,名字叫gitskills 勾选Initialize this repository with a README,这样GitHub会自动为我们创建一个READM ...
- 编写Java程序,模拟网上商城购物,当用户选好物品提交订单时,每笔订单会自动生成一个唯一的订单编号。
查看本章节 查看作业目录 需求说明: 模拟网上商城购物,当用户选好物品提交订单时,每笔订单会自动生成一个唯一的订单编号.而部分电子商务网站在数据高峰期时,一毫秒可能需要处理近千笔的订单 现在简单模拟 ...
- javaScript系列 [43]-TS、Class and ES5
本文讨论Typescript中的Class同ES5构造函数的对应关系,涉及TypeScript的诸多语法.构造函数.面向对象以及原型对象等相关知识点细节,本文只简单对比并不进行深入展开. TypeSc ...
