linux随笔-03
必须掌握的Linux命令
系统状态检测命令
1.ifconfig命令
ifconfig命令用于获取网卡配置与网络状态等信息,格式为“ifconfig [网络设备] [参数]”。
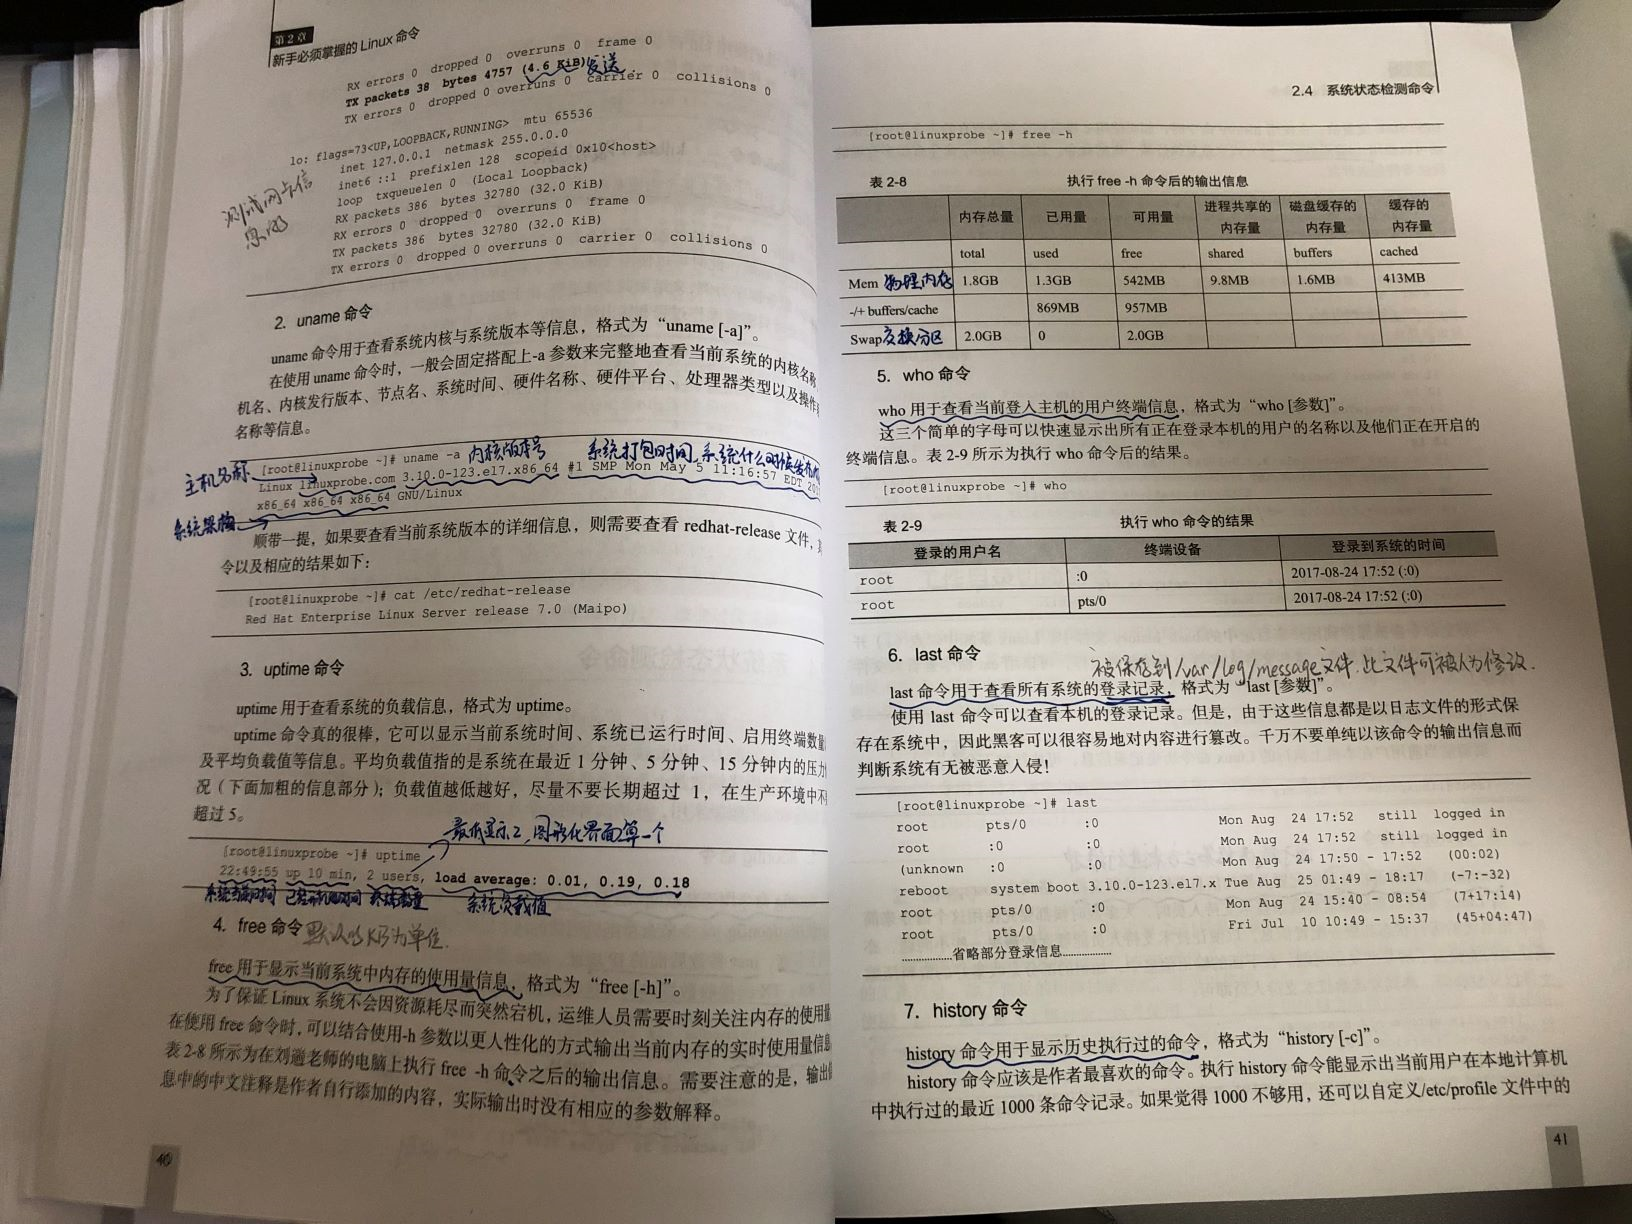
使用ifconfig命令来查看本机当前的网卡配置与网络状态等信息时,其实主要查看的就是网卡名称、inet参数后面的IP地址、ether参数后面的网卡物理地址(又称为MAC地址),以及RX、TX的接收数据包与发送数据包的个数及累计流量(即下面加粗的信息内容):
[root@linuxprobe ~]# ifconfig

eno16777728: flags=4163  mtu 1500

        inet 192.168.10.10  netmask 255.255.255.0  broadcast 192.168.10.255

        inet6 fe80::20c:29ff:fec4:a409  prefixlen 64  scopeid 0x20

        ether 00:0c:29:c4:a4:09  txqueuelen 1000  (Ethernet)

        RX packets 36  bytes 3176 (3.1 KiB)

        RX errors 0  dropped 0  overruns 0  frame 0

        TX packets 38  bytes 4757 (4.6 KiB)

        TX errors 0  dropped 0 overruns 0  carrier 0  collisions 0
2.uname命令
uname命令用于查看系统内核与系统版本等信息,格式为“uname [-a]”。
在使用uname命令时,一般会固定搭配上-a参数来完整地查看当前系统的内核名称、主机名、内核发行版本、节点名、系统时间、硬件名称、硬件平台、处理器类型以及操作系统名称等信息。
[root@linuxprobe ~]# uname -a

Linux linuxprobe.com 3.10.0-123.el7.x86_64 #1 SMP Mon May 5 11:16:57 EDT 2017 x86_64 x86_64 x86_64 GNU/Linux
顺带一提,如果要查看当前系统版本的详细信息,则需要查看redhat-release文件,其命令以及相应的结果如下:
[root@linuxprobe ~]# cat /etc/redhat-release

Red Hat Enterprise Linux Server release 7.0 (Maipo)
3.uptime命令
uptime用于查看系统的负载信息,格式为uptime。
显示当前系统时间、系统已运行时间、启用终端数量以及平均负载值等信息。平均负载值指的是系统在最近1分钟、5分钟、15分钟内的压力情况。
[root@linuxprobe ~]# uptime

22:49:55 up 10 min, 2 users, load average: 0.01, 0.19, 0.18
4.free命令
free用于显示当前系统中内存的使用量信息,格式为“free [-h]”。
5.who命令
who用于查看当前登入主机的用户终端信息,格式为“who [参数]”。
6.last命令
last命令用于查看所有系统的登录记录,格式为“last [参数]”。
7.history命令
history命令用于显示历史执行过的命令,格式为“history [-c]”。
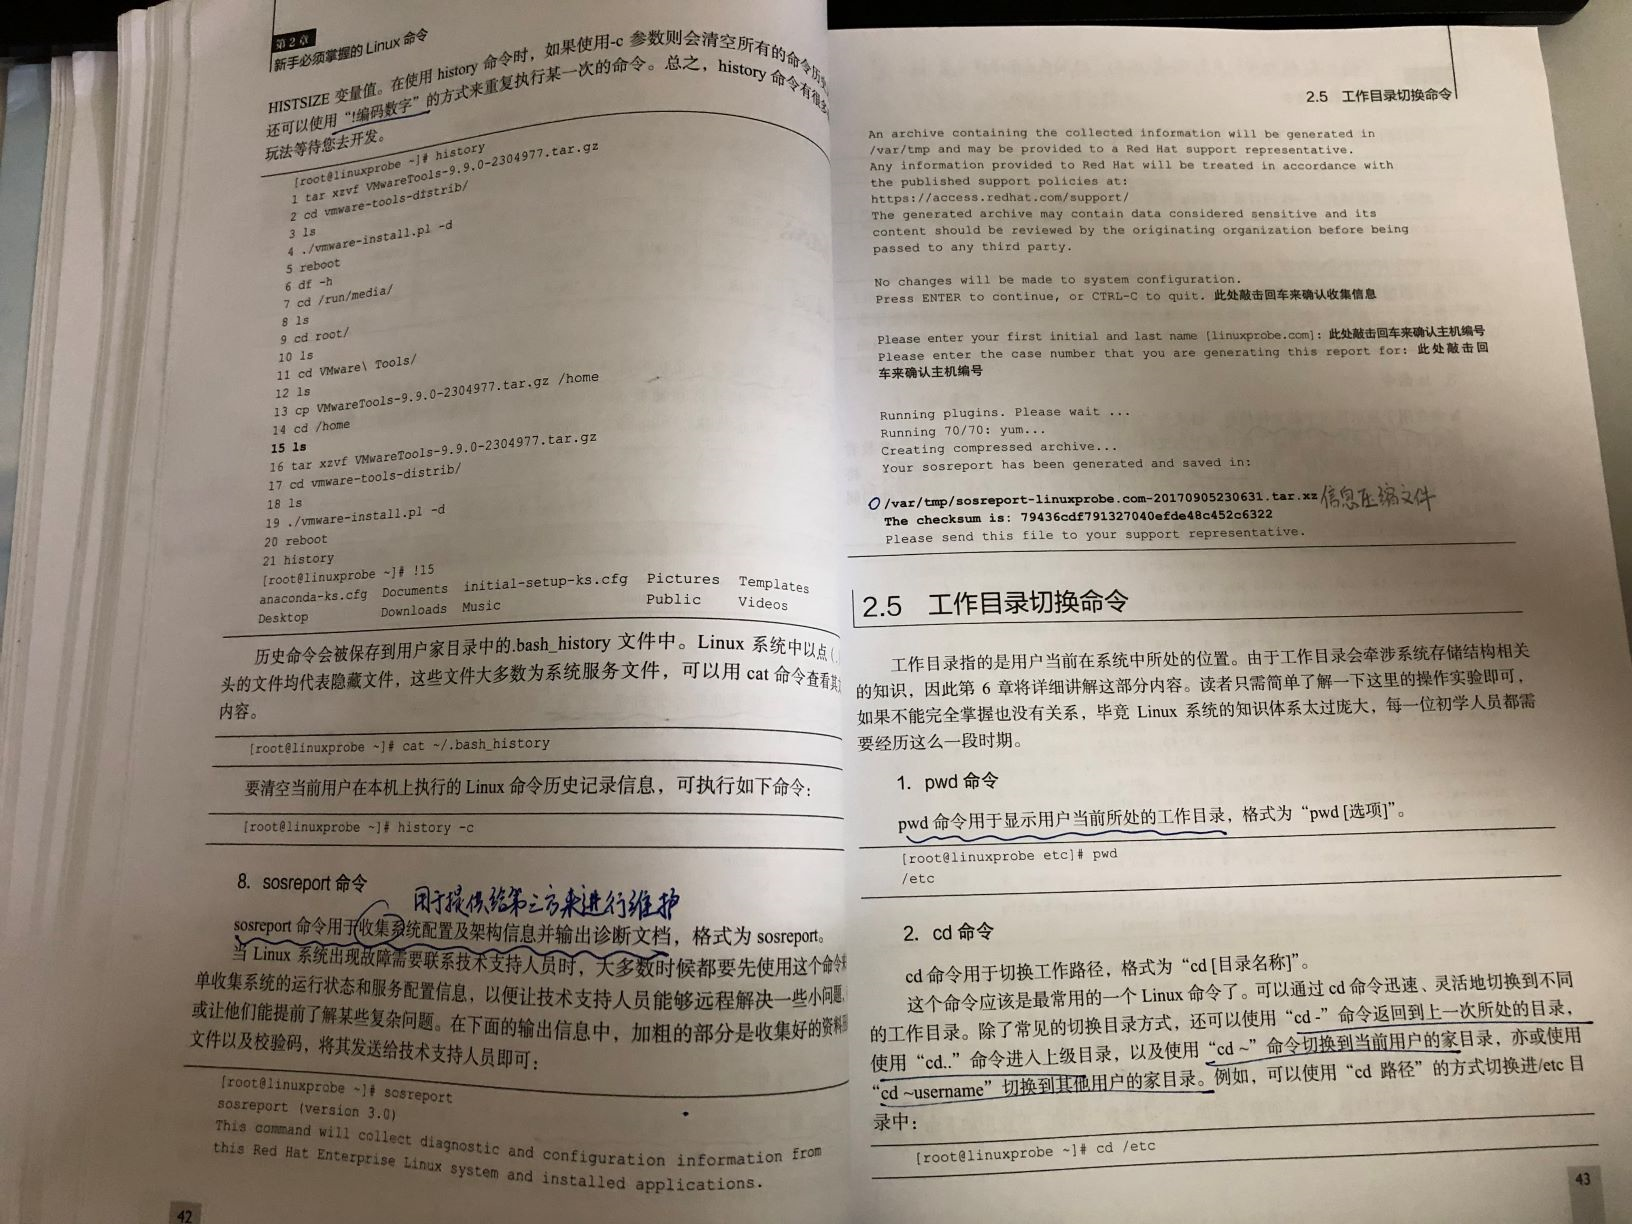
执行history命令能显示出当前用户在本地计算机中执行过的最近1000条命令记录。如果觉得1000不够用,还可以自定义/etc/profile文件中的HISTSIZE变量值。在使用history命令时,如果使用-c参数则会清空所有的命令历史记录。还可以使用“!编码数字”的方式来重复执行某一次的命令。
[root@linuxprobe ~]# history

1 tar xzvf VMwareTools-9.9.0-2304977.tar.gz

2 cd vmware-tools-distrib/

3 ls

4 ./vmware-install.pl -d

5 reboot

6 df -h

7 cd /run/media/

8 ls

9 cd root/

10 ls

11 cd VMware\ Tools/

12 ls

13 cp VMwareTools-9.9.0-2304977.tar.gz /home

14 cd /home

15 ls

16 tar xzvf VMwareTools-9.9.0-2304977.tar.gz

17 cd vmware-tools-distrib/

18 ls

19 ./vmware-install.pl -d

20 reboot

21 history

[root@linuxprobe ~]# !15

anaconda-ks.cfg  Documents  initial-setup-ks.cfg  Pictures  Templates

Desktop          Downloads  Music                 Public    Videos
8.sosreport命令
sosreport命令用于收集系统配置及架构信息并输出诊断文档,格式为sosreport。诊断文档用于提供给第三方来进行维护。
[root@linuxprobe ~]# sosreport

sosreport (version 3.0)

This command will collect diagnostic and configuration information from

this Red Hat Enterprise Linux system and installed applications.

An archive containing the collected information will be generated in

/var/tmp and may be provided to a Red Hat support representative.

Any information provided to Red Hat will be treated in accordance with

the published support policies at:

https://access.redhat.com/support/

The generated archive may contain data considered sensitive and its

content should be reviewed by the originating organization before being

passed to any third party.

No changes will be made to system configuration.

Press ENTER to continue, or CTRL-C to quit. 此处敲击回车来确认收集信息

Please enter your first initial and last name [linuxprobe.com]:此处敲击回车来确认主机编号

Please enter the case number that you are generating this report for:此处敲击回车来确认主机编号

Running plugins. Please wait ...

Running 70/70: yum...

Creating compressed archive...

Your sosreport has been generated and saved in:

/var/tmp/sosreport-linuxprobe.com-20170905230631.tar.xz

The checksum is: 79436cdf791327040efde48c452c6322

Please send this file to your support representative.
工作目录切换命令
工作目录指的是用户当前在系统中所处的位置。
1.pwd命令
pwd命令用于显示用户当前所处的工作目录,格式为“pwd [选项]”。
[root@linuxprobe etc]# pwd

/etc
2.cd命令
cd命令用于切换工作路径,格式为“cd [目录名称]”。
除了常见的切换目录方式,还可以使用“cd -”命令返回到上一次所处的目录,使用“cd..”命令进入上级目录,以及使用“cd ~”命令切换到当前用户的家目录,亦或使用“cd ~username”切换到其他用户的家目录。例如,可以使用“cd 路径”的方式切换进/etc目录中:
[root@linuxprobe ~]# cd /etc
同样的道理,可使用下述命令切换到/bin目录中:
[root@linuxprobe etc]# cd /bin
此时,要返回到上一次的目录(即/etc目录),可执行如下命令:
[root@linuxprobe bin]# cd -

/etc

[root@linuxprobe etc]#
还可以通过下面的命令快速切换到用户的家目录:
[root@linuxprobe etc]# cd ~

[root@linuxprobe ~]#
3.ls命令
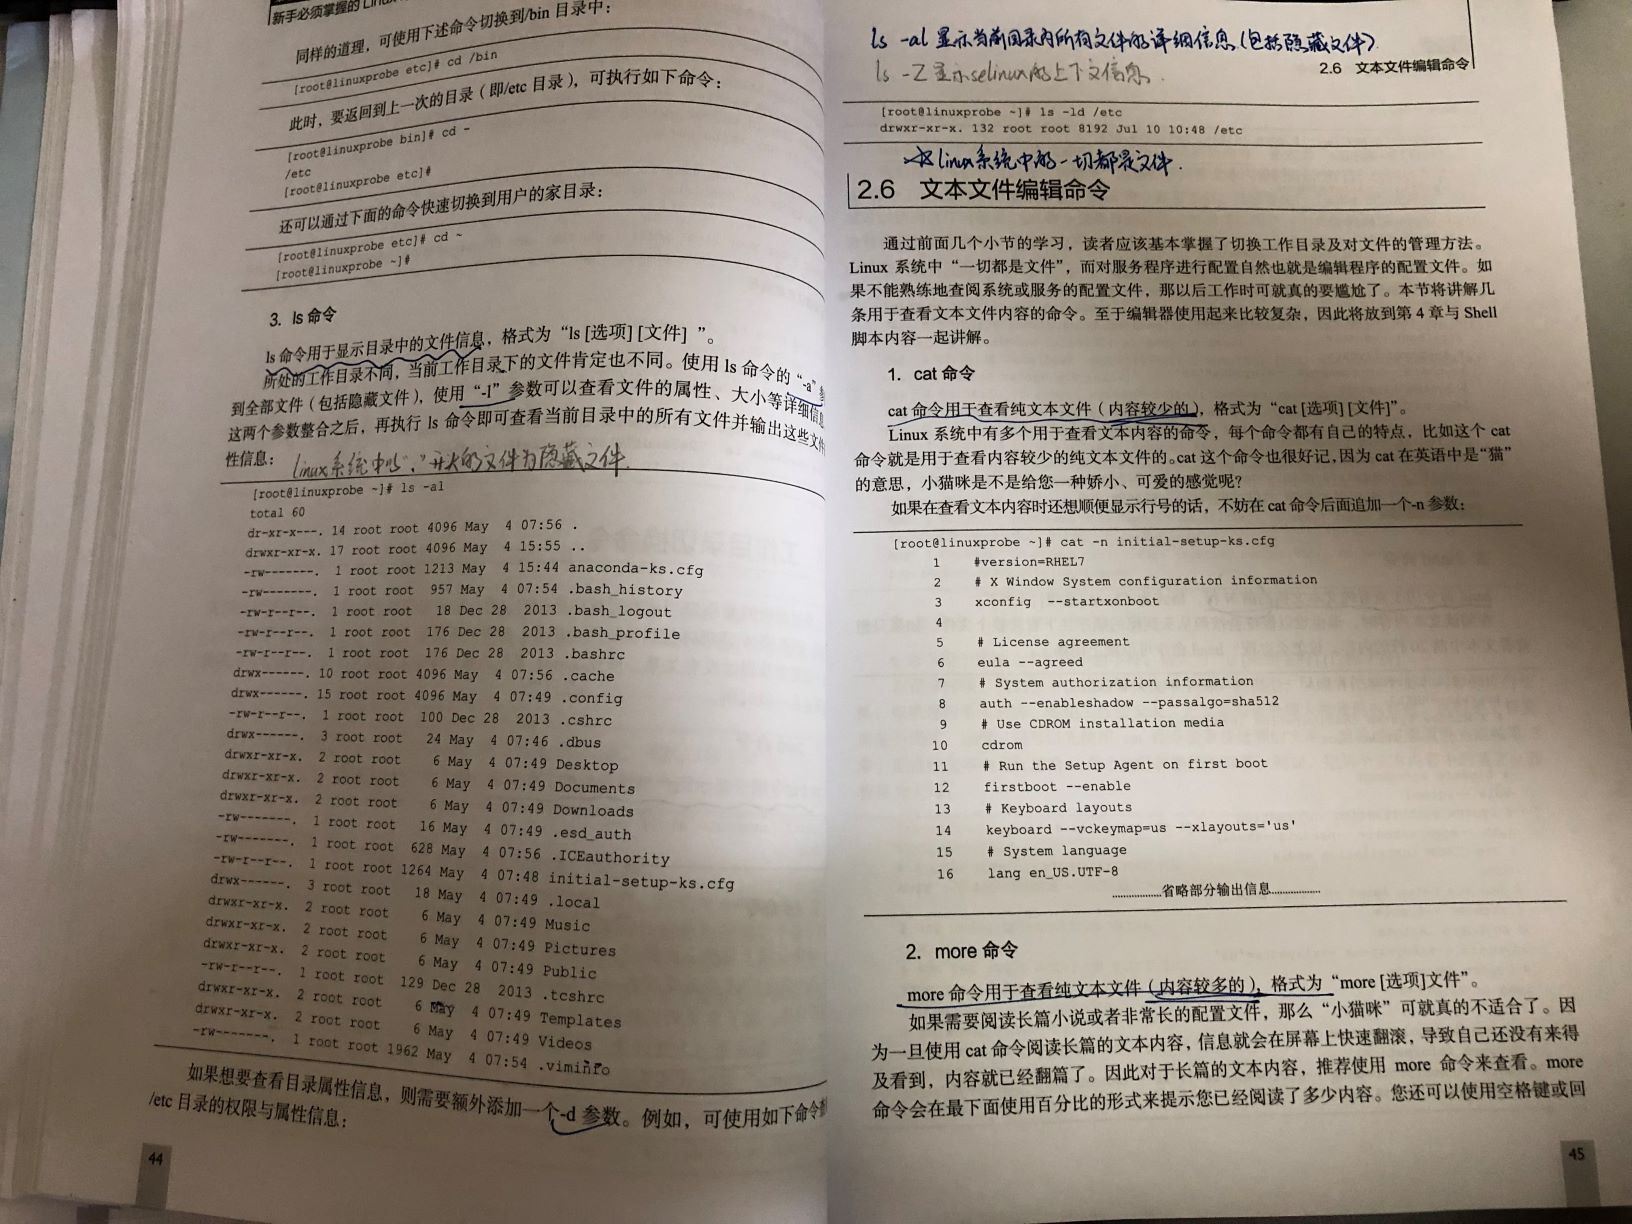
ls命令用于显示目录中的文件信息,格式为“ls [选项] [文件] ”。
使用ls命令的“-a”参数看到全部文件(包括隐藏文件),使用“-l”参数可以查看文件的属性、大小等详细信息。将这两个参数整合之后,再执行ls命令即可查看当前目录中的所有文件并输出这些文件的属性信息:
[root@linuxprobe ~]# ls -al

total 60

dr-xr-x---. 14 root root 4096 May  4 07:56 .

drwxr-xr-x. 17 root root 4096 May  4 15:55 ..

-rw-------.  1 root root 1213 May  4 15:44 anaconda-ks.cfg

-rw-------.  1 root root  957 May  4 07:54 .bash_history

-rw-r--r--.  1 root root   18 Dec 28  2013 .bash_logout

-rw-r--r--.  1 root root  176 Dec 28  2013 .bash_profile

-rw-r--r--.  1 root root  176 Dec 28  2013 .bashrc

drwx------. 10 root root 4096 May  4 07:56 .cache

drwx------. 15 root root 4096 May  4 07:49 .config

-rw-r--r--.  1 root root  100 Dec 28  2013 .cshrc

drwx------.  3 root root   24 May  4 07:46 .dbus

drwxr-xr-x.  2 root root    6 May  4 07:49 Desktop

drwxr-xr-x.  2 root root    6 May  4 07:49 Documents

drwxr-xr-x.  2 root root    6 May  4 07:49 Downloads

-rw-------.  1 root root   16 May  4 07:49 .esd_auth

-rw-------.  1 root root  628 May  4 07:56 .ICEauthority

-rw-r--r--.  1 root root 1264 May  4 07:48 initial-setup-ks.cfg

drwx------.  3 root root   18 May  4 07:49 .local

drwxr-xr-x.  2 root root    6 May  4 07:49 Music

drwxr-xr-x.  2 root root    6 May  4 07:49 Pictures

drwxr-xr-x.  2 root root    6 May  4 07:49 Public

-rw-r--r--.  1 root root  129 Dec 28  2013 .tcshrc

drwxr-xr-x.  2 root root    6 May  4 07:49 Templates

drwxr-xr-x.  2 root root    6 May  4 07:49 Videos

-rw-------.  1 root root 1962 May  4 07:54 .viminfo
如果想要查看目录属性信息,则需要额外添加一个-d参数。例如,可使用如下命令查看/etc目录的权限与属性信息:
[root@linuxprobe ~]# ls -ld /etc

drwxr-xr-x. 132 root root 8192 Jul 10 10:48 /etc
文本文件编辑命令
Linux系统中“一切都是文件”
1.cat命令
cat命令用于查看纯文本文件(内容较少的),格式为“cat [选项] [文件]”。
显示行号在后面追加一个-n参数:
[root@linuxprobe ~]# cat -n initial-setup-ks.cfg

     1    #version=RHEL7

     2    # X Window System configuration information

     3    xconfig  --startxonboot

     4

     5    # License agreement

     6    eula --agreed

     7    # System authorization information

     8    auth --enableshadow --passalgo=sha512

     9    # Use CDROM installation media

    10    cdrom

    11    # Run the Setup Agent on first boot

    12    firstboot --enable

    13    # Keyboard layouts

    14    keyboard --vckeymap=us --xlayouts='us'

    15    # System language

    16    lang en_US.UTF-8

………………省略部分输出信息………………
2.more命令
more命令用于查看纯文本文件(内容较多的),格式为“more [选项]文件”。
[root@linuxprobe ~]# more initial-setup-ks.cfg
3.head命令
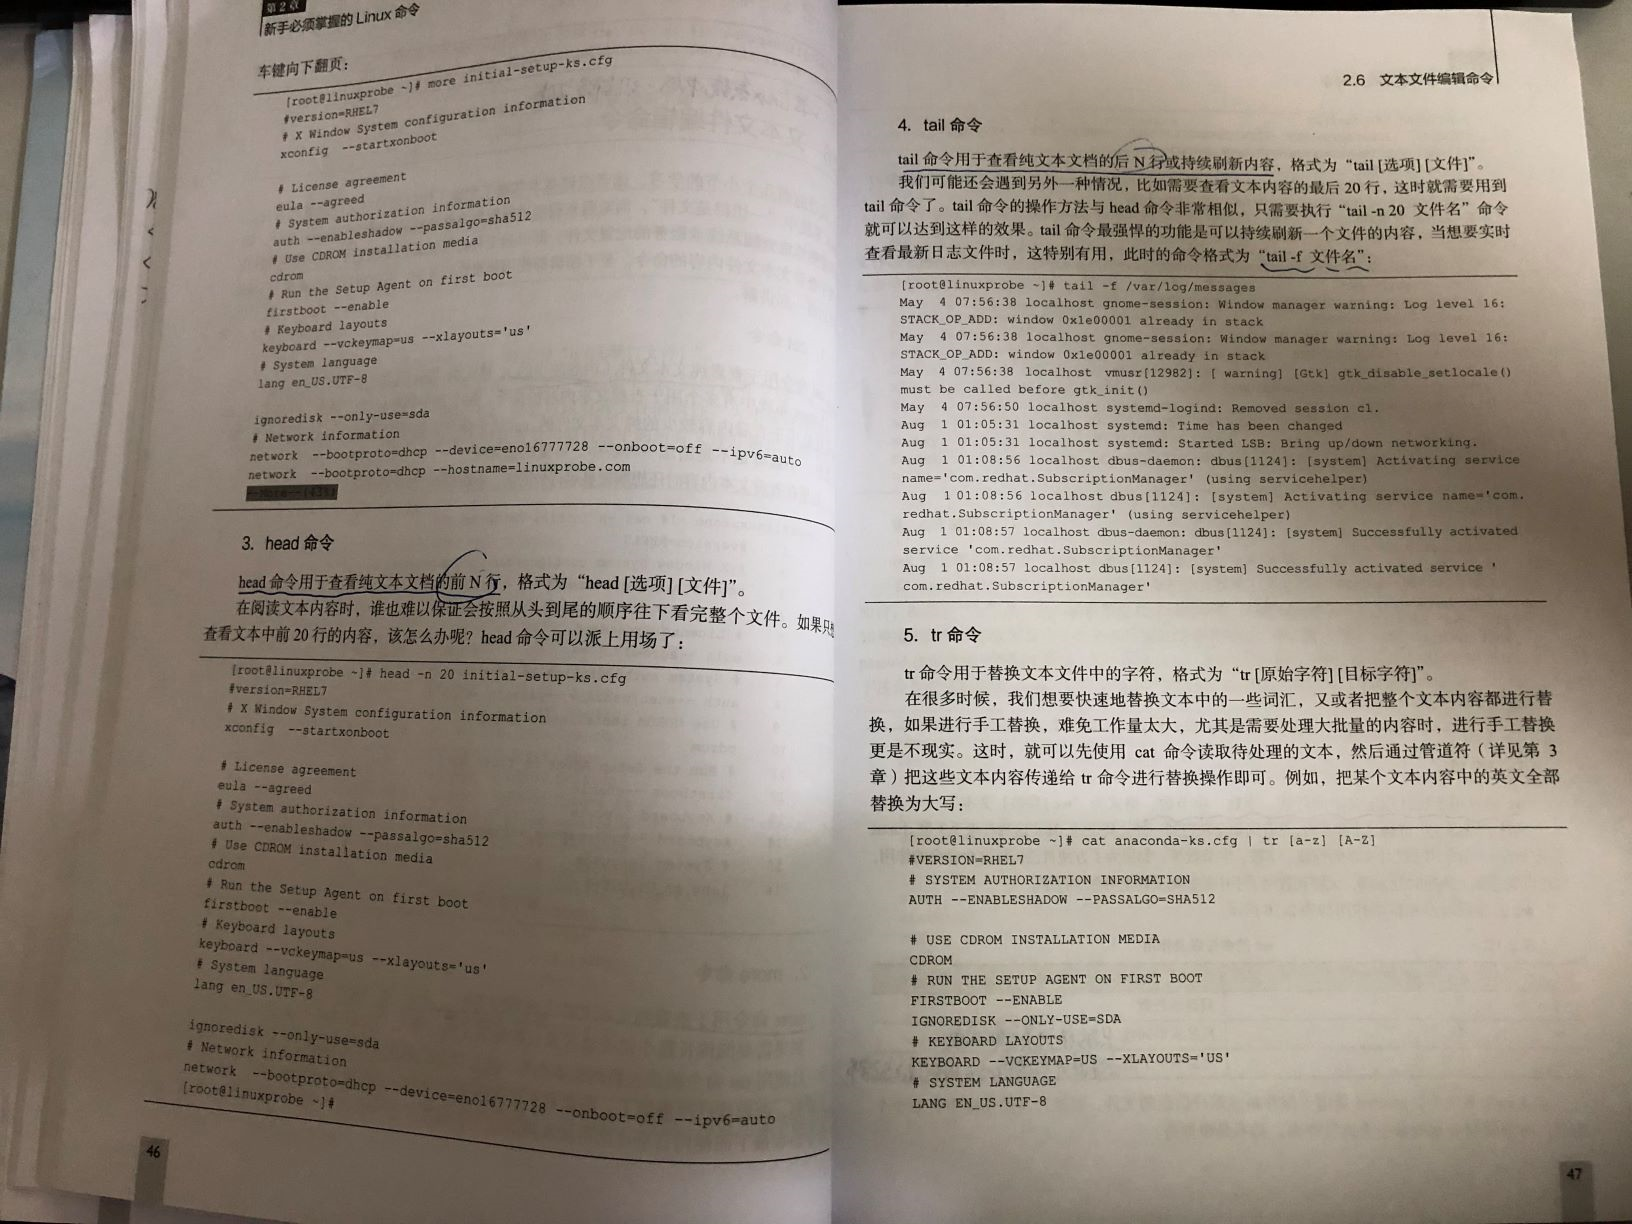
head命令用于查看纯文本文档的前N行,格式为“head [选项] [文件]”。
查看文本中前20行的内容:
[root@linuxprobe ~]# head -n 20  initial-setup-ks.cfg

#version=RHEL7

# X Window System configuration information

xconfig  --startxonboot

# License agreement

eula --agreed

# System authorization information

auth --enableshadow --passalgo=sha512

# Use CDROM installation media

cdrom

# Run the Setup Agent on first boot

firstboot --enable

# Keyboard layouts

keyboard --vckeymap=us --xlayouts='us'

# System language

lang en_US.UTF-8

ignoredisk --only-use=sda

# Network information

network  --bootproto=dhcp --device=eno16777728 --onboot=off --ipv6=auto

[root@linuxprobe ~]#
4.tail命令
tail命令用于查看纯文本文档的后N行或持续刷新内容,格式为“tail [选项] [文件]”。
查看文本内容的最后20行:
[root@linuxprobe ~]# tail -f /var/log/messages

May  4 07:56:38 localhost gnome-session: Window manager warning: Log level 16: STACK_OP_ADD: window 0x1e00001 already in stack

May  4 07:56:38 localhost gnome-session: Window manager warning: Log level 16: STACK_OP_ADD: window 0x1e00001 already in stack

May  4 07:56:38 localhost vmusr[12982]: [ warning] [Gtk] gtk_disable_setlocale() must be called before gtk_init()

May  4 07:56:50 localhost systemd-logind: Removed session c1.

Aug  1 01:05:31 localhost systemd: Time has been changed

Aug  1 01:05:31 localhost systemd: Started LSB: Bring up/down networking.

Aug  1 01:08:56 localhost dbus-daemon: dbus[1124]: [system] Activating service name='com.redhat.SubscriptionManager' (using servicehelper)

Aug  1 01:08:56 localhost dbus[1124]: [system] Activating service name='com.redhat.SubscriptionManager' (using servicehelper)

Aug  1 01:08:57 localhost dbus-daemon: dbus[1124]: [system] Successfully activated service 'com.redhat.SubscriptionManager'

Aug  1 01:08:57 localhost dbus[1124]: [system] Successfully activated service 'com.redhat.SubscriptionManager'
5.tr命令
tr命令用于替换文本文件中的字符,格式为“tr [原始字符] [目标字符]”。
把某个文本内容中的英文全部替换为大写:
[root@linuxprobe ~]# cat anaconda-ks.cfg | tr [a-z] [A-Z]

#VERSION=RHEL7

# SYSTEM AUTHORIZATION INFORMATION

AUTH --ENABLESHADOW --PASSALGO=SHA512

# USE CDROM INSTALLATION MEDIA

CDROM

# RUN THE SETUP AGENT ON FIRST BOOT

FIRSTBOOT --ENABLE

IGNOREDISK --ONLY-USE=SDA

# KEYBOARD LAYOUTS

KEYBOARD --VCKEYMAP=US --XLAYOUTS='US'

# SYSTEM LANGUAGE

LANG EN_US.UTF-8

# NETWORK INFORMATION

NETWORK --BOOTPROTO=DHCP --DEVICE=ENO16777728 --ONBOOT=OFF --IPV6=AUTO

NETWORK --HOSTNAME=LOCALHOST.LOCALDOMAIN

# ROOT PASSWORD

ROOTPW --ISCRYPTED $6$PDJJF42G8C6PL069$II.PX/YFAQPO0ENW2PA7MOMKJLYOAE2ZJMZ2UZJ7BH3UO4OWTR1.WK/HXZ3XIGMZGJPCS/MGPYSSOI8HPCT8B/

# SYSTEM TIMEZONE

TIMEZONE AMERICA/NEW_YORK --ISUTC

USER --NAME=LINUXPROBE --PASSWORD=$6$A9V3INSTNBWEIR7D$JEGFYWBCDOOOKJ9SODECCDO.ZLF4OSH2AZ2SS2R05B6LZ2A0V2K.RJWSBALL2FEKQVGF640OA/TOK6J.7GUTO/ --ISCRYPTED --GECOS="LINUXPROBE"

# X WINDOW SYSTEM CONFIGURATION INFORMATION

XCONFIG --STARTXONBOOT

# SYSTEM BOOTLOADER CONFIGURATION

BOOTLOADER --LOCATION=MBR --BOOT-DRIVE=SDA

AUTOPART --TYPE=LVM

# PARTITION CLEARING INFORMATION

CLEARPART --NONE --INITLABEL

%PACKAGES

@BASE

@CORE

@DESKTOP-DEBUGGING

@DIAL-UP

@FONTS

@GNOME-DESKTOP

@GUEST-AGENTS

@GUEST-DESKTOP-AGENTS

@INPUT-METHODS

@INTERNET-BROWSER

@MULTIMEDIA

@PRINT-CLIENT

@X11

%END
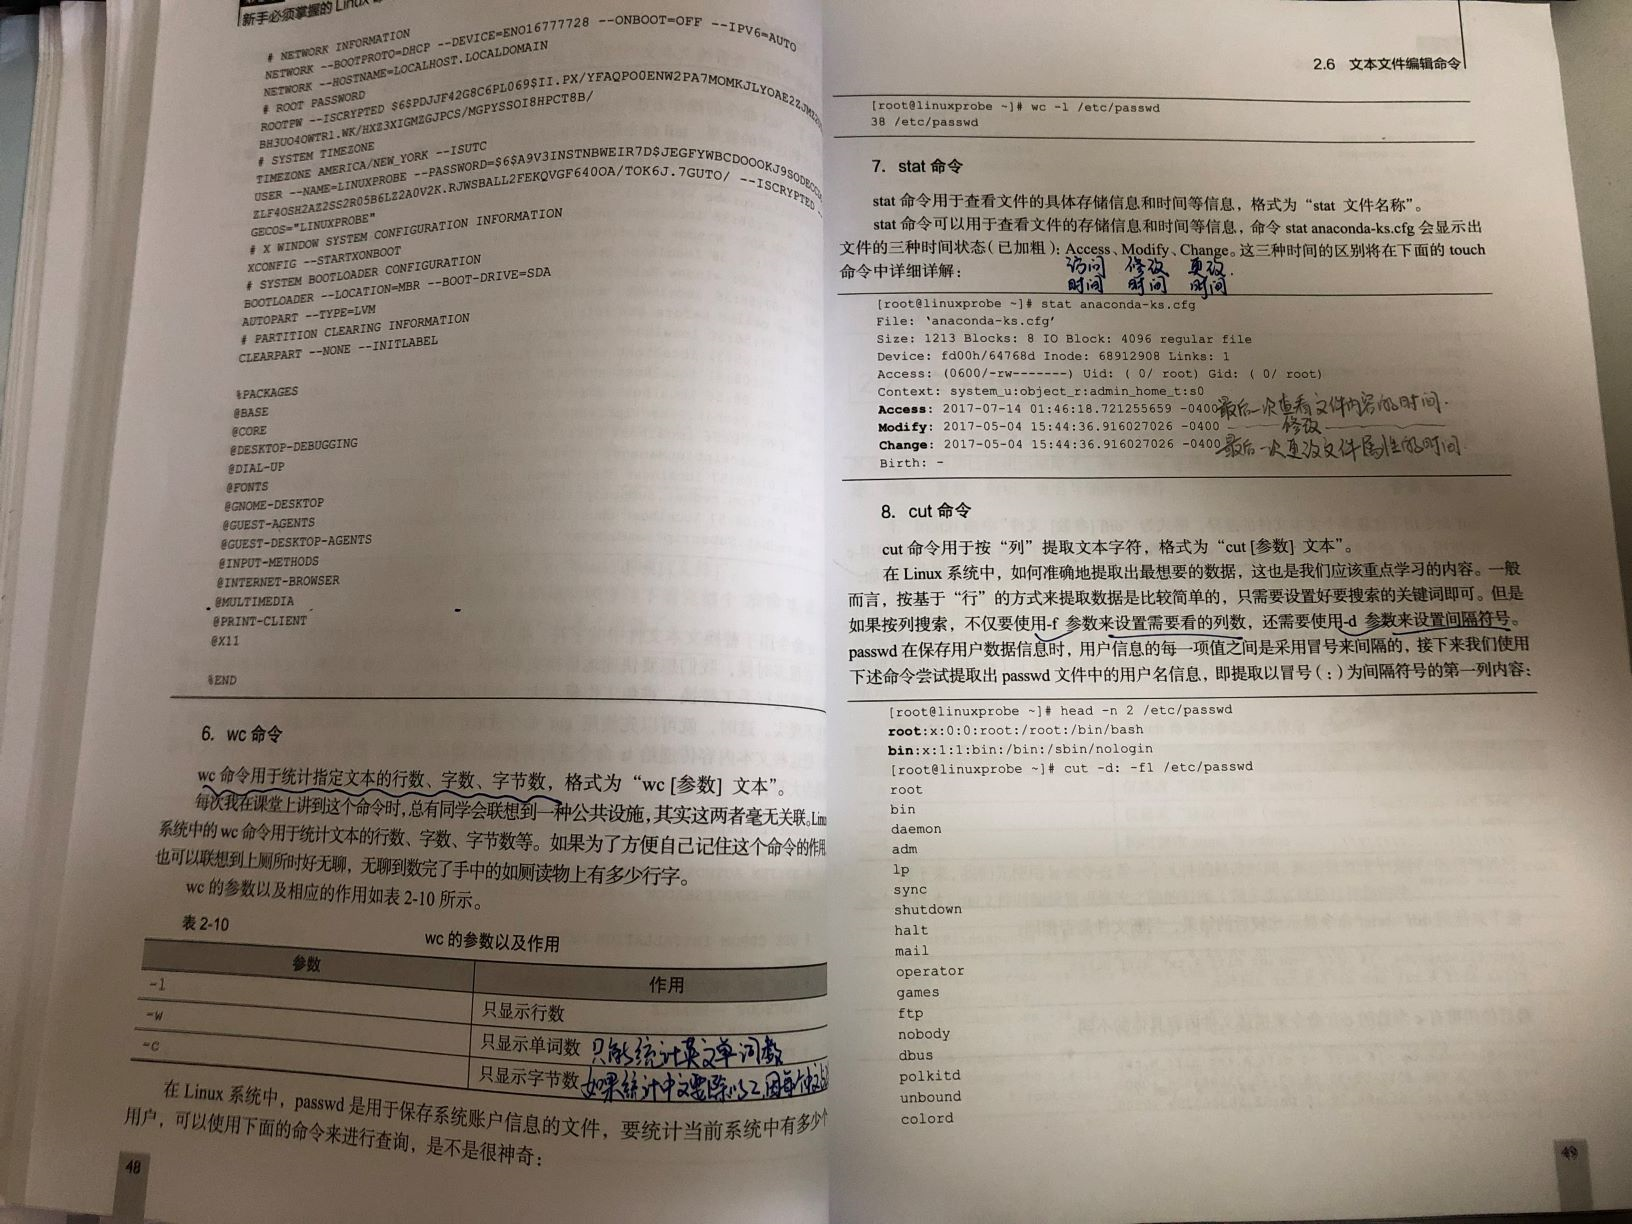
6.wc命令
wc命令用于统计指定文本的行数、字数、字节数,格式为“wc [参数] 文本”。
7.stat命令
stat命令用于查看文件的具体存储信息和时间等信息,格式为“stat 文件名称”。
stat命令可以用于查看文件的存储信息和时间等信息,命令stat anaconda-ks.cfg会显示出文件的三种时间状态(已加粗):Access、Modify、Change。这三种时间的区别将在下面的touch命令中详细详解:
[root@linuxprobe ~]# stat anaconda-ks.cfg

File: ‘anaconda-ks.cfg’

Size: 1213 Blocks: 8 IO Block: 4096 regular file

Device: fd00h/64768d Inode: 68912908 Links: 1

Access: (0600/-rw-------) Uid: ( 0/ root) Gid: ( 0/ root)

Context: system_u:object_r:admin_home_t:s0

Access: 2017-07-14 01:46:18.721255659 -0400

Modify: 2017-05-04 15:44:36.916027026 -0400

Change: 2017-05-04 15:44:36.916027026 -0400

Birth: -
8.cut命令
cut命令用于按“列”提取文本字符,格式为“cut [参数] 文本”。
提取以冒号(:)为间隔符号的第一列内容:
[root@linuxprobe ~]# cut -d: -f1 /etc/passwd

root

bin

daemon

adm

lp

sync
...
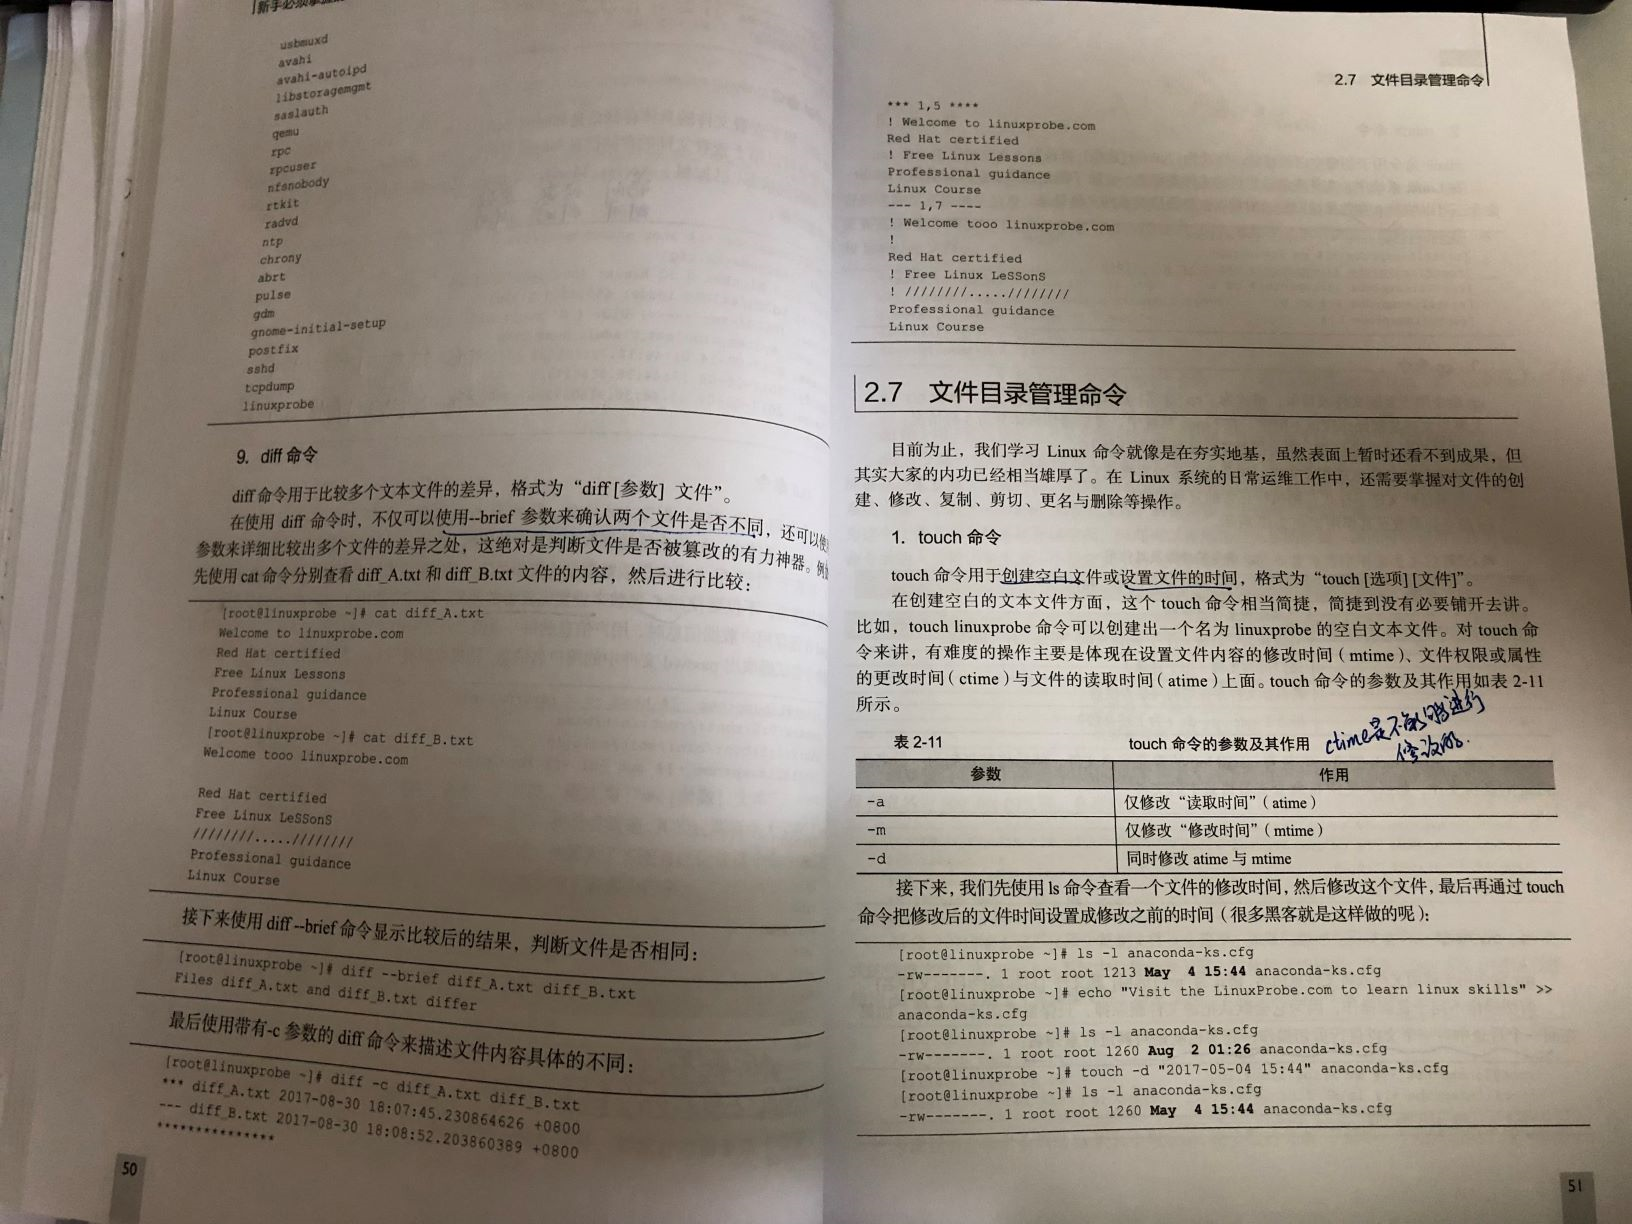
9.diff命令
diff命令用于比较多个文本文件的差异,格式为“diff [参数] 文件”。
接下来使用diff --brief命令显示比较后的结果,判断文件是否相同:
[root@linuxprobe ~]# diff --brief diff_A.txt diff_B.txt

Files diff_A.txt and diff_B.txt differ
最后使用带有-c参数的diff命令来描述文件内容具体的不同:
[root@linuxprobe ~]# diff -c diff_A.txt diff_B.txt

*** diff_A.txt 2017-08-30 18:07:45.230864626 +0800

--- diff_B.txt 2017-08-30 18:08:52.203860389 +0800

***************

*** 1,5 ****

! Welcome to linuxprobe.com

Red Hat certified

! Free Linux Lessons

Professional guidance

Linux Course

--- 1,7 ----

! Welcome tooo linuxprobe.com

!

Red Hat certified

! Free Linux LeSSonS

! ////////.....////////

Professional guidance

Linux Course
文件目录管理命令
1.touch命令
touch命令用于创建空白文件或设置文件的时间,格式为“touch [选项] [文件]”。
[root@linuxprobe ~]# touch -d "2017-05-04 15:44" anaconda-ks.cfg

[root@linuxprobe ~]# ls -l anaconda-ks.cfg

-rw-------. 1 root root 1260 May  4 15:44 anaconda-ks.cfg
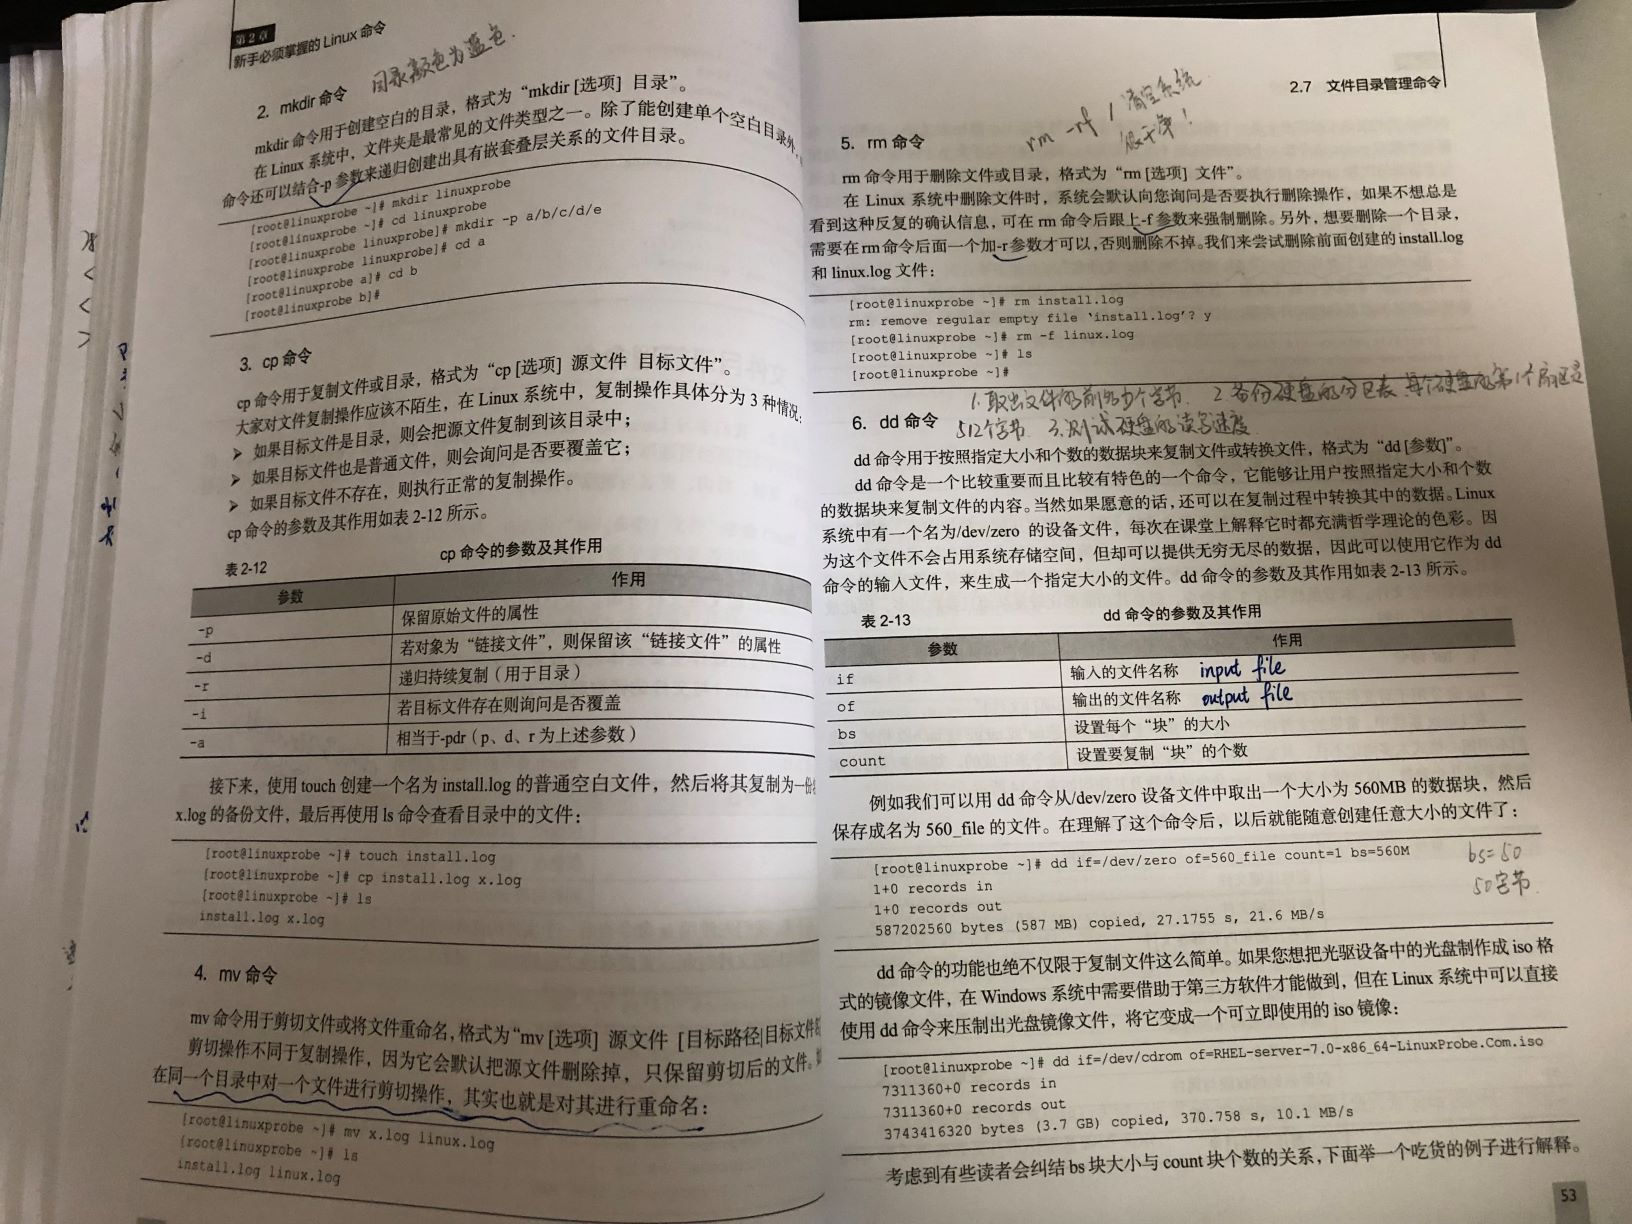
2.mkdir命令
mkdir命令用于创建空白的目录,格式为“mkdir [选项] 目录”。
[root@linuxprobe ~]# mkdir linuxprobe

[root@linuxprobe ~]# cd linuxprobe

[root@linuxprobe linuxprobe]# mkdir -p a/b/c/d/e

[root@linuxprobe linuxprobe]# cd a

[root@linuxprobe a]# cd b

[root@linuxprobe b]#
3.cp命令
cp命令用于复制文件或目录,格式为“cp [选项] 源文件 目标文件”。
4.mv命令
mv命令用于剪切文件或将文件重命名,格式为“mv [选项] 源文件 [目标路径|目标文件名]”。
剪切操作不同于复制操作,因为它会默认把源文件删除掉,只保留剪切后的文件。如果在同一个目录中对一个文件进行剪切操作,其实也就是对其进行重命名:
[root@linuxprobe ~]# mv x.log linux.log

[root@linuxprobe ~]# ls

install.log linux.log
5.rm命令
rm命令用于删除文件或目录,格式为“rm [选项] 文件”。
[root@linuxprobe ~]# rm install.log

rm: remove regular empty file ‘install.log’? y
6.dd命令
dd命令用于按照指定大小和个数的数据块来复制文件或转换文件,格式为“dd [参数]”。
例如我们可以用dd命令从/dev/zero设备文件中取出一个大小为560MB的数据块,然后保存成名为560_file的文件:
[root@linuxprobe ~]# dd if=/dev/zero of=560_file count=1 bs=560M

1+0 records in

1+0 records out

587202560 bytes (587 MB) copied, 27.1755 s, 21.6 MB/s
dd命令的功能也绝不仅限于复制文件这么简单。如果您想把光驱设备中的光盘制作成iso格式的镜像文件,在Windows系统中需要借助于第三方软件才能做到,但在Linux系统中可以直接使用dd命令来压制出光盘镜像文件,将它变成一个可立即使用的iso镜像:
[root@linuxprobe ~]# dd if=/dev/cdrom of=RHEL-server-7.0-x86_64-LinuxProbe.Com.iso

7311360+0 records in

7311360+0 records out

3743416320 bytes (3.7 GB) copied, 370.758 s, 10.1 MB/s
7.file命令
file命令用于查看文件的类型,格式为“file 文件名”。
[root@linuxprobe ~]# file anaconda-ks.cfg

anaconda-ks.cfg: ASCII text

[root@linuxprobe ~]# file /dev/sda

/dev/sda: block special
打包压缩与搜索命令
1.tar命令
tar命令用于对文件进行打包压缩或解压,格式为“tar [选项] [文件]”。
[root@linuxprobe ~]# tar czvf etc.tar.gz /etc

tar: Removing leading `/' from member names

/etc/

/etc/fstab

/etc/crypttab

/etc/mtab

/etc/fonts/

/etc/fonts/conf.d/

/etc/fonts/conf.d/65-0-madan.conf

/etc/fonts/conf.d/59-liberation-sans.conf

/etc/fonts/conf.d/90-ttf-arphic-uming-embolden.conf

/etc/fonts/conf.d/59-liberation-mono.conf

/etc/fonts/conf.d/66-sil-nuosu.conf

………………省略部分压缩过程信息………………
接下来将打包后的压缩包文件指定解压到/root/etc目录中(先使用mkdir命令来创建/root/etc目录):
[root@linuxprobe ~]# mkdir /root/etc

[root@linuxprobe ~]# tar xzvf etc.tar.gz -C /root/etc

etc/

etc/fstab

etc/crypttab

etc/mtab

etc/fonts/

etc/fonts/conf.d/

etc/fonts/conf.d/65-0-madan.conf

etc/fonts/conf.d/59-liberation-sans.conf

etc/fonts/conf.d/90-ttf-arphic-uming-embolden.conf

etc/fonts/conf.d/59-liberation-mono.conf

etc/fonts/conf.d/66-sil-nuosu.conf

etc/fonts/conf.d/65-1-vlgothic-gothic.conf

etc/fonts/conf.d/65-0-lohit-bengali.conf

etc/fonts/conf.d/20-unhint-small-dejavu-sans.conf

………………省略部分解压过程信息………………
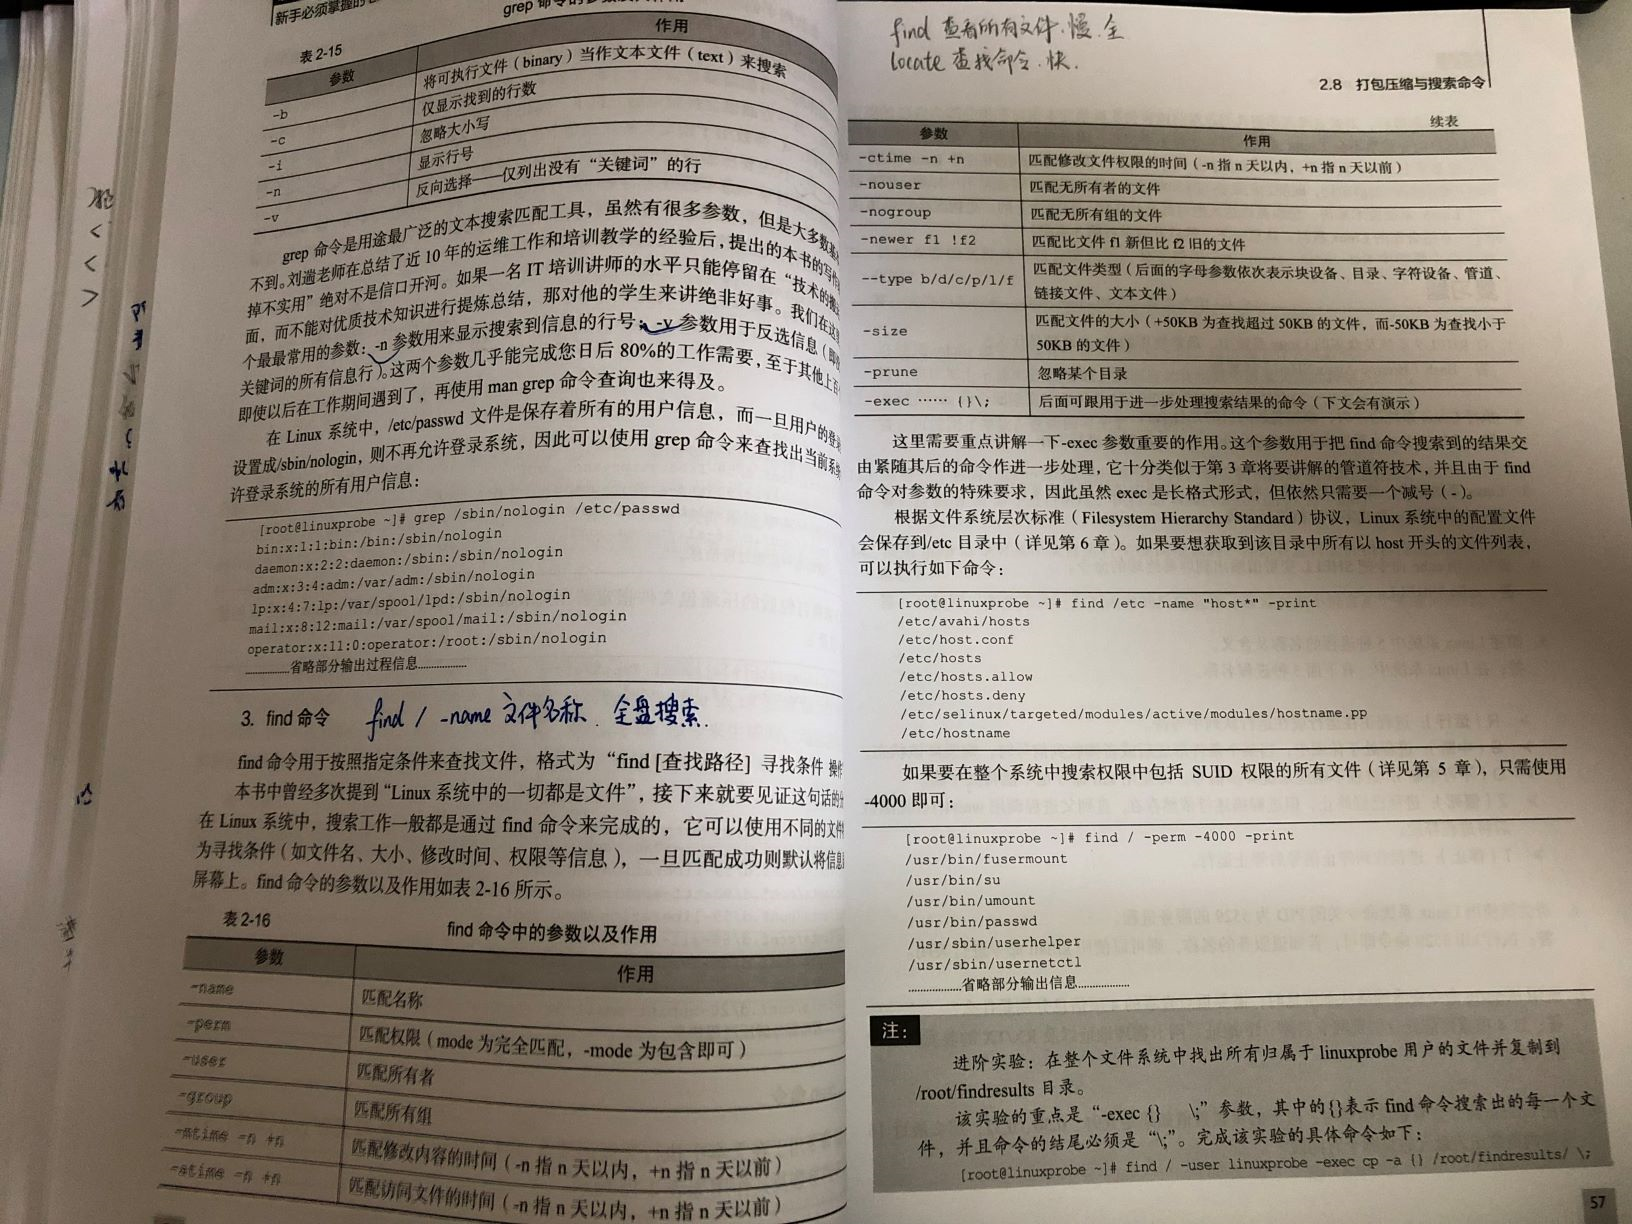
2.grep命令
grep命令用于在文本中执行关键词搜索,并显示匹配的结果,格式为“grep [选项] [文件]”。
[root@linuxprobe ~]# grep /sbin/nologin /etc/passwd

bin:x:1:1:bin:/bin:/sbin/nologin

daemon:x:2:2:daemon:/sbin:/sbin/nologin

adm:x:3:4:adm:/var/adm:/sbin/nologin

lp:x:4:7:lp:/var/spool/lpd:/sbin/nologin

mail:x:8:12:mail:/var/spool/mail:/sbin/nologin

operator:x:11:0:operator:/root:/sbin/nologin

………………省略部分输出过程信息………………
3.find命令
find命令用于按照指定条件来查找文件,格式为“find [查找路径] 寻找条件 操作”。
[root@linuxprobe ~]# find /etc -name "host*" -print

/etc/avahi/hosts

/etc/host.conf

/etc/hosts

/etc/hosts.allow

/etc/hosts.deny

/etc/selinux/targeted/modules/active/modules/hostname.pp

/etc/hostname

linux随笔-03的更多相关文章
- Linux随笔-鸟哥Linux基础篇学习总结(全)
Linux随笔-鸟哥Linux基础篇学习总结(全) 修改Linux系统语系:LANG-en_US,如果我们想让系统默认的语系变成英文的话我们可以修改系统配置文件:/etc/sysconfig/i18n ...
- Linux第03天
Linux 第03天 1.Linux帐号和ACL权限管理 1.帐号和用户组 1.1 用户标识符————UID(root为0 系统用户为1~499 普通用户为500~65535) 1.2 用户组标识符— ...
- Linux 时间同步 03 ntpdate时间同步
Linux 时间同步 03 ntpdate时间同步 目录 Linux 时间同步 03 ntpdate时间同步 安装ntpdate 修改/etc/sysconfig/ntpdate 使用ntpdate手 ...
- 我的Linux随笔目录
现在整理博客的时间少了,大多是在用为知笔记收藏和整理,一次集中发点Linux相关随笔整理和一个目录,是按时间顺序来的.每一篇都是自己用过之后整理的,应用场景已经尽可能的说明了,不明白的可以Q我,上班时 ...
- Linux随笔-鸟哥Linux服务器篇学习总结(全)
作者:Danbo 时间:2015-7-17 在runlevel3启动级别下默认启动网络挂载(autofs)机制,我们可以通过命令将其关闭:chkconfig autofs off 或者 /etc/in ...
- Linux基础03
** Linux基本操作常用命令(三) ** Linux的软件包 Linux的软件把分为“源码包”和“二进制包” 源码包:免费,开源 二进制包:系统默认包,即RPM包(上一节我们通过rpm卸载过ope ...
- 【Linux】一步一步学Linux——Linux版本(03)
目录 00. 目录 01. Linux内核版本 02. Linux内核官方网站 03. Linux发行版本 04. Linux发行版本介绍 4.1 Ubuntu 4.2 RedHat 4.3 Debi ...
- linux随笔-06
用户身份与文件权限 用户身份与能力 Linux系统的管理员之所以是root,并不是因为它的名字叫root,而是因为该用户的身份号码即UID(User IDentification)的数值为0. 在Li ...
- Linux基础 -03
2.2.3 head-tail 命令 #------head #head pass #查看头部内容,默认前10行 #head -n5 pass #查看头部前5行,使用-n指定 #-------tail ...
随机推荐
- 莫比乌斯反演/线性筛/积性函数/杜教筛/min25筛 学习笔记
最近重新系统地学了下这几个知识点,以前没发现他们的联系,这次总结一下. 莫比乌斯反演入门:https://blog.csdn.net/litble/article/details/72804050 线 ...
- Java虚拟机(JVM)与垃圾回收机制(GC)的详解
一.JVM结构 根据<java虚拟机规范>规定,JVM的基本结构一般如下图所示: 从左图可知,JVM主要包括四个部分: 1.类加载器(ClassLoader):在JVM启动时或者在类运行时 ...
- day15 python lambda函数 递归函数 二分法
day15 python 一.匿名函数 lambda 1.lambda函数 def func(n): #普通函数, 功能比较简单, 当函数多的时候, 起名也不 ...
- 关系型数据库---MYSQL---优化
1.为什么要进行SQL优化? 1.1 查询性能低 1.2 执行时间过长 1.3 等待时间过长 1.4 SQL写的太差(尤其是多表关联查询) 1.5 索引失效 1.6 服务器参数(缓存.线程数)设置不合 ...
- NET Core+win10+Jenkins+Github持续集成
本篇和上一篇NET Core+win10+Jenkins+Gogs+open ssh持续集成没什么区别,只不过源码库换成github. 这里有两点不一样的是: 获取的代码的凭证不用用户名和密码用sec ...
- JS中数据结构之二叉查找树
树是一种非线性的数据结构,以分层的方式存储数据.在二叉树上进行查找非常快,为二叉树添加或删除元素也非常快. 一棵树最上面的节点称为根节点,如果一个节点下面连接多个节点,那么该节点称为父节点,它下面的节 ...
- SQL注入的简单认识
写在前面 MYSQL5.0之后的版本,默认在数据库中存放一个information_schema的数据库,其中应该记住里面的三个表SCHEMATA.TABLES.COLUMNS SCHEMATA表:存 ...
- 20 October in ss
Contest A: sum 快速读. B: 鬼谷子的钱袋(coin) 贪心. 按照类似二进制的方式准备钱袋:1, 2, 4, 8, ... 以此装入的钱袋数目记为 \(N\). 如果最后剩余不足以凑 ...
- 2018-2019-2 20175223 实验四 《Android开发基础》实验报告
目录 北京电子科技学院(BESTI)实验报告 实验名称:实验四 Android程序设计 实验内容.步骤与体会: 一.实验四 Android程序设计-1 二.实验四 Android程序设计-2 三.实验 ...
- XX-net https://github.com/XX-net/XX-Net
XX-net https://github.com/XX-net/XX-Net
