FastDFS的安装及上传下载(二)
百度云:所有附件的地址
一 安装前的检查
检查Linux上是否安装了 gcc、libevent、libevent-devel,执行如下yum命令检查:
[root@node02 ~]#  yum list installed | grep gcc

gcc.x86_64                                  4.8.5-39.el7               @base

gcc-c++.x86_64                              4.8.5-39.el7               @base

libgcc.x86_64                               4.8.5-39.el7               @base

[root@node02 ~]# yum list installed | grep libevent

libevent.x86_64                             2.0.21-4.el7               @anaconda

libevent-devel.x86_64                       2.0.21-4.el7               @base

[root@node02 ~]# yum list installed | grep libevent-devel

libevent-devel.x86_64                       2.0.21-4.el7               @base

[root@node02 ~]#
如果没有安装,则需进行安装,执行如下命令安装:
yum install gcc libevent libevent-devel -y
二 安装 libfastcommon 库
libfastcommon 库是 FastDFS 文件系统运行需要的公共 C 语言函数库;
[root@node02 mnt]# tar -zvxf libfastcommon-1.0.36.tar.gz
libfastcommon-1.0.36/
libfastcommon-1.0.36/HISTORY
libfastcommon-1.0.36/INSTALL
libfastcommon-1.0.36/README
[root@node02 libfastcommon-1.0.36]# ./make.sh
cc -Wall -D_FILE_OFFSET_BITS=64 -D_GNU_SOURCE -g -O3 -c -o hash.o hash.c
cc -Wall -D_FILE_OFFSET_BITS=64 -D_GNU_SOURCE -g -O3 -c -o chain.o chain.c
cc -Wall -D_FILE_OFFSET_BITS=64 -D_GNU_SOURCE -g -O3 -c -o shared_func.o shared_func.c
cc -Wall -D_FILE_OFFSET_BITS=64 -D_GNU_SOURCE -g -O3 -c -o ini_file_reader.o ini_file_reader.c
cc -Wall -D_FILE_OFFSET_BITS=64 -D_GNU_SOURCE -g -O3 -c -o logger.o logger.c
cc -Wall -D_FILE_OFFSET_BITS=64 -D_GNU_SOURCE -g -O3 -c -o sockopt.o sockopt.c
[root@node02 libfastcommon-1.0.36]# ./make.sh install
mkdir -p /usr/lib64
mkdir -p /usr/lib
install -m 755 libfastcommon.so /usr/lib64
install -m 755 libfastcommon.so /usr/lib
mkdir -p /usr/include/fastcommon
install -m 644 common_define.h hash.h chain.h logger.h base64.h shared_func.h pthread_func.h ini_file_reader.h _os_define.h sockopt.h sched_thread.h http_func.h md5.h local_ip_func.h avl_tree.h ioevent.h ioevent_loop.h fast_task_queue.h fast_timer.h process_ctrl.h fast_mblock.h connection_pool.h fast_mpool.h fast_allocator.h fast_buffer.h skiplist.h multi_skiplist.h flat_skiplist.h skiplist_common.h system_info.h fast_blocked_queue.h php7_ext_wrapper.h id_generator.h char_converter.h char_convert_loader.h /usr/include/fastcommon
[root@node02 libfastcommon-1.0.36]#
至此 libfastcommon 库安装完毕;
三 安装FastDFS
1、下载FastDFS,下载地址:https://github.com/happyfish100/fastdfs/releases
注:上面从百度云下载也可以
2、解压下载下来的tar.gz包:tar -zxvf fastdfs-5.11.tar.gz
3、切换到解压后的目录:cd fastdfs-5.11
4、执行编译: ./make.sh
5、然后再执行安装 ./make.sh install
至此FastDFS安装完成,安装后所有编译出来的文件存放在/usr/bin目录下,所有配置文件存放在/etc/fdfs目录下; 使用命令查看: ll /usr/bin/fdfs*
6、另外注意需要把解压后的fastdfs-5.11/conf目录下的两个文件拷贝到/etc/fdfs/ 1、cp http.conf /etc/fdfs/ 2、cp mime.types /etc/fdfs/
这两个文件后续需要用到,所以先拷贝过去;
代码如下:
[root@node02 mnt]# tar -zvxf fastdfs-5.11.tar.gz
fastdfs-5.11/
fastdfs-5.11/COPYING-3_0.txt
fastdfs-5.11/HISTORY
fastdfs-5.11/INSTALL
fastdfs-5.11/README.md
fastdfs-5.11/client/
[root@node02 fastdfs-5.11]# ./make.sh
cc -Wall -D_FILE_OFFSET_BITS=64 -D_GNU_SOURCE -g -O -DDEBUG_FLAG -c -o ../common/fdfs_global.o ../common/fdfs_global.c -I../common -I/usr/include/fastcommon
cc -Wall -D_FILE_OFFSET_BITS=64 -D_GNU_SOURCE -g -O -DDEBUG_FLAG -c -o tracker_proto.o tracker_proto.c -I../common -I/usr/include/fastcommon
cc -Wall -D_FILE_OFFSET_BITS=64 -D_GNU_SOURCE -g -O -DDEBUG_FLAG -c -o tracker_mem.o tracker_mem.c -I../common -I/usr/include/fastcommon
cc -Wall -D_FILE_OFFSET_BITS=64 -D_GNU_SOURCE -g -O -DDEBUG_FLAG -c -o tracker_service.o tracker_service.c -I../common -I/usr/include/fastcommon
cc -Wall -D_FILE_OFFSET_BITS=64 -D_GNU_SOURCE -g -O -DDEBUG_FLAG -c -o tracker_status.o tracker_status.c -I../common -I/usr/include/fastcommon
[root@node02 fastdfs-5.11]# ./make.sh install
mkdir -p /usr/bin
mkdir -p /etc/fdfs
cp -f fdfs_trackerd /usr/bin
if [ ! -f /etc/fdfs/tracker.conf.sample ]; then cp -f ../conf/tracker.conf /etc/fdfs/tracker.conf.sample; fi
if [ ! -f /etc/fdfs/storage_ids.conf.sample ]; then cp -f ../conf/storage_ids.conf /etc/fdfs/storage_ids.conf.sample; fi
mkdir -p /usr/bin
mkdir -p /etc/fdfs
cp -f fdfs_storaged /usr/bin
if [ ! -f /etc/fdfs/storage.conf.sample ]; then cp -f ../conf/storage.conf /etc/fdfs/storage.conf.sample; fi
[root@node02 fastdfs-5.11]# ll /usr/bin/fdfs*
-rwxr-xr-x 1 root root 317344 11月 8 21:40 /usr/bin/fdfs_appender_test
-rwxr-xr-x 1 root root 317120 11月 8 21:40 /usr/bin/fdfs_appender_test1
-rwxr-xr-x 1 root root 303976 11月 8 21:40 /usr/bin/fdfs_append_file
-rwxr-xr-x 1 root root 303696 11月 8 21:40 /usr/bin/fdfs_crc32
-rwxr-xr-x 1 root root 304032 11月 8 21:40 /usr/bin/fdfs_delete_file
-rwxr-xr-x 1 root root 304768 11月 8 21:40 /usr/bin/fdfs_download_file
-rwxr-xr-x 1 root root 304360 11月 8 21:40 /usr/bin/fdfs_file_info
-rwxr-xr-x 1 root root 322256 11月 8 21:40 /usr/bin/fdfs_monitor
-rwxr-xr-x 1 root root 1111376 11月 8 21:40 /usr/bin/fdfs_storaged
-rwxr-xr-x 1 root root 327248 11月 8 21:40 /usr/bin/fdfs_test
-rwxr-xr-x 1 root root 326464 11月 8 21:40 /usr/bin/fdfs_test1
-rwxr-xr-x 1 root root 453720 11月 8 21:40 /usr/bin/fdfs_trackerd
-rwxr-xr-x 1 root root 304960 11月 8 21:40 /usr/bin/fdfs_upload_appender
-rwxr-xr-x 1 root root 305984 11月 8 21:40 /usr/bin/fdfs_upload_file
[root@node02 fastdfs-5.11]#
[root@node02 fastdfs-5.11]# cd conf/
[root@node02 conf]# ll
总用量 84
-rw-rw-r-- 1 root root 23981 6月 3 2017 anti-steal.jpg
-rw-rw-r-- 1 root root 1461 6月 3 2017 client.conf
-rw-rw-r-- 1 root root 955 6月 3 2017 http.conf
-rw-rw-r-- 1 root root 31172 6月 3 2017 mime.types
-rw-rw-r-- 1 root root 7927 6月 3 2017 storage.conf
-rw-rw-r-- 1 root root 105 6月 3 2017 storage_ids.conf
-rw-rw-r-- 1 root root 7389 6月 3 2017 tracker.conf
[root@node02 conf]# cp http.conf /etc/fdfs/
[root@node02 conf]# cp mime.types /etc/fdfs/
[root@node02 conf]#
四 FastDFS配置
FastDFS安装后配置文件位于/etc/fdfs/目录下,修改该目录下的配置文件;把所有的.sample后缀都去掉,使用 mv 命令改文件名,去掉文件名后缀;
[root@node02 etc]# cd fdfs/

[root@node02 fdfs]# ll

总用量 60

-rw-r--r-- 1 root root  1461 11月  8 21:40 client.conf.sample

-rw-r--r-- 1 root root   955 11月  8 21:43 http.conf

-rw-r--r-- 1 root root 31172 11月  8 21:44 mime.types

-rw-r--r-- 1 root root  7927 11月  8 21:40 storage.conf.sample

-rw-r--r-- 1 root root   105 11月  8 21:40 storage_ids.conf.sample

-rw-r--r-- 1 root root  7389 11月  8 21:40 tracker.conf.sample

[root@node02 fdfs]# pwd

/etc/fdfs

[root@node02 fdfs]# mv client.conf.sample client.conf

[root@node02 fdfs]# mv storage.conf.sample storage.conf

[root@node02 fdfs]# mv storage_ids.conf.sample storage_ids.conf

[root@node02 fdfs]# mv tracker.conf.sample tracker.conf

[root@node02 fdfs]# ll

总用量 60

-rw-r--r-- 1 root root  1461 11月  8 21:40 client.conf

-rw-r--r-- 1 root root   955 11月  8 21:43 http.conf

-rw-r--r-- 1 root root 31172 11月  8 21:44 mime.types

-rw-r--r-- 1 root root  7927 11月  8 21:40 storage.conf

-rw-r--r-- 1 root root   105 11月  8 21:40 storage_ids.conf

-rw-r--r-- 1 root root  7389 11月  8 21:40 tracker.conf

[root@node02 fdfs]#
修改tracker.conf文件
base_path=/opt/fastdfs/tracker
修改storage.conf文件
base_path=/opt/fastdfs/storage
store_path0=/opt/fastdfs/storage/files
tracker_server=192.168.180.104:22122
[root@node02 fdfs]# vim tracker.conf
# is this config file disabled
# false for enabled
# true for disabled
disabled=false
# bind an address of this host
# empty for bind all addresses of this host
bind_addr=
# the tracker server port
port=22122
# connect timeout in seconds
# default value is 30s
connect_timeout=30
# network timeout in seconds
# default value is 30s
network_timeout=60
# the base path to store data and log files
base_path=/opt/fastdfs/tracker
# max concurrent connections this server supported
max_connections=256
# accept thread count
# default value is 1
# since V4.07
accept_threads=1
# work thread count, should <= max_connections
# default value is 4
# since V2.00
work_threads=4
# min buff size
# default value 8KB
min_buff_size = 8KB
# max buff size
# default value 128KB
max_buff_size = 128KB
[root@node02 fdfs]# cat storage.conf
# is this config file disabled
# false for enabled
# true for disabled
disabled=false
# the name of the group this storage server belongs to
#
# comment or remove this item for fetching from tracker server,
# in this case, use_storage_id must set to true in tracker.conf,
# and storage_ids.conf must be configed correctly.
group_name=group1
# bind an address of this host
# empty for bind all addresses of this host
bind_addr=
# if bind an address of this host when connect to other servers
# (this storage server as a client)
# true for binding the address configed by above parameter: "bind_addr"
# false for binding any address of this host
client_bind=true
# the storage server port
port=23000
# connect timeout in seconds
# default value is 30s
connect_timeout=30
# network timeout in seconds
# default value is 30s
network_timeout=60
# heart beat interval in seconds
heart_beat_interval=30
# disk usage report interval in seconds
stat_report_interval=60
# the base path to store data and log files
base_path=/opt/fastdfs/storage
# max concurrent connections the server supported
# default value is 256
# more max_connections means more memory will be used
max_connections=256
# the buff size to recv / send data
# this parameter must more than 8KB
# default value is 64KB
# since V2.00
buff_size = 256KB
# accept thread count
# default value is 1
# since V4.07
accept_threads=1
# work thread count, should <= max_connections
# work thread deal network io
# default value is 4
# since V2.00
work_threads=4
# if disk read / write separated
## false for mixed read and write
## true for separated read and write
# default value is true
# since V2.00
disk_rw_separated = true
# disk reader thread count per store base path
# for mixed read / write, this parameter can be 0
# default value is 1
# since V2.00
disk_reader_threads = 1
# disk writer thread count per store base path
# for mixed read / write, this parameter can be 0
# default value is 1
# since V2.00
disk_writer_threads = 1
# when no entry to sync, try read binlog again after X milliseconds
# must > 0, default value is 200ms
sync_wait_msec=50
# after sync a file, usleep milliseconds
# 0 for sync successively (never call usleep)
sync_interval=0
# storage sync start time of a day, time format: Hour:Minute
# Hour from 0 to 23, Minute from 0 to 59
sync_start_time=00:00
# storage sync end time of a day, time format: Hour:Minute
# Hour from 0 to 23, Minute from 0 to 59
sync_end_time=23:59
# write to the mark file after sync N files
# default value is 500
write_mark_file_freq=500
# path(disk or mount point) count, default value is 1
store_path_count=1
# store_path#, based 0, if store_path0 not exists, it's value is base_path
# the paths must be exist
store_path0=/opt/fastdfs/storage/files
#store_path1=/home/yuqing/fastdfs2
# subdir_count * subdir_count directories will be auto created under each
# store_path (disk), value can be 1 to 256, default value is 256
subdir_count_per_path=256
# tracker_server can ocur more than once, and tracker_server format is
# "host:port", host can be hostname or ip address
tracker_server=192.168.180.104:22122
#standard log level as syslog, case insensitive, value list:
### emerg for emergency
### alert
### crit for critical
### error
### warn for warning
### notice
### info
### debug
log_level=info
#unix group name to run this program,
#not set (empty) means run by the group of current user
run_by_group=
#unix username to run this program,
#not set (empty) means run by current user
run_by_user=
# allow_hosts can ocur more than once, host can be hostname or ip address,
# "*" (only one asterisk) means match all ip addresses
# we can use CIDR ips like 192.168.5.64/26
# and also use range like these: 10.0.1.[0-254] and host[01-08,20-25].domain.com
# for example:
# allow_hosts=10.0.1.[1-15,20]
# allow_hosts=host[01-08,20-25].domain.com
# allow_hosts=192.168.5.64/26
allow_hosts=*
# the mode of the files distributed to the data path
# 0: round robin(default)
# 1: random, distributted by hash code
file_distribute_path_mode=0
# valid when file_distribute_to_path is set to 0 (round robin),
# when the written file count reaches this number, then rotate to next path
# default value is 100
file_distribute_rotate_count=100
# call fsync to disk when write big file
# 0: never call fsync
# other: call fsync when written bytes >= this bytes
# default value is 0 (never call fsync)
fsync_after_written_bytes=0
# sync log buff to disk every interval seconds
# must > 0, default value is 10 seconds
sync_log_buff_interval=10
# sync binlog buff / cache to disk every interval seconds
# default value is 60 seconds
sync_binlog_buff_interval=10
# sync storage stat info to disk every interval seconds
# default value is 300 seconds
sync_stat_file_interval=300
# thread stack size, should >= 512KB
# default value is 512KB
thread_stack_size=512KB
# the priority as a source server for uploading file.
# the lower this value, the higher its uploading priority.
# default value is 10
upload_priority=10
# the NIC alias prefix, such as eth in Linux, you can see it by ifconfig -a
# multi aliases split by comma. empty value means auto set by OS type
# default values is empty
if_alias_prefix=
# if check file duplicate, when set to true, use FastDHT to store file indexes
# 1 or yes: need check
# 0 or no: do not check
# default value is 0
check_file_duplicate=0
# file signature method for check file duplicate
## hash: four 32 bits hash code
## md5: MD5 signature
# default value is hash
# since V4.01
file_signature_method=hash
# namespace for storing file indexes (key-value pairs)
# this item must be set when check_file_duplicate is true / on
key_namespace=FastDFS
# set keep_alive to 1 to enable persistent connection with FastDHT servers
# default value is 0 (short connection)
keep_alive=0
# you can use "#include filename" (not include double quotes) directive to
# load FastDHT server list, when the filename is a relative path such as
# pure filename, the base path is the base path of current/this config file.
# must set FastDHT server list when check_file_duplicate is true / on
# please see INSTALL of FastDHT for detail
##include /home/yuqing/fastdht/conf/fdht_servers.conf
# if log to access log
# default value is false
# since V4.00
use_access_log = false
# if rotate the access log every day
# default value is false
# since V4.00
rotate_access_log = false
# rotate access log time base, time format: Hour:Minute
# Hour from 0 to 23, Minute from 0 to 59
# default value is 00:00
# since V4.00
access_log_rotate_time=00:00
# if rotate the error log every day
# default value is false
# since V4.02
rotate_error_log = false
# rotate error log time base, time format: Hour:Minute
# Hour from 0 to 23, Minute from 0 to 59
# default value is 00:00
# since V4.02
error_log_rotate_time=00:00
# rotate access log when the log file exceeds this size
# 0 means never rotates log file by log file size
# default value is 0
# since V4.02
rotate_access_log_size = 0
# rotate error log when the log file exceeds this size
# 0 means never rotates log file by log file size
# default value is 0
# since V4.02
rotate_error_log_size = 0
# keep days of the log files
# 0 means do not delete old log files
# default value is 0
log_file_keep_days = 0
# if skip the invalid record when sync file
# default value is false
# since V4.02
file_sync_skip_invalid_record=false
# if use connection pool
# default value is false
# since V4.05
use_connection_pool = false
# connections whose the idle time exceeds this time will be closed
# unit: second
# default value is 3600
# since V4.05
connection_pool_max_idle_time = 3600
# use the ip address of this storage server if domain_name is empty,
# else this domain name will ocur in the url redirected by the tracker server
http.domain_name=
# the port of the web server on this storage server
http.server_port=8888
[root@node02 fdfs]#
五 FastDFS启停
启动
1、启动FastDFS的tracker服务,在任意目录下执行:fdfs_trackerd /etc/fdfs/tracker.conf
2、启动FastDFS的storage服务,在任意目录下执行:fdfs_storaged /etc/fdfs/storage.conf
首次启动storage后,它会在配置的路径下创建存储文件的目录;
查看启动进程:ps -ef | grep fdfs ,有启动的执行命令即为启动成功;
查看storage是否已经登记到了tracker下:fdfs_monitor /etc/fdfs/storage.conf
[root@node02 fdfs]# mkdir -p /opt/fastdfs/tracker
[root@node02 fdfs]# mkdir -p /opt/fastdfs/storage/files
[root@node02 fdfs]# fdfs_trackerd /etc/fdfs/tracker.conf
[root@node02 fdfs]# fdfs_storaged /etc/fdfs/storage.conf
[root@node02 fdfs]# ps -ef | grep fdfs
root 13680 1 0 09:43 ? 00:00:00 fdfs_trackerd /etc/fdfs/tracker.conf
root 13689 1 98 09:43 ? 00:00:19 fdfs_storaged /etc/fdfs/storage.conf
root 13701 13331 0 09:43 pts/2 00:00:00 grep --color=auto fdfs
[root@node02 fdfs]# fdfs_monitor /etc/fdfs/storage.conf
[2019-11-10 20:38:37] DEBUG - base_path=/opt/fastdfs/storage, connect_timeout=30, network_timeout=60, tracker_server_count=1, anti_steal_token=0, anti_steal_secret_key length=0, use_connection_pool=0, g_connection_pool_max_idle_time=3600s, use_storage_id=0, storage server id count: 0
server_count=1, server_index=0
tracker server is 192.168.180.104:22122
group count: 1
Group 1:
group name = group1
disk total space = 35818 MB
disk free space = 28034 MB
trunk free space = 0 MB
storage server count = 1
active server count = 1
storage server port = 23000
storage HTTP port = 8888
store path count = 1
subdir count per path = 256
current write server index = 0
current trunk file id = 0
Storage 1:
id = 192.168.180.104
ip_addr = 192.168.180.104 (node02) ACTIVE
http domain =
version = 5.11
join time = 2019-11-09 09:43:13
up time = 2019-11-09 13:44:47
[root@node02 data]# ls
00 07 0E 15 1C 23 2A 31 38 3F 46 4D 54 5B 62 69 70 77 7E 85 8C 93 9A A1 A8 AF B6 BD C4 CB D2 D9 E0 E7 EE F5 FC
01 08 0F 16 1D 24 2B 32 39 40 47 4E 55 5C 63 6A 71 78 7F 86 8D 94 9B A2 A9 B0 B7 BE C5 CC D3 DA E1 E8 EF F6 FD
02 09 10 17 1E 25 2C 33 3A 41 48 4F 56 5D 64 6B 72 79 80 87 8E 95 9C A3 AA B1 B8 BF C6 CD D4 DB E2 E9 F0 F7 FE
03 0A 11 18 1F 26 2D 34 3B 42 49 50 57 5E 65 6C 73 7A 81 88 8F 96 9D A4 AB B2 B9 C0 C7 CE D5 DC E3 EA F1 F8 FF
04 0B 12 19 20 27 2E 35 3C 43 4A 51 58 5F 66 6D 74 7B 82 89 90 97 9E A5 AC B3 BA C1 C8 CF D6 DD E4 EB F2 F9
05 0C 13 1A 21 28 2F 36 3D 44 4B 52 59 60 67 6E 75 7C 83 8A 91 98 9F A6 AD B4 BB C2 C9 D0 D7 DE E5 EC F3 FA
06 0D 14 1B 22 29 30 37 3E 45 4C 53 5A 61 68 6F 76 7D 84 8B 92 99 A0 A7 AE B5 BC C3 CA D1 D8 DF E6 ED F4 FB
[root@node02 data]# pwd
/opt/fastdfs/storage/files/data
[root@node02 data]#
关闭
1、关闭tracker执行命令,在任意目录下执行:fdfs_trackerd /etc/fdfs/tracker.conf stop
2、关闭storage执行命令,在任意目录下执行:fdfs_storaged /etc/fdfs/storage.conf stop
或者kill关闭fastdfs,但不建议在线上使用 kill -9 强制关闭,因为可能会导致文件信息不同步问题;
重启
1、 重启tracker执行命令:fdfs_trackerd /etc/fdfs/tracker.conf restart
2、重启storage执行命令:fdfs_storaged /etc/fdfs/storage.conf restart
六 测试
测试之前,需要修改client.conf配置文件,修改两个配置:
base_path=/opt/fastdfs/client tracker_server=192.168.180.104:22122
测试文件上传,执行命令:
fdfs_test /etc/fdfs/client.conf upload /root/anaconda-ks.cfg
测试文件删除,执行命令:
fdfs_delete_file /etc/fdfs/client.conf group1/M00/00/00/wKjmgVnaduyAIYxnAAAK-LjeM3Q088_big.txt
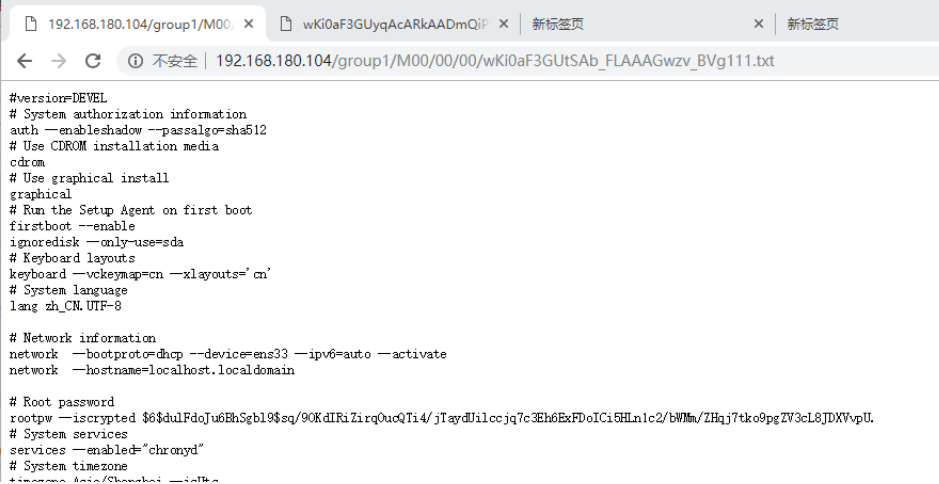
FastDFS生成的文件目录结构及名称示例:

[root@node02 fdfs]# cat client.conf
# connect timeout in seconds
# default value is 30s
connect_timeout=30
# network timeout in seconds
# default value is 30s
network_timeout=60
# the base path to store log files
base_path=/opt/fastdfs/client
# tracker_server can ocur more than once, and tracker_server format is
# "host:port", host can be hostname or ip address
tracker_server=192.168.180.104:22122
#standard log level as syslog, case insensitive, value list:
### emerg for emergency
### alert
### crit for critical
### error
### warn for warning
### notice
### info
### debug
log_level=info
# if use connection pool
# default value is false
# since V4.05
use_connection_pool = false
# connections whose the idle time exceeds this time will be closed
# unit: second
# default value is 3600
# since V4.05
connection_pool_max_idle_time = 3600
# if load FastDFS parameters from tracker server
# since V4.05
# default value is false
load_fdfs_parameters_from_tracker=false
# if use storage ID instead of IP address
# same as tracker.conf
# valid only when load_fdfs_parameters_from_tracker is false
# default value is false
# since V4.05
use_storage_id = false
# specify storage ids filename, can use relative or absolute path
# same as tracker.conf
# valid only when load_fdfs_parameters_from_tracker is false
# since V4.05
storage_ids_filename = storage_ids.conf
#HTTP settings
http.tracker_server_port=8888
#use "#include" directive to include HTTP other settiongs
##include http.conf
[root@node02 fdfs]#
[root@node02 fdfs]# fdfs_test /etc/fdfs/client.conf upload /root/anaconda-ks.cfg
This is FastDFS client test program v5.11
Copyright (C) 2008, Happy Fish / YuQing
FastDFS may be copied only under the terms of the GNU General
Public License V3, which may be found in the FastDFS source kit.
Please visit the FastDFS Home Page http://www.csource.org/
for more detail.
[2019-11-09 10:06:14] DEBUG - base_path=/opt/fastdfs/client, connect_timeout=30, network_timeout=60, tracker_server_count=1, anti_steal_token=0, anti_steal_secret_key length=0, use_connection_pool=0, g_connection_pool_max_idle_time=3600s, use_storage_id=0, storage server id count: 0
tracker_query_storage_store_list_without_group:
server 1. group_name=, ip_addr=192.168.180.104, port=23000
group_name=group1, ip_addr=192.168.180.104, port=23000
storage_upload_by_filename
group_name=group1, remote_filename=M00/00/00/wKi0aF3GHxaAJ7gaAAAGwzv_BVg994.cfg
source ip address: 192.168.180.104
file timestamp=2019-11-09 10:06:14
file size=1731
file crc32=1006568792
example file url: http://192.168.180.104/group1/M00/00/00/wKi0aF3GHxaAJ7gaAAAGwzv_BVg994.cfg
storage_upload_slave_by_filename
group_name=group1, remote_filename=M00/00/00/wKi0aF3GHxaAJ7gaAAAGwzv_BVg994_big.cfg
source ip address: 192.168.180.104
file timestamp=2019-11-09 10:06:14
file size=1731
file crc32=1006568792
example file url: http://192.168.180.104/group1/M00/00/00/wKi0aF3GHxaAJ7gaAAAGwzv_BVg994_big.cfg
[root@node02 fdfs]#
FastDFS的安装及上传下载(二)的更多相关文章
- centos 6.5下安装文件上传下载服务
centos 6.5下安装文件上传下载服务 由于每次在CentOS中要下载一些配置文件到物理机,和上传一些文件到服务器,导致来回的开启ftp软件有点麻烦,这里我们可以使用文件上传下载服务,来解决上传和 ...
- ubuntu 安装 lrzsz 上传下载
原文:ubuntu 安装 lrzsz 上传下载 版权声明:本文为博主原创文章,随意转载. https://blog.csdn.net/Michel4Liu/article/details/808223 ...
- fastDFS与Java整合上传下载
由于项目需要整合个文件管理,选择使用的是fastDFS. 整合使用还是很方便的. 准备 下载fastdfs-client-java源码 源码地址 密码:s3sw 修改pom.xml 第一个plugin ...
- SpringBoot实现上传下载(二)
这篇写下载. **1.实现思路** 上一篇的数据库设计中,我们有一个字段始终没有用到fileName,这是用来给Layer对象存储文件名的,以此来完成文件与对象的对应, _私服安装与上传下载
本篇文章主要介绍maven的私服安装和 jar包的上传与下载.毕竟大家还是在公司需要上传jar包到自己公司私服的. 1.安装私服 下载链接: https://pan.baidu.com/s/17dbQ ...
- Linux下安装lrzsz上传下载工具
使用yum安装 为什么要使用yum安装? 答:安装十分方便,几乎不需要别的操作,只需要一个yum命令就可以完成所有的安装过程. yum -y install lrzsz 要有网络才行 输入命令:rz ...
- Node +FastDFS 实现文件的上传下载
npm install fastdfsl-client //--------------------------------配置文件---------------------------------- ...
- linux常用命令(二)文件上传下载及软件安装
1.上传下载工具安装 (1)WINDOWS 到linux的文件上传及下载: windows下打开secureCRT,通过SSH连到⾄至远程linux主机:上传下载工具安装命令:yum -y insta ...
- FastDFS实现文件上传下载实战
正好,淘淘商城讲这一块的时候,我又想起来当时老徐让我写过一个关于实现FastDFS实现文件上传下载的使用文档,当时结合我们的ITOO的视频系统和毕业论文系统,整理了一下,有根据网上查到的知识,总结了一 ...
随机推荐
- Eclipse Java工程转为Web工程步骤
找到工程的.project文件,在<natures>标签中增加以下两行配置:<nature>org.eclipse.wst.common.modulecore.ModuleCo ...
- 阶段1 语言基础+高级_1-3-Java语言高级_06-File类与IO流_09 序列化流_3_对象的反序列化流_ObjectInputStream
声明了IO异常,这里还是红色的 转换为Person对象
- 阶段1 语言基础+高级_1-3-Java语言高级_04-集合_03 斗地主案例(单列)_1_斗地主案例的需求分析
洗牌用到集合工具类.Collections里面有个shuffle的方法 完整的需求分析
- Git的资源地址
下载地址:https://git-scm.com/downloads 安装教程: https://baijiahao.baidu.com/s?id=1619087367741781687&wf ...
- ugui代码设置ui锚点
using UnityEngine; public enum AnchorPresets { TopLeft, TopCenter, TopRight, MiddleLeft, MiddleCente ...
- ubuntu彩色图形界面
Ubuntu的默认 ~/.bashrc 文件里,有一个控制是否打开彩色提示符文件的变量 $force_color_promt,只需要打开这个变量的开关,就可以使用彩色的命令行提示符了. 这对于输查看命 ...
- HackGame2 writeup
网址:http://hackgame.blackbap.org/ 第一关 突破客户端:无论输入什么密码都会提示"密码不能为空",使用浏览器检查网页元素会发现提交时会触发 javas ...
- [Python3 填坑] 011 元组中有多个最值,索引出来的是哪一个
目录 1. print( 坑的信息 ) 2. 开始填坑 (1) max() (2) min() (3) 结论 1. print( 坑的信息 ) 挖坑时间:2019/01/11 明细 坑的编码 内容 P ...
- css定位:相对定位、绝对定位、固定定位的区别与特性
css定位:相对定位.绝对定位.固定定位的区别与特性 原文地址:http://www.qingzhouquanzi.com/106.html css定位常用的有以下三种: 使用了定位的共同特性: 这三 ...
- spring data solr 搜索关键字高亮显示
spring data solr 搜索关键字高亮显示 public Map<String, Object> highSearch(Map searchMap) { Map map = ne ...