Hystrix + Hystrix Dashboard搭建(Spring Cloud 2.X)
本机IP为 192.168.1.102
一、搭建Hystrix Dashboard
1. 新建 Maven 项目 hystrix-dashboard
2. pom.xml
<project xmlns="http://maven.apache.org/POM/4.0.0"

    xmlns:xsi="http://www.w3.org/2001/XMLSchema-instance"

    xsi:schemaLocation="http://maven.apache.org/POM/4.0.0

        http://maven.apache.org/xsd/maven-4.0.0.xsd">

    <modelVersion>4.0.0</modelVersion>

    <groupId>com.java</groupId>

    <artifactId>hystrix-dashboard</artifactId>

    <version>1.0.0-SNAPSHOT</version>

    <name>${project.artifactId}</name>

    <!-- 配置版本常量 -->

    <properties>

        <jdk.version>1.8</jdk.version>

        <spring.cloud.version>2.0.0.RELEASE</spring.cloud.version>

    </properties>

    <parent>

        <groupId>org.springframework.boot</groupId>

        <artifactId>spring-boot-starter-parent</artifactId>

        <version>2.0.5.RELEASE</version>

    </parent>

    <dependencies>

        <dependency>

            <groupId>org.springframework.boot</groupId>

            <artifactId>spring-boot-starter-web</artifactId>

        </dependency>

        <dependency>

            <groupId>org.springframework.cloud</groupId>

            <artifactId>spring-cloud-starter-netflix-hystrix</artifactId>

            <version>${spring.cloud.version}</version>

        </dependency>

        <dependency>

            <groupId>org.springframework.cloud</groupId>

            <artifactId>spring-cloud-starter-netflix-hystrix-dashboard</artifactId>

            <version>${spring.cloud.version}</version>

        </dependency>

    </dependencies>

    <build>

        <finalName>${project.artifactId}</finalName>

        <plugins>

            <plugin>

                <groupId>org.apache.maven.plugins</groupId>

                <artifactId>maven-compiler-plugin</artifactId>

                <configuration>

                    <source>${jdk.version}</source>

                    <target>${jdk.version}</target>

                    <encoding>UTF-8</encoding>

                </configuration>

            </plugin>

            <plugin>

                <groupId>org.springframework.boot</groupId>

                <artifactId>spring-boot-maven-plugin</artifactId>

                <executions>

                    <execution>

                        <goals>

                            <goal>repackage</goal>

                        </goals>

                    </execution>

                </executions>

            </plugin>

        </plugins>

    </build>

</project>
3. application.yml
server:

  port: 9999
4. HystrixDashboardStarter.java
package com.java.hystrix.dashboard;

import org.springframework.boot.SpringApplication;

import org.springframework.boot.autoconfigure.SpringBootApplication;

import org.springframework.boot.builder.SpringApplicationBuilder;

import org.springframework.boot.web.servlet.support.SpringBootServletInitializer;

import org.springframework.cloud.netflix.hystrix.dashboard.EnableHystrixDashboard;

@SpringBootApplication

@EnableHystrixDashboard

public class HystrixDashboardStarter extends SpringBootServletInitializer {

    public static void main(String[] args) {

        SpringApplication.run(HystrixDashboardStarter.class, args);

    }

    @Override

    protected SpringApplicationBuilder configure(SpringApplicationBuilder builder) {

        return builder.sources(HystrixDashboardStarter.class);

    }

}
5. 运行 HystrixDashboardStarter.java
浏览器打开URL
http://192.168.1.102:9999/hystrix/
或
http://127.0.0.1:9999/hystrix/
截图如下:
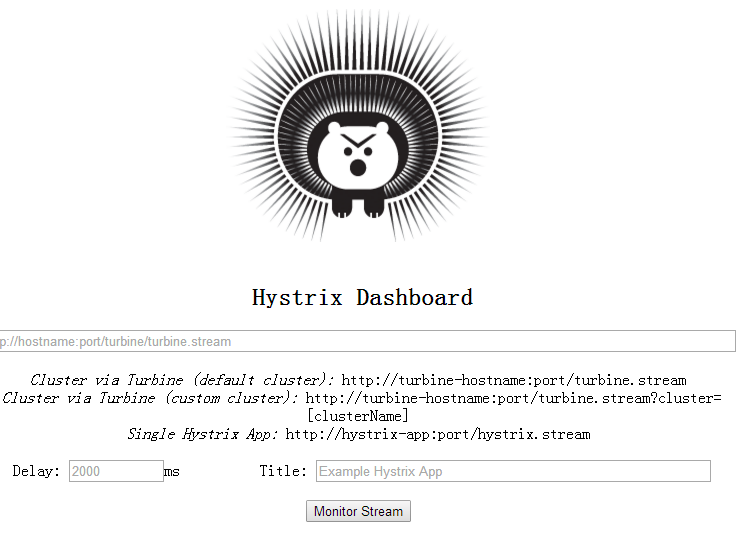
Hystrix Dashboard搭建成功!
二、搭建 Hystrix
1. 新建 Maven 项目 hystrix
2. pom.xml
<project xmlns="http://maven.apache.org/POM/4.0.0"

    xmlns:xsi="http://www.w3.org/2001/XMLSchema-instance"

    xsi:schemaLocation="http://maven.apache.org/POM/4.0.0

        http://maven.apache.org/xsd/maven-4.0.0.xsd">

    <modelVersion>4.0.0</modelVersion>

    <groupId>com.java</groupId>

    <artifactId>hystrix</artifactId>

    <version>1.0.0-SNAPSHOT</version>

    <name>${project.artifactId}</name>

    <!-- 配置版本常量 -->

    <properties>

        <jdk.version>1.8</jdk.version>

    </properties>

    <parent>

        <groupId>org.springframework.boot</groupId>

        <artifactId>spring-boot-starter-parent</artifactId>

        <version>2.0.5.RELEASE</version>

    </parent>

    <dependencies>

        <dependency>

            <groupId>org.springframework.boot</groupId>

            <artifactId>spring-boot-starter-web</artifactId>

        </dependency>

        <dependency>

            <groupId>org.springframework.cloud</groupId>

            <artifactId>spring-cloud-starter-netflix-eureka-client</artifactId>

            <version>2.0.0.RELEASE</version>

        </dependency>

        <dependency>

            <groupId>org.springframework.cloud</groupId>

            <artifactId>spring-cloud-starter-netflix-hystrix</artifactId>

            <version>2.0.0.RELEASE</version>

        </dependency>

        <dependency>

            <groupId>org.springframework.boot</groupId>

            <artifactId>spring-boot-starter-actuator</artifactId>

        </dependency>

        <!-- 热部署 -->

        <dependency>

            <groupId>org.springframework</groupId>

            <artifactId>springloaded</artifactId>

            <version>1.2.8.RELEASE</version>

        </dependency>

        <dependency>

            <groupId>org.springframework.boot</groupId>

            <artifactId>spring-boot-devtools</artifactId>

        </dependency>

    </dependencies>

    <build>

        <finalName>${project.artifactId}</finalName>

        <plugins>

            <plugin>

                <groupId>org.apache.maven.plugins</groupId>

                <artifactId>maven-compiler-plugin</artifactId>

                <configuration>

                    <source>${jdk.version}</source>

                    <target>${jdk.version}</target>

                    <encoding>UTF-8</encoding>

                </configuration>

            </plugin>

            <plugin>

                <groupId>org.springframework.boot</groupId>

                <artifactId>spring-boot-maven-plugin</artifactId>

                <executions>

                    <execution>

                        <goals>

                            <goal>repackage</goal>

                        </goals>

                    </execution>

                </executions>

            </plugin>

            <plugin>

                <groupId>org.apache.maven.plugins</groupId>

                <artifactId>maven-resources-plugin</artifactId>

                <configuration>

                    <delimiters>

                        <delimit>$</delimit>

                    </delimiters>

                </configuration>

            </plugin>

        </plugins>

    </build>

</project>
3. application.yml
server:

  port: 8888

spring:

  application:

    name: hystrix

eureka:

  client:

    service-url:

      defaultZone: http://192.168.1.102:8080/eureka

  instance:

    instance-id: hystrix.java.com

    prefer-ip-address: true #访问路径可以显示IP地址

info:

  app.name: hystrix

  app.update: 2018-10-07

  build.groupId: $project.groupId$

  build.artifactId: $project.artifactId$

  build.version: $project.version$
4. HostController.java
package com.java.hystrix.controller;

import java.net.InetAddress;

import java.net.UnknownHostException;

import java.util.HashMap;

import java.util.Map;

import org.springframework.web.bind.annotation.GetMapping;

import org.springframework.web.bind.annotation.PathVariable;

import org.springframework.web.bind.annotation.RestController;

import com.netflix.hystrix.contrib.javanica.annotation.HystrixCommand;

@RestController

public class HostController {

    @GetMapping("/getHostMessage/{id}")

    @HystrixCommand(fallbackMethod = "getHostMessageFallback")

    public Map<String, Object> getHostMessage(@PathVariable String id) {

        if ("error".equals(id)) {

            throw new RuntimeException("测试异常演习!");

        }

        Map<String, Object> map = new HashMap<>();

        try {

            InetAddress serverHost = InetAddress.getLocalHost();

            map.put("hostname", serverHost.getHostName());

            map.put("hostAddress", serverHost.getHostAddress());

            map.put("id", id);

            return map;

        } catch (UnknownHostException e) {

            e.printStackTrace();

            map.put("msg", e.getMessage());

            throw new RuntimeException(e.getMessage());

        }

    }

    public Map<String, Object> getHostMessageFallback(@PathVariable String id) {

        Map<String, Object> map = new HashMap<>();

        map.put("id", id);

        map.put("description", "异常演习Fallback!");

        return map;

    }

}
5. ConfigBean.java
package com.java.hystrix.config;

import org.springframework.boot.web.servlet.ServletRegistrationBean;

import org.springframework.context.annotation.Bean;

import org.springframework.context.annotation.Configuration;

import com.netflix.hystrix.contrib.metrics.eventstream.HystrixMetricsStreamServlet;

@Configuration

public class ConfigBean {

    @Bean

    public ServletRegistrationBean<HystrixMetricsStreamServlet> getServlet() {

        HystrixMetricsStreamServlet servlet = new HystrixMetricsStreamServlet();

        ServletRegistrationBean<HystrixMetricsStreamServlet> bean = new ServletRegistrationBean<>(servlet);

        bean.addUrlMappings("/hystrix.stream");

        bean.setName("HystrixMetricsStreamServlet");

        return bean;

    }

}
6. HystrixStarter.java
package com.java.hystrix;

import org.springframework.boot.SpringApplication;

import org.springframework.boot.autoconfigure.SpringBootApplication;

import org.springframework.boot.builder.SpringApplicationBuilder;

import org.springframework.boot.web.servlet.support.SpringBootServletInitializer;

import org.springframework.cloud.client.circuitbreaker.EnableCircuitBreaker;

import org.springframework.cloud.client.discovery.EnableDiscoveryClient;

import org.springframework.cloud.netflix.eureka.EnableEurekaClient;

@EnableEurekaClient

@EnableCircuitBreaker

@EnableDiscoveryClient

@SpringBootApplication

public class HystrixStarter extends SpringBootServletInitializer {

    public static void main(String[] args) {

        SpringApplication.run(HystrixStarter.class, args);

    }

    @Override

    protected SpringApplicationBuilder configure(SpringApplicationBuilder builder) {

        return builder.sources(HystrixStarter.class);

    }

}
7. 运行测试
启动 Eureka 服务注册中心,参考 https://www.cnblogs.com/jonban/p/eureka.html
运行 HystrixStarter.java
浏览器输入URL
http://192.168.1.102:8888/getHostMessage/hello
或
http://127.0.0.1:8888/getHostMessage/hello
返回数据如下:
{"hostname":"F6RK2EXYAFARPPS","hostAddress":"192.168.1.102","id":"hello"
截图如下:

Hystrix 搭建成功!
三、使用 Hystrix Dashboard 监控 Hystrix 服务
在 Hystrix Dashboard 监控页面 (http://127.0.0.1:9999/hystrix/)输入Hystrix 的监控地址
http://192.168.1.102:8888/hystrix.stream
截图如下:
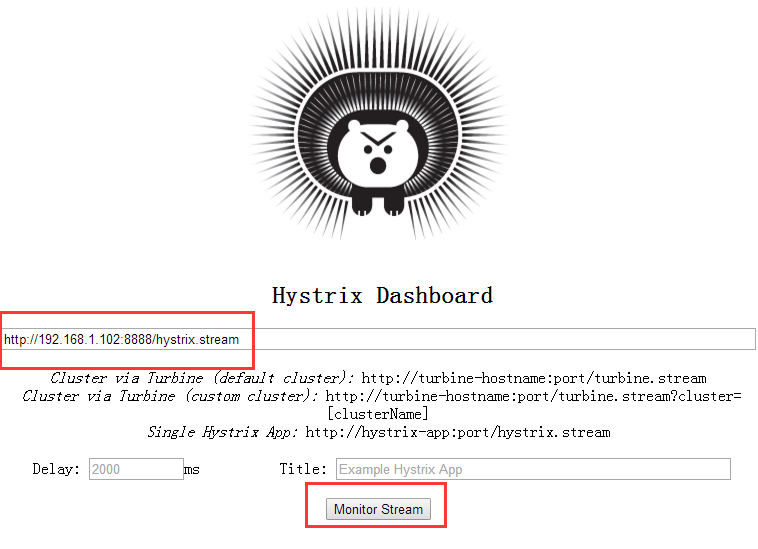
单击【Monitor Stream】按钮,开始监控,截图如下:

连续多次请求Hystrix 服务的URL
http://192.168.1.102:8888/getHostMessage/hello
切换到仪表盘页面观察,监控开始变化。
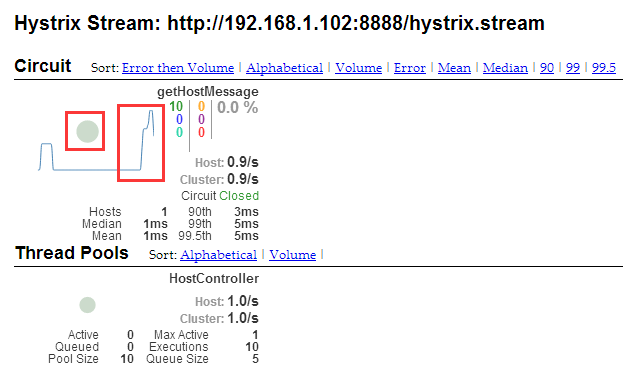
监控仪表盘功能正常
搭建完毕!
技术要点提炼
只要在被监控项目上加入相关依赖和配置并开启注解即可
内容如下:
<dependency>

    <groupId>org.springframework.cloud</groupId>

    <artifactId>spring-cloud-starter-netflix-hystrix</artifactId>

    <version>2.0.0.RELEASE</version>

</dependency>

<dependency>

    <groupId>org.springframework.boot</groupId>

    <artifactId>spring-boot-starter-actuator</artifactId>

    <version>2.0.5.RELEASE</version>

</dependency>
@EnableCircuitBreaker

@EnableDiscoveryClient
package com.java.hystrix.config;

import org.springframework.boot.web.servlet.ServletRegistrationBean;

import org.springframework.context.annotation.Bean;

import org.springframework.context.annotation.Configuration;

import com.netflix.hystrix.contrib.metrics.eventstream.HystrixMetricsStreamServlet;

@Configuration

public class ConfigBean {

    @Bean

    public ServletRegistrationBean<HystrixMetricsStreamServlet> getServlet() {

        HystrixMetricsStreamServlet servlet = new HystrixMetricsStreamServlet();

        ServletRegistrationBean<HystrixMetricsStreamServlet> bean = new ServletRegistrationBean<>(servlet);

        bean.addUrlMappings("/hystrix.stream");

        bean.setName("HystrixMetricsStreamServlet");

        return bean;

    }

}
.
Hystrix + Hystrix Dashboard搭建(Spring Cloud 2.X)的更多相关文章
- maven 聚合工程 用spring boot 搭建 spring cloud 微服务 模块式开发项目
项目的简单介绍: 项目采用maven聚合工程 用spring boot 搭建 spring cloud的微服务 模块式开发 项目的截图: 搭建开始: 能上图 我少打字 1.首先搭建maven的聚合工程 ...
- 搭建spring cloud config
很久没更新了,因为不是专职研究spring cloud,因此更新速度得看工作强度大不大,每天能抽出的时间不多,如果更新太慢了,并且有小伙伴看的话,请见谅了. Spring Cloud简介 Spring ...
- 以zookeeper为注册中心搭建spring cloud环境
在spring cloud体系中,有多种手段实现注册中心,本例中采用zookeeper作为注册中心的角色.服务提供者向zookeeper注册,服务消费者从zookeeper中发现服务提供者的相关信息, ...
- 搭建Spring Cloud+Dubbo
公司要测试一下zipkin是否可以跟踪全流程,项目的架构比较复杂,不要问我为什么,基本架构如下:前端门户,调用spring cloud组件,spring cloud在调用dubbo,这样一套流程.于是 ...
- 只需五分钟-用Maven快速搭建Spring Cloud微服务
Maven安装手册 1.准备安装包 安装包: apache-maven-3.5.4-bin.zip (最好JDK 1.7及以上版本) 集成包: eclipse-maven3-plugin.zip 2 ...
- Docker composer搭建Spring Cloud Alibaba 运行环境(二)
" Spring Cloud Alibaba要用到的组件很多,注册中心nacos, 限流sentinel, 数据库,网关等等.由于用到的组件相对较多,部署会很繁琐,最关键的是没有资源服务器, ...
- 从零搭建Spring Cloud Gateway网关(一)
新建Spring Boot项目 怎么新建Spring Boot项目这里不再具体赘述,不会的可以翻看下之前的博客或者直接百度.这里直接贴出对应的pom文件. pom依赖如下: <?xml vers ...
- 从零搭建Spring Cloud Gateway网关(二)—— 打印请求响应日志
作为网关,日志记录是必不可少的功能,可以在网关出增加requestId来查询整个请求链的调用执行情况等等. 打印请求日志 打印请求日志最重要的就是打印请求参数这些东西,不过RequestBody通常情 ...
- 从零搭建Spring Cloud Gateway网关(三)——报文结构转换
背景 作为网关,有些时候可能报文的结构并不符合前端或者某些服务的需求,或者因为某些原因,其他服务修改报文结构特别麻烦.或者需要修改的地方特别多,这个时候就需要走网关单独转换一次. 实现 话不多说,直接 ...
- spring cloud 2.x版本 Hystrix Dashboard断路器教程
前言 本文采用Spring cloud本文为2.1.8RELEASE,version=Greenwich.SR3 本文基于前两篇文章eureka-server.eureka-client.eureka ...
随机推荐
- springboot批量导入excel数据
1 背景 小白今天闲着没事,在公司摸鱼,以为今天有事无聊的一天,突然上头说小子,今天实现一下批量导入Excel数据吧,当时我的内心是拒绝的,然后默默打开idea. 2 介绍 2.1 框架 java本身 ...
- 帝都Day4(3)——还是数据结构
可并堆 左偏树中 dist[x]=dist[rs[x]]+1 合并的时候,把权志较大的根作为根节点,把这棵树右子树和另一棵树合并. 说明白点:(上图描述有点问题) 设x表示根权值较大的左偏树,y表示根 ...
- react native ios打包,即生产包
参考文章:http://www.devio.org/2017/02/09/React-Native%E5%8F%91%E5%B8%83APP%E4%B9%8B%E6%89%93%E5%8C%85iOS ...
- wampserver切换php版本问题
安装的wampserver有两个php版本,一个5.6的.一个7.1的,之前一直使用的php5.6的版本,今天切换7.1版本,切换成功了 phpinfo显示的版本也是7.1,但是php -v显示的却始 ...
- ios 检测是否安装微信异常
解决方法 在info.plist 添加LSApplicationQueriesSchemes 类型是Array weixin wechat
- redis常用
redis的key和string类型value限制均为512MB
- LeetCode 583 Delete Operation for Two Strings 删除两个字符串的不同部分使两个字符串相同,求删除的步数
Given two words word1 and word2, find the minimum number of steps required to make word1 and word2 t ...
- (转)Linux最常用指令及快捷键 Linux学习笔记
Linux最常用指令及快捷键 Linux学习笔记 原文:http://blog.csdn.net/yanghongche/article/details/50827478 [摘自 鸟叔的私房菜]--转 ...
- aop 切面配置
<bean id="userServiceImpl" class="com.bj.aop.xml.before.UserServiceImpl">& ...
- <select> js中 设置选重
function ChangeSelect(n) { var selectnum=n; var kk = document.getElementById(&q ...