VsCode插件开发之插件初步通信
参考了Egret Wing,想像Egret Wing那样在上方titlebar最右边上面增加一个menu(这个menu相对于一个按钮,当点击这个按钮时会出现一个window弹框,这个window弹框里就包含相关的表单信息以供登录或者注册使用。我是以这个作为参考模板的。但是目前进展并不是很顺。于是我通过插件的方式暂时性解决了这个问题。但是觉得还不是想要的那样。
Egret Wing是这样的,如图所示:

不得不承认一点Egret Wing改造的挺不错的,不愧是对VsCode进行魔改。
今天先说一下通过插件通信。
我主要参考的是一个叫小茗同学的插件开发,并改造其插件来达到我的目的。
这个小茗同学我觉得他写的插件开发,我觉得不是特别详细全面,当然,参考意义还是有的。
他的插件开发目录如下:
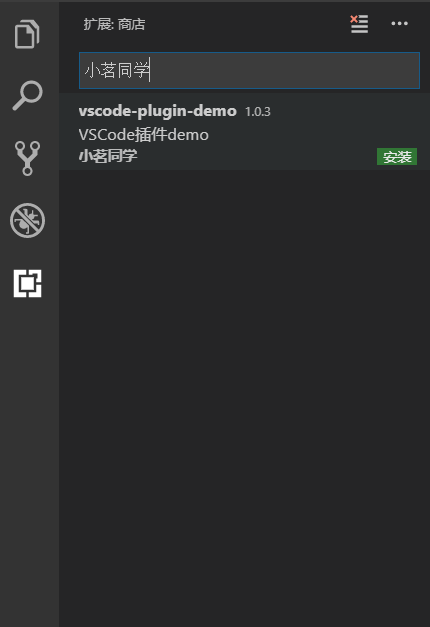
他的插件github地址为:https://github.com/sxei/vscode-plugin-demo.git
他的插件可以在VsCode插件扩展中搜到(搜到后安装,然后直接在下载成功的插件的基础上改造),例如:
那么说说我是如何改造它的呢?
我主要改造它这么几个地方?
一个是图标,另外一个修改它的html界面(主要是修改custom-welcome.html),同时我要和还改了package.json文件。
插件开发可以用TypeScript,也可以用JavaScript。
如果是用TypeScript的话,通常扩展脚本文件是extension.ts形式存在,如果是JavaScript,则是以extension.js的形式存在。
在此我想强调的是改他人插件或者自己编写插件,以ts为例,主要把握也就两个文件,一个是extension.ts,另一个就是package.json。
如何从0开发以插件的相关视频,感兴趣的可以看看,感觉还是有一定的启发的:https://v.qq.com/x/page/k08220bdz3s.htmlb
我改造后的插件代码,放在我的个人github上,大家可以将其下载下来放入,如下两个文件中(任意一个都行):
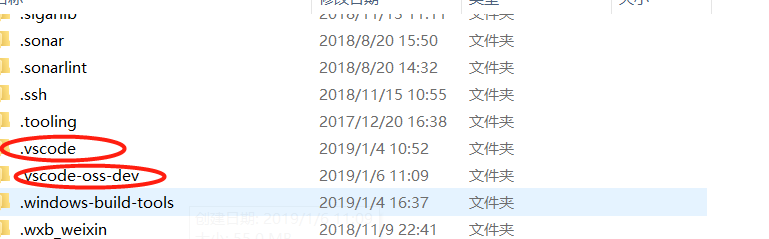
注意:
.vscode文件夹:官方插件下载好默认放入的目录。
.vscode-oss-dev:下载源码,自己编译,下载插件放置的目录。
自己编译的不知道由于什么原因不能直接联网通信搜索一些应用市场下载的插件。
通常情况下(以.vscode-oss-dev为例),git clone下来我的插件地址,然后将其移植到这个目录就能看到对应的效果,效果图如下:
我的VsCode插件地址为:https://github.com/youcong1996/study_simple_demo/tree/vscode-plugin-communication
将其克隆下来放入.vscode或者.vscode-oss-dev中的extensions目录下即可起作用。
另外有一点要强调的是,如果是vscode非自己编译的,需要重启一下vscode,如果是自己编译的话,监听需要暂时中断重新输入(yarn watch)。
接下来说说我修改的三个地方。
1.修改package.json(包含图标一起说了及其点击登录的同时展示对应的左侧栏sidebar)
{

    "name": "vscode-plugin-demo",

    "displayName": "vscode-plugin-demo",

    "description": "VSCode插件demo",

    "keywords": [

        "vscode",

        "plugin",

        "demo"

    ],

    "version": "1.0.3",

    "publisher": "sxei",

    "engines": {

        "vscode": "^1.27.0"

    },

    "categories": [

        "Other"

    ],

    "icon": "images/icon.png",

    "activationEvents": [

        "*"

    ],

    "main": "./src/extension",

    "contributes": {

        "configuration": {

            "type": "object",

            "title": "Code插件demo",

            "properties": {

                "vscodePluginDemo.yourName": {

                    "type": "string",

                    "default": "guest",

                    "description": "你的名字"

                },

                "vscodePluginDemo.showTip": {

                    "type": "boolean",

                    "default": true,

                    "description": "启动时显示自定义欢迎页"

                }

            }

        },

        "commands": [

            {

                "command": "extension.sayHello",

                "title": "Hello,小茗同学"

            },

            {

                "command": "extension.demo.getCurrentFilePath",

                "title": "获取当前文件(夹)路径"

            },

            {

                "command": "extension.demo.testMenuShow",

                "title": "这个菜单仅在JS文件中出现",

                "icon": {

                    "light": "./images/tool-light.svg",

                    "dark": "./images/tool-light.svg"

                }

            },

            {

                "command": "extension.demo.openWebview",

                "title": "打开WebView"

            },

            {

                "command": "extension.demo.showWelcome",

                "title": "显示自定义欢迎页"

            }

        ],

        "keybindings": [

            {

                "command": "extension.sayHello",

                "key": "ctrl+f10",

                "mac": "cmd+f10",

                "when": "editorTextFocus"

            },

            {

                "command": "extension.demo.openWebview",

                "key": "ctrl+f9",

                "mac": "cmd+f9",

                "when": "editorTextFocus"

            }

        ],

        "menus": {

            "editor/context": [

                {

                    "when": "editorFocus",

                    "command": "extension.sayHello",

                    "group": "navigation@6"

                },

                {

                    "when": "editorFocus",

                    "command": "extension.demo.getCurrentFilePath",

                    "group": "navigation@5"

                },

                {

                    "when": "editorFocus && resourceLangId == javascript",

                    "command": "extension.demo.testMenuShow",

                    "group": "z_commands"

                },

                {

                    "command": "extension.demo.openWebview",

                    "group": "navigation"

                }

            ],

            "editor/title": [

                {

                    "when": "editorFocus && resourceLangId == javascript",

                    "command": "extension.demo.testMenuShow",

                    "group": "navigation"

                }

            ],

            "editor/title/context": [

                {

                    "when": "resourceLangId == javascript",

                    "command": "extension.demo.testMenuShow",

                    "group": "navigation"

                }

            ],

            "explorer/context": [

                {

                    "command": "extension.demo.getCurrentFilePath",

                    "group": "navigation"

                },

                {

                    "command": "extension.demo.openWebview",

                    "group": "navigation"

                }

            ]

        },

        "snippets": [

            {

                "language": "javascript",

                "path": "./snippets/javascript.json"

            },

            {

                "language": "html",

                "path": "./snippets/html.json"

            }

        ],

        "viewsContainers": {

            "activitybar": [

                {

                    "id": "beautifulGirl",

                    "title": "测试",

                    "icon": "images/beautifulGirl.svg"

                }

            ]

        },

        "views": {

            "beautifulGirl": [

                {

                    "id": "测试001",

                    "name": "test"

                },

                {

                    "id": "测试002",

                    "name": "test"

                },

                {

                    "id": "测试003",

                    "name": "test"

                }

            ]

        },

        "iconThemes": [

            {

                "id": "testIconTheme",

                "label": "测试图标主题",

                "path": "./theme/icon-theme.json"

            }

        ]

    },

    "scripts": {

        "postinstall": "node ./node_modules/vscode/bin/install",

        "test": "node ./node_modules/vscode/bin/test"

    },

    "devDependencies": {

        "typescript": "^2.6.1",

        "vscode": "^1.1.6",

        "eslint": "^4.11.0",

        "@types/node": "^7.0.43",

        "@types/mocha": "^2.2.42"

    },

    "license": "SEE LICENSE IN LICENSE.txt",

    "bugs": {

        "url": "https://github.com/sxei/vscode-plugin-demo/issues"

    },

    "repository": {

        "type": "git",

        "url": "https://github.com/sxei/vscode-plugin-demo"

    },

    "homepage": "https://github.com/sxei/vscode-plugin-demo/blob/master/README.md",

    "__metadata": {

        "id": "ac2b7b16-d87f-4e51-87a8-37011e8aa713",

        "publisherId": "cdd0fc1d-3acf-4250-a09b-95545e29bdbc",

        "publisherDisplayName": "小茗同学"

    }

}
在package.json我也就修改了这么几个地方,一个是views(这个view通常主要用于展示左侧的sidebar视图),一个是viewsContainers(我主要修改beautifulGirl.svg)。
修改后的效果分别如下所示:

2.通信(修改custom-welcome.html)
通信我目前采用最原始的javascript的ajax请求,其实jQuery及其vue.js的异步通信也是可以的。
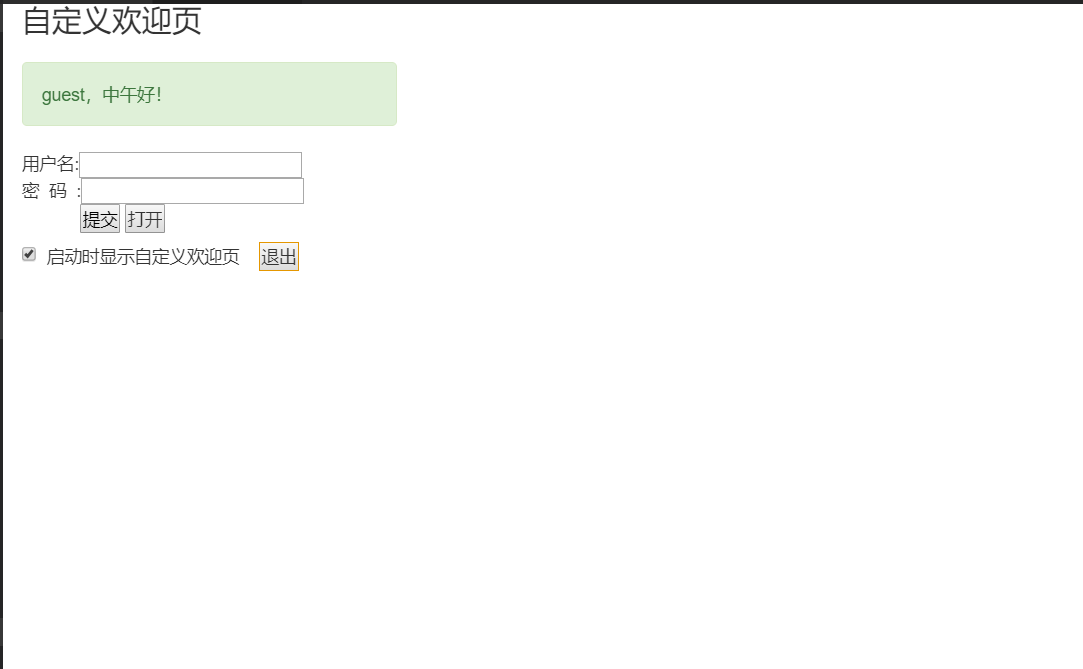
这个custom-welcome.html你可以理解成它就是一个webview。
custom-welcome.html文件内容如下:
<!DOCTYPE html>
<html lang="en">
<head>
<meta charset="UTF-8">
<meta name="viewport" content="width=device-width, initial-scale=1.0">
<title>自定义欢迎页</title>
<link rel="stylesheet" href="../../lib/bootstrap-3.3.1/css/bootstrap.min.css">
<link rel="stylesheet" href="../../lib/layui/css/layui.css">
<style>
html, body, #app {
height: 100%;
}
::-webkit-scrollbar {
width: 10px;
height: 10px
} ::-webkit-scrollbar-track {
border-radius: 10px;
background-color: #d8dce5
} ::-webkit-scrollbar-thumb {
border-radius: 5px;
background-color: #adadad
} ::-webkit-scrollbar-thumb:hover {
background-color: #929292
} ::-webkit-scrollbar-thumb:active {
background-color: #666363
} ::-webkit-scrollbar-corner {
background-color: #535353
} ::-webkit-scrollbar-resizer {
background-color: #ff6e00
}
.page-title {
margin-bottom: 20px;
} .control-label {
font-weight: normal;
} .btn-primary {
background-color: #1890ff;
border-color: #1890ff;
outline: none;
} .btn-primary:focus,
.btn-primary:hover {
background-color: #40a9ff;
border-color: #40a9ff;
outline: none;
} .btn-primary.active,
.btn-primary:active {
background-color: #096dd9;
border-color: #096dd9;
color: #fff;
outline: none;
}
</style>
</head> <body>
<div id="app" class="container-fluid">
<h3 class="page-title">自定义欢迎页</h3>
<p class="alert alert-success" style="width: 300px;">{{userName}},{{time}}好!
<span id="info"></span>
</p>
<form class="form-horizontal">
<div class="form-group">
<div class="col-sm-6">
<div id="form">
<form>
<p>用户名:<input type="text" id="userName" style="color:black;"/></p>
<p>密 码 :<input type="password" id="password" style="color:black;"/></p>
<p> <input type="button" style="color:black;" value="提交" onclick="test()"/>
<input type="button" value="打开" onclick="openLogin()"/>
</form>
</div>
<div class="checkbox">
<label>
<input type="checkbox" v-model="show"> 启动时显示自定义欢迎页
<input type="button" onclick="register()" value="退出"/>
</label>
</div>
</div>
</div>
</form> </div>
<script src="../../lib/jquery/jquery.min.js"></script>
<script src="../../lib/bootstrap-3.3.1/js/bootstrap.min.js"></script>
<script src="../../lib/vue-2.5.17/vue.js"></script>
<script src="../../src/view/custom-welcome.js"></script>
<script src="../../lib/layui/layui.js"></script>
<script src="../../lib/layer/layer-v3.1.1/layer/mobile/layer.js"></script>
<script>
function openLogin(){
layui.use('layer', function(){
var layer = layui.layer; layer.open({
type: 2,
title: 'Login',
fix: false,
maxmin: true,
shadeClose: true,
shade: 0.8,
area: ['500px', '500px'],
content: 'login.html',
end: function () {
location.reload();
}
});
});
} function test(){
var userName = document.getElementById("userName").value; if(userName != null && userName != undefined){
var xhr = new XMLHttpRequest();
xhr.onreadystatechange = function () {
if (xhr.readyState == 4) {
if ((xhr.status >= 200 && xhr.status < 300) || xhr.status == 304) {
$("#info").html("登录成功");
$("#form").hide(); console.log('test:'+xhr.status);
console.log(xhr.responseText);
} else {
console.log("请求成功:" + xhr.status);
}
}
};
xhr.open("POST", "http://www.test.com/test-web/sysUser/getUserCodeByInfo?userCode=2", true);
xhr.send(null); }else{
layui.use('layer', function(){ var layer = layui.layer; layer.msg('userName为必填项');
});
} }
function register(){
$("#info").html("");
$("#form").show();
} </script>
</body> </html>
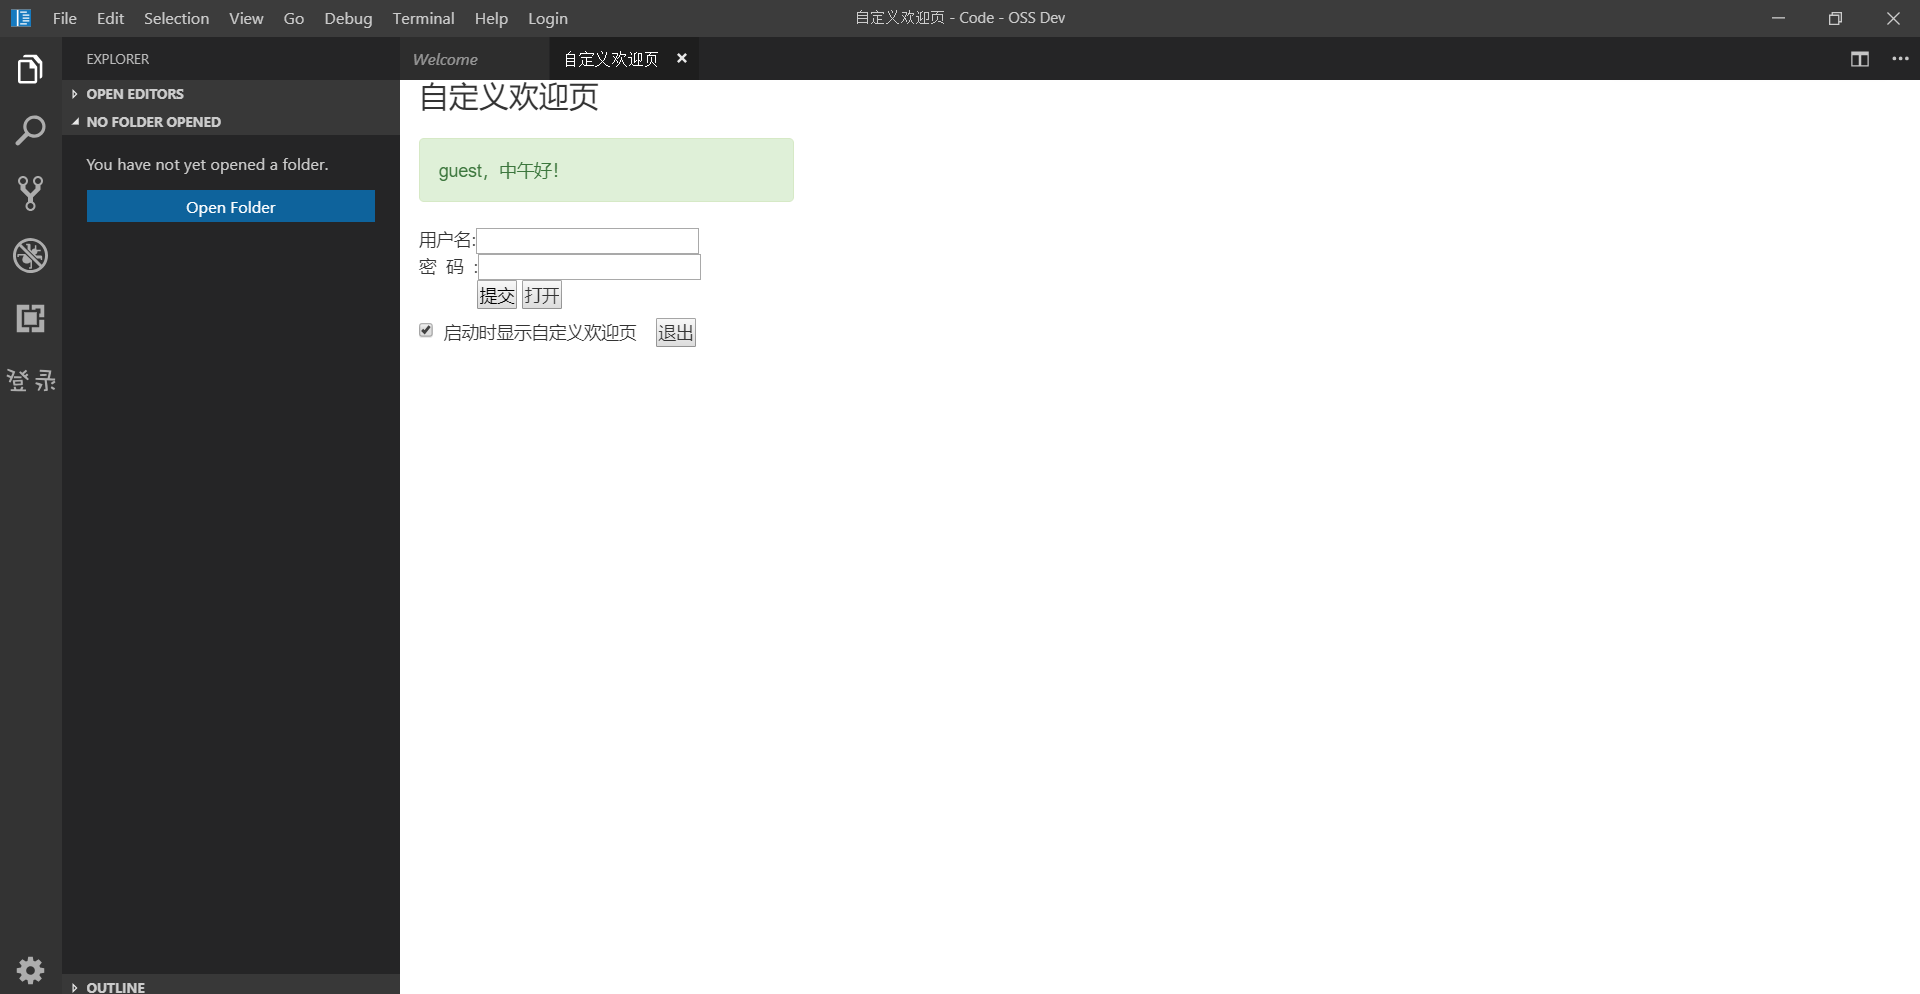
这个html在浏览器上看到的效果如下所示:
目前这仅仅是一个很初级的(蹩脚通信),后续我将会继续补充对VsCode的源码解析及其插件开发相关的详细说明,由于目前掌握的比较分散不够系统,暂时延后讲解。
VsCode插件开发之插件初步通信的更多相关文章
- VSCode插件开发全攻略(七)WebView
更多文章请戳VSCode插件开发全攻略系列目录导航. 什么是Webview 大家都知道,整个VSCode编辑器就是一张大的网页,其实,我们还可以在Visual Studio Code中创建完全自定义的 ...
- 万圣节福利:红孩儿3D引擎开发课程《3ds max导出插件初步》
ds max文件夹,插件文件夹以及3ds max的可执行程序文件夹: 位的,这里要改成x64,否则启动程序后3ds max会提示"不是有效的win32程序"之类的对话框. 然后要将 ...
- VSCode插件开发全攻略(十)打包、发布、升级
更多文章请戳VSCode插件开发全攻略系列目录导航. 发布方式 插件开发完了,如何发布出去分享给他人呢?主要有3种方法: 方法一:直接把文件夹发给别人,让别人找到vscode的插件存放目录并放进去,然 ...
- VSCode插件开发全攻略(八)代码片段、设置、自定义欢迎页
更多文章请戳VSCode插件开发全攻略系列目录导航. 代码片段 代码片段,也叫snippets,相信大家都不陌生,就是输入一个很简单的单词然后一回车带出来很多代码.平时大家也可以直接在vscode中创 ...
- VSCode插件开发全攻略(六)开发调试技巧
更多文章请戳VSCode插件开发全攻略系列目录导航. 前言 在介绍完一些比较简单的内容点之后,我觉得有必要先和大家介绍一些开发中遇到的一些细节问题以及技巧,特别是后面一章节将要介绍WebView的知识 ...
- VSCode插件开发全攻略(四)命令、菜单、快捷键
更多文章请戳VSCode插件开发全攻略系列目录导航. 命令 我们在前面HelloWord章节中已经提到了命令写法,这里再重温一下. context.subscriptions.push(vscode. ...
- VSCode插件开发全攻略(三)package.json详解
更多文章请戳VSCode插件开发全攻略系列目录导航. package.json 在详细介绍vscode插件开发细节之前,这里我们先详细介绍一下vscode插件的package.json写法,但是建议先 ...
- VSCode插件开发全攻略(二)HelloWord
更多文章请戳VSCode插件开发全攻略系列目录导航. 写着前面 学习一门新的语言或者生态首先肯定是从HelloWord开始. 您可以直接克隆我放在GitHub上vscode-plugin-demo 的 ...
- VSCode插件开发全攻略(一)概览
文章索引 VSCode插件开发全攻略(一)概览 VSCode插件开发全攻略(二)HelloWord VSCode插件开发全攻略(三)package.json详解 VSCode插件开发全攻略(四)命令. ...
随机推荐
- C#语句 分支语句 if --- else ---
语句是指程序命令,都是按照顺序执行的.语句在程序中的执行顺序称为“控制流”或“执行流”. 根据程序对运行时所收到的输入的响应,在程序每次运行时控制流可能有所不同. 注意,语句间的标点符号必须是英文标点 ...
- matlab的解方程的例子
syms x y z=exp(2*x+y)+cos(3*x*y)-exp(1)-1; zz=subs(z,x,1) solve(zz)
- ViewModel处理View相关事件的多种方式(非技术贴,仅学习总结)
众所周知,在UWP中,微软为我们提供了一种新的绑定方式:x:bind,它是基于编译时的绑定.在性能方面,运行时绑定Binding与它相比还是有些逊色的.因此针对一些确定的.不需要变更的数据,我们完全有 ...
- 通过写一个Demo展示C#中多种常用的集合排序方法
不多说,程序很简单,就是将集合中的数据进行排序,但使用到的知识点还是比较多的,大牛勿喷,谨献给初学者!直接上程序吧! namespace Demo { /// <summary> /// ...
- returnFunc.js
var cyn = function(){ console.log("one") return function(){ console.log("two") } ...
- 使用CSS兄弟选择器完成复杂垂直边距(vertical margins)的设计
-------------------sibling选择器如何在完成复杂设计要求的同时,保持CSS可读 这是web前端开发过程中开始简单逐步变的复杂的例子之一:将一篇文章中的所有元素应用垂直边距(ve ...
- Kotlin入门(5)字符串及其格式化
上一篇文章介绍了数组的声明和操作,包括字符串数组的用法.注意到Kotlin的字符串类也叫String,那么String在Java和Kotlin中的用法有哪些差异呢?这便是本文所要阐述的内容了. 首先要 ...
- Wim镜像编辑
1.挂载install.wim文件为本地的一个文件夹 dism /mount-wim /wimfile:D:\install.wim /index:1 /mountdir:D:\Win 注:1> ...
- VS 函数,方法上方 引用等显示
VS有一个这个功能贼好用,喜欢的可以打开看看哦,特别是团队开发,有惊喜哦!
- 解决windows下git push卡住问题的方法
问题描述: 在windows下向使用git协议传输的Git Repo进行push时会卡住. -- 这是windows上的msysgit的bug,在新版本上已经修复,但要在.gitconfig中做一项配 ...