springboot集成swagger实战(基础版)
1. 前言说明
本文主要介绍springboot整合swagger的全过程,从开始的swagger到Knife4j的进阶之路;Knife4j是swagger-bootstarp-ui的升级版,包括一些增强功能,关于Knife4j下篇文章中着重介绍
swagger特点:
- Api框架
- restful Api文档在线自动生成工具
- 可以直接运行,在线测试api接口
- 支持多种语言:java、php...
2. 实战步骤
(1) 搭建springboot项目
- springboot搭建项目就不介绍了,如果需要springboot整合swagger源码的,可以去我的仓库查看下载:点击跳转
(2) 添加依赖
<!-- swagger2 -->

<dependency>

    <groupId>io.springfox</groupId>

    <artifactId>springfox-swagger2</artifactId>

</dependency>

<!-- swagger-ui,原生swagger-Ui界面,访问后缀(默认的):swagger-ui.html-->

<dependency>

    <groupId>io.springfox</groupId>

    <artifactId>springfox-swagger-ui</artifactId>

</dependency>

<!-- bootstrap-ui,只是在改变页面效果,访问后缀:doc.html -->

<dependency>

    <groupId>com.github.xiaoymin</groupId>

    <artifactId>swagger-bootstrap-ui</artifactId>

    <version>1.9.2</version>

</dependency>
- springfox-swagger-ui和swagger-bootstrap-ui都是纯swagger-ui的ui皮肤项目,渲染页面的,作用是一样的,只是swagger-bootstarp-ui在原来的基础上做了页面优化,页面更符合中国人的阅读习惯;
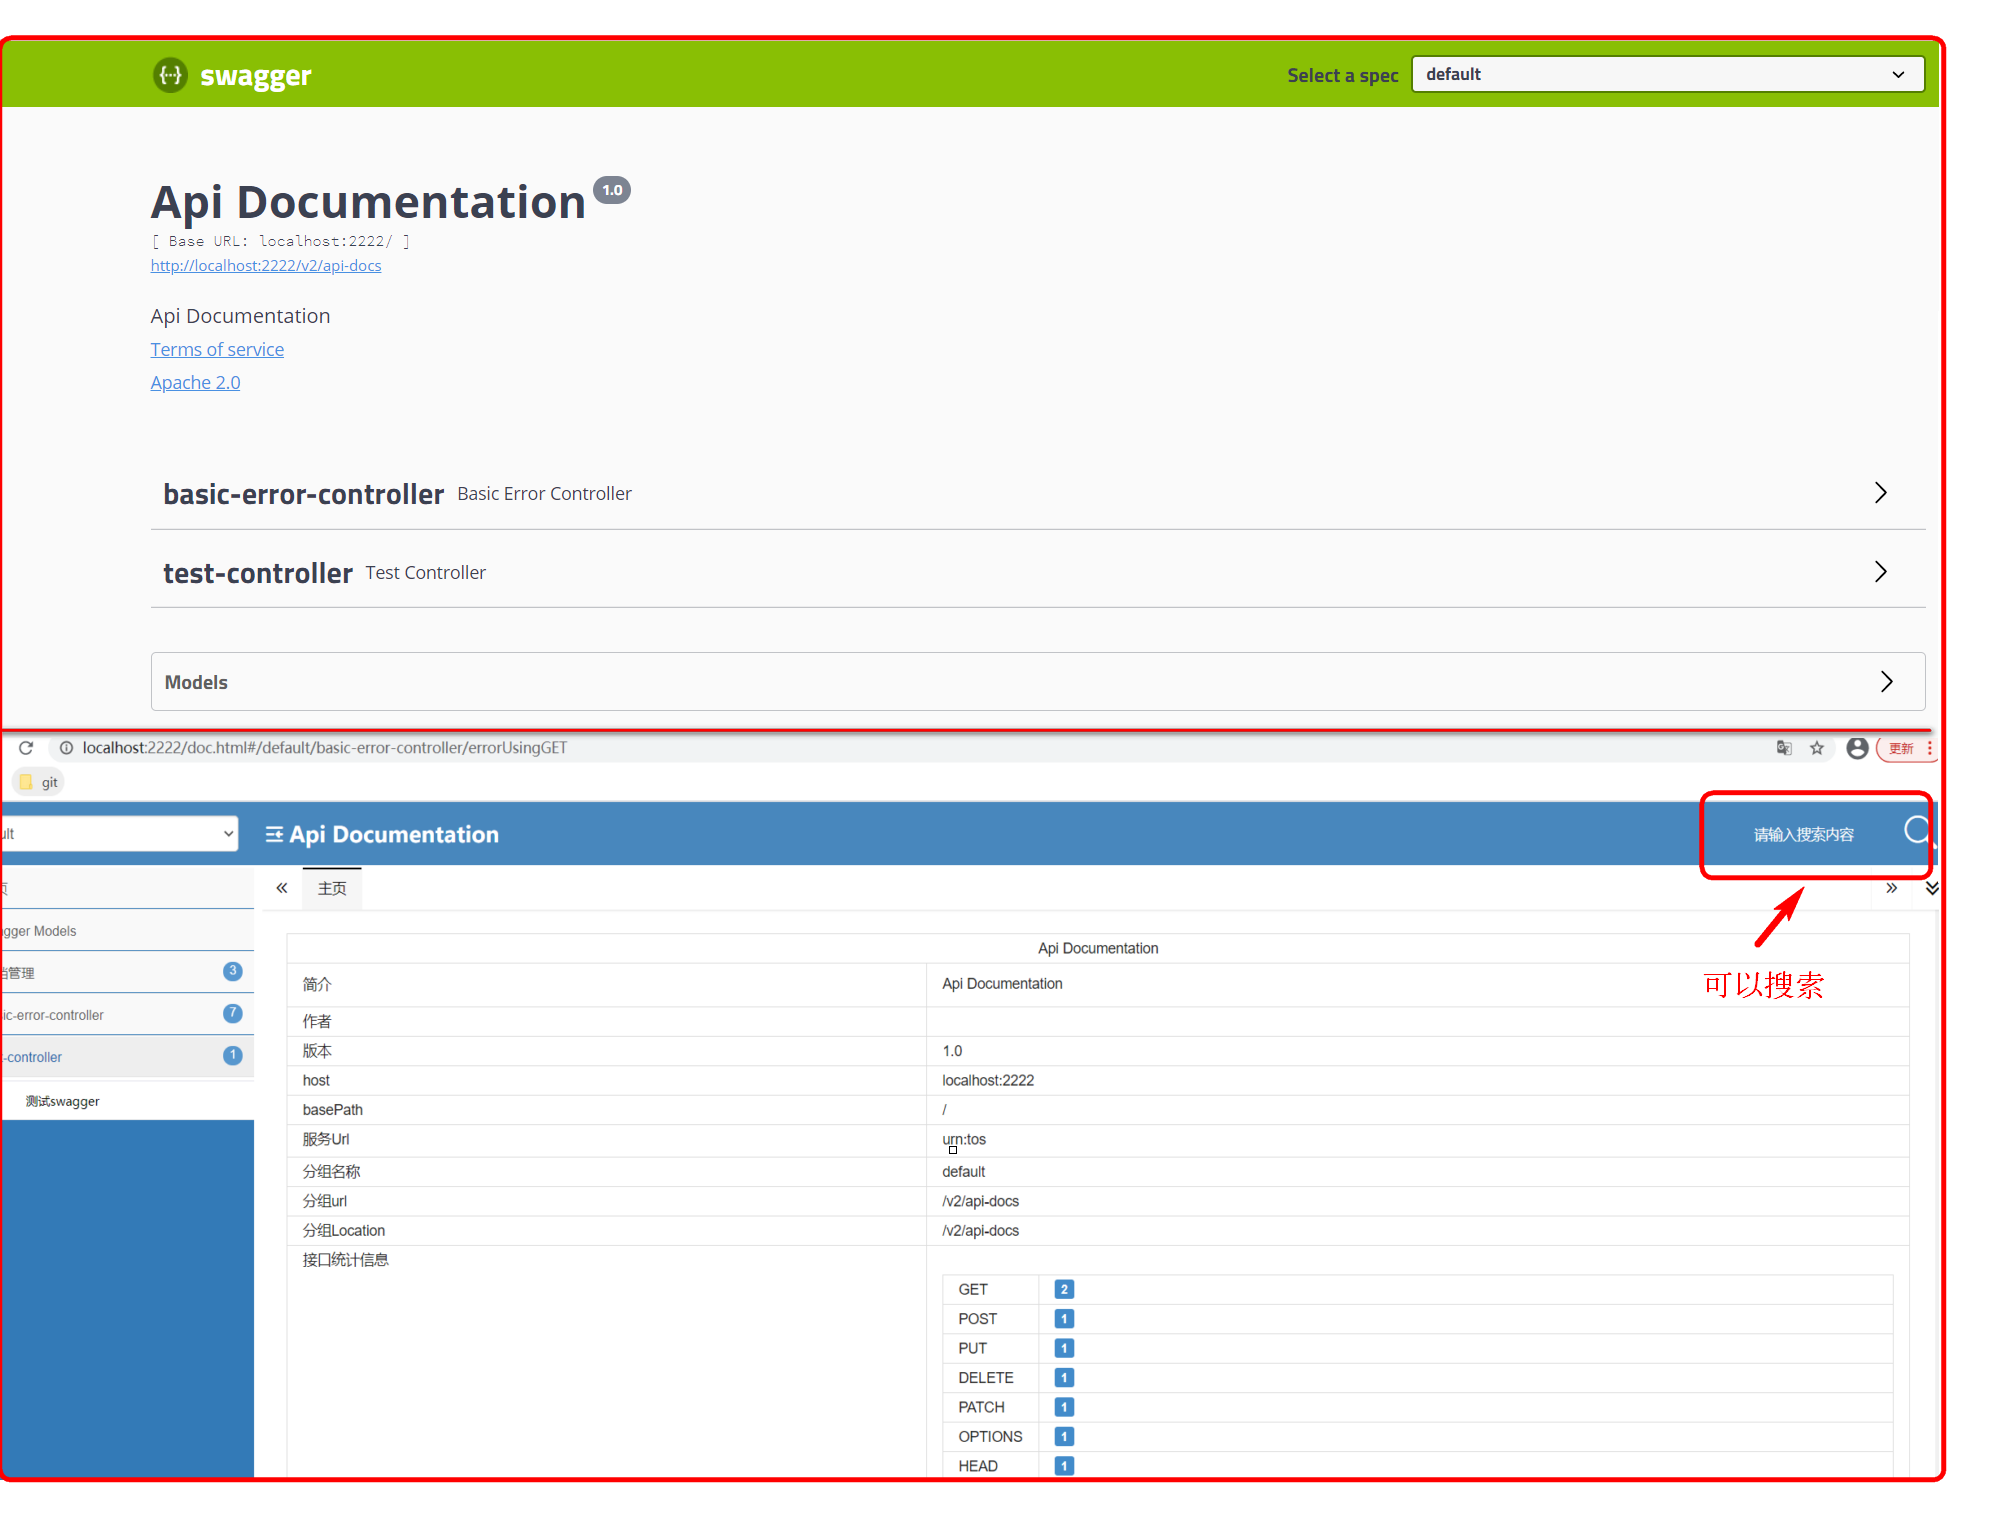
- 其实两种都不介意使用,因为springfox-swagger-ui原生的比较丑,功能也不齐全(不能导出,不能搜索...),swagger-bootstrap-ui已经停更了,最终版本是1.9.6;所有推荐使用使用最新的Knife4j,下边文章中着重介绍!!!
- 两种UI页面比较

(3) 注解标注
- 导入依赖之后,只要再启动类上开启注解@EnableSwagger2即可,就可以访问UI页面了;如果有自定义的配置类,可以标注到配置类上。
- UI页面可以访问,但是需要使用其他注解来标注类,方法,参数,才可以看到接口等信息,注解后边一一罗列!!!
- 页面中有好多初始化的设置,如果需要修改为自己的,就需要添加配置类,就是第四步编写配置
(4) 编写配置
package com.ruyidan.swagger.config;

import java.util.ArrayList;

import org.springframework.beans.factory.annotation.Autowired;

import org.springframework.context.annotation.Bean;

import org.springframework.context.annotation.Configuration;

import org.springframework.core.env.Environment;

import org.springframework.core.env.Profiles;

import springfox.documentation.builders.PathSelectors;

import springfox.documentation.builders.RequestHandlerSelectors;

import springfox.documentation.service.ApiInfo;

import springfox.documentation.service.Contact;

import springfox.documentation.spi.DocumentationType;

import springfox.documentation.spring.web.plugins.Docket;

import springfox.documentation.swagger2.annotations.EnableSwagger2;

/**

 * @ClassName: SwaggerConfig

 * @Description:

 * @Author: dangbo

 * @Date: 2021/3/25 14:13

 * @Version

 */

@Configuration

@EnableSwagger2

public class SwaggerConfig {

  @Autowired

  private Environment environment;

  @Bean

  public Docket docket() {

      // 设置显示的swagger环境信息

      Profiles profiles = Profiles.of("dev", "test");

      // 判断是否处在自己设定的环境当中

      boolean flag = environment.acceptsProfiles(profiles);

      return new Docket(DocumentationType.SWAGGER_2)

              .apiInfo(apiInfo())

              .groupName("分组名称")  // 配置api文档的分组

              .enable(flag)  // 配置是否开启swagger

              .select()

              .apis(RequestHandlerSelectors.basePackage("com.ruyidan.swagger.controller")) //配置扫描路径

              .paths(PathSelectors.any()) // 配置过滤哪些

              .build();

  }

  // api基本信息

  private ApiInfo apiInfo() {

      return new ApiInfo("dxiaodang's swagger",

              "测试swagger-ui",

              "v1.0",

              "http://mail.qq.com",

              new Contact("dangbo", "http://mail.qq.com", "145xxxxx@qq.com"),  //作者信息

              "Apache 2.0",

              "http://www.apache.org/licenses/LICENSE-2.0",

              new ArrayList());

  }

}
️ 注意点: ️
- 如果只需要在dev和test环境开启swagger,就使用springboot的Environment实例来判断当前配置文件时使用的哪种;
- 如果需要配置多个分组,就要创建多个docket实例;
- 如果页面无法正常访问, 请看是否配置拦截器了,是不是因为拦截器拦截了请求
(5) 启动服务验证
略...
3. 常用注解
- 实体类: ApiModel、实体属性:ModelProperty
- Controller类:Api
- 接口方法的说明:ApiOperation
- 方法参数的说明:@ApiImplicitParams、@ApiImplicitParam
- 方法返回值的说明:@ApiResponses @ApiResponse
- ParamType和dataType区别
- ParamType:表示参数放在哪个位置
- header-->请求参数的获取:@RequestHeader(代码中接收注解)
- query-->请求参数的获取:@RequestParam(代码中接收注解)
- path(用于restful接口)-->请求参数的获取:@PathVariable(代码中接收注解)
- body-->请求参数的获取:@RequestBody(代码中接收注解)
- form(不常用)
- dataType:参数类型,可传基本类型、类、泛型类等
4. 常见问题汇总
(1) swagger-ui.html访问报错,或doc.html访问之后为空:==未使用@EnableSwagger注解开启服务
Unable to infer base url. This is common when using dynamic servlet registration or when the API is behind an API Gateway. The base url is the root of where all the swagger resources are served. For e.g. if the api is available at http://example.org/api/v2/api-docs then the base url is http://example.org/api/. Please enter the location manually:


(2) 自定义配置后,页面没有一个接口: 检查docket配置的扫描路径和配置过滤哪些,是否配置错误导致
(3) 页面就会出现Could not render e, see the console,或请确保swagger资源接口正确:配置文件问题,配置dev和test环境开启swagger,其他环境关闭导致的
Could not render e, see the console
请确保swagger资源接口正确


(2) 自定义配置后,页面没有一个接口: 检查docket配置的扫描路径和配置过滤哪些,是否配置错误导致
springboot集成swagger实战(基础版)的更多相关文章
- SpringBoot Mybatis整合(注解版),SpringBoot集成Mybatis(注解版)
SpringBoot Mybatis整合(注解版),SpringBoot集成Mybatis(注解版) ================================ ©Copyright 蕃薯耀 2 ...
- spring-boot 集成 swagger 问题的解决
spring-boot 集成 swagger 网上有许多关于 spring boot 集成 swagger 的教程.按照教程去做,发现无法打开接口界面. 项目由 spring mvc 迁移过来,是一个 ...
- 20190909 SpringBoot集成Swagger
SpringBoot集成Swagger 1. 引入依赖 // SpringBoot compile('org.springframework.boot:spring-boot-starter-web' ...
- SpringBoot集成Swagger,Postman,newman,jenkins自动化测试.
环境:Spring Boot,Swagger,gradle,Postman,newman,jenkins SpringBoot环境搭建. Swagger简介 Swagger 是一款RESTFUL接口的 ...
- springboot集成swagger添加消息头(header请求头信息)
springboot集成swagger上篇文章介绍: https://blog.csdn.net/qiaorui_/article/details/80435488 添加头信息: package co ...
- 全局异常处理及参数校验-SpringBoot 2.7 实战基础 (建议收藏)
优雅哥 SpringBoot 2.7 实战基础 - 08 - 全局异常处理及参数校验 前后端分离开发非常普遍,后端处理业务,为前端提供接口.服务中总会出现很多运行时异常和业务异常,本文主要讲解在 Sp ...
- springboot 集成 swagger 自动生成API文档
Swagger是一个规范和完整的框架,用于生成.描述.调用和可视化RESTful风格的Web服务.简单来说,Swagger是一个功能强大的接口管理工具,并且提供了多种编程语言的前后端分离解决方案. S ...
- SpringBoot集成Swagger接口管理工具
手写Api文档的几个痛点: 文档需要更新的时候,需要再次发送一份给前端,也就是文档更新交流不及时. 接口返回结果不明确 不能直接在线测试接口,通常需要使用工具,比如postman 接口文档太多,不好管 ...
- springboot 集成swagger ui
springboot 配置swagger ui 1. 添加依赖 <!-- swagger ui --> <dependency> <groupId>io.sprin ...
随机推荐
- favicon.ico All In One
favicon.ico All In One link rel="icon" type="image/x-icon" href="http://exa ...
- Linux bash fi
Linux bash fi if..else..fi allows to make choice based on the success or failure of a command. if..e ...
- 1+X 证书制度
1+X 证书制度 教育部职业技术教育 http://www.cvae.com.cn/zgzcw/tzgg/202001/c0ddd6c87e6c42839f8cc3e09a2dce89.shtml 2 ...
- LeetCode & Binary Search 解题模版
LeetCode & Binary Search 解题模版 In computer science, binary search, also known as half-interval se ...
- 3D 室内装修线设计软件
3D 室内装修线设计软件 WebGL & canvas https://threejs.org/ xgqfrms 2012-2020 www.cnblogs.com 发布文章使用:只允许注册用 ...
- js 拖拽排序
See alsoe: https://www.runoob.com/html/html5-draganddrop.html https://developer.mozilla.org/zh-CN/do ...
- ts 使用 keyof typeof
传递参数 const cats = { "Coding Cat": "https://media.giphy.com/media/JIX9t2j0ZTN9S/giphy. ...
- Flutter 区分开发环境和生产环境
Uri _baseUrl; final isProd = const bool.fromEnvironment('dart.vm.product'); if (isProd) { _baseUrl = ...
- 启动Turtlesim,输入roscore命令,报错
Error: Traceback (most recent call last): File "/opt/ros/indigo/lib/python2.7/dist-packages/r ...
- 无所不能的Embedding7 - 探索通用文本表达[FastSent/InferSent/GenSen/USE]
在4/5章我们讨论过用skip-thought,quick-thought任务来进行通用文本向量提取,当时就有一个疑问为什么用Bookcorpus这种连续文本,通过预测前一个和后一个句子的方式得到的文 ...
