nginx+php-fpm docker镜像合二为一
一、概述
在上一篇文章介绍了nginx+php-fpm,链接如下:
https://www.cnblogs.com/xiao987334176/p/12918413.html
nginx和php-fpm是2个独立的镜像,在实际环境部署过程中,发现配置比较麻烦,排错比较耗费实际。
因此,需要将nginx和php-fpm 这2个镜像合并为一个。
二、nginx+php-fpm封装
目录结构
由于crunchgeek/php-fpm:7.3-r7 镜像比较大,有1.08GB。
因此需要使用alpine:3.11重新封装才行。
在dockerhub上面,php已经有官方的镜像了,php:7.3-fpm-alpine3.11。
由于项目php7cms依赖于组件mysqli,因此需要额外安装才行。
新建目录/opt/alpine_nginx_php7.3,结构如下:
- ./
- ├── default.conf
- ├── dockerfile
- ├── index.html
- ├── php.ini
- ├── repositories
- └── run.sh
default.conf
- server {
- listen 80;
- server_name localhost;
- root /var/www/html;
- index index.html index.htm index.nginx-debian.html;
- location / {
- try_files $uri $uri/ =404;
- }
- location ~ \.php$ {
- fastcgi_pass 127.0.0.1:9000;
- fastcgi_index index.php;
- fastcgi_param SCRIPT_FILENAME $document_root$fastcgi_script_name;
- include fastcgi_params;
- }
- }
dockerfile
- FROM php:7.3-fpm-alpine3.11
- ADD repositories /etc/apk/repositories
- ADD default.conf /
- ADD index.html /
- ADD run.sh /
- ADD php.ini /usr/local/etc/php/
- RUN apk update && apk add nginx && \
- apk add m4 autoconf make gcc g++ linux-headers && \
- docker-php-ext-install pdo_mysql opcache mysqli && \
- mkdir /run/nginx && \
- mv /default.conf /etc/nginx/conf.d && \
- mv /index.html /var/www/html && \
- touch /run/nginx/nginx.pid && \
- chmod 755 /run.sh && \
- apk del m4 autoconf make gcc g++ linux-headers
- EXPOSE 80
- EXPOSE 9000
- ENTRYPOINT ["/run.sh"]
注意:这里我额外安装了pdo_mysql,因为某些php项目用的是这个模块。opcache是用来做性能加速的。
index.html
- <!DOCTYPE html>
- <html>
- <head>
- <title>Welcome to nginx!</title>
- <style>
- body {
- width: 35em;
- margin: 0 auto;
- font-family: Tahoma, Verdana, Arial, sans-serif;
- }
- </style>
- </head>
- <body>
- <h1>Welcome to nginx!</h1>
- <p>If you see this page, the nginx web server is successfully installed and
- working. Further configuration is required.</p>
- <p>For online documentation and support please refer to
- <a href="http://nginx.org/">nginx.org</a>.<br/>
- Commercial support is available at
- <a href="http://nginx.com/">nginx.com</a>.</p>
- <p><em>Thank you for using nginx.</em></p>
- </body>
- </html>
php.ini


- [PHP]
- engine = On
- short_open_tag = Off
- precision = 14
- output_buffering = 4096
- zlib.output_compression = Off
- implicit_flush = Off
- unserialize_callback_func =
- serialize_precision = -1
- disable_functions =
- disable_classes =
- zend.enable_gc = On
- expose_php = On
- max_execution_time = 30
- max_input_time = 60
- memory_limit = 128M
- error_reporting = E_ALL & ~E_DEPRECATED & ~E_STRICT
- display_errors = Off
- display_startup_errors = Off
- log_errors = On
- log_errors_max_len = 1024
- ignore_repeated_errors = Off
- ignore_repeated_source = Off
- report_memleaks = On
- html_errors = On
- variables_order = "GPCS"
- request_order = "GP"
- register_argc_argv = Off
- auto_globals_jit = On
- post_max_size = 8M
- auto_prepend_file =
- auto_append_file =
- default_mimetype = "text/html"
- default_charset = "UTF-8"
- doc_root =
- user_dir =
- enable_dl = Off
- cgi.fix_pathinfo=0
- file_uploads = On
- upload_max_filesize = 2M
- max_file_uploads = 20
- allow_url_fopen = On
- allow_url_include = Off
- default_socket_timeout = 60
- [CLI Server]
- cli_server.color = On
- [Date]
- [filter]
- [iconv]
- [imap]
- [intl]
- [sqlite3]
- [Pcre]
- [Pdo]
- [Pdo_mysql]
- pdo_mysql.default_socket=
- [Phar]
- [mail function]
- SMTP = localhost
- smtp_port = 25
- mail.add_x_header = Off
- [ODBC]
- odbc.allow_persistent = On
- odbc.check_persistent = On
- odbc.max_persistent = -1
- odbc.max_links = -1
- odbc.defaultlrl = 4096
- odbc.defaultbinmode = 1
- [Interbase]
- ibase.allow_persistent = 1
- ibase.max_persistent = -1
- ibase.max_links = -1
- ibase.timestampformat = "%Y-%m-%d %H:%M:%S"
- ibase.dateformat = "%Y-%m-%d"
- ibase.timeformat = "%H:%M:%S"
- [MySQLi]
- mysqli.max_persistent = -1
- mysqli.allow_persistent = On
- mysqli.max_links = -1
- mysqli.default_port = 3306
- mysqli.default_socket =
- mysqli.default_host =
- mysqli.default_user =
- mysqli.default_pw =
- mysqli.reconnect = Off
- [mysqlnd]
- mysqlnd.collect_statistics = On
- mysqlnd.collect_memory_statistics = Off
- [OCI8]
- [PostgreSQL]
- pgsql.allow_persistent = On
- pgsql.auto_reset_persistent = Off
- pgsql.max_persistent = -1
- pgsql.max_links = -1
- pgsql.ignore_notice = 0
- pgsql.log_notice = 0
- [bcmath]
- bcmath.scale = 0
- [browscap]
- [Session]
- session.save_handler = files
- session.use_strict_mode = 0
- session.use_cookies = 1
- session.use_only_cookies = 1
- session.name = PHPSESSID
- session.auto_start = 0
- session.cookie_lifetime = 0
- session.cookie_path = /
- session.cookie_domain =
- session.cookie_httponly =
- session.cookie_samesite =
- session.serialize_handler = php
- session.gc_probability = 1
- session.gc_divisor = 1000
- session.gc_maxlifetime = 1440
- session.referer_check =
- session.cache_limiter = nocache
- session.cache_expire = 180
- session.use_trans_sid = 0
- session.sid_length = 26
- session.trans_sid_tags = "a=href,area=href,frame=src,form="
- session.sid_bits_per_character = 5
- [Assertion]
- zend.assertions = -1
- [COM]
- [mbstring]
- [gd]
- [exif]
- [Tidy]
- tidy.clean_output = Off
- [soap]
- soap.wsdl_cache_enabled=1
- soap.wsdl_cache_dir="/tmp"
- soap.wsdl_cache_ttl=86400
- soap.wsdl_cache_limit = 5
- [sysvshm]
- [ldap]
- ldap.max_links = -1
- [dba]
- [opcache]
- [curl]
- [openssl]
此文件是从容器里面copy出来的,路径为:/usr/local/etc/php/php.ini-production
去除了注释和多余的空行。
此配置文件,修改了cgi.fix_pathinfo=0
如果需要更改其他配置,修改此文件即可。
repositories
- https://mirrors.aliyun.com/alpine/v3.11/main/
- https://mirrors.aliyun.com/alpine/v3.11/community/
这个是阿里云的alpine更新源
run.sh
- #!/bin/sh
- # 后台启动
- php-fpm -D
- # 关闭后台启动,hold住进程
- nginx -g 'daemon off;'
封装镜像
- cd /opt/alpine_nginx_php7.3
- docker build -t alpine_nginx_php7.3:1 .
查看镜像大小
- # docker images|grep alpine_nginx_php7.3
- alpine_nginx_php7.3 1 927ddfbdd027 14 minutes ago 78.4MB
可以看到这个镜像只有78.4MB。
运行镜像
- docker run -it --name alpine_nginx_php7.3 -p 80:80 alpine_nginx_php7.3:1 .
访问首页
- http://ip地址/
效果如下:
phpinfo页面
新建test.php
- cd /opt/alpine_nginx_php7.3
- vi test.php
内容如下:
- <?php
- phpinfo();
- ?>
拷贝到容器中
- docker cp test.php alpine_nginx_php7.3:/var/www/html/
访问test.php
- http://ip地址/test.php
效果如下:

三、运行PHP7CMS
下载源代码
源代码下载地址:
http://down.chinaz.com/soft/38829.htm
下载完成后,在windows10电脑中解压。
进入linux系统,创建空目录/opt/php7cms,将解压文件夹PHP7CMS的所有内容上传到/opt/php7cms中。
此时/opt/php7cms目录结构如下:
- # tree -L 1
- .
- ├── admin.php
- ├── api
- ├── cache
- ├── config
- ├── index.php
- ├── install.php
- ├── LICENSE
- ├── php7cms
- ├── README.md
- ├── static
- ├── template
- ├── uploadfile
- ├── 安装方法.txt
- └── 安装环境.docx
-L 参数表示控制深度,这里只展示第一层。
在此目录新建dockerfile
- FROM alpine_nginx_php7.3:1
- ADD default.conf /etc/nginx/conf.d
- ADD . /var/www/html/PHP7CMS
- RUN chown www-data:www-data -R /var/www/html
在此目录新建default.conf
- server {
- listen 80;
- server_name localhost;
- root /var/www/html/PHP7CMS;
- index index.php index.html index.htm;
- location ~ \.php$ {
- fastcgi_pass 127.0.0.1:9000;
- fastcgi_index index.php;
- fastcgi_param SCRIPT_FILENAME $document_root$fastcgi_script_name;
- include fastcgi_params;
- }
- }
这个文件用来将nginx默认的配置覆盖掉
封装镜像
- cd /opt/php7cms
- docker build -t php7cms:1 .
运行docker
先将之前运行的nginx_php删除掉,再运行php7cms。否则会端口冲突
- docker rm -f alpine_nginx_php7.3
- docker run -d -it --restart=always --name php7cms -p 80:80 php7cms:1
由于php7cms依赖于mysql,还得运行一个mysql才行。
- mkdir -p /data/mysql/data
- docker run -d --name mysql5.7 --restart=always -e MYSQL_ROOT_PASSWORD=abcd@1234 -p 3306:3306 -v /data/mysql/data:/var/lib/mysql mysql:5.7 --character-set-server=utf8mb4 --collation-server=utf8mb4_unicode_ci
新建空的数据库cms
- # docker exec -it mysql5.7 /bin/bash
- # mysql -u root -pabcd@1234
- mysql> create database cms default character set utf8mb4 collate utf8mb4_unicode_ci;
安装向导
我的服务器ip地址为:10.212.20.213
访问安装页面
- http://10.212.20.213/install.php
输入数据库连接信息

点击下一步后,提示安装完成。

登录后台页面
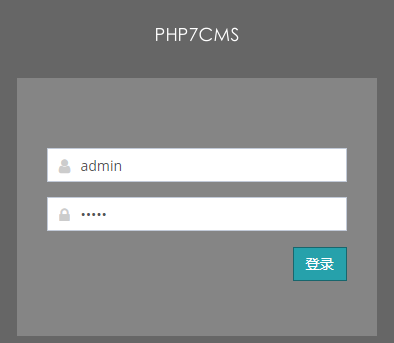
默认用户名和密码都是admin
登录成功后,效果如下:

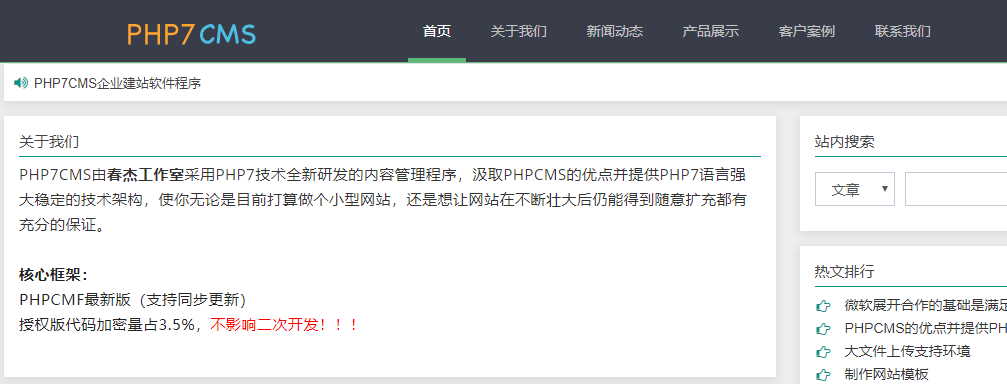
访问首页
- http://10.212.20.213/
效果如下:
nginx+php-fpm docker镜像合二为一的更多相关文章
- 制作nginx+php的docker镜像方法
制作nginx+php的docker镜像方法一.准备安装的工具工具:docker-17.06.0-ce.nginx-1.13.2.PHP-5.5.38 .supervisor配置思路:1.安装dock ...
- Nginx+PHP7.3.9 Docker镜像制作
最近因项目需要制作了多个版本的php docker镜像,制作过程可谓是一波三折,因基于yum的方式安装php的方式在安装扩展插件时很不方便,不容易找到插件对应的yum源,所以PHP在docker镜像中 ...
- jenkins自动打包生成docker镜像后自动发布并nginx代理访问
之前曾写过docker及jenkins基础使用 https://www.cnblogs.com/xiaochangwei/category/816943.html 现在搭建环境的功能为: 1.jen ...
- Docker镜像+nginx 部署 vue 项目
一.打包vue项目 在开发完的vue项目输入如下命名,打包生成dist文件夹 yarn build / npm run build 此时根目录会多出一个文件夹:dist文件夹,里面就是我们要发布的东西 ...
- Docker镜像实战(ssh、systemctl、nginx、tomcat、mysql)
Docker镜像实战 1.构建ssh镜像 2.构建systemctl 镜像 3.构建nginx镜像 4.构建tomcat镜像 5.构建mysql镜像 1.构建ssh镜像: 创建镜像目录 mkdir / ...
- 理解Docker(2):Docker 镜像
本系列文章将介绍Docker的有关知识: (1)Docker 安装及基本用法 (2)Docker 镜像 (3)Docker 容器的隔离性 - 使用 Linux namespace 隔离容器的运行环境 ...
- 第四章 使用Docker镜像和仓库(二)
第四章 使用Docker镜像和仓库(二) 回顾: 开始学习之前,我先pull下来ubuntu和fedora镜像 [#9#cloudsoar@cloudsoar-virtual-machine ~]$s ...
- 第四章 使用Docker镜像和仓库
第4章 使用Docker镜像和仓库 回顾: 回顾如何使用 docker run 创建最基本的容器 $sudo docker run -i -t --name another_container_mum ...
- 《第一本docker书》第4章 使用docker镜像和仓库 读书笔记
docker最底端是一个引导文件系统,即bootfs. 第二层是root文件系统rootfs,位于引导文件系统之上. 在传统的Linux引导过程中,root文件系统会最先以只读的方式加载,当引导结束并 ...
随机推荐
- mitmproxy使用详解
mitmproxy 相比Charles.fiddler的优点在于,它可以命令行方式或脚本的方式进行mock mitmproxy不仅可以像Charles那样抓包,还可以对请求数据进行二次开发,进入高度二 ...
- Educational Codeforces Round 90 (Rated for Div. 2) D. Maximum Sum on Even Positions(dp)
题目链接:https://codeforces.com/contest/1373/problem/D 题意 给出一个大小为 $n$ 的数组 $a$,下标为 $0 \sim n - 1$,可以进行一次反 ...
- 找新朋友 HDU - 1286 欧拉函数模板题
题意: 求出来区间[1,n]内与n互质的数的数量 题解: 典型的欧拉函数应用,具体见这里:Relatives POJ - 2407 欧拉函数 代码: 1 #include<stdio.h> ...
- Codeforces Round #327 (Div. 1) C. Three States
C. Three States time limit per test 5 seconds memory limit per test 512 megabytes input standard inp ...
- Vue的七种传值方式
目录 1,父传子 2,子传父 3,兄弟组件传值 4,父组件使用子组件的数据和方法 5,子组件使用父组件的数据和方法 6,Vuex传值 6.1,定义store 6.2,挂载 6.3,使用 7,路由传值 ...
- Logstash 日志收集(补)
收集 Tomcat 日志 安装 Tomcat # 安装 jdk [root@web01 ~]# rpm -ivh jdk-8u181-linux-x64.rpm # 下载 [root@web01 ~] ...
- Xtrabackup 物理备份
目录 Xtrabackup 安装 Xtrabackup 备份介绍 Xtrabackup全量备份 准备备份目录 全量备份 查看全量备份内容 Xtrabackup 全量备份恢复数据 删除所有数据库 停止数 ...
- printf,sprintf,fprintf的区别与联系
在写代码过程中总会遇到printf和sprintf,既然这两个都遇到了,那么不妨再加一个fprintf吧. 他们三个都是将格式化字符串输出,区别就是他们输出的目标不一样. (1).printf,是把格 ...
- PAT l2-010 排座位 【并查集】
L2-010. 排座位 时间限制 150 ms 内存限制 65536 kB 代码长度限制 8000 B 判题程序 Standard 作者 陈越 布置宴席最微妙的事情,就是给前来参宴的各位宾客安排座位. ...
- springboot demo(一)快速开始
快速入门 maven构建项目 1.访问http://start.spring.io/ 2.选择构建工具Maven Project.Spring Boot版本2.26以及一些工程基本信息,点击" ...