windows服务总结
一、创建windows服务项目
创建完成后结构,如:
其中,Program.cs代码:
using System;

using System.Collections.Generic;

using System.Linq;

using System.ServiceProcess;

using System.Text;

namespace WindowsService1

{

    static class Program

    {

        /// <summary>

        /// 应用程序的主入口点。

        /// </summary>

        static void Main()

        {

            ServiceBase[] ServicesToRun;

            ServicesToRun = new ServiceBase[]

            {

                new Service1()

            };

            ServiceBase.Run(ServicesToRun);

        }

    }

}
Service1.cs代码:
using System;

using System.Collections.Generic;

using System.ComponentModel;

using System.Data;

using System.Diagnostics;

using System.Linq;

using System.ServiceProcess;

using System.Text;

namespace WindowsService1

{

    public partial class Service1 : ServiceBase

    {

        public Service1()

        {

            InitializeComponent();

        }

        protected override void OnStart(string[] args)

        {

        }

        protected override void OnStop()

        {

        }

    }

}
此时,Service1.cs设计视图默认属性为:
二、配置windows服务,添加安装程序
(以上时默认初始化展示,为方便演示,下面将服务文件名Service1.cs改为XFKFinanceAccService.cs,服务名称也改成了XFKFinanceAccService)
回到XFKFinanceAccService.cs设计视图,空白处右键==》添加安装程序,如:
可以看到,在ProjectInstaller安装程序文件的设计视图里,有两个名为serviceInstaller1和serviceProcessInstaller1的组件,设置它们的属性,如:

三、编写windows服务代码
服务设置好以后,进入XFKFinanceAccService.cs代码视图,开始实现处理逻辑。
示例一:
using System;

using System.Collections.Generic;

using System.ComponentModel;

using System.Configuration;

using System.Data;

using System.Diagnostics;

using System.Linq;

using System.ServiceProcess;

using System.Text;

using System.Threading;

using XFKFinanceAccountsSys.BussinessLogic;

using XFKFinanceAccountsSys.Common;

namespace XFKFinanceAccountsSys.WindowsService

{

    public partial class XFKFinanceAccService : ServiceBase

    {

        DateTime lastDt = DateTime.Now.AddDays(-1);

        Thread thread = null;

        public XFKFinanceAccService()

        {

            InitializeComponent();

            LogHelper.WriteLog("---初始化windows服务!!!");

        }

        protected override void OnStart(string[] args)

        {

            LogHelper.WriteLog("---启动windows服务!!!");

            thread = new Thread(new ThreadStart(AutoGenElapsed));

            thread.IsBackground = true;

            thread.Start();

        }

        protected override void OnStop()

        {

            LogHelper.WriteLog("Stop");

            if (thread != null)

            {

                if (thread.ThreadState == System.Threading.ThreadState.Running)

                {

                    thread.Abort();

                }

            }

        }

        private void AutoGenElapsed()

        {

            LogHelper.WriteLog("---进入windows服务!!!");

            while (true)

            {

                //服务开始处理时间

                string startTime = ConfigurationManager.AppSettings["StartTime"];

                //每次处理完间隔时间

                int interval = int.Parse(ConfigurationManager.AppSettings["Interval"]);

                try

                {

                    //一天执行一次

                    if (DateTime.Now.DayOfYear == lastDt.DayOfYear + 1)

                    {

                        //到达处理时间时,任务开始处理数据

                        if (DateTime.Now > Convert.ToDateTime(DateTime.Now.ToString("yyyy-MM-dd") + " " + startTime))

                        {

                            /********** 处理逻辑主体 Begin***********/

                            /********** 处理逻辑主体 End***********/

                            //处理完后时间改为当前时间,下一次不再处理

                            lastDt = DateTime.Now;

                        }

                    }

                }

                catch (Exception ex)

                {

                    LogHelper.WriteLog("error" + ex);

                }

                finally

                {

                    Thread.Sleep(interval * 1000);

                }

            }

        }

    }

}
示例二(启用定时器):
using System;

using System.Collections.Generic;

using System.ComponentModel;

using System.Configuration;

using System.Data;

using System.Diagnostics;

using System.Linq;

using System.ServiceProcess;

using System.Text;

using System.Threading;

using XFKFinanceAccountsSys.BussinessLogic;

using XFKFinanceAccountsSys.Common;

namespace XFKFinanceAccountsSys.WindowsService

{

    public partial class XFKFinanceAccService : ServiceBase

    {

        DateTime lastDt = DateTime.Now.AddDays(-1);

        Thread thread = null;

        public XFKFinanceAccService()

        {

            InitializeComponent();

            LogHelper.WriteLog("---初始化windows服务!!!");

            //启用定时器

            System.Timers.Timer timer = new System.Timers.Timer();

            timer.Elapsed += timer_Elapsed;

            timer.Interval = 5000;//每5秒执行一次

            timer.Enabled = true;

        }

        void timer_Elapsed(object sender, System.Timers.ElapsedEventArgs e)

        {

            LogHelper.WriteLog("---进入windows服务!!!");

            //服务开始处理时间

            string startTime = ConfigurationManager.AppSettings["StartTime"];

            //每次处理完间隔时间

            int interval = int.Parse(ConfigurationManager.AppSettings["Interval"]);

            try

            {

                //一天执行一次

                if (DateTime.Now.DayOfYear == lastDt.DayOfYear + 1)

                {

                    //到达处理时间时,任务开始处理数据

                    if (DateTime.Now > Convert.ToDateTime(DateTime.Now.ToString("yyyy-MM-dd") + " " + startTime))

                    {

                        /********** 处理逻辑主体 Begin***********/

                        /********** 处理逻辑主体 End***********/

                        //处理完后时间改为当前时间,下一次不再处理

                        lastDt = DateTime.Now;

                    }

                }

            }

            catch (Exception ex)

            {

                LogHelper.WriteLog("error" + ex);

            }

            finally

            {

                Thread.Sleep(interval * 1000);

            }

        }

        protected override void OnStart(string[] args)

        {

            LogHelper.WriteLog("---启动windows服务!!!");

        }

        protected override void OnStop()

        {

            LogHelper.WriteLog("---停止windows服务!!!");

        }

    }

}
在项目中加入配置文件App.config,需加入下面配置:
我们可以修改程序入口代码,以便可以将服务定制化,如:
using System;

using System.Collections.Generic;

using System.Data;

using System.Linq;

using System.ServiceProcess;

using System.Text;

using System.Windows.Forms;

using XFKFinanceAccountsSys.BussinessLogic;

using XFKFinanceAccountsSys.WindowsService.Model;

namespace XFKFinanceAccountsSys.WindowsService

{

    static class Program

    {

        /// <summary>

        /// 应用程序的主入口点。

        /// </summary>

        [STAThread]

        static void Main(string[] args)

        {

            Application.EnableVisualStyles();

            Application.SetCompatibleTextRenderingDefault(false);

            string dataBaseXmlFile = System.AppDomain.CurrentDomain.BaseDirectory + "../../ConfigXml\\DataBase.xml";

            XFK.AFX1.Common.DB.ORM.Setting.Instance().DatabaseMapFile = dataBaseXmlFile;

            if (args.Length > 0)

            {

		//如果入口参数不为空,则运行服务

                if (args[0].ToLower() == "/s" || args[0].ToLower() == "-s")

                {

                    ServiceBase[] ServicesToRun;

                    ServicesToRun = new ServiceBase[]

                    {

                        new XFKFinanceAccService()

                    };

                    ServiceBase.Run(ServicesToRun);

                }

            }

            else

            {

		//如果入口参数为空,则进入到服务操作界面

                Application.Run(new OperationForm());

            }

        }

    }

}
OperationForm窗口: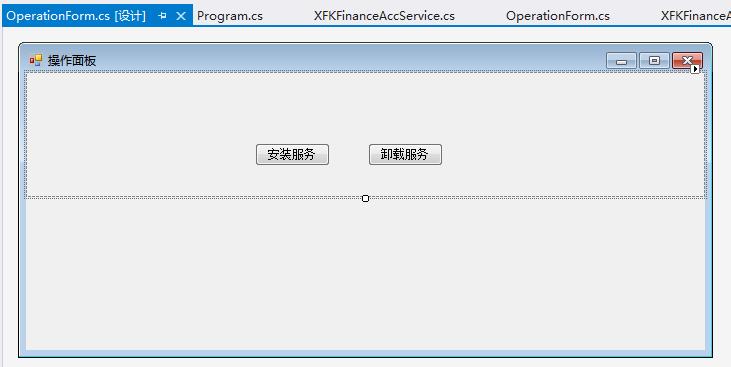
我们可以在这个winform窗体中增加需要的功能,如安装/卸载服务、查看/编辑数据等。
当然,我们也可以用DOS命令安装和卸载服务,如:
安装:
C:\WINDOWS\Microsoft.NET\Framework\v4.0.30319\InstallUtil.exe "E:\WORK\对账系统\XFKFinanceAccountsSys20170627\XFKFinanceAccountsSys.WindowsService\bin\Debug\XFKFinanceAccountsSys.WindowsService.exe"
卸载:
C:\WINDOWS\Microsoft.NET\Framework\v4.0.30319\InstallUtil.exe -U E:\WORK\对账系统\XFKFinanceAccountsSys20170627\XFKFinanceAccountsSys.WindowsService\bin\Debug\XFKFinanceAccountsSys.WindowsService.exe
参考资料:
http://www.cnblogs.com/xujie/p/5695673.html
http://blog.csdn.net/xiaoy_h/article/details/26090277(内存共享)
windows服务总结的更多相关文章
- 基于SignalR实现B/S系统对windows服务运行状态的监测
通常来讲一个BS项目肯定不止单独的一个BS应用,可能涉及到很多后台服务来支持BS的运行,特别是针对耗时较长的某些任务来说,Windows服务肯定是必不可少的,我们还需要利用B/S与windows服务进 ...
- C#创建、安装、卸载、调试Windows Service(Windows 服务)的简单教程
前言:Microsoft Windows 服务能够创建在它们自己的 Windows 会话中可长时间运行的可执行应用程序.这些服务可以在计算机启动时自动启动,可以暂停和重新启动而且不显示任何用户界面.这 ...
- 玩转Windows服务系列汇总
玩转Windows服务系列汇总 创建Windows服务 Debug.Release版本的注册和卸载及其原理 无COM接口Windows服务启动失败原因及解决方案 服务运行.停止流程浅析 Windows ...
- 玩转Windows服务系列——给Windows服务添加COM接口
当我们运行一个Windows服务的时候,一般情况下,我们会选择以非窗口或者非控制台的方式运行,这样,它就只是一个后台程序,没有界面供我们进行交互. 那么当我们想与Windows服务进行实时交互的时候, ...
- 玩转Windows服务系列——使用Boost.Application快速构建Windows服务
玩转Windows服务系列——创建Windows服务一文中,介绍了如何快速使用VS构建一个Windows服务.Debug.Release版本的注册和卸载,及其原理和服务运行.停止流程浅析分别介绍了Wi ...
- 玩转Windows服务系列——Debug、Release版本的注册和卸载,及其原理
Windows服务Debug版本 注册 Services.exe -regserver 卸载 Services.exe -unregserver Windows服务Release版本 注册 Servi ...
- C# 开发windows服务的一些心得
最近在做一个windows服务的项目,发现并解决了一些问题,拿出来和大家分享一下,以下windows服务简称“服务” 文章会在适合时间更新,因为朋友们在不断提出新的意见或思路,感谢-.- 1.服务如何 ...
- 使用topshelf包装redis为windows服务
Redis服务端目前用的是控制台程序运行,部署的时候能作为windows服务后台运行感觉更好.找到一篇文章Running Redis as a Windows Service,利用win ...
- 编写Windows服务疑问1:操作过程
Windows 服务开发平时不太受人关注,毕竟那是高大上的项目类型,平常需求也用不上,很多老掉牙的家伙也只知有WinForm,仍不知有WPF,更别说Windows 服务了,正如陶渊明所写的,“不知有汉 ...
- C# windows服务制作(包括安装及卸载)
开篇语 因工作内容需要做一个windows服务,此前并没有相关经验,所以做了一个demo来跑跑这个梗(高手跳过,需要的来踩)- 效果如下:打开服务,可以找到我们新增的一个windows服务,这个dem ...
随机推荐
- 【MyBatis】从一千万记录中批量删除八百万条,耗时4m7s
批量删除主要借助了MySql的limit函数,其次用了in删除. 代码如下: package com.hy.action; import java.io.Reader; import java.uti ...
- Python接口测试-以&连接拼接字典数据(get中url请求数据)
get请求的utl数据是这样的,例如:/banner/findBanner?bannerType=1&_=1556107073181 ''' 1-banner图-banner/findBann ...
- docker进入容器的四种方法
在使用Docker创建了容器之后,大家比较关心的就是如何进入该容器了,其实进入Docker容器有好几多种方式,这里我们就讲一下常用的几种进入Docker容器的方法. 进入Docker容器比较常见的几种 ...
- spring cloud之docker微服务客户端注册eureka问题
正常我们起一个微服务注册到eureka他的实例id是默认这样的主机名称:服务名称:服务端口号, 如果配置eureka.instance.prefer-ip-address=true则实例id为主机Ip ...
- 经典MapReduce作业和Yarn上MapReduce作业运行机制
一.经典MapReduce的作业运行机制 如下图是经典MapReduce作业的工作原理: 1.1 经典MapReduce作业的实体 经典MapReduce作业运行过程包含的实体: 客户端,提交MapR ...
- (转载)悟透JavaScript
引子 编程世界里只存在两种基本元素,一个是数据,一个是代码.编程世界就是在数据和代码千丝万缕的纠缠中呈现出无限的生机和活力. 数据天生就是文静的,总想保持自己固有的本色:而代码却天生活泼,总想改变这个 ...
- Java泛型(9):动态类型安全
因为可以向Java SE5之前的代码传递泛型容器,所以旧式代码仍有可能破坏你的容器.Java SE5中有一组便利工具,可以解决这种情况下类型检查的问题. 它们是静态方法checkedCollectio ...
- Java泛型(7):无界通配符<?>
无界通配符<?>很容易和原生类型混淆. 以List为例: List表示持有任何Object类型的原生List,其实就等价于List<Object> List<?>表 ...
- 四、VSCode调试vue项目
1.先决条件设置 你必须安装好 Chrome 和 VS Code.同时请确保自己在 VS Code 中安装了 Debugger for Chrome 扩展的最新版本. 在可以从 VS Code 调试你 ...
- 20190926 - macOS 下查看进程路径
首先,从 Activity Monitor 中查看进程 PID,然后使用以下命令查看. ps xuwww -p PID 另一个办法是,使用系统调用 proc_pidpath . #include &l ...