[工具] 利用setuptools打包python程序
一、准备工程文件
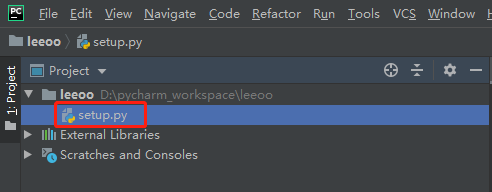
1.创建工程leeoo

2.在工程根目录下创建setup.py文件
3.在工程根目录下创建同名package

二、编辑setup.py
1.编辑setup.py文件
- from setuptools import setup, find_packages
- setup(
- name='leeoo', # 包的名称
- version='1.0', # 版本号
- packages=find_packages(), # 动态获取packages
- description="leeoo package",
- author='Leo',
- author_email='leo4774177@gmail.com',
- url="None",
- )
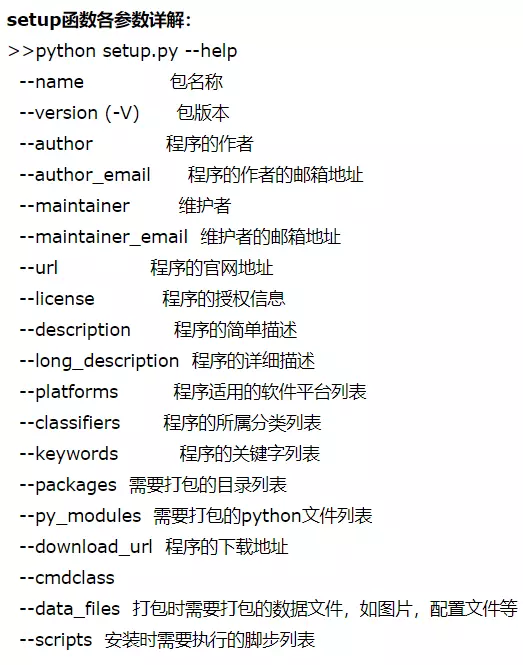
2.参数说明
三、编写测试代码
1.在leeoo package下创建pkg
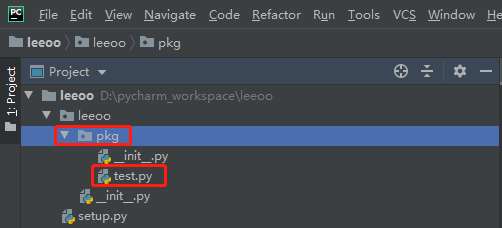
2.test.py文件内容
- def testfunc():
- print("This is a test function..")
- class TestClass(object):
- def __init__(self, name):
- self.name = name
- print("This is a test Class..")
- def get_name(self):
- return self.name
3.将test.py中的内容全部导入到leeoo的__init__.py中
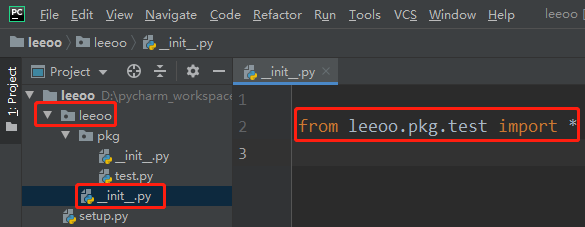
这样,以后import leeoo后,就可以直接使用leeoo.testfunc()了。
四、打包
1.命令行进入工程根目录
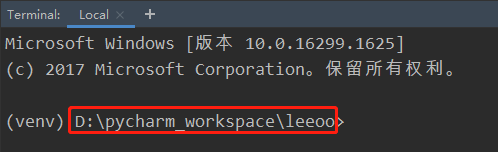
2.运行命令
- (venv) D:\pycharm_workspace\leeoo>python setup.py check
- running check
- (venv) D:\pycharm_workspace\leeoo>python setup.py bdist_egg
- running bdist_egg
- running egg_info
- creating leeoo.egg-info
- writing leeoo.egg-info\PKG-INFO
- writing dependency_links to leeoo.egg-info\dependency_links.txt
- writing top-level names to leeoo.egg-info\top_level.txt
- writing manifest file 'leeoo.egg-info\SOURCES.txt'
- reading manifest file 'leeoo.egg-info\SOURCES.txt'
- writing manifest file 'leeoo.egg-info\SOURCES.txt'
- installing library code to build\bdist.win-amd64\egg
- running install_lib
- running build_py
- creating build
- creating build\lib
- creating build\lib\leeoo
- copying leeoo\__init__.py -> build\lib\leeoo
- creating build\bdist.win-amd64
- creating build\bdist.win-amd64\egg
- creating build\bdist.win-amd64\egg\leeoo
- copying build\lib\leeoo\__init__.py -> build\bdist.win-amd64\egg\leeoo
- byte-compiling build\bdist.win-amd64\egg\leeoo\__init__.py to __init__.cpython-.pyc
- creating build\bdist.win-amd64\egg\EGG-INFO
- copying leeoo.egg-info\PKG-INFO -> build\bdist.win-amd64\egg\EGG-INFO
- copying leeoo.egg-info\SOURCES.txt -> build\bdist.win-amd64\egg\EGG-INFO
- copying leeoo.egg-info\dependency_links.txt -> build\bdist.win-amd64\egg\EGG-INFO
- copying leeoo.egg-info\top_level.txt -> build\bdist.win-amd64\egg\EGG-INFO
- zip_safe flag not set; analyzing archive contents...
- creating dist
- creating 'dist\leeoo-1.0-py3.7.egg' and adding 'build\bdist.win-amd64\egg' to it
- removing 'build\bdist.win-amd64\egg' (and everything under it)
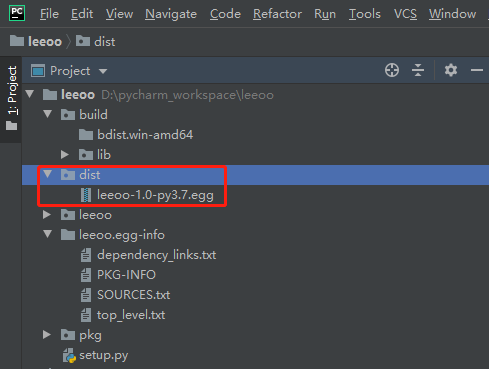
3.查看生成的文件
在工程根目录下,可以看到生成了一系列文件:
4.几种常用打包格式
1)打包成egg
- python setup.py bdist_egg #生成egg文件,支持easy_install安装
安装:
- easy_install xx.egg
2)打包成exe
- python setup.py bdist_wininst #生成exe文件
支持windows下的分发。
3)打包成*.zip、*.tar.gz
- python setup.py sdist #生成*.zip/*.tar.gz文件,支持pip安装
4)打包成*.whl
- python setup.py bdist_wheel #生成.whl文件
安装:
- pip install xxx.whl
五、安装leeoo
1.在工程目录下(setup.py所在目录)运行命令
- D:\pycharm_workspace\leeoo>python setup.py install
- running install
- running bdist_egg
- running egg_info
- writing leeoo.egg-info\PKG-INFO
- writing dependency_links to leeoo.egg-info\dependency_links.txt
- writing top-level names to leeoo.egg-info\top_level.txt
- reading manifest file 'leeoo.egg-info\SOURCES.txt'
- writing manifest file 'leeoo.egg-info\SOURCES.txt'
- installing library code to build\bdist.win-amd64\egg
- running install_lib
- running build_py
- creating build\bdist.win-amd64\egg
- creating build\bdist.win-amd64\egg\leeoo
- copying build\lib\leeoo\__init__.py -> build\bdist.win-amd64\egg\leeoo
- byte-compiling build\bdist.win-amd64\egg\leeoo\__init__.py to __init__.cpython-.pyc
- creating build\bdist.win-amd64\egg\EGG-INFO
- copying leeoo.egg-info\PKG-INFO -> build\bdist.win-amd64\egg\EGG-INFO
- copying leeoo.egg-info\SOURCES.txt -> build\bdist.win-amd64\egg\EGG-INFO
- copying leeoo.egg-info\dependency_links.txt -> build\bdist.win-amd64\egg\EGG-INFO
- copying leeoo.egg-info\top_level.txt -> build\bdist.win-amd64\egg\EGG-INFO
- zip_safe flag not set; analyzing archive contents...
- creating 'dist\leeoo-1.0-py3.7.egg' and adding 'build\bdist.win-amd64\egg' to it
- removing 'build\bdist.win-amd64\egg' (and everything under it)
- Processing leeoo-1.0-py3..egg
- Copying leeoo-1.0-py3..egg to d:\dev_apps\anaconda5.3.0\lib\site-packages
- Adding leeoo 1.0 to easy-install.pth file
- Installed d:\dev_apps\anaconda5.3.0\lib\site-packages\leeoo-1.0-py3..egg
- Processing dependencies for leeoo==1.0
- Finished processing dependencies for leeoo==1.0
2.查看安装好的文件
我们看到上述打印日志中,将leeoo-1.0-py3.7.egg安装到了d:\dev_apps\anaconda5.3.0\lib\site-packages。

六、使用leeoo
新建一个项目,然后导入leeoo:
- import leeoo
- leeoo.testfunc()
- obj = leeoo.TestClass("demo")
- print(obj.get_name())
也可以使用:
- from leeoo.pkg import test
- test.testfunc()
- obj = test.TestClass("demo")
- print(obj.get_name())
当然也可以直接将testfunc()和TestClass导入,但是容易引起命名冲突。
(>‿◠)✌
[工具] 利用setuptools打包python程序的更多相关文章
- 利用setuptools发布Python程序到PyPI,为Python添砖加瓦
pip install的东西从哪里来的? 从PyPI (Python Package Index)来的,官网是: https://pypi.python.org/pypi/执行pip install ...
- Jenkins简明入门(二) -- 利用Jenkins完成Python程序的build、test、deployment
大家可能还没搞清楚,Jenkins到底能做什么? 本节内容利用Jenkins完成python程序的build.test.deployment,让大家对Jenkins能做的事情有一个直观的了解. 本节内 ...
- 使用 py2exe 打包 Python 程序
上回在<使用 PyInstaller 打包 Python 程序>中,我们介绍了使用 PyInstaller 对 Python 程序进行打包,今天带大家认识一个新的工具:py2exe. 接下 ...
- Python学习笔记:py2exe打包Python程序
使用py2exe将一个Python程序打包成一个exe程序,这样Python程序也可以在没有安装Python的环境中运行Python程序了.使用这个工具需要写一个用于打包的setup.py文件(名称可 ...
- PyInstaller 打包 python程序成exe
pychaim下PyInstaller 打包 python程序 主题是使用PyInstaller 打包python时遇到一些问题以及解决方案,其中将要打包的程序是用tensorflow做的LSTM算法 ...
- “failed to excute script xxx” PyInstaller 打包python程序为exe文件过程错误
在使用PyInstaller打包python程序,打包命令为: pyinstaller -F -w -i manage.ico yourpyfile.py 顺便说一下几个参数的作用 -F:是直接生成单 ...
- 利用 pip 安装 Python 程序包到个人用户文件夹下
利用 --user 参数,即 pip install --user package_name 这样会将Python 程序包安装到 $HOME/.local 路径下,其中包含三个字文件夹:bin,lib ...
- 【Python】 如何用pyinstaller打包python程序成exe
[pyinstaller] pyinstaller在他们的官方网站上下载:http://www.pyinstaller.org/ 下载完pyinstaller之后还要安装一个支持包pywin32. 这 ...
- cxfreeze打包python程序的方法说明(生成安装包,实现桌面快捷方式、删除快捷方式)
一.cxfreeze基础 1.cxfreeze功能 python代码文件转exe方法有三种,分别是cx_freeze,py2exe,PyInstaller,这三种方式各有千秋,本人只用过py2exe和 ...
随机推荐
- H3C 启动包过滤防火墙功能
- Python--day41--守护线程
1,守护线程:守护线程会在主线程结束之后等待其他子线程的结束才结束 拓展--守护进程:守护进程随着主进程代码的执行结束而结束 代码示例:守护线程.py import time from threadi ...
- java 使用反射操作字段
Field提供两组方法操作字段: xxx getXxx(Object obj):获取obj对象该Field的字段值,此处的xxx表示8个基本数据类型.若该字段的类型是引用数据类型则使用,Object ...
- Vue中的scoped及穿透方法(修改第三方组件局部的样式)
何为scoped? 在vue文件中的style标签上,有一个特殊的属性:scoped.当一个style标签拥有scoped属性时,它的CSS样式就只能作用于当前的组件,也就是说,该样式只能适用于当前组 ...
- flex布局属性说明
flex布局又称为盒子布局或弹性布局,用来为盒状模型提供最大的灵活性,任何一个容器都可以指定为 Flex 布局. 给父容器添加display: flex/inline-flex;属性,即可使容器内容采 ...
- 原 Linux:ping不通baidu.com
如果某台Linux服务器ping不通域名, 如下提示: [root@localhost ~]# ping www.baidu.com ping: unknown host www.baidu.com ...
- es6笔记 day3---对象简介语法以及对象新增
以前的老写法↓ 新写法来了↓ 提示:千万不要手贱,在里面去用箭头函数!!! -------------------------------------------------------------- ...
- MobaXterm 使用中间服务器
经常需要连接服务器,但是有时候服务器需要经过一层中间服务器才可以连接,所以本文告诉大家如何使用MobaXterm 配置中间服务器,进行ssh连接 在本文的开始,本地转发服务器已经弄好,本文不会告诉大家 ...
- CSU 2323 疯狂的企鹅II (中位数的性质)
Description 继在鹅厂工作的DJ训练完鹅厂的企鹅们之后,DJ发明了一个新游戏.该游戏在nxn的棋盘上进行,其中恰好有n个企鹅,企鹅向四个方向之一移动一格算作一步.DJ希望用最少的总步数把这些 ...
- CITRIX VPX配置四层负载
网络拓扑如下: Step1:开启四层负载特性 在Configuration->Traffic Management->Load Balancing上右键弹出菜单点击enable,如下图: ...