004-集成maven和Spring boot的profile功能打包
参考地址:https://blog.csdn.net/lihe2008125/article/details/50443491
一、主要目标
1、通过mvn在命令行中打包时,可以指定相应的profile。
2、需使用了maven的profile功能
3、使用了Spring Boot的profile功能
二、profile简介
什么是profile,解决什么问题呢?
一般在开发项目的时候要有多个环境,如开发环境、测试环境、生产环境,配置文件一般不同。当要向各个环境发布程序时,需要人工处理这些配置文件。有了profile,只要在maven打包时使用下面命令即可。
- mvn clean package -Dmaven.test.skip=true -P prod
-P prod 就是告诉maven要使用名字为prod的profile来打包,即所有的配置文件都使用生产环境(prod:生产;test:测试;dev:开发)。
三、实现过程
maven支持profile功能,当使用maven profile打包时,可以打包指定目录和指定文件,且可以修改文件中的变量。
spring boot也支持profile功能,只要在application.properties文件中指定spring.profiles.active=xxx 即可,其中xxx是一个变量,当maven打包时,修改这个变量即可。
3.1、父pom增加profile配置
- <profiles>
- <profile>
- <id>dev</id>
- <properties>
- <profileActive>dev</profileActive>
- </properties>
- <activation>
- <activeByDefault>true</activeByDefault>
- </activation>
- </profile>
- <profile>
- <id>test</id>
- <properties>
- <profileActive>test</profileActive>
- </properties>
- </profile>
- <profile>
- <id>prod</id>
- <properties>
- <profileActive>properties</profileActive>
- </properties>
- </profile>
- </profiles>
方式一、基本打包
测试环境:springboot 1.5.1下
在build中配置,下文 中会有详细解释
- <resources>
- <resource>
- <directory>src/main/resources</directory>
- <filtering>true</filtering>
- <excludes>
- <exclude>application-dev.properties</exclude>
- <exclude>application-test.properties</exclude>
- <exclude>application-produce.properties</exclude>
- </excludes>
- </resource>
- <resource>
- <directory>src/main/resources</directory>
- <filtering>true</filtering>
- <includes>
- <include>application.properties</include>
- <include>application-${profiles.active}.properties</include>
- <include>**/*.xml</include>
- </includes>
- </resource>
- <resource>
- <directory>src/main/java</directory>
- <includes>
- <include>**/*.xml</include>
- </includes>
- <filtering>false</filtering>
- </resource>
- </resources>
因可能版本较低,需要配置 maven-resources-plugin,否则变量不替换,但是更换了springboot 2.0.4后不用配置既可以
- <plugins>
- <plugin>
- <groupId>org.springframework.boot</groupId>
- <artifactId>spring-boot-maven-plugin</artifactId>
- </plugin>
- <plugin>
- <groupId>org.apache.maven.plugins</groupId>
- <artifactId>maven-resources-plugin</artifactId>
- <configuration>
- <delimiters><!-- 使用${..}作为占位符 -->
- <delimiter>${*}</delimiter>
- </delimiters>
- <!-- 使用默认的占位符(@..@) -->
- <useDefaultDelimiters>true</useDefaultDelimiters>
- </configuration>
- </plugin>
- </plugins>
方式二、自定义配置的打包
1、配置好:assembly/depolyment.xml
- <?xml version="1.0" encoding="UTF-8"?>
- <assembly xmlns="http://maven.apache.org/plugins/maven-assembly-plugin/assembly/1.1.3" xmlns:xsi="http://www.w3.org/2001/XMLSchema-instance"
- xsi:schemaLocation="http://maven.apache.org/plugins/maven-assembly-plugin/assembly/1.1.3 http://maven.apache.org/xsd/assembly-1.1.3.xsd">
- <id>dist</id>
- <formats>
- <format>zip</format>
- <format>dir</format>
- </formats>
- <includeBaseDirectory>false</includeBaseDirectory>
- <fileSets>
- <fileSet>
- <directory>src/main/bin</directory>
- <outputDirectory>bin/</outputDirectory>
- </fileSet>
- <!--<fileSet>-->
- <!--<directory>src/main/resources</directory>-->
- <!--<outputDirectory>/</outputDirectory>-->
- <!--</fileSet>-->
- <fileSet>
- <directory>${project.build.directory}</directory>
- <outputDirectory>/</outputDirectory>
- <includes>
- <include>*.jar</include>
- </includes>
- </fileSet>
- </fileSets>
- <dependencySets>
- <dependencySet>
- <outputDirectory>lib</outputDirectory>
- <scope>runtime</scope>
- <excludes>
- <exclude>${groupId}:${artifactId}</exclude>
- </excludes>
- </dependencySet>
- </dependencySets>
- </assembly>
2、多环境配置
方式2.1、文件后缀方式
在需要打包的子项目pom设置
- <build>
- <resources>
- <resource>
- <!--指定打包时需要特殊处理的目录文件-->
- <directory>src/main/resources</directory>
- <!--处理文件是时,需要变量替换-->
- <filtering>true</filtering>
- <!--打包时,排除文件-->
- <excludes>
- <exclude>application.properties</exclude>
- <exclude>application-dev.properties</exclude>
- <exclude>application-test.properties</exclude>
- <exclude>application-prod.properties</exclude>
- </excludes>
- </resource>
- <resource>
- <!--指定打包时需要特殊处理的目录文件-->
- <directory>src/main/resources</directory>
- <!--处理文件是时,需要变量替换-->
- <filtering>true</filtering>
- <!--打包时,包含文件-->
- <includes>
- <include>application.properties</include>
- <include>application-${profileActive}.properties</include>
- </includes>
- </resource>
- </resources>
- <plugins>
- <plugin>
- <groupId>org.apache.maven.plugins</groupId>
- <artifactId>maven-compiler-plugin</artifactId>
- <configuration>
- <source>${java.version}</source>
- <target>${java.version}</target>
- </configuration>
- </plugin>
- <!--打jar包-->
- <plugin>
- <groupId>org.apache.maven.plugins</groupId>
- <artifactId>maven-jar-plugin</artifactId>
- <version>2.6</version>
- <configuration>
- <archive>
- <manifest>
- <!--jar入口累-->
- <mainClass>com.jd.bt.gateway.ZuulApplication</mainClass>
- <!-- classpath路径 -->
- <addClasspath>true</addClasspath>
- <classpathPrefix>lib/</classpathPrefix>
- </manifest>
- <manifestEntries>
- <Class-Path>./</Class-Path>
- </manifestEntries>
- </archive>
- <excludes>
- <!--注意从编译结果目录开始算目录结构-->
- <!--<exclude>/*.yml</exclude>-->
- <!--<exclude>/*.properties</exclude>-->
- <!--<exclude>/*.xml</exclude>-->
- <!--<exclude>/*.txt</exclude>-->
- </excludes>
- </configuration>
- </plugin>
- <!--自定义打包-->
- <plugin>
- <artifactId>maven-assembly-plugin</artifactId>
- <configuration>
- <finalName>${artifactId}</finalName>
- <!-- not append assembly id in release file name -->
- <appendAssemblyId>false</appendAssemblyId>
- <descriptors>
- <descriptor>src/main/assembly/depolyment.xml</descriptor>
- </descriptors>
- </configuration>
- <executions>
- <execution>
- <id>dist</id>
- <phase>package</phase>
- <goals>
- <goal>single</goal>
- </goals>
- </execution>
- </executions>
- </plugin>
- </plugins>
- </build>
在resources配置管理boot 文件
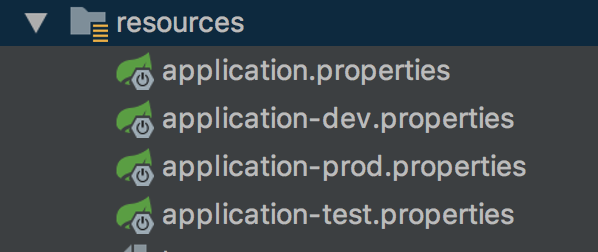
工程中有4个文件:
application.properties, 包含通用配置的文件。文件中有spring.profiles.active=@profileActive@的属性。spring boot的profile是通过spring.profiles.active属性来配置的,这里的profileActive和上面coolpro工程中配置的profileActive属性名要一致。这样,在运行mvn命令时,maven就会帮我们将@profileActive@替换成指定的profile。
application-dev.properties, 当mvn -P dev时, 需要打包这个文件。
application-test.properties, 当mvn -P test时, 需要打包这个文件。
application-prod.properties, 当mvn -P prod时, 需要打包这个文件。
application.properties
- spring.profiles.active=@profileActive@
- server.port=8040
application-dev.properties
- server.port=8050
……
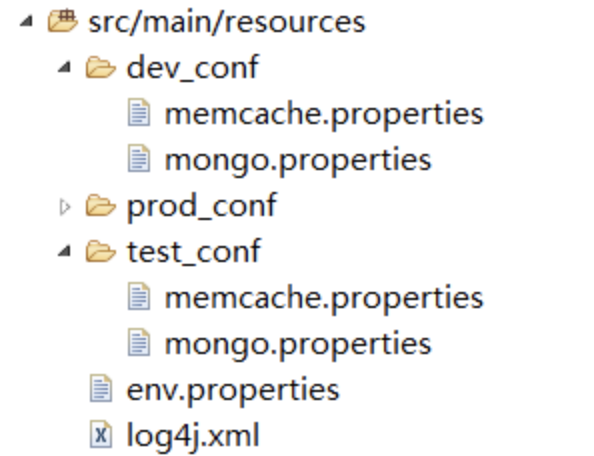
方式2.2、以文件夹方式
在需要打包的子项目pom设置
- <build>
- <resources>
- <!--文件夹-->
- <resource>
- <!--指定打包时需要特殊处理的目录文件-->
- <directory>src/main/resources</directory>
- <!--处理文件是时,需要变量替换-->
- <filtering>true</filtering>
- <!--打包时,排除文件-->
- <excludes>
- <exclude>dev_conf/*</exclude>
- <exclude>test_conf/*</exclude>
- <exclude>prod_conf/*</exclude>
- </excludes>
- </resource>
- <resource>
- <!--指定打包时需要特殊处理的目录文件-->
- <directory>src/main/resources/${profileActive}_conf</directory>
- <!--处理文件是时,需要变量替换-->
- <filtering>true</filtering>
- </resource>
- </resources>
- <plugins>
- <plugin>
- <groupId>org.apache.maven.plugins</groupId>
- <artifactId>maven-compiler-plugin</artifactId>
- <configuration>
- <source>${java.version}</source>
- <target>${java.version}</target>
- </configuration>
- </plugin>
- <!--打jar包-->
- <plugin>
- <groupId>org.apache.maven.plugins</groupId>
- <artifactId>maven-jar-plugin</artifactId>
- <version>2.6</version>
- <configuration>
- <archive>
- <manifest>
- <!--jar入口累-->
- <mainClass>com.jd.bt.gateway.ZuulApplication</mainClass>
- <!-- classpath路径 -->
- <addClasspath>true</addClasspath>
- <classpathPrefix>lib/</classpathPrefix>
- </manifest>
- <manifestEntries>
- <Class-Path>./</Class-Path>
- </manifestEntries>
- </archive>
- <excludes>
- <!--注意从编译结果目录开始算目录结构-->
- <!--<exclude>/*.yml</exclude>-->
- <!--<exclude>/*.properties</exclude>-->
- <!--<exclude>/*.xml</exclude>-->
- <!--<exclude>/*.txt</exclude>-->
- </excludes>
- </configuration>
- </plugin>
- <!--自定义打包-->
- <plugin>
- <artifactId>maven-assembly-plugin</artifactId>
- <configuration>
- <finalName>${artifactId}</finalName>
- <!-- not append assembly id in release file name -->
- <appendAssemblyId>false</appendAssemblyId>
- <descriptors>
- <descriptor>src/main/assembly/depolyment.xml</descriptor>
- </descriptors>
- </configuration>
- <executions>
- <execution>
- <id>dist</id>
- <phase>package</phase>
- <goals>
- <goal>single</goal>
- </goals>
- </execution>
- </executions>
- </plugin>
- </plugins>
- </build>
在resources
log4j.xml:共有文件
env.properties:
- env.profile.active=@profileActive@
注意:使用$符号,不能替换,maven的maven-resources-plugin使用@替换的符号。
3.4、打包即可
- mvn clean package -Dmaven.test.skip=true -P dev -e
004-集成maven和Spring boot的profile功能打包的更多相关文章
- [Spring Boot 系列] 集成maven和Spring boot的profile功能
由于项目的需要, 今天给spirng boot项目添加了profile功能.再网上搜索了一圈,也没有找到满意的参考资料,其实配置并不难,就是没有一个one stop(一站式)讲解的地方,所以有了写这篇 ...
- 集成maven和Spring boot的profile功能
思路:maven支持profile功能,当使用maven profile打包时,可以打包指定目录和指定文件,且可以修改文件中的变量.spring boot也支持profile功能,只要在applica ...
- 集成maven和Spring boot的profile 专题
maven中配置profile节点: <project> .... <profiles> <profile> <!-- 生产环境 --> <id& ...
- [Spring Boot 系列] 集成maven和Spring boot的profile 专题
maven中配置profile节点: <project> .... <profiles> <profile> <!-- 生产环境 --> <id& ...
- 集成maven和Spring boot的profile
如果在配置中勾选了多套配置,则以pom.xml文件中 profiles中 配置 最后一个配置为准. maven中配置profile节点: <project> .... <profi ...
- Spring boot 的profile功能如何实现多环境配置自动切换
通常服务端应用开发需要经过以下几个流程: 开发 -> 测试 -> RC验证 -> 上线 这就涉及到四个不同的环境,开发环境.测试环境.RC环境以及生产环境,为了避免不同环境之间相互干 ...
- 借助Maven入手Spring Boot第一个程序
目前网上有不少Spring Boot的入门文章,都很有帮助,本人最近在深入学习Spring Cloud,在搭建第一个Hello World程序时,感觉对于新手而言,介绍文章怎么详细都不为过,因为其中坑 ...
- Maven 搭建spring boot多模块项目(附源码),亲测可以,感谢原创
原创地址:https://segmentfault.com/a/1190000005020589 我的DEMO码云地址,持续添加新功能: https://gitee.com/itbase/Spring ...
- Myeclipse下使用Maven搭建spring boot项目
开发环境:Myeclipse2017.JDK1.6.Tomcat 8.0.Myeclipse下使用Maven搭建spring boot项目,详细过程如下: 1. New -> Project.. ...
随机推荐
- PHP——修改数据库2-加提示框,加登录页面
登录页面:0127lianxi.php <body> <h1>登陆</h1> <form action="0127lianxi.php" ...
- Spider Studio 新版本 (20131201) - BrowserManager / 节点选择器 / JQueryContext.Focus
2013-12-1版本更新, 包含如下改动: 1. 修复BrowserManager重复初始化的bug; 2. 大幅提高节点选择器性能: 以网页 http://data.sports.sohu.com ...
- selenuim爬虫实战(日lofter.com)
LOFTER是网易公司2011年8月下旬推出的一款轻博客产品. LOFTER专注于为用户提供简约.易用.有品质.重原创的博客工具.原创社区,以及有品质的手机博客应用. LOFTER首次采用独立域名,口 ...
- 24SpringMvc中的重定向和转发-解释return "redirect:/cargo/contractproduct/tocreate.action";
我在做JK项目时发现:我们在增加一个货物时.会先根据提交的Action()进入到一个新增页面 //跳转到新增的页面 @RequestMapping("/cargo/contractprodu ...
- php -- each()、list()
1.each的用法 先看API:array each ( array &$array ) api里是这么描述的:each — 返回数组中当前的键/值对并将数组指针向前移动一步 我们先来看看返回 ...
- IOC和AOP的一些基本概念
IOC和AOP的一些基本概念介绍 IOC 介绍 IOC 一.什么是IOC IoC就是Inversion of Control,控制反转.在Java开发中,IoC意味着将你设计好的类交给系统去控制,而不 ...
- linux下源代码搭建php环境之mysql(一)
如今已经大半夜了,五一劳动节挺无聊的. 折腾一下吧.实在是睡不着.于是乎在电脑上安装个虚拟机,然后呢,在虚拟机上搭建一个php环境. 首先我得安装MYSQL吧. 发现遇到的问题真多. .待我娓娓道来. ...
- Spring_day04--HibernateTemplate介绍_整合其他方式_Spring分模块开发
HibernateTemplate介绍 1 HibernateTemplate对hibernate框架进行封装, 直接调用HibernateTemplate里面的方法实现功能 2 HibernateT ...
- Spring_day04--Spring框架整合hibernate框架
Spring框架整合hibernate框架 1 把hibernate核心配置文件中配置数据库信息,把数据库信息在spring进行配置 2 把hibernate里面的sessionFactory创建交给 ...
- 如何隐藏js
前端好像一直会遇到js容易被查看的问题,针对这种情况,如何隐藏js呢? 突发奇想,想到一个办法,如果说一段js只需要执行一次的话 可以尝试在所有js加载操作完毕后把它去掉.看代码 <!DOCTY ...