vue2.0和better-scroll实现左右联动效果
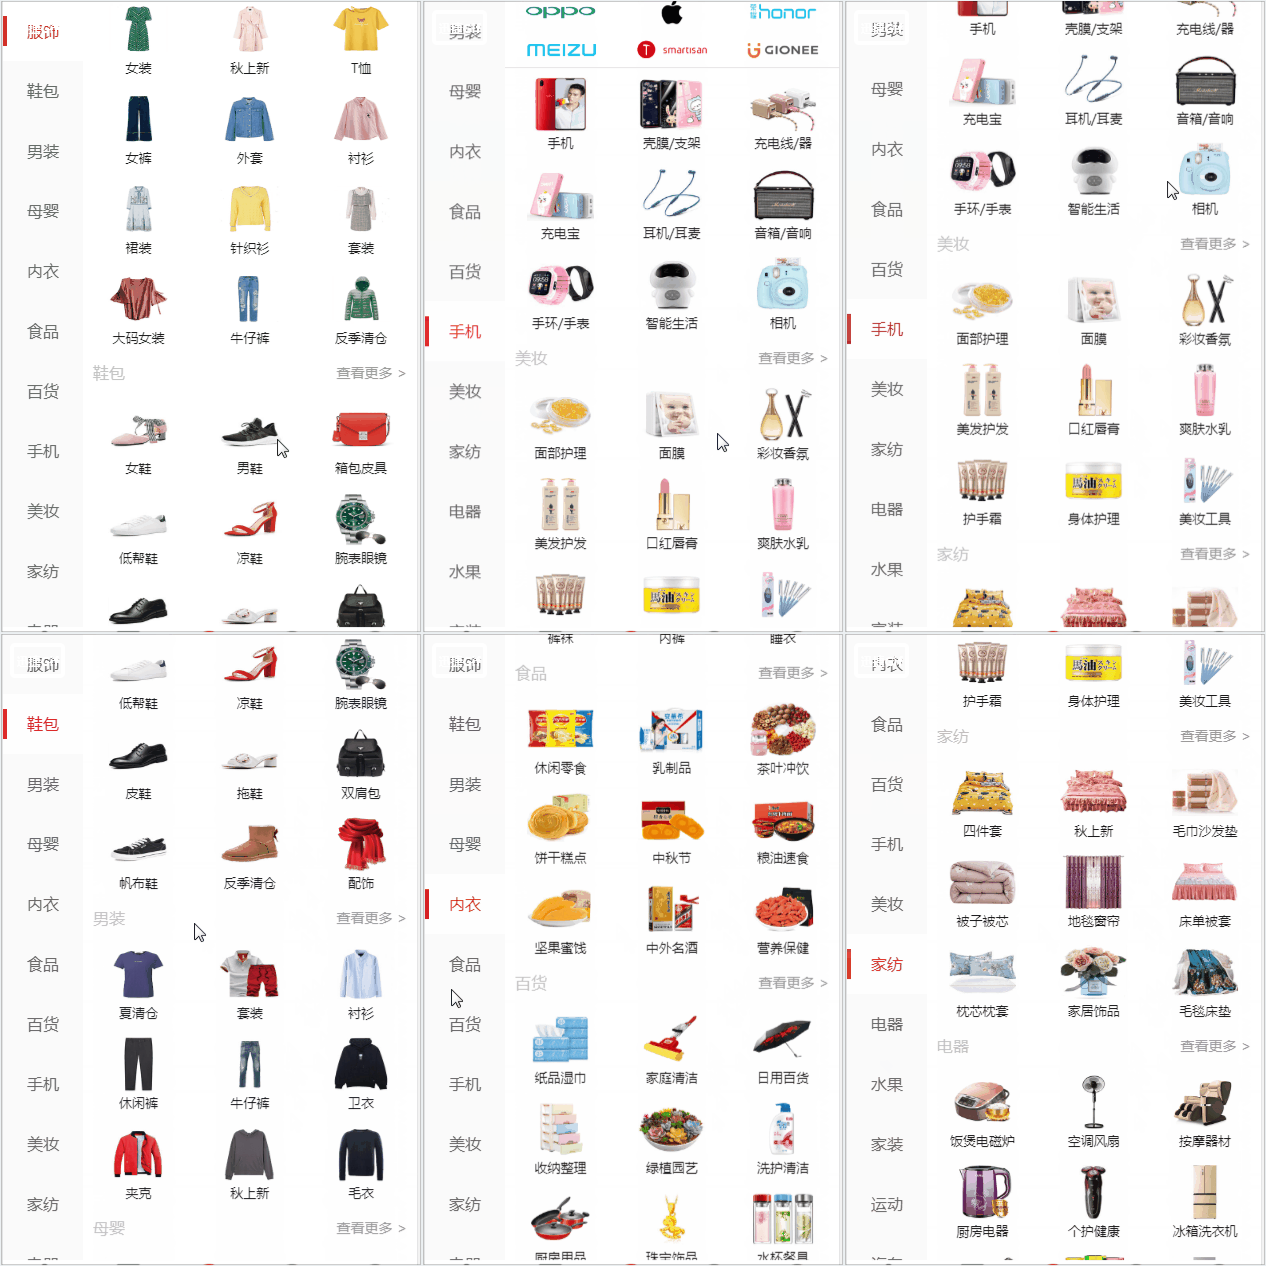
在做移动端商城或者其他页面的时候,经常会遇到左右联动的效果,今天小编vue2.0和better-scroll这个插件一起实现左右联动效果。

实现上面的效果,思路一定很重要,还有需求
1. 左边一级分类和右边二级分类形成联动
2. 当滑动右侧分类列表时, 更新左侧分类选中
3. 点击左侧一级分类项时, 右侧列表滑动到对应位置
在vue脚手架的时候,引入第三方插件better-scroll,如果想了解的话,可以去看看它的中午文档说明,
npm install better-scroll --save直接安装到自己项目当中,并引入
1.页面结构搭建
<div class="search">

    <!-- 搜索导航 -->

    <SearchNav></SearchNav>

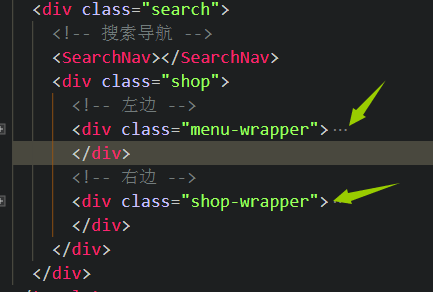
    <div class="shop">

      <!-- 左边 -->

      <div class="menu-wrapper">

        <ul>

          <!-- current -->

          <li

            class="menu-item"

            v-for="(goods,index) in searchgoods"

            :key="index"

            :class="{current: index === currentIndex}"

            @click="clickList(index)"

            ref="menuList"

            >

            <span>{{goods.name}}</span>

          </li>

        </ul>

      </div>

      <!-- 右边 -->

      <div class="shop-wrapper">

        <ul ref="itemList">

          <li class="shops-li" v-for="(goods, index1) in searchgoods" :key="index1">

            <div class="shops-title">

              <h4>{{goods.name}}</h4>

              <a href="">查看更多 > </a>

            </div>

            <ul class="phone-type" v-if="goods.tag === 'phone'">

              <li v-for="(phone,index) in goods.category" :key="index">

                <img :src="phone.icon" alt="">

              </li>

            </ul>

            <ul class="shops-items">

              <li v-for="(item, index2) in goods.items" :key="index2">

                <img :src="item.icon" alt="">

                <span>{{item.title}}</span>

              </li>

            </ul>

          </li>

        </ul>

      </div>

    </div>

  </div>
css样式
<style lang="stylus" rel="stylesheet/stylus" scoped>

  @import "../../common/stylus/mixins.styl"

  .search

    width 100%

    height 100%

    background-color #f5f5f5

    overflow hidden

    .shop

      display flex

      position absolute

      top 60px

      bottom 50px

      width 100%

      overflow hidden

      .menu-wrapper

        background-color #e0e0e0

        width 80px

        flex 0 0 80px

        .menu-item

          width 100%

          height 60px

          background #fafafa

          display flex

          justify-content center

          align-items center

          font-family lighter

          color #666

          position relative

        .current

          color #e02e24

          background #ffffff

        .current::before

          content ''

          background-color #e02e24

          width 4px

          height 30px

          position absolute

          left 0

      .shop-wrapper

        flex 1

        background #fff

        .shops-title

          display flex

          flex-direction row

          padding 0 10px

          height 40px

          align-items center

          justify-content space-between

          color #9999

        a

          text-decoration none

          color #9c9c9c

          font-size 14px

        .shops-items

          display flex

          flex-wrap wrap

          li

            display flex

            flex-direction column

            width 33.3%

            height 90px

            justify-content center

            align-items center

            img

              width 60%

              height 60%

              margin-bottom 5px

            span

              color #151516

              font-size 13px

        .phone-type

          width 100%

          display flex

          flex-direction row

          flex-wrap wrap

          border-bottom-1px (#cccccc)

          li

            width 33.3%

            display flex

            justify-content center

            align-items center

            margin 5px 0

            img

              width 70%

</style>
页面分为左右两个部分,

先实现左右两边滚动效果,我们需要在methods定义一个方法,但是better-scroll的初始化一定要在数据渲染完成后进行
methods:{
    //左边滚动

      this.leftBscroll = new BScroll('.menu-wrapper',{});

      //右边滚动

      this.rightBscroll = new BScroll('.shop-wrapper',{
});
}
我们通过watch监听searchgoods数据是否有,并通过this.$nextTick去调用_initBScroll方法。
searchgoods是数据存储的地方
watch:{

    searchgoods(){

      //监听数据

      this.$nextTick(() =>{

        //左右两边滚动

        this. _initBScroll();
      })

    }

  },
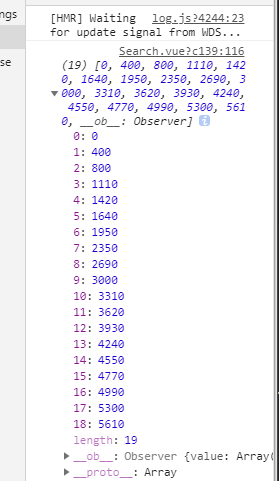
2.计算出每一个li标签的高度,并把它存放在一个数组当中
1.需要在data中定义两个变量
data () {

    return {

      scrollY:0, //右侧列表滑动的y轴坐标
      rightLiTops:[] //所有分类头部位置

    }

  },
2.在methods中定义一个方法,_initRightHeight,这个方法是用于计算每个li标签的高度
 //求出右边列表的高度

    _initRightHeight(){

      let itemArray=[]; //定义一个伪数组

      let top = 0;

      itemArray.push(top)

      //获取右边所有li的礼

      let allList = this.$refs.itemList.getElementsByClassName('shops-li');

      //allList伪数组转化成真数组

      Array.prototype.slice.call(allList).forEach(li => {

        top += li.clientHeight; //获取所有li的每一个高度

        itemArray.push(top)

      });

      this.rightLiTops = itemArray;

      // console.log(this.rightLiTops)

    },
通过上面的方法,已经把所有li标签的高度计算出来

3.监听右边滚动事件
通过better-scroll提供的 on 事件,当右边内容滚动的时候计算出滚动的距离,一定要在滚动的时候触发这个事件_initBScroll这个方法当中去写
//监听右边滚动事件

      this.rightBscroll.on('scroll',(pos) => {

        this.scrollY = Math.abs(pos.y);

        console.log(this.scrollY)

      })
4.动态绑定class样式
1需要给左右的li标签绑定一个:class="{current: index === currentIndex}",通过计算属性,实现这个效果
computed: {

    //动态绑定class类名

    currentIndex(index) {

      const {scrollY,rightLiTops} = this;

      return rightLiTops.findIndex((tops,index )=>{

        this._initLeftScroll(index);  //调用左右联调滚动效果

        return scrollY >= tops && scrollY < rightLiTops[index + 1]

      })

    }

  },
5.点击左边实现滚动和左右滚动联调
5.1实现点击左边实现滚动效果,需要给左边的li标签绑定一个点击事件@click="clickList(index)",通过index来来计算出点击的位置
this.rightLiTops[index]通过index索引得到点击的时候,会得到每一块li标签的高度
通过better-scroll提供的scrollTo来实现具体滚动的位置
clickList(index){

        this.scrollY = this.rightLiTops[index];

        this.rightBscroll.scrollTo(0,-this.scrollY,200,)

    },
5.2当右边内容滚动的时候,滚动一定的程度的时候,希望左边也会随着滚动,
5.2.1通过ref所有所有li标签
//左右联调

    _initLeftScroll(index){

      let menu = this.$refs.menuList;

      let el = menu[index];

      this.leftBscroll.scrollToElement(el,300,0,-300)

    }
以上都是基本上完成了这些需求了
最终代码
<template>

  <div class="search">

    <!-- 搜索导航 -->

    <SearchNav></SearchNav>

    <div class="shop">

      <!-- 左边 -->

      <div class="menu-wrapper">

        <ul>

          <!-- current -->

          <li

            class="menu-item"

            v-for="(goods,index) in searchgoods"

            :key="index"

            :class="{current: index === currentIndex}"

            @click="clickList(index)"

            ref="menuList"

            >

            <span>{{goods.name}}</span>

          </li>

        </ul>

      </div>

      <!-- 右边 -->

      <div class="shop-wrapper">

        <ul ref="itemList">

          <li class="shops-li" v-for="(goods, index1) in searchgoods" :key="index1">

            <div class="shops-title">

              <h4>{{goods.name}}</h4>

              <a href="">查看更多 > </a>

            </div>

            <ul class="phone-type" v-if="goods.tag === 'phone'">

              <li v-for="(phone,index) in goods.category" :key="index">

                <img :src="phone.icon" alt="">

              </li>

            </ul>

            <ul class="shops-items">

              <li v-for="(item, index2) in goods.items" :key="index2">

                <img :src="item.icon" alt="">

                <span>{{item.title}}</span>

              </li>

            </ul>

          </li>

        </ul>

      </div>

    </div>

  </div>

</template>

<script>

import SearchNav from './Children/SearchNav'

import {mapState} from 'vuex'

import BScroll from 'better-scroll'

export default {

  name: 'chat',

  data () {

    return {

      scrollY: 0, //右侧列表滑动的y轴坐标

      rightLiTops:[] //所有分类头部位置

    }

  },

  computed: {

    ...mapState(['searchgoods']),   //列表数据

    //动态绑定class类名

    currentIndex(index) {

      const {scrollY,rightLiTops} = this;

      return rightLiTops.findIndex((tops,index )=>{

        this._initLeftScroll(index);

        return scrollY >= tops && scrollY < rightLiTops[index + 1]

      })

    }

  },

  mounted() {

    this.$store.dispatch('reqSearchGoods')

  },

  components: {

    SearchNav

  },

  watch:{

    searchgoods(){

      //监听数据

      this.$nextTick(() =>{

        //左右两边滚动

        this. _initBScroll();

        //右边列表高度

        this._initRightHeight()

      })

    }

  },

  methods:{

    _initBScroll() {

      //左边滚动

      this.leftBscroll = new BScroll('.menu-wrapper',{});

      //右边滚动

      this.rightBscroll = new BScroll('.shop-wrapper',{

        probeType:3

      });

      //监听右边滚动事件

      this.rightBscroll.on('scroll',(pos) => {

        this.scrollY = Math.abs(pos.y);

        // console.log(this.scrollY)

      })

    },

    //求出右边列表的高度

    _initRightHeight(){

      let itemArray=[]; //定义一个伪数组

      let top = 0;

      itemArray.push(top)

      //获取右边所有li的礼

      let allList = this.$refs.itemList.getElementsByClassName('shops-li');

      //allList伪数组转化成真数组

      Array.prototype.slice.call(allList).forEach(li => {

        top += li.clientHeight; //获取所有li的每一个高度

        itemArray.push(top)

      });

      this.rightLiTops = itemArray;

      // console.log(this.rightLiTops)

    },

    //点击左边实现滚动

    clickList(index){

        this.scrollY = this.rightLiTops[index];

        console.log(this.scrollY)

        this.rightBscroll.scrollTo(0,-this.scrollY,200,)

    },

    //左右联调

    _initLeftScroll(index){

      let menu = this.$refs.menuList;

      let el = menu[index];

      this.leftBscroll.scrollToElement(el,300,0,-300)

    }

  }

}

</script>

<!-- Add "scoped" attribute to limit CSS to this component only -->

<style lang="stylus" rel="stylesheet/stylus" scoped>

  @import "../../common/stylus/mixins.styl"

  .search

    width 100%

    height 100%

    background-color #f5f5f5

    overflow hidden

    .shop

      display flex

      position absolute

      top 60px

      bottom 50px

      width 100%

      overflow hidden

      .menu-wrapper

        background-color #e0e0e0

        width 80px

        flex 0 0 80px

        .menu-item

          width 100%

          height 60px

          background #fafafa

          display flex

          justify-content center

          align-items center

          font-family lighter

          color #666

          position relative

        .current

          color #e02e24

          background #ffffff

        .current::before

          content ''

          background-color #e02e24

          width 4px

          height 30px

          position absolute

          left 0

      .shop-wrapper

        flex 1

        background #fff

        .shops-title

          display flex

          flex-direction row

          padding 0 10px

          height 40px

          align-items center

          justify-content space-between

          color #9999

        a

          text-decoration none

          color #9c9c9c

          font-size 14px

        .shops-items

          display flex

          flex-wrap wrap

          li

            display flex

            flex-direction column

            width 33.3%

            height 90px

            justify-content center

            align-items center

            img

              width 60%

              height 60%

              margin-bottom 5px

            span

              color #151516

              font-size 13px

        .phone-type

          width 100%

          display flex

          flex-direction row

          flex-wrap wrap

          border-bottom-1px (#cccccc)

          li

            width 33.3%

            display flex

            justify-content center

            align-items center

            margin 5px 0

            img

              width 70%

</style>
vue2.0和better-scroll实现左右联动效果的更多相关文章
- vue2.0使用动态组件实现tab切换效果(vue-cli)
<template> <div> <div>#动态组件实现tab切换效果#</div><br><br><br> &l ...
- 项目vue2.0仿外卖APP(六)
goods 商品列表页开发 布局编写 除了商品之外还有购物车,还有个详情页,挺复杂的. 两栏布局:左侧固定宽度,右侧自适应,还是用flex. 因为内容可能会超过手机高度,超过就隐藏.左右两侧的内容是可 ...
- vue2.0+element+node+webpack搭建的一个简单的后台管理界面
闲聊: 今天是六一儿童节哟,小颖祝大家节日快乐哈哈哈.其实这个demo小颖断断续续做了将近两个礼拜了,心塞的,其实这个也没有多难,主要是小颖有点最近事情有点多,所以就把这个一直拖着,今天好不容易做好了 ...
- vue2.0 如何自定义组件(vue组件的封装)
一.前言 之前的博客聊过 vue2.0和react的技术选型:聊过vue的axios封装和vuex使用.今天简单聊聊 vue 组件的封装. vue 的ui框架现在是很多的,但是鉴于移动设备的复杂性,兼 ...
- vue2.0 移动端,下拉刷新,上拉加载更多 插件
本人正在基于 vue2.0 + webpack + es6 搭建前端架构,整理了部分插件,下面这个是下拉更新 上拉更多的,挺好用的,分享给大家. 直接上代码,不懂的多看几遍,下面我换会告诉大家如何使用 ...
- vue2.0做移动端开发用到的相关插件和经验总结1.0
最近在用vue2.0做微信公众号相关的前端开发,经过这次开发实践,现将项目中用到的相关比较实用的插件及遇到的相关问题进行整理,希望和大家共同交流...... cssrem:一个CSS值转REM的VSC ...
- 【饿了么】—— Vue2.0高仿饿了么核心模块&移动端Web App项目爬坑(三)
前言:接着上一篇项目总结,这一篇是学习过程记录的最后一篇,这里会梳理:评论组件.商家组件.优化.打包.相关资料链接.项目github地址:https://github.com/66Web/ljq_el ...
- vue2.0 移动端,下拉刷新,上拉加载更多插件,修改版
在[实现丰盛]的插件基础修改[vue2.0 移动端,下拉刷新,上拉加载更多 插件], 1.修改加载到尾页面,返回顶部刷新数据,无法继续加重下一页 2.修改加载完成文字提示 原文链接:http://ww ...
- 使用vue2.0 vue-router vuex 模拟ios7操作
其实你也可以,甚至做得更好... 首先看一下效果:用vue2.0实现SPA:模拟ios7操作 与 通讯录实现 github地址是:https://github.com/QRL909109/ios7 如 ...
随机推荐
- 视图,sql注入问题,事物,存储过程
视图:本质是一张虚拟的表数据来自select语句用途是保障原表安全 功能1:隐藏部分数据,开放指定数据功能2:因为视图可以将查询结果保存的特性,我们可以用视图来达到减少书写sql语句的功能 例如:se ...
- (转)MYSQL远程登录权限设置
转自:http://blog.csdn.net/zhengnz/article/details/6308773 Mysql默认关闭远程登录权限,如下操作允许用户在任意地点登录: 1. 进入mysql, ...
- uint8_t / uint16_t / uint32_t /uint64_t
这些数据类型是 C99 中定义的,它就是一个结构的标注,可理解为type/typedef的缩写,表示通过typedef定义.它们只是使用typedef给类型起的别名 #ifndef _UINT8_T ...
- JSP动作元素<jsp:include>和<jsp:param>的搭配使用
最近开发项目中广告头的优化:引入了<jsp:include page="XX.jsp"></jsp:include> 当<jsp:include> ...
- 《mysql必知必会》学习_第12章_20180801_欢
第12章:汇总数据 P76 avg()函数求平均值 select avg(prod_price) as avg_price from products; #计算prod_price的平均值,并且命名为 ...
- 用Html创建简历
用最基本的html实现简历的创建 代码 <!doctype html> <html> <head><meta charset="utf-8" ...
- python使用httplib2访问REST服务的例子
首先你需要安装httplib2,这个可以在github上找到: 然后你需要获得一个http连接的对象: con = httplib2.Http() 然后你需要发起连接: (6)resp, (5)c ...
- Windows核心编程:第8章 用户模式下的线程同步
Github https://github.com/gongluck/Windows-Core-Program.git //第8章 用户模式下的线程同步.cpp: 定义应用程序的入口点. // #in ...
- [翻译]第二天 - Visual Studio 中的 .NET Core 模版一览
原文: http://michaelcrump.net/part2-aspnetcore/ 免责声明:我不是 .NET Core 开发团队的一员,并且使用的是公开.可用的工具. 简介 该系列文章的完整 ...
- DataTable 快速导入数据库——百万条数据只需几秒
public void InsertTable(DataTable dt, string TabelName, DataColumnCollection dtColum) { string str = ...
