Shell习题100例(2)
找文件差异
grep -f 选项可以匹配到文件a在文件b中所有相关的行(取a中有b中有的)
[root@centos-04 tmp]# vim b.txt

vvvv

root

[root@centos-04 tmp]# grep -f b.txt /etc/passwd

root:x:0:0:root:/root:/bin/bash

operator:x:11:0:operator:/root:/sbin/nologin

dockerroot:x:994:991:Docker User:/var/lib/docker:/sbin/nologin

[root@centos-04 tmp]#
取passwd中有b文件中没有的
[root@centos-04 tmp]# grep -vf b.txt /etc/passwd
[root@centos-04 tmp]# vim 61.sh

#!/bin/bash

#这个脚本用来比较文件差异

#作者:SYJ

#日期:2019-03-13

cat a.txt|while read line

do

        if ! grep -q "$line" b.txt

        then

                echo $line

        fi

done > c.txt

wc -l c.txt

[root@centos-04 tmp]# sh 61.sh

3 c.txt

[root@centos-04 tmp]# cat c.txt

aaa

1111

2222

[root@centos-04 tmp]#
杀进程

[root@centos-04 tmp]# ps -u $USER|awk '$NF ~ /kworker/ {print $1}' |xargs kill
[root@centos-04 tmp]# vim 62.sh

#!/bin/bash

#这个脚本用来杀进程

#作者:SYJ

#日期:2019-03-13

ps -u $USER|awk '$NF ~ /kworker/ {print $1}' |xargs kill
并发备份数据库
split切割文件,默认文件名是aa、ab、ac这种,可以自定义名,我们下面例子用test为文件名前缀
[root@centos-04 tmp]# cat 1.txt

1

2

3

4

5

6

[root@centos-04 tmp]# split -l 2 1.txt

[root@centos-04 tmp]# wc -l xa*

 2 xaa

 2 xab

 2 xac

 6 总用量

[root@centos-04 tmp]#
[root@centos-04 tmp]# cat xaa

1

2

[root@centos-04 tmp]# cat xab

3

4

[root@centos-04 tmp]# cat xac

5

6

[root@centos-04 tmp]#
[root@centos-04 tmp]# split -l 2 1.txt test

[root@centos-04 tmp]# wc -l testa*

 2 testaa

 2 testab

 2 testac

 6 总用量

[root@centos-04 tmp]#
scale运算结果保留几位小数
[root@centos-04 tmp]# echo "scale=3;1000/265"|bc -l

3.773
wait命令会等后台运行的进程执行完再执行后面的命令
[root@centos-04 tmp]# sleep 10 &

[1] 38044

[root@centos-04 tmp]# wait

[1]+  完成                  sleep 10

[root@centos-04 tmp]#
jobs命令查看后台进程
[root@centos-04 tmp]# jobs

[root@centos-04 tmp]#
[root@centos-04 tmp]# sleep 10 &

[1] 38136

[root@centos-04 tmp]# jobs

[1]+  运行中               sleep 10 &

[root@centos-04 tmp]#
[root@centos-04 tmp]# vim 63.sh

#!/bin/bash

#这个脚本用来并发备份数据库

#作者:SYJ

#日期:2019-03-14

N=2

mysql -uroot -p -h10.21.95.237 big -e "show tables"|sed '1d' > /tmp/table.txt

n=`wc -l /tmp/table.txt|awk '{print $1}'`

div()

{

        n=`echo "scale=1;$1/$2"|bc`

        n1=`echo "scale=1;$n+0.5"|bc`

        echo $n1|cut -d. -f1

}

n1=`div $n $N`

split -l $n1 /tmp/table.txt

myd(){

        for t in `cat $1`

        do

                mysqldump -uroot -p -h10.21.95.237 big $t > $t.sql

        done

}

for f in xaa xab

do

        myd $f &

done

wait

tar zcf mydb.tar.gz *.sql

rm -f $.sql
[root@centos-04 tmp]# sh 63.sh
监控CDN节点

cdn其实就是一个代理服务器,只不过这个代理服务器有缓存功能。用户访问的时候加入访问的是图片,用户直接可以在最近的cdn服务器上访问图片。
[root@centos-04 tmp]# vim 64.sh

#这个脚本用来监控CDN节点

#作者:SYJ

#!/bin/bash

#这个脚本用来监控CDN节点

#作者:SYJ

#日期:2019-04-08

s_ip=88.88.88.88

url=www.syj.com/index.php

ipf=/data/ip.list

curl -x$s_ip:80 $url 2>/dev/null >/tmp/source.txt

for ip in `cat $ipf`

do

        curl -x$ip:80 $url 2>/dev/null >/tmp/$ip.txt

        diff /tmp/source.txt /tmp/$ip.txt > /tmp/$ip.diff

        n=`wc -l /tmp/$ip.diff|awk '{print $1}'`

        if [ $n -gt 0 ]

        then

                echo "节点$ip有异常。"

        fi

done
破解字符串
[root@centos-04 tmp]# vim 65.sh

#!/bin/bash

#这个脚本用来破解字符串

#作者:SYJ

#日期:2019-04-08

for i in `seq 0 32767`

do

        m=`echo $i|md5sum |cut -c 1-8 `

        echo $i $m

done > /tmp/md5.txt

cat > c.txt <<EOF

21029299

00205d1c

EOF

grep -f c.txt /tmp/md5.txt
[root@centos-04 tmp]# sh 65.sh

1346 00205d1c

25667 21029299
判断cpu厂商

[root@centos-04 tmp]# cat /proc/cpuinfo

processor       : 0

vendor_id       : GenuineIntel

cpu family      : 6

model           : 58

model name      : Intel(R) Core(TM) i3-3220 CPU @ 3.30GHz

stepping        : 9

microcode       : 0x16

cpu MHz         : 3292.569

cache size      : 3072 KB

physical id     : 0

siblings        : 1

core id         : 0

cpu cores       : 1

apicid          : 0

initial apicid  : 0

fpu             : yes

fpu_exception   : yes

cpuid level     : 13

wp              : yes

flags           : fpu vme de pse tsc msr pae mce cx8 apic sep mtrr pge mca cmov pat pse36 clflush dts mmx fxsr sse sse2 ss syscall nx rdtscp lm constant_tsc arch_perfmon pebs bts nopl
 xtopology tsc_reliable nonstop_tsc aperfmperf eagerfpu pni pclmulqdq ssse3 cx16 pcid sse4_1 sse4_2 x2apic popcnt tsc_deadline_timer xsave avx f16c hypervisor lahf_lm epb fsgsbase
tsc_adjust smep dtherm arat pln pts

bogomips        : 6585.13

clflush size    : 64

cache_alignment : 64

address sizes   : 42 bits physical, 48 bits virtual

power management:

[root@centos-04 tmp]#
[root@centos-04 tmp]# grep '^vendor_id' /proc/cpuinfo |head -1

vendor_id       : GenuineIntel

[root@centos-04 tmp]#
[root@centos-04 tmp]# grep '^vendor_id' /proc/cpuinfo |head -1 |awk -F ': ' '{print $2}'

GenuineIntel

[root@centos-04 tmp]#
同步时间
[root@centos-04 tmp]# ntpdate time.windows.com

 8 Apr 15:59:35 ntpdate[8808]: step time server 13.65.245.138 offset -28350.105140 sec

[root@centos-04 tmp]# date

2019年 04月 08日 星期一 15:59:41 CST

[root@centos-04 tmp]#
[root@centos-04 tmp]# vim 66.sh

#company[GenuineIntel]='CPU厂商是Intel'

#for name in  GenuineIntel AMD

#do

#       if [ $name == $cpu ]

#       then

#               echo ${company[$name]}

#       else

#               echo "CPU厂商是非主流厂商"

#       fi

#done

#if [ $cpu == "AMD" ]

#then

#       echo "CPU厂商是AMD"

#elif [ $cpu == "GenuineIntel" ]

#then

#       echo "CPU厂商是Intel"

#else

#       echo "CPU厂商是非主流厂商"

#fi

case $cpu in

        AMD)

                echo "CPU厂商是AMD"

        ;;

        GenuineIntel)

                echo "CPU厂商是Intel"

        ;;

        *)

                echo "CPU厂商是非主流厂商"

        ;;

esac
[root@centos-04 tmp]# sh 66.sh

CPU厂商是Intel

[root@centos-04 tmp]#
监控CPU使用率

用空白字符和百分号分割字符
[root@centos-04 tmp]# top -bn1 |grep 'Cpu(s):'|sed 's/^%//'|awk -F ' +|%' '{print $8}'

93.8
[root@centos-04 tmp]# vim 67.sh

#!/bin/bash

#这个脚本用来计算CPU使用率

#作者:SYJ

#日期:2019-04-08

while :

do

        cpu_i=`top -bn1 |grep 'Cpu(s):'|sed 's/^%//'|awk -F ' +|%' '{print $8}'`

        cpu_u=`echo 100-$cpu_i|bc`

        if [ $cpu_u gt 90 ]

        then

                python mail.py xxx@xxx.com "CPU使用率偏高" "`top -bn1`"

        fi

        sleep 10

done
打印子进程

查看父进程ID是7046的子进程
[root@centos-04 tmp]# ps -elf |awk '$5==7046 {print $4}'

7052

7573

[root@centos-04 tmp]#
[root@centos-04 tmp]# vim 68.sh

#!/bin/bash

#这个脚本用来打印子进程

#作者:SYJ

#日期:2019-04-08

ps -elf > /tmp/pid.txt

read -p "Please input a pid: " p

if [ -z "$p" ]

then

        echo "Please input a pid"

        exit

fi

if ! grep -qw "$p" /tmp/pid.txt

then

        echo "你输入的pid不存在"

        exit

fi

get_cpid()

{

        p1=$1

        ps -elf |awk -v p2=$p1 '$5==p2 {print $4}' > /tmp/$p1.txt

        n=`wc -l /tmp/$p1.txt|awk '{print $1}'`

        if [ $n -eq 0 ]

        then

                echo "进程$1下没有子进程"

        else

                echo "进程$1下的子进程是:"

                cat /tmp/$p1.txt

        fi

}

get_cpid $p

for c_p in `cat /tmp/$p.txt`

do

        get_cpid $c_p

done
[root@centos-04 tmp]# sh 68.sh

Please input a pid: 1

进程1下的子进程是:

3161

3184

3191

6542

6564

6565

6567

6568

6569

6598

6606

6610

6835

6836

6838

6969

7046

7772

进程3161下没有子进程

进程3184下没有子进程

进程3191下没有子进程

进程6542下没有子进程

进程6564下没有子进程

进程6565下没有子进程

进程6567下没有子进程

进程6568下没有子进程

进程6569下的子进程是:

6652

进程6598下没有子进程

进程6606下没有子进程

进程6610下没有子进程

进程6835下没有子进程

进程6836下的子进程是:

7189

进程6838下没有子进程

进程6969下的子进程是:

6970

6971

进程7046下的子进程是:

7052

7573

进程7772下没有子进程

[root@centos-04 tmp]#
给lamp环境增加项目
[root@centos-04 tmp]# vim 69.sh

#!/bin/bash

#本脚本的功能是在LAMP环境中增加站点,包括apache配置、FTP增加用户、Mysql增加库和用户

#作者:SYJ

#日期:2019-04-09

#网站目录

webdir=/data/wwwroot

#ftp的虚拟用户配置文件目录

ftpudir=/etc/vsftpd/vuuser

#ftp虚拟用户密码文件

ftpuserfile=/root/login

#mysql命令行登录root

mysqlc="/usr/local/mysql/bin/mysql -uroot -proot"

#apache虚拟主机配置文件

httpd_config_f="/usr/local/apache2/conf/extra/httpd-vhosts.conf"

#定义增加Mysql库和用户的函数

add_mysql_user()

{

        #生成随机密码

        mysql_p=`mkpasswd -s 0 -l 12`

        #将密码保存到临时文件里,这里的$pro为用户自定义的项目名字

        echo "$pro $mysql_p" >/tmp/$pro.txt

        #这里使用嵌入文档的形式(需顶格),将创建用户并授权的命令传递给mysql

$mysqlc <<EOF

create database $pro;

grant all on $pro.* to "$pro"@'127.0.0.1' identified by "$mysql_p";

#下面这个EOF必须要顶格

EOF

}

#定义增加FTP用户的函数

add_ftp_user()

{

        ftp_P=`mkpasswd -s 0 -l 12`

        echo "$pro" >> $ftpuserfile

        echo "$ftp_p" >> $ftpuserfile

        #将用户、密码文件转换为密码db文件

        db_load -T -t hash -f $ftpuserfile /etc/vsftpd/vsftpd_login.db

        cd $ftpudir

        #这里的aaa是一个文件,是之前的一个项目,可以作为配置模板

        cp aaa $pro

        #把里面的aaa改为新的项目名字

        sed -i "s/aaa/$pro/" $pro

        #重启vsftpd服务

        /etc/init.d/vsftpd restart

}

#定义增加apache虚拟主机的函数

config_httpd()

{

        #增加网站根目录,和域名保持一致,这里的$dom为用户自定义的域名

        mkdir $webdir/$dom

        #将网站根目录属主和属组设置为ftp用户

        chown vsftpd:vsftpd $webdir/$dom

        #用嵌入文档(需顶格),把虚拟主机配置写入到配置文件里

cat >> $httpd_config_f <<EOF

<VirtualHost *.80>

        DocumentRoot $webdir/$dom

        ServerName $dom

        <Directory $webdir/$dom>

                AllowOverride none

                Require all granted

        </Directory>

EOF

        #重载apache服务

        /usr/local/apache2/bin/apachectl graceful

}

read -p "input the project name: " pro

read -p "input the domain: " dom

add_mysql_user

add_ftp_user

config_httpd
简易计算器

[root@centos-04 tmp]# vim 70.sh

#!/bin/bash

#这个脚本用来实现简易计算器

#作者:SYJ

#日期:2019-04-09

if [ $# -ne 3 ]

then

        echo "你输出的参数个数不对,应该给3个参数"

        exit

fi

if_number()

{

        n1=`echo $1|sed 's/[0-9.]//g'`

        if [ -n "$n1" ]

        then

                echo "$1不是数字"

                exit

        fi

        if echo $1|grep -q '^\.'

        then

                echo "数字$1不合法"

                exit

        fi

}

if_number $1

if_number $3

case $2 in

        +)

                echo "$1+$3"|bc

                ;;

        -)

                echo "$1-$3"|bc

                ;;

        \*)

                echo "$1*$3"|bc

                ;;

        /)

                echo "scale=2;$1/$3"|bc

                ;;

        *)

                echo "你给出的格式不对,第二个参数只能是+,-,*,/"

                ;;

esac

[root@centos-04 tmp]# sh 70.sh 1 2 3

你给出的格式不对,第二个参数只能是+,-,*,/

[root@centos-04 tmp]# sh 70.sh 1 + 3

4

[root@centos-04 tmp]# sh 70.sh 1 - 3

-2

[root@centos-04 tmp]# sh 70.sh 1 '*' 3

3

[root@centos-04 tmp]# sh 70.sh 1 \* 3

3

[root@centos-04 tmp]# sh 70.sh 1 / 3

.33

[root@centos-04 tmp]#
判断文件并计算单词
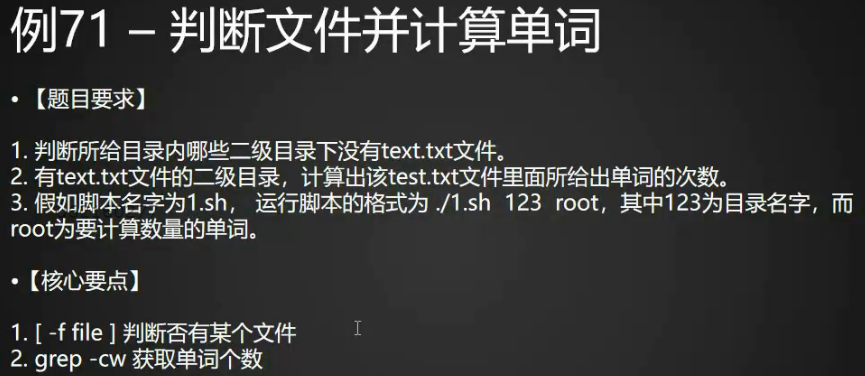
[root@centos-04 tmp]# vim 71.sh

#!/bin/bash

#这个脚本用来判断文件是否存在并计算单词个数

#作者:SYJ

#日期2019-04-09

if [ $# -ne 2 ]

then

        echo "请提供两个参数,第一个参数是目录名字,第二个参数是单词"

        exit

fi

cd $1

for f in `ls .`

do

        if [ -d $f ]

        then

                if [ -f $f/test.txt ]

                then

                        n=`grep -cw "$2" $f/test.txt`

                        echo "$1/$f目录下面有test.txt, 该test.txt里面有$n个$2"

                fi

        fi

done
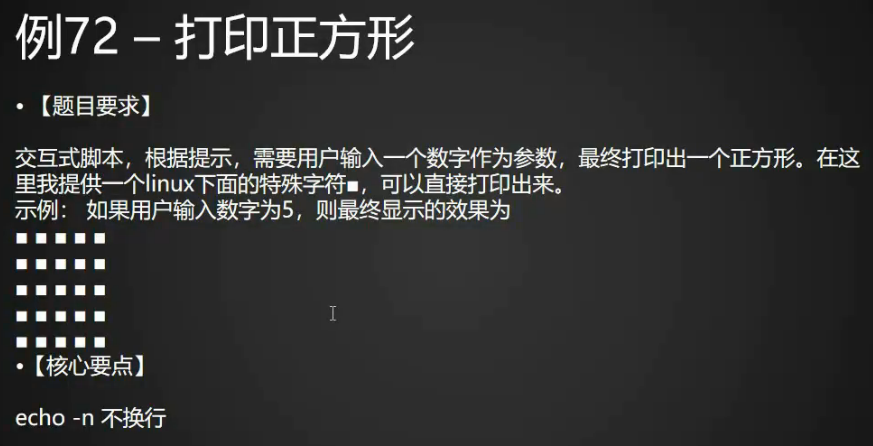
打印正方形
[root@centos-04 tmp]# for i in `seq 1 3`; do for j in `seq 1 3`; do echo -n "口 "; done; echo ; done

口 口 口

口 口 口

口 口 口

[root@centos-04 tmp]#
[root@centos-04 tmp]# vim 72.sh

#!/bin/bash

#这个脚本用来打印正方形

#作者:SYJ

#日期:2019-04-09

while :

do

        read -p "Please input a number: " n

        n1=`echo $n|sed 's/[0-9]//g'`

        if [ -n "$n1" ]

        then

                echo "$n is not a number"

                continue

        else

                break

        fi

done

for i in `seq 1 $n`

do

        for j in `seq 1 $n`

        do

                echo -n "口 "

        done

        echo

done

[root@centos-04 tmp]# sh 72.sh

Please input a number: 4

口 口 口 口

口 口 口 口

口 口 口 口

口 口 口 口

[root@centos-04 tmp]# sh 72.sh

Please input a number: 5

口 口 口 口 口

口 口 口 口 口

口 口 口 口 口

口 口 口 口 口

口 口 口 口 口

[root@centos-04 tmp]#
问候用户
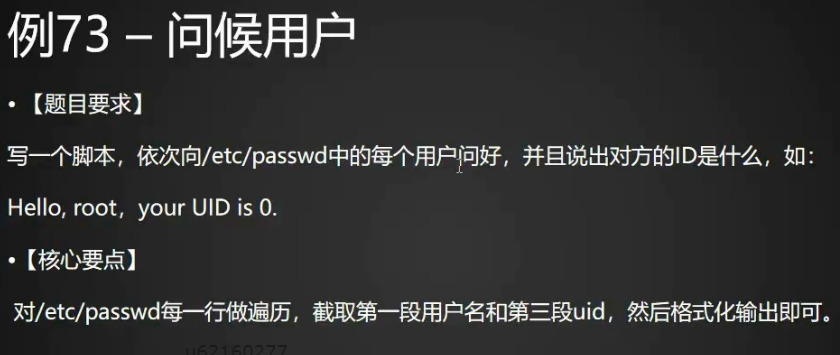
[root@centos-04 tmp]# awk -F ':' '{print "Hello, "$1", your uid is "$3"."}' /etc/passwd

Hello, root, your uid is 0.

Hello, bin, your uid is 1.

Hello, daemon, your uid is 2.

Hello, adm, your uid is 3.

Hello, lp, your uid is 4.

Hello, sync, your uid is 5.
[root@centos-04 tmp]# vim 73.sh

#!/bin/bash

#这个脚本用来问候用户

#作者:SYJ

#日期:2019-04-09

cat /etc/passwd |while read line

do

        username=`echo $line|awk -F ':' '{print $1}'`

        uid=`echo $line|awk -F ':' '{print $3}'`

        echo "Hello,$username,your uid is $uid"

done
[root@centos-04 tmp]# sh 73.sh

Hello,root,your uid is 0

Hello,bin,your uid is 1

Hello,daemon,your uid is 2

Hello,adm,your uid is 3
格式化输出xml

[root@centos-04 tmp]# vim 74.sh

#!/bin/bash

#这个脚本用来格式化xml文件

#作者:SYJ

#日期:2019-04-09

sed '/<!--.*-->/d' test.xml > test2.xml #注释在一行的情况

egrep -n '<!--|\-\->' test2.xml |awk -F ':' '{print $1}' > /tmp/line_number1.txt #注释在两行的情况计算行号

n=`wc -l /tmp/line_number1.txt|awk '{print $1}'`

n1=$[$n/2]

for i in `seq 1 $n1`

do

        j=$[$i*2]

        k=$[$j-1]

        x=`sed -n "$k"p /tmp/line_number1.txt`

        y=`sed -n "$j"p /tmp/line_number1.txt`

        sed -i "$x,$y"d test2.xml

done

grep -n 'artifactItem>' test2.xml |awk '{print $1}' |sed 's/://' > /tmp/line_number2.txt

n2=`wc -l /tmp/line_number2.txt|awk '{print $1}'`

get_value()

{

        sed -n "$1,$2"p test2.xml|awk -F '<' '{print $2}' |awk -F '>' '{print $1,$2}' > /tmp/value.txt

        cat /tmp/value.txt|while read line

        do

                x=`echo $line|awk '{print $1}'`

                y=`echo $line|awk '{print $2}'`

                echo artifactItem:$x:$y

        done

}

n3=$[$n2/2]

for j in `seq 1 $n3`

do

        m1=$[$j*2-1]

        m2=$[$j*2]

        nu1=`sed -n "$m1"p /tmp/line_number2.txt`

        nu2=`sed -n "$m2"p /tmp/line_number2.txt`

        nu3=$[$nu1+1]

        nu4=$[$nu2-1]

        get_value $nu3 $nu4

done
小函数

[root@centos-04 tmp]# vim 75.sh

#!/bin/bash

#这个脚本用来写一个小函数

#作者:SYJ

#日期:2019-04-09

f_judge()

{

        if [ -d /home/log ]

        then

                #find /home -name "tmp*" |xargs -i mv {} /home/log/

                find /home -name "tmp*" -exec mv {} /home/log/ \;

        else

                mkdir /home/log

                exit

        fi

}

f_judge
批量杀进程
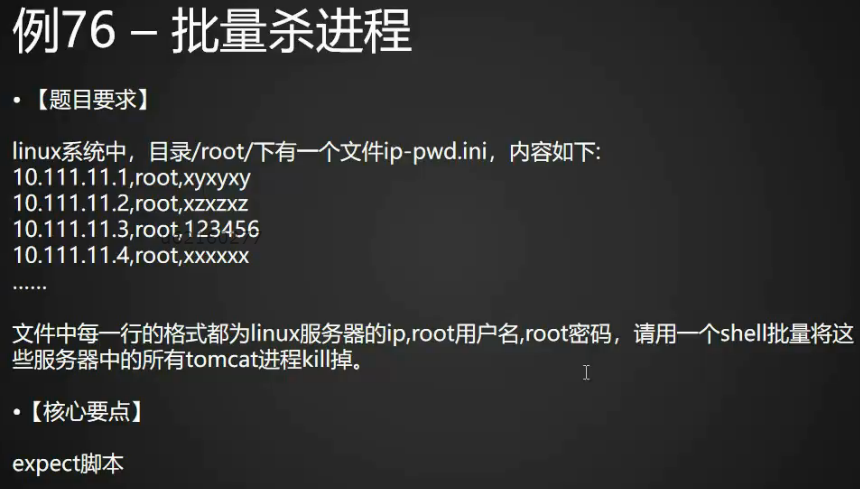
殺死tomcat進程
[root@centos-04 tmp]# ps aux |grep tomcat |awk '{print $2}' |xargs kill
[root@centos-04 tmp]# vim 76.sh

#!/bin/bash

#这个脚本用来批量杀tomcat进程

#作者:SYJ

#日期:2019-04-09

cat > kill_tomcat.expect <<EOF

#!/usr/bin/expect

set passwd [lindex \$argv 0]

set host [lindex \$argv 1]

spawn ssh root@\$host

expect {

        "yes/no" { send "yes\r"; exp_continue}

        "password:" { send "\$passwd\r" }

}

expect "]*"

send "killall java\r"

expect "]*"

send "exit\r"

EOF

chmod a+x kill_tomcat.expect

cat ip-pwd.ini|while read line

do

        ip=`echo $line |awk -F ',' '{print $1}'`

        pw=`echo $line |awk -F ',' '{print $3}'`

        ./kill_tomcat.expect $pw $ip

done
查找老日志打包

[root@centos-04 tmp]# vim 77.sh

#!/bin/bash

#这个脚本用来查找老日志打包

#作者:SYJ

#日期:2019-04-09

cd /data/log

fin . -type f -name "*.log" -mtime +3 > /tmp/old_log

d=`date +%F`

tar czf $d.tar.gz  `cat /tmp/old_log|xargs`

rsync -a $d.tar.gz 192.168.1.2:/data/log/

cat /tmp/old_log|xargs rm
处理文本

[root@centos-04 tmp]# vim 78.sh

#!/bin/bash

#这个脚本用来处理文本

#作者:SYJ

#日期:2019-04-09

for w in `awk -F ':' '{print $1}' 3.txt |sort |uniq`

do

        echo "[$w]"

        awk -v w2=$w -F ':' '$1==W2 {print $2}' 3.txt

done
批量删除日志
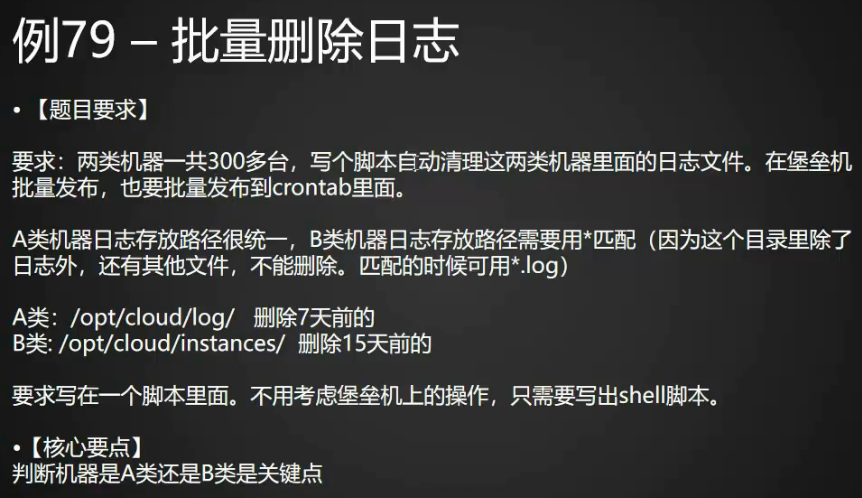
[root@centos-04 tmp]# vim 79.sh

#!/bin/bash

#这个脚本用来删除老日志

#作者:SYJ

#日期:2019-04-09

dir1=/opt/cloud/log/

dir2=/opt/cloud/instance/

if [ -d $dir1 ]

then

        find $dir1 -type f -mtime +7 |xargs rm

elif [ -d $dir2 ]

then

        find $dir2 -name "*.log" -type f -mtime +15 |xargs rm

fi
房贷计算器

#!/bin/bash

#这个脚本用来实现简易的房贷计算器

#作者:猿课-阿铭 www.apelearn.com

#日期:2018-12-12

read -p "请输入贷款总额(单位:万元):" sum_w

read -p "请输入贷款年利率(如年利率为6.5%,直接输入6.5):" y_r

read -p "请输入贷款年限(单位:年):" y_n

echo "贷款计算方式:"

echo "1)等额本金计算法"

echo "2)等额本息计算法"

read -p "请选择贷款方式(1|2)" type

#贷款总额

sum=`echo "scale=2;$sum_w*10000 " | bc -l`

#年利率

y_r2=`echo "scale=6;$y_r/100 " | bc -l`

#月利率

m_r=`echo "scale=6;$y_r2/12 " | bc -l`

#期数

count=$[$y_n*12]

echo "期次 本月还款额 本月利息 未还款额"

jin()

{

    #月还款本金m_jin=贷款总额sum/期数count

    m_jin=`echo "scale=2;($sum/$count)/1 " | bc -l`

    #定义未还本金r_jin(第一期应该是贷款总额)

    r_jin=$sum

    for((i=1;i<=$count;i++))

    do

        #本月利息m_xi=剩余本金*月利率

        m_xi=`echo "scale=2;( $r_jin*$m_r)/1"|bc -l`

        #本月还款m_jinxi=月还本金m_jin+本月利息m_xi

        m_jinxi=`echo "scale=2;( $m_jin+$m_xi)/1"|bc -l`

        #已还款本金jin=月还本金m_jin*期数i

        jin=`echo "scale=2;( $m_jin*$i)/1"|bc -l`

        #剩余本金r_jin=贷款总额sum-已还本金jin

        r_jin=`echo "scale=2;( $sum-$jin)/1"|bc -l`

        if [ $i -eq $count ]

        then

            #最后一月的还款额应该是每月还款本金+本月利息+剩余本金

            m_jinxi=`echo "scale=2;( $m_jin+$r_jin+$m_xi)/1"|bc -l`

            #最后一月的剩余本金应该是0

            r_jin=0

        fi

        echo "$i  $m_jinxi  $m_xi  $r_jin"

     done

}

xi()

{

    #每期还款m_jinxi=(贷款总额sum*月利率m_r*((1+月利率m_r)^期数count))/(((1+月利率m_r)^期数count)-1)

    m_jinxi=`echo "scale=2;(($sum*$m_r*((1+$m_r)^$count))/(((1+$m_r)^$count)-1))/1 " | bc -l`

    #定义未还本金r_jin(第一期应该是贷款总额)

    r_jin=$sum

    for((i=1;i<=$count;i++))

    do

        #本期利息m_xi=剩余本金r_jin*月利率m_r

        m_xi=`echo "scale=2;( $r_jin*$m_r)/1"|bc -l`

        #本期本金m_jin=本期本息m_jinxi-本期利息m_xi

        m_jin=`echo "scale=2;($m_jinxi-$m_xi)/1 " | bc -l`

        #未还本金r_jin=上期未还本金r_jin-本期应还本金m_jin

        r_jin=`echo "scale=2;($r_jin-$m_jin)/1 " | bc -l`

        if [ $i -eq $count ]

        then

            #最后一月本息m_jinxi=本期本金m_jin+未还本金r_jin

            m_jinxi=`echo "scale=2;($m_jin+$r_jin)/1 " | bc -l`

            #最后一月的剩余本金应该是0

            r_jin="0.00"

        fi

        echo "$i $m_jinxi $m_xi $r_jin"

    done

}

case $type in

    1)

        jin

        ;;

    2)

	xi

        ;;

    *)

	exit 1

        ;;

esac
监控磁盘
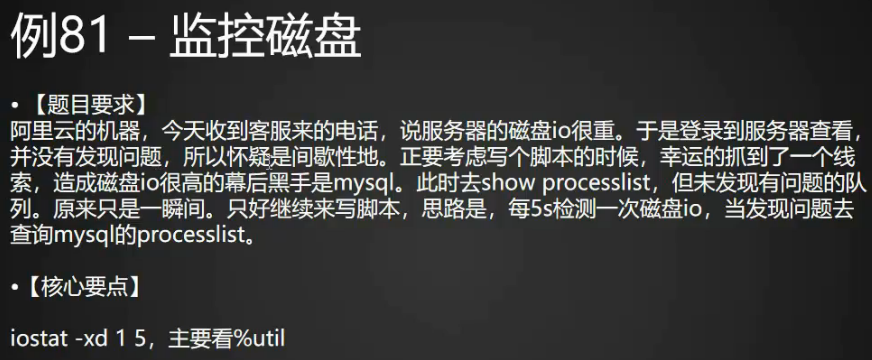
[root@centos-04 tmp]# vim 81.sh

#!/bin/bash

#这个脚本用来监控磁盘IO

#作者:SYJ

#日期:2019-04-10

if ! while iostat &>/dev/null

then

        yum install -y sysstat

fi

while :

do

        t=`date +%T`

        iostat -xd 1 5 |grep '^sda' > /tmp/io.log

        sum=`awk '{sum=sum+$NF} END {print sum}' /tmp/io.log`

        a=`echo "scale=2;$sum/5" |bc`

        b=`echo $a|cut -d . -f 1`

        if [ $b -gt 90 ]

        then

                mysql -uroot -pxxx -e "show processlist" > mysql_$t.log

        fi

        sleep 1

done
查看tomcat日志
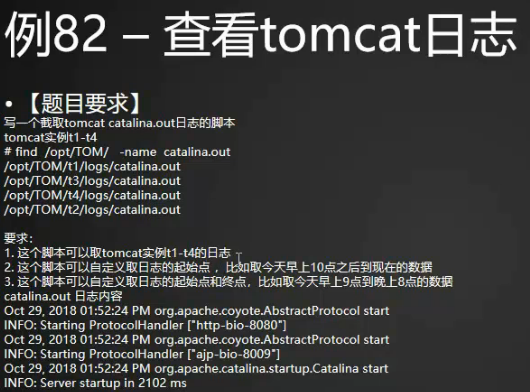
#!/bin/bash

#这个脚本用来查看Tomcat日志

#作者:猿课-阿铭 www.apelearn.com

#日期:2018-12-12

LANG=en

logfile="/opt/TOM/$1/logs/catalina.out"

#将当天的英文月、数字日期、数字年作为变量赋值给d_mdy

d_mdy=`date "+%b %d, %Y"`

#判断参数个数

if [ $# -ne 2 ] && [ $# -ne 3 ]

then

    echo "你提供的参数个数不对,请提供2个或者3个参数。例:sh $0 t1 08:01:00 14:00:00"

    exit 1

fi

#判断第一个参数是否符合要求

if ! echo $1|grep -qE '^t1$|^t2$|^t3$|^t4$'

then

    echo "第一个参数必须是t1、t2、t3或t4"

    exit 1

fi

#判断时间有效性

judge_time()

{

    date -d "$1" +%s &>/dev/null

    if [ $? -ne 0 ]

    then

        echo "你提供的时间$1格式不正确"

        exit 1

    fi

}

#将24小时制时间转换为12小时

tr_24_12()

{

    date -d "$1" +%r

}

#判断提供的时间点是否在日志中出现

judge_time_in_log()

{

    if ! grep -q "$d_mdy $(tr_24_12 $1)" $logfile

        then

            echo "你提供的时间$1在日志$logfile中不曾出现,请换一个时间点"

            exit 1

        fi

}

#判断第2个参数是否合法

judge_time $2

#判断起始时间点是否出现在日志里

judge_time_in_log $2

#如果提供第3个参数

if [ $# -eq 3 ]

then

    #判断第3个参数是否合法

    judge_time $3

    #判断起始时间是否早于结束时间

    t1=`date -d "$2" +%s`

        t2=`date -d "$3" +%s`

        if [ $t2 -lt $t1 ]

        then

            echo "你提供的时间$2比$3要晚,应该把早的时间放到前面"

            exit

        fi

        #判断提供的结束时间点是否出现在日志中

        judge_time_in_log $3

fi

#取起始时间所在行行号

begin_n=`grep -n "$d_mdy $(tr_24_12 $2)" $logfile|head -1|awk -F ':' '{print $1}'`

#取结束时间所在行行号,并用sed截取日志内容

if [ $# -eq 3 ]

then

    n=`grep -n "$d_mdy $(tr_24_12 $3)" $logfile|tail -1|awk -F ':' '{print $1}'`

    #结束日期所在行的下一行才是日志的内容

    end_n=$[$n+1]

    sed -n "$begin_n,$end_n"p $logfile

else

    sed -n "$begin_n,$"p $logfile

fi
打印城市名字

打印数组
[root@centos-04 tmp]# a=(1,2,3,4,5)

[root@centos-04 tmp]# echo ${a[@]}

1,2,3,4,5

[root@centos-04 tmp]#
[root@centos-04 tmp]# a="1 2 3"

[root@centos-04 tmp]# echo $a

1 2 3

[root@centos-04 tmp]# b=($a)(把带空格的字符串变成数组加一个()就行了,这样b就变成一个数组了)

[root@centos-04 tmp]# echo $b

1

[root@centos-04 tmp]# echo ${b[@]}

1 2 3

[root@centos-04 tmp]#
获取数组的个数
[root@centos-04 tmp]# echo ${#b[@]}

3

[root@centos-04 tmp]#
[root@centos-04 tmp]# vim 83.sh

#!/bin/bash

#这个脚本用来打印城市名字

#作者:SYJ

#日期:2019-04-10

read -p "输入不少于5个城市的名字,用空格分隔开。" name

n=`echo $name|awk '{print NF}'`

if [ $n -lt 5 ]

then

        echo "请输入至少5个城市的名字。"

        exit

fi

city=($name)

#echo ${city[@]}

for i in `seq 0 $[${#city[@]}-1]`

do

        echo ${city[$i]}

done
[root@centos-04 tmp]# sh 83.sh

输入不少于5个城市的名字,用空格分隔开。1 2 3 4 5

1

2

3

4

5

[root@centos-04 tmp]#
代码上线
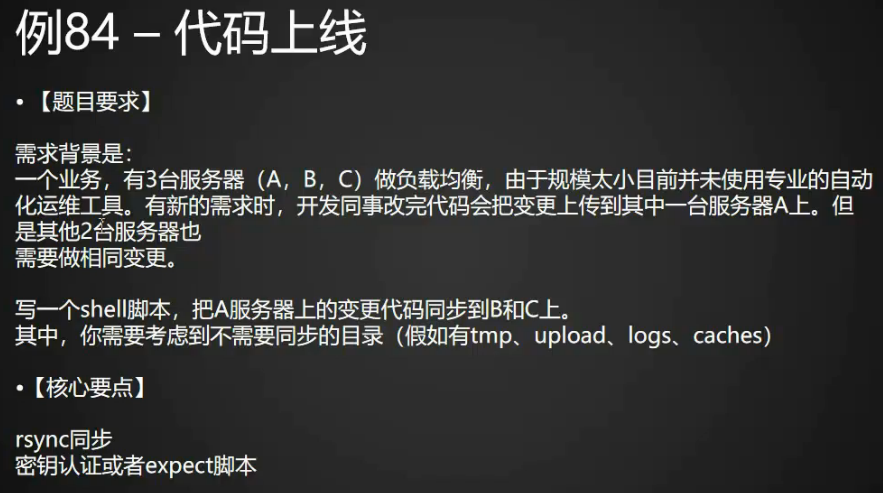
[root@centos-04 tmp]# vim 84.sh

#!/bin/bash

#这个脚本用来代码上线

#作者:SYJ

#日期:2019-04-10

dir=/data/wwwroot/www.aaa.com

B_Ip=1.1.1.1

C_Ip=2.2.2.2

rs()

{

        rsync -azP --exclude="logs" \

        --exclude="tmp" --exclude="upload" \

        --exclude="caches" $dir/ $1:$dir/

}

read -p "该脚本将会把本机的$dir下的文件同步到$B_IP和$c_ip上,是否要继续?y|n" c

case $c in

        y|Y)

                rs B_IP

                rs C_IP

                ;;

        n|N)

                exit

                ;;

        *)

                echo "你只能输入y或者n。"

                ;;

esac
统计并发量

[root@centos-04 tmp]# date -d "-1 second" +%d/%b/%Y:%T

10/4月/2019:23:15:59

[root@centos-04 tmp]#
[root@centos-04 tmp]# vim 85.sh

#!/bin/bash

#这个脚本用来计算网站并发量

#作者:SYJ

#日期:2019-04-10

LANG=en

t=`date -d "-1 second" + %d/%b/%Y:%T`

log=/data/logs/www.aaa.com_access.log

tail -1000 $log |grep -c "$t"
关闭服务

chkconfig --list查看到服务的状态(查看第三列)
[root@centos-04 tmp]# chkconfig --list

注:该输出结果只显示 SysV 服务,并不包含

原生 systemd 服务。SysV 配置数据

可能被原生 systemd 配置覆盖。

      要列出 systemd 服务,请执行 'systemctl list-unit-files'。

      查看在具体 target 启用的服务请执行

      'systemctl list-dependencies [target]'。

netconsole      0:关    1:关    2:关    3:关    4:关    5:关    6:关

network         0:关    1:关    2:开    3:开    4:开    5:开    6:关

nginx           0:关    1:关    2:开    3:开    4:开    5:开    6:关

[root@centos-04 tmp]#
[root@centos-04 tmp]# LANG=en

[root@centos-04 tmp]# chkconfig --list

Note: This output shows SysV services only and does not include native

      systemd services. SysV configuration data might be overridden by native

      systemd configuration.

      If you want to list systemd services use 'systemctl list-unit-files'.

      To see services enabled on particular target use

      'systemctl list-dependencies [target]'.

netconsole      0:off   1:off   2:off   3:off   4:off   5:off   6:off

network         0:off   1:off   2:on    3:on    4:on    5:on    6:off

nginx           0:off   1:off   2:on    3:on    4:on    5:on    6:off

[root@centos-04 tmp]#
[root@centos-04 tmp]# chkconfig --list |grep '3:on' |awk '{print $1}'

Note: This output shows SysV services only and does not include native

      systemd services. SysV configuration data might be overridden by native

      systemd configuration.

      If you want to list systemd services use 'systemctl list-unit-files'.

      To see services enabled on particular target use

      'systemctl list-dependencies [target]'.

network

nginx

[root@centos-04 tmp]#
[root@centos-04 tmp]# vim 86.sh

#!/bin/bash

#这个脚本用来关闭服务

#作者:SYJ

#日期:2019-04-10

LANG=en

while :

do

        chkconfig --list 2>/dev/null|grep '3:on' |awk '{print $1}' > /tmp/on_sev.txt

        echo -e "\033[32m系统里开启了这些服务: \033[0m"

        cat /tmp/on_sev.txt

        echo

        read -p "Please select a service from this list." s

        if ! grep -qw "$s" /tmp/on_sev.txt

        then

                echo -e "\033[31m The service is not in the service list.\33[0m"

                continue

        fi

        chkconfig $s off

        break

done

~

~

~

~

~

~

~

~

~

~

"86.sh" 23L, 474C 已写入

[root@centos-04 tmp]# sh 86.sh

系统里开启了这些服务:

network

nginx

Please select a service from this list.nginx

[root@centos-04 tmp]# sh 86.sh

系统里开启了这些服务:

network

Please select a service from this list.

彻底关闭tomcat服务
[root@centos-04 tmp]# vim 87.sh

#!/bin/bash

#这个脚本用来彻底杀死Tomcat进程

#作者:SYJ

#日期:2019-04-10

dir=/usr/local/tomcat/bin/

java_pc()

{

        pgrep java|wc -l

}

cd $dir

./shutdown.sh

count=0

while [ $count -lt 5 ]:

do

        n=`java_pc`

        if [ $n -gt 0 ]

        then

                killall java

                count=$[$count+1]

                sleep 1

        else

                break

        fi

done

n=`java_pc`

if [ $n -gt 0 ]

then

        killall -9 java

fi

n=`java_pc`

if [ $n -gt 0 ]

then

        echo "Tomcat can not killed"

        exit

fi

cd $dir

./startup.sh
去掉文件名后缀
[root@centos-04 tmp]# vim 88.sh

#!/bin/bash

#这个脚本用来去掉文件名后缀

#作者:SYJ

#日期:2019-04-10

for f in `ls -d ./*.bak`

do

#       mv $f `echo $f|sed 's/.bak$//'`

        f1=`echo $f|awk -F '.bak$' {print $1}`

        mv $f $f1

done
检查域名是否到期

[root@centos-04 tmp]# whois baidu.com |grep 'Expiration Date'

Registrar Registration Expiration Date: 2026-10-11T00:00:00-0700

[root@centos-04 tmp]#
#!/bin/bash

#这个脚本用来检查域名是否到期

#作者:猿课-阿铭 www.apelearn.com

#日期:2018-12-14

mail_u=admin@admin.com

#当前日期时间戳,用于和域名的到期时间做比较

t1=`date +%s`

#检测whois命令是否存在,不存在则安装jwhois包

is_install_whois()

{

    which whois >/dev/null 2>/dev/null

    if [ $? -ne 0 ]

    then

	yum install -y epel-release

        yum install -y jwhois

    fi

}

notify()

{

    #e_d=`whois $1|grep 'Expiry Date'|awk '{print $4}'|cut -d 'T' -f 1`

    e_d=`whois $1|grep 'Expiration'|tail -1 |awk '{print $5}' |awk -F 'T' '{print $1}'`

    #如果e_d的值为空,则过滤关键词'Expiration Time'

    if [ -z "$e_d" ]

    then

        e_d=`whois $1|grep 'Expiration Time'|awk '{print $3}'`

    fi

    #将域名过期的日期转化为时间戳

    e_t=`date -d "$e_d" +%s`

    #计算一周一共有多少秒

    n=`echo "86400*7"|bc`

    e_t1=$[$e_t-$n]

    e_t2=$[$e_t+$n]

    if [ $t1 -ge $e_t1 ] && [ $t1 -lt $e_t ]

    then

        python mail.py  $mail_u "Domain $1 will  to be expired." "Domain $1 expire date is $e_d."

    fi

    if [ $t1 -ge $e_t ] && [ $t1 -lt $e_t2 ]

    then

        python mail.py $mail_u "Domain $1 has been expired" "Domain $1 expire date is $e_d."

    fi

}

#检测上次运行的whois查询进程是否存在

#若存在,需要杀死进程,以免影响本次脚本执行

if pgrep whois &>/dev/null

then

    killall -9 whois

fi

is_install_whois

for d in aaa.com bbb.com  aaa.cn

do

    notify $d

done
自动密钥认证
#!/bin/bash

#这个脚本用来自动配置密钥认证

#作者:猿课-阿铭 www.apelearn.com

#日期:2018-12-14

read -p "输入一个IP地址: " ip

read -p "输入此机器的root密码: " pasd

is_install()

{

    if ! rpm -q $1 &>/dev/null

    then

	yum install -y $1

    fi

}

is_install openssh-clients

is_install expect

if [ ! -f ~/.ssh/id_rsa.pub ]

then

    echo -e "\n" |ssh-keygen  -P ''

fi

cat > key.expect <<EOF

#!/usr/bin/expect

set host [lindex \$argv 0]

set passwd [lindex \$argv 1]

spawn ssh-copy-id root@\$host

expect {

    "yes/no" { send "yes\r"; exp_continue}

    "password:" { send "\$passwd\r" }

}

expect eof

EOF

chmod a+x key.expect

./key.expect $ip $pasd
普通我们将本机的ssh公钥放到另一台机器的方法(id_rsa.pub文件内容放到对方机器的authorized_keys里面)
root@centos-04 tmp]# cat ~/.ssh/id_rsa.pub

ssh-rsa AAAAB3NzaC1yc2EAAAADAQABAAABAQC7oSVWcFIwNAku8g3gXBD79HH1H/7hZg5hshKyQWvPT7q+pzFGiZ0H3zZgG0kHU6j9BB1t/NAooiKmOF5sJmzuDed6
rBeLOw210kG7r9cfU/yHrUljTXjETQQVrlG7LRrW6kwNOoXaJceau60s2P9b91hN3unLqu+wscAC6CfCyIJm2epniltMOgBrRXx7ghOQ3XVkvC84N/9koyC8fypZNeTb
7l/QzeGZNsXDUVChuP9z9mCMaedGGvhfGfPY7qZO0b0aeU8didYSXubekp4rI8JUuPuhOSK49+TxXe0QivtByiZycM69D1XZU5Pilr4f3gbFQc4bSBpbgXkKVpu7 root@centos-04

[root@centos-04 tmp]# vim ~/.ssh/authorized_keys

ssh-rsa AAAAB3NzaC1yc2EAAAADAQABAAABAQC7oSVWcFIwNAku8g3gXBD79HH1H/7hZg5hshKyQWvPT7q+pzFGiZ0H3zZgG0kHU6j9BB1t/NAooiKmOF5sJmzuDed6

rBeLOw210kG7r9cfU/yHrUljTXjETQQVrlG7LRrW6kwNOoXaJceau60s2P9b91hN3unLqu+wscAC6CfCyIJm2epniltMOgBrRXx7ghOQ3XVkvC84N/9koyC8fypZNeTb

7l/QzeGZNsXDUVChuP9z9mCMaedGGvhfGfPY7qZO0b0aeU8didYSXubekp4rI8JUuPuhOSK49+TxXe0QivtByiZycM69D1XZU5Pilr4f3gbFQc4bSBpbgXkKVpu7 roo

t@centos-04
我们也可以用ssh-copy-id命令实现,输入对方的用户名和ip
[root@centos-04 tmp]# ssh-copy-id root@1.1.1.1
[root@centos-04 tmp]# vim 1.expect

#!/usr/bin/expect

set host [lindex $argv 0]

set passwd [lindex $argv 1]

spawn ssh-copy-id root@$host

expect {

        "yes/no" { send "yes\r"; exp_continue}

        "password:" { send "$passwd\r" }

}

expect eof

[root@centos-04 tmp]# ./1.expect 127.0.0.1 root

spawn ssh-copy-id root@127.0.0.1

/usr/bin/ssh-copy-id: INFO: Source of key(s) to be installed: "/root/.ssh/id_rsa.pub"

/usr/bin/ssh-copy-id: INFO: attempting to log in with the new key(s), to filter out any that are already installed

/usr/bin/ssh-copy-id: WARNING: All keys were skipped because they already exist on the remote system.

                (if you think this is a mistake, you may want to use -f option)

expect: spawn id exp6 not open

    while executing

"expect eof"

    (file "./1.expect" line 9)

[root@centos-04 tmp]#

[root@centos-04 tmp]# ssh-copy-id root@127.0.0.1

/usr/bin/ssh-copy-id: INFO: Source of key(s) to be installed: "/root/.ssh/id_rsa.pub"

/usr/bin/ssh-copy-id: INFO: attempting to log in with the new key(s), to filter out any that are already installed

/usr/bin/ssh-copy-id: WARNING: All keys were skipped because they already exist on the remote system.

                (if you think this is a mistake, you may want to use -f option)

[root@centos-04 tmp]# ssh-copy-id -f root@127.0.0.1

/usr/bin/ssh-copy-id: INFO: Source of key(s) to be installed: "/root/.ssh/id_rsa.pub"

Number of key(s) added: 1

Now try logging into the machine, with:   "ssh 'root@127.0.0.1'"

and check to make sure that only the key(s) you wanted were added.

[root@centos-04 tmp]#

[root@centos-04 tmp]# cat /root/.ssh/id_rsa.pub

ssh-rsa AAAAB3NzaC1yc2EAAAADAQABAAABAQC7oSVWcFIwNAku8g3gXBD79HH1H/7hZg5hshKyQWvPT7q+pzFGiZ0H3zZgG0kHU6j9BB1t/NAooiKmOF5sJmzuDed6rBeLOw210kG7r9cfU/
yHrUljTXjETQQVrlG7LRrW6kwNOoXaJceau60s2P9b91hN3unLqu+wscAC6CfCyIJm2epniltMOgBrRXx7ghOQ3XVkvC84N/9koyC8fypZNeTb7l/QzeGZNsXDUVChuP9z9mCMaedGGvhfGfPY
7qZO0b0aeU8didYSXubekp4rI8JUuPuhOSK49+TxXe0QivtByiZycM69D1XZU5Pilr4f3gbFQc4bSBpbgXkKVpu7 root@centos-04

[root@centos-04 tmp]#

[root@centos-04 tmp]# cat /root/.ssh/authorized_keys

ssh-rsa AAAAB3NzaC1yc2EAAAADAQABAAABAQC7oSVWcFIwNAku8g3gXBD79HH1H/7hZg5hshKyQWvPT7q+pzFGiZ0H3zZgG0kHU6j9BB1t/NAooiKmOF5sJmzuDed6rBeLOw210kG7r9cfU/
yHrUljTXjETQQVrlG7LRrW6kwNOoXaJceau60s2P9b91hN3unLqu+wscAC6CfCyIJm2epniltMOgBrRXx7ghOQ3XVkvC84N/9koyC8fypZNeTb7l/QzeGZNsXDUVChuP9z9mCMaedGGvhfGfPY
7qZO0b0aeU8didYSXubekp4rI8JUuPuhOSK49+TxXe0QivtByiZycM69D1XZU5Pilr4f3gbFQc4bSBpbgXkKVpu7 root@centos-04

[root@centos-04 tmp]#
查看一个命令由那个包装的
[root@centos-04 tmp]# which ssh-copy-id

/usr/bin/ssh-copy-id

[root@centos-04 tmp]# rpm -qf /usr/bin/ssh-copy-id

openssh-clients-7.4p1-16.el7.x86_64

[root@centos-04 tmp]#
部署MySQL主从
[root@centos-04 tmp]# vim 91.sh

#!/bin/bash

#这个脚本用来配置MySQL主从同步

#作者:猿课-阿铭 www.apelearn.com

#日期:2018-12-17

#!/bin/bash

master_ip=192.168.100.12

slave_ip=192.168.100.13

mysqlc="mysql -uroot -paminglinux"

check_ok()

{

    if [ $? -ne 0 ]

    then

        echo "$1 出错了。"

        exit 1

    fi

}

f_exist()

{

    d=`date +%F%T`

    if [ -f $1 ]

    then

        mv $1 $1_$d

    fi

}

## 设置主mysql配置

if ! grep '^server-id' /etc/my.cnf

then

if ! grep '^log-bin.*=.*' /etc/my.cnf

then

    sed -i '/^\[mysqld\]$/a\log-bin = aminglinux' /etc/my.cnf

fi

sed -i '/^log-bin.*/a\binlog-ignore-db = mysql ' /etc/my.cnf

/etc/init.d/mysqld restart

check_ok "主上重启mysql"

## 登录mysql,授权用户、锁表以及show master status。

$mysqlc <<EOF

    grant replication slave on *.* to 'repl'@$slave_ip identified by 'yourpassword';

    flush tables with read lock;

EOF

$mysqlc -e "show master status" > /tmp/master.log

file=`tail -1 /tmp/master.log|awk '{print $1}'`

pos=`tail -1 /tmp/master.log|awk '{print $2}'`

## 创建在从上配置和操作的脚本

f_exist /tmp/slave.sh

cat > /tmp/slave.sh << EOF

#!/bin/bash

if ! grep '^server-id' /etc/my.cnf

then

    sed -i '/^\[mysqld\]$/a\server-id = 1002' /etc/my.cnf

fi

/etc/init.d/mysqld restart

check_ok "从上重启mysql"

$mysqlc  <<EOF

    stop slave;

    start slave;

EOF

EOF

## 创建传输slave.sh的expect脚本

f_exist /tmp/rs_slave.expect

cat > /tmp/rs_slave.expect <<EOF

#!/usr/bin/expect

set passwd "aminglinux"

spawn rsync -a /tmp/slave.sh root@$slave_ip:/tmp/slave.sh

expect {

    "yes/no" { send "yes\r"}

    "password:" { send "\$passwd\r" }

}

expect eof

EOF

## 执行expect脚本

chmod +x /tmp/rs_slave.expect

/tmp/rs_slave.expect

check_ok "传输slave.sh"

## 创建远程执行命令的expect脚本

f_exist /tmp/exe.expect

cat > /tmp/exe.expect <<EOF

#!/usr/bin/expect

set passwd "aminglinux"

spawn ssh root@$slave_ip

expect {

    "yes/no" { send "yes\r"}

    "password:" { send "\$passwd\r" }

}

expect "]*"

send "/bin/bash /tmp/slave.sh\r"

expect "]*"

send "exit\r"

EOF

## 执行expect脚本

chmod +x /tmp/exe.expect

/tmp/exe.expect

check_ok "远程执行slave.sh"

## 主上解锁表

$mysqlc -e "unlock tables"
管理docker
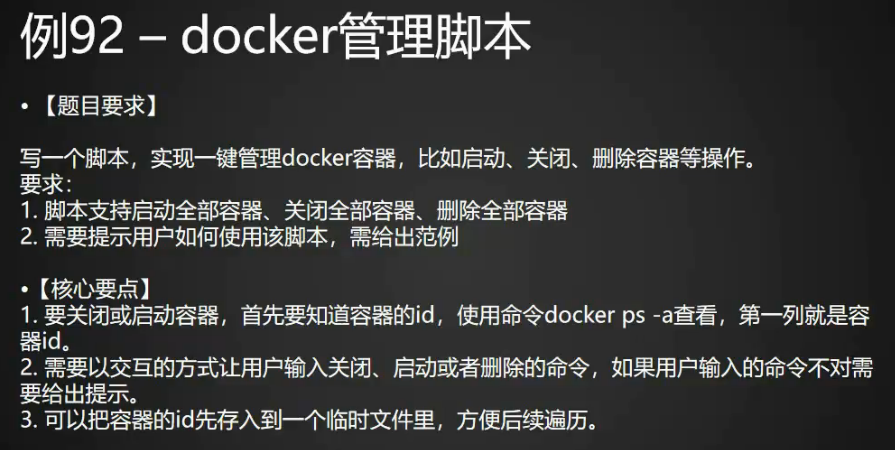
[root@centos-04 tmp]# vim 92.sh

#!/bin/bash

#这个脚本用来管理docker容器

#作者:猿课-阿铭 www.apelearn.com

#日期:2018-12-17

while true

do

    read -p "请输入你要执行的操作:(stop/start/rm) " opt

    if [ -z "$opt" ]

    then

        echo "请输入要执行的操作。"

        continue

    else

        break

    fi

done

docker ps -a |awk '{print $1}' > /tmp/id.txt

case $opt in

  stop)

    for id in `cat /tmp/id.txt`

    do

        docker stop $id

    done

    ;;

  start)

    for id in `cat /tmp/id.txt`

    do

        docker start $id

    done

  rm)

    for id in `cat /tmp/id.txt`

    do

        read -p "将要删除容器$id,是否继续?(y|n)" c

        case $c in

          y|Y)

            docker rm -f $id

            ;;

          n|N)

            echo "容器$id不会被删除。"

            ;;

          *)

            echo "你只能输入'y'或者'n'。"

            ;;

        esac

    done

  *)

    echo "你只能输入start/stop/rm。"

    ;;

esac
安装配置samba

[root@centos-04 tmp]# vim 93.sh

#!/bin/bash

#这个脚本用来一键安装并配置samba

#作者:猿课-阿铭 www.apelearn.com

#日期:2018-12-17

if [ "$#" -ne 1 ]

then

    echo "运行脚本的格式为:$0 /dir/"

    exit 1

else

    if ! echo $1 |grep -q '^/.*'

    then

        echo "请提供一个绝对路径。"

        exit 1

    fi

fi

if ! rpm -q samba >/dev/null

then

    echo "将要安装samba"

    sleep 1

    yum install -y samba

    if [ $? -ne 0 ]

    then

        echo "samba安装失败"

        exit 1

    fi

fi

cnfdir="/etc/samba/smb.conf"

cat >> $cnfdir <<EOF

[share]

        comment = share all

        path = $1

        browseable = yes

        public = yes

        writable = no

EOF

if [ ! -d $1 ]

then

    mkdir -p $1

fi

chmod 777 $1

echo "test" > $1/test.txt

#假设系统为CentOS7

systemctl start smb

if [ $? -ne 0 ]

then

    echo "samba服务启动失败,请检查配置文件是否正确。"

else

    echo "samba配置完毕,请验证。"

fi
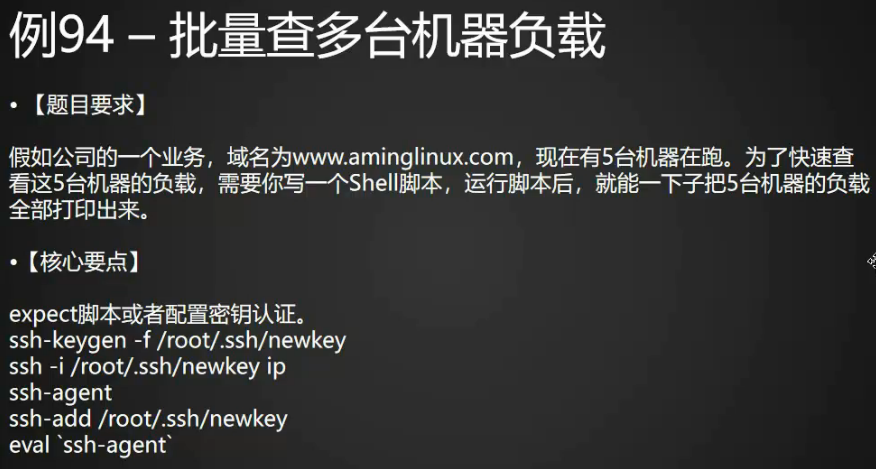
批量查看多台机器负载
指定文件名字(aaa)的秘钥
[root@centos-04 tmp]# ssh-keygen -f /tmp/aaa

Generating public/private rsa key pair.

Enter passphrase (empty for no passphrase):

Enter same passphrase again:

Your identification has been saved in /tmp/aaa.

Your public key has been saved in /tmp/aaa.pub.

The key fingerprint is:

SHA256:1P7xXAJP++vRPNHXETWP/3LZDHJRHVHdxoNUewrA868 root@centos-04

The key's randomart image is:

+---[RSA 2048]----+

|         .. ..oB%|

|         .o. . +@|

|        . .oo +++|

|       . .  .= ==|

|        S . o.B.*|

|           . *.BB|

|            ..++O|

|            E  o+|

|              .o |

+----[SHA256]-----+

[root@centos-04 tmp]# ls

1.expect  3191.txt  6542.txt  6569.txt  66.sh     68.sh     71.sh  76.sh     80.sh  86.sh  93.sh    nginx_proxy_tmp

1.txt     3.txt     6564.txt  6598.txt  67.sh     6969.txt  72.sh  7772.txt  81.sh  87.sh  aaa      on_sev.txt

2.txt     456.log   6565.txt  65.sh     6835.txt  69.sh     73.sh  77.sh     83.sh  88.sh  aaa.pub  pid.txt

3161.txt  4.txt     6567.txt  6606.txt  6836.txt  7046.txt  74.sh  78.sh     84.sh  91.sh  c.txt    proxy.log

3184.txt  64.sh     6568.txt  6610.txt  6838.txt  70.sh     75.sh  79.sh     85.sh  92.sh  md5.txt

[root@centos-04 tmp]# cat aaa(私钥)

-----BEGIN RSA PRIVATE KEY-----

Proc-Type: 4,ENCRYPTED

DEK-Info: AES-128-CBC,6471B3E0E269F92672EABB4201EC8314

PF7gcBUGljlSYCX1IazbSPaqRkqA3M5BuDiBe9YkUFXiTTWOcx1eo0aus/GGK4P1

kb1wJEoa7kVjSlB6h0Ed9d2oB08faRKj6yzLGdpQp4I+ZKQMYsXii+QhDT3R0c2c

c9zImVq5Jub6DZtYP7LTs7k2A7Sb1GIio+S3cEEZ1hun84HriFWfViiLKD43crDb

jHTuHv7f4V+J85XHjljB+k7DgZxGx7N+F+/DNjacR/AXP48rq5SD3DWRk0IOmS9T

Iihf7v6euKG3SlKeqRCuJbseeCDVIRNcOuMzrHCzYdj2zAOfNTYNtB9MdEa3rucT

Cg4xaMyJDwDMtGCI/swQ/vTDV/Of/nOC359HHFdFOEdurXULH3nPsU1/qfElLpYe

ims5JYnA5cfvo75iMQowzYHv+VZaKl7lUYldfE5z/n/tgcd5O8HxnzEm1pV1SC6L

dkNM2bjMxlIcpW+nZGLztcF9A5MUy4lRTcjYhgjqTM9LPMpDA1rnQ9FajxQoP1IU

hYsGYCjbjkvy41xtmDH2EgaIoZBI+VDmE6EKlgh4E2H0xROvg1bgYjauF2m2ZVrS

A8tSy7/ox6JB6imUoc8taxGAUP9Cr8Nbe3l7iFkAtqeW+MSFZ7ho53iupUFirmYO

TwDzro9A1z8n4lMc0hn+ZMhVnhSGwr8N+ON7U4puBVRwoM3jyH7HlTbWxsGlDGqG

4A19p8SgJKStfbDSgIICvGE7hPeegpEMeo/syWXAKj8jNBGmvKg5dG4rPMPGKecI

YTETnYO0Q5a5YyEw8gXu16R7Zbs9YYYbq+pKTQjQC5AeW+kokl416/qG1oF7Yizi

/JZ6lVBTLw3z96/xvd6VW0ZpVCshGL1iZr1k3R4mmO+brNyuCgKjzaS6iOCIc4Xz

doZdEEJsJqiEDbo1lzMc5cZGhNVVdcGiN0BmnaoYWl4OtMX00vAz/ECTyiZt+en+

y1sLR/RpCVzSGACLYwgPHJY/2FQWAN6RDhmQQcCQTWPo7SZdY6j2lM3fmG1MV6Lc

Phb/xUXwm/zsCqSr6Lb0RPL36C/UPBJKz2i8do/xADEaqSardV+WIHWIkz1bSdVo

JRPmW517m/SgzCI74jZ8mW7//DdQ0ciXUd+23DRGcDW+2TqC78vxZmfr7FdzUTZZ

RgVX9TC8XnCxUA4ZiMOpaLdzHDfjllAul3ns6sB/UNQ0ckVX61Wsb81WFoj0VLuN

F5wS4sS3NTYhZ5qqkI0eejkiNraSPtYWd0JTNYuKYPXhiJn3beW3XuWy3AdPannD

Pw0y1RXcwKd79ls+/OvFV/UvWRrSEzwh5qsNZE7gfo9JzHCNaOuHUvLcsrh50I1P

1hEnMYCpfCPCJBNd0d7JE0bNICTPE6W/7uypxp3POkfi2dqICEhjMUAJ77rhx3ub

X2/Y6NCkZqHfpV8aE1wHKCVHrb5Fj/KP3FZ9xt0eojcp196ZSvNhfO5wrJafRHaE

u56tHnYbtAeKwVp+6NUiv00RjIrsYLtwgAID8OSmL02+E1QlemnU61BrbEXFDUcM

LHjNvSSyG+h98+S5NF7RpXK8DjF6mI+T6u3pVNdjPpZwzXgxiZAsRs8Ss9rld5eD

-----END RSA PRIVATE KEY-----

[root@centos-04 tmp]# cat aaa.pub (公钥)

ssh-rsa AAAAB3NzaC1yc2EAAAADAQABAAABAQDWPuKc4lKJzZ+Zunq2RTi7IUP2FkhzZ7fXfH0lUvzom9+3wsarU1cCC5UU1JibgmhuU68
/yTlj/ZAHa80Sgdyxn2/ZBJFMJcIKyHk5XyZJhhfdLvEB1QORHBYn0rcbPkqpCJcciZLNx1N0soSRVHgOIVimFa1eIAa8zDBjvEXTtl7coL
MlxzMIj+DOvoDTy7gq+VlPcpk9hnY+AA4TtxEUZ+btc+ZnaaFGxjPkOxiSRp4nOHwtagJrJ4YQYNhfoAuOqNzFQOfoTw2HnCuJF4uM0kjDY
0Anm9CjQkbWwH4zSinvLeU4fG4POLDqLwbZX7YLDPlGVFShRNZJtiPyoQNv root@centos-04

[root@centos-04 tmp]#
由于我们在脚本中输入密码不合适,除了用expect我们还可以用ssh-agent命令把密码放到内存里,现在我们在本机登录本机,出现让我们输入密码,这说明我们的秘钥没有生效
[root@centos-04 tmp]# ssh -i /tmp/aaa root@127.0.0.1

root@127.0.0.1's password:
我们将公钥写到authorized_keys文件里
[root@centos-04 tmp]# cat aaa.pub

ssh-rsa AAAAB3NzaC1yc2EAAAADAQABAAABAQDWPuKc4lKJzZ+Zunq2RTi7IUP2FkhzZ7fXfH0lUvzom9+
3wsarU1cCC5UU1JibgmhuU68/yTlj/ZAHa80Sgdyxn2/ZBJFMJcIKyHk5XyZJhhfdLvEB1QORHBYn0rcbPk
qpCJcciZLNx1N0soSRVHgOIVimFa1eIAa8zDBjvEXTtl7coLMlxzMIj+DOvoDTy7gq+VlPcpk9hnY+AA4Tt
xEUZ+btc+ZnaaFGxjPkOxiSRp4nOHwtagJrJ4YQYNhfoAuOqNzFQOfoTw2HnCuJF4uM0kjDY0Anm9CjQkbW
wH4zSinvLeU4fG4POLDqLwbZX7YLDPlGVFShRNZJtiPyoQNv root@centos-04

[root@centos-04 tmp]# vim /root/.ssh/authorized_keys

ssh-rsa AAAAB3NzaC1yc2EAAAADAQABAAABAQDWPuKc4lKJzZ+Zunq2RTi7IUP2FkhzZ7fXfH0lUvzom9+3
wsarU1cCC5UU1JibgmhuU68/yTlj/ZAHa80Sgdyxn2/ZBJFMJcIKyHk5XyZJhhfdLvEB1QORHBYn0rcbPkqp
CJcciZLNx1N0soSRVHgOIVimFa1eIAa8zDBjvEXTtl7coLMlxzMIj+DOvoDTy7gq+VlPcpk9hnY+AA4TtxEU
Z+btc+ZnaaFGxjPkOxiSRp4nOHwtagJrJ4YQYNhfoAuOqNzFQOfoTw2HnCuJF4uM0kjDY0Anm9CjQkbWwH4z
SinvLeU4fG4POLDqLwbZX7YLDPlGVFShRNZJtiPyoQNv root@centos-04
再次测试让我们输入公钥的密码,输入之后即登录成功
[root@centos-04 tmp]# ssh -i /tmp/aaa root@127.0.0.1

Enter passphrase for key '/tmp/aaa':

Last login: Wed Apr 17 18:22:40 2019 from 192.168.242.1

[root@centos-04 ~]#
ssh-agent可以将私钥放到内存里去,执行ssh-agent命令后再执行命令结果中的前两行。
[root@centos-04 ~]# ssh-agent

SSH_AUTH_SOCK=/tmp/ssh-ZhiIYiItxeaK/agent.8521; export SSH_AUTH_SOCK;

SSH_AGENT_PID=8522; export SSH_AGENT_PID;

echo Agent pid 8522;

[root@centos-04 ~]# SSH_AUTH_SOCK=/tmp/ssh-ZhiIYiItxeaK/agent.8521; export SSH_AUTH_SOCK;

[root@centos-04 ~]# SSH_AGENT_PID=8522; export SSH_AGENT_PID;

[root@centos-04 ~]#
这样就有了一个秘钥代理,我们把私钥加进去
[root@centos-04 ~]# ssh-add /tmp/aaa

Enter passphrase for /tmp/aaa:

Identity added: /tmp/aaa (/tmp/aaa)

[root@centos-04 ~]#
我们再次登录发现不需要密码直接登录成功了
[root@centos-04 ~]# ssh -i /tmp/aaa root@127.0.0.1

Last login: Thu Apr 18 01:43:51 2019 from localhost

[root@centos-04 ~]#
[root@centos-04 ~]# ps aux|grep ssh-agent

root       8522  0.0  0.0  72312  1228 ?        Ss   01:46   0:00 ssh-agent

root       8579  0.0  0.0 112724   984 pts/2    S+   01:53   0:00 grep --color=auto ssh-agent

[root@centos-04 ~]# killall ssh-agent

[root@centos-04 ~]# ps aux|grep ssh-agent

root       8582  0.0  0.0 112724   988 pts/2    R+   01:53   0:00 grep --color=auto ssh-agent

[root@centos-04 ~]#
eval直接执行命令,用ssh-agent > 的方式再执行ssh-add 不能成功,因为这样执行不在一个终端里ssh-add执行失败。
[root@centos-04 ~]# eval echo 123

123
[root@centos-04 ~]# ssh-agent > /tmp/123.sh

[root@centos-04 ~]# sh /tmp/123.sh

Agent pid 8588

[root@centos-04 ~]#
[root@centos-04 ~]# ssh-add /tmp/aaa

Could not open a connection to your authentication agent.

[root@centos-04 ~]#
[root@centos-04 ~]# killall ssh-agent

[root@centos-04 ~]# ps aux|grep ssh-agent

root       8615  0.0  0.0 112724   988 pts/2    R+   02:00   0:00 grep --color=auto ssh-agent

[root@centos-04 ~]#
但是我们用eval可以
[root@centos-04 ~]# eval `ssh-agent`

Agent pid 8651

[root@centos-04 ~]# !ps

ps aux|grep ssh-agent

root       8651  0.0  0.0  72312   776 ?        Ss   02:02   0:00 ssh-agent

root       8653  0.0  0.0 112724   988 pts/2    R+   02:02   0:00 grep --color=auto ssh-agent

[root@centos-04 ~]# ssh-add /tmp/aaa

Enter passphrase for /tmp/aaa:

Identity added: /tmp/aaa (/tmp/aaa)

[root@centos-04 ~]#
[root@centos-04 ~]#  ssh -i /tmp/aaa root@127.0.0.1

Last login: Thu Apr 18 01:50:32 2019 from localhost

[root@centos-04 ~]#
[root@centos-04 ~]# killall ssh-agent

[root@centos-04 ~]# eval `ssh-agent`; ssh-add /tmp/aaa

Agent pid 8686

Enter passphrase for /tmp/aaa:

Identity added: /tmp/aaa (/tmp/aaa)

[root@centos-04 ~]#
给命令起个别名
[root@centos-04 ~]# alias ak='eval `ssh-agent`; ssh-add /tmp/aaa'

[root@centos-04 ~]# !kill

killall ssh-agent

[root@centos-04 ~]# ak

Agent pid 8691

Enter passphrase for /tmp/aaa:

Bad passphrase, try again for /tmp/aaa:

Identity added: /tmp/aaa (/tmp/aaa)

[root@centos-04 ~]#
[root@centos-04 tmp]# vim 94.sh

#!/bin/bash

#这个脚本用来批量查机器负载

#作者:猿课-阿铭 www.apelearn.com

#日期:2018-12-17

for ip in `cat /tmp/ip.list`

do

    echo $ip

    ssh $ip "uptime"

done
自动挂云盘

[root@centos-04 tmp]# vim 95.sh

#!/bin/bash

#这个脚本用来自动挂载磁盘

#作者:猿课-阿铭 www.apelearn.com

#日期:2018-12-17

if [ $# -ne 2 ]

then

    echo "Useage $0 盘符 挂载点, 如: $0 /dev/xvdb /data"

    exit 1

fi

if [ ! -b $1 ]

then

    echo "你提供的盘符不正确,请检查后再操作"

    exit 1

fi

echo "格式化$1"

mkfs -t ext4 $1

if [ ! -d $2 ] ;then

        mkdir -p $2

fi

n=`awk '$NF == "$2"' /etc/fstab|wc -l`

if [ $n -eq 0 ]

then

    echo "$1              $2                      ext4   defaults  0  0" >> /etc/fstab

    mount -a

else

    echo "配置文件/etc/fstab中已经存在挂载点$2,请检查一下."

    exit 1

fi
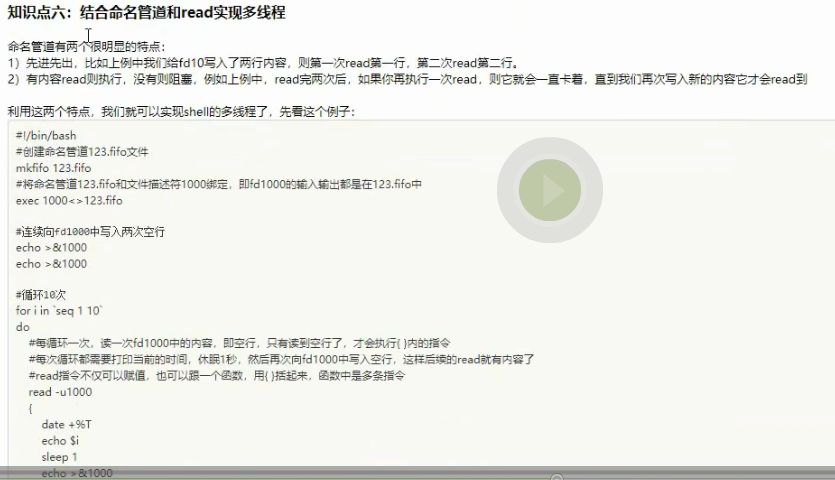
并发备份数据库


[root@centos-04 tmp]# screen

[root@centos-04 tmp]# mkfifo 123.fifo

[root@centos-04 tmp]# echo "123" > 123.fifo

ctrl+a d

[root@centos-04 tmp]# cat 123.fifo

123

[root@centos-04 tmp]# screen -r

[root@centos-04 ~]# mkfifo test10.fifo

[root@centos-04 ~]# exec 10<>test10.fifo

[root@centos-04 ~]# ls -l /dev/fd/10

lrwx------ 1 root root 64 4月  18 19:00 /dev/fd/10 -> /root/test10.fifo

[root@centos-04 ~]# read -u10 b

[root@centos-04 ~]# ls -l /dev/fd/(查看是否有fifo)

总用量 0

lrwx------ 1 root root 64 4月  18 19:09 0 -> /dev/pts/0

lrwx------ 1 root root 64 4月  18 19:09 1 -> /dev/pts/0

lrwx------ 1 root root 64 4月  18 19:09 10 -> /root/test10.fifo

lrwx------ 1 root root 64 4月  18 19:09 2 -> /dev/pts/0

lr-x------ 1 root root 64 4月  18 19:09 3 -> /proc/11917/fd

[root@centos-04 ~]#
如果没有,需要执行
[root@centos-04 ~]# exec 10<> test10.fifo

[root@centos-04 ~]#
[root@centos-04 ~]# echo "3333" >&10

[root@centos-04 ~]#
screen -r
[root@centos-04 ~]# echo $b

3333
总结:第一步需要将10描述符和test10.fifo命名管道绑定到一起,然后用read命令向10要一个字符串赋值给a,如果有将直接输出,如果没有处于等待状态,我们需要用echo “123” >&10(在终端)将123写入,这样a就有值了也就是123,在screen里echo $a就输出123了。


[root@centos-04 tmp]# vim 96.sh

#!/bin/bash

#这个脚本用来并发备份数据库

#作者:猿课-阿铭 www.apelearn.com

#日期:2018-12-19

##假设100个库的库名、host、port以及配置文件路径存到了一个文件里,文件名字为/tmp/databases.list

##格式:db1 10.10.10.2 3308 /data/mysql/db1/my.cnf

##备份数据库使用xtrabackup(由于涉及到myisam,命令为inoobackupex)

exec &> /tmp/mysql_bak.log

if ! which innobackupex &>/dev/nll

then

    echo "安装xtrabackup工具"

    rpm -ivh http://www.percona.com/downloads/percona-release/redhat/0.1-3/percona-release-0.1-3.noarch.rpm  && \

    yum install -y percona-xtrabackup-24

    if [ $? -ne 0 ]

    then

        echo "安装xtrabackup工具出错,请检查。"

        exit 1

    fi

fi

bakdir=/data/backup/mysql

bakuser=vyNctM

bakpass=99omeaBHh

function bak_data {

    db_name=$1

    db_host=$2

    db_port=$3

    cnf=$4

    [ -d $bakdir/$db_name ] || mkdir -p $bakdir/$db_name

    innobackupex --defaults-file=$4  --host=$2  --port=$3 --user=$bakuser --password=$bakpass  $bakdir/$1

        if [ $? -ne 0 ]

        then

            echo "备份数据库$1出现问题。"

        fi

}

fifofile=/tmp/$$

mkfifo $fifofile

exec 1000<>$fifofile

thread=10

for ((i=0;i<$thread;i++))

do

    echo >&1000

done

cat /tmp/databases.list | while read line

do

    read -u1000

    {

        bak_data `echo $line`

        echo >&1000

    } &

done

wait

exec 1000>&-

rm -f $fifofile
打印三角形

[root@centos-04 tmp]# vim 97.sh

#!/bin/bash

#这个脚本用来打印三角形

#作者:SYJ

#日期:2019-04-18

#!/bin/bash

#这个脚本用来打印三角形

#作者:猿课-阿铭 www.apelearn.com

#日期:2018-12-19

while true

do

    read -p "please input the lenth: " n

    if [ -z $n ]

    then

        echo "要输入一个数字。"

        continue

    else

        n1=`echo $n|sed 's/[0-9]//g'`

        if [ -n "$n1" ]

        then

            echo "你输入的不是纯数字,重新输入。"

            continue

        else

            break

        fi

    fi

done

for i in `seq 1 $n`

do

    j=$[$n-$i]

    for m in `seq $j`

    do

        echo -n " "

    done

    for p in `seq 1 $i`

    do

        echo -n "* "

    done

    echo

done
[root@centos-04 tmp]# sh 97.sh

please input the lenth: 9

        *

       * *

      * * *

     * * * *

    * * * * *

   * * * * * *

  * * * * * * *

 * * * * * * * *

* * * * * * * * *

[root@centos-04 tmp]#
截取字符串
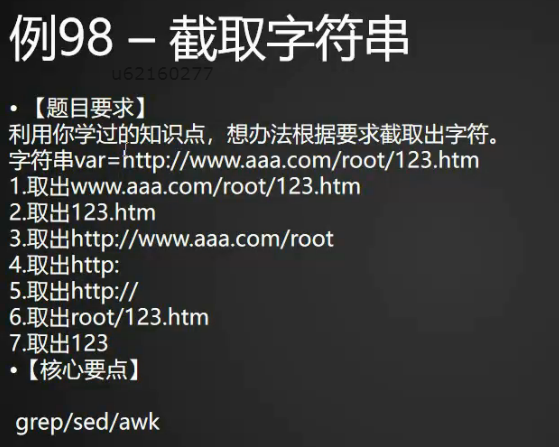
[root@centos-04 tmp]# vim 98.sh

#!/bin/bash

#这个脚本用来截取字符串

#作者:猿课-阿铭 www.apelearn.com

#日期:2018-12-19

var=http://www.aaa.com/root/123.htm

echo "1.取出www.aaa.com/root/123.htm"

echo $var |awk -F '//' '{print $2}'

echo "2.取出123.htm"

echo $var |awk -F '/' '{print $5}'

echo "3.取出http://www.aaa.com/root"

echo $var |sed 's#/123.htm##'

echo "4.取出http:"

echo $var |awk -F '//' '{print $1}'

echo "5.取出http://"

echo $var |awk -F 'www' '{print $1}'

echo "6.取出root/123.htm"

echo $var |awk -F 'com/' '{print $2}'

echo $var |awk -F '/' '{print $4"/"$5}'

echo "7.取出123"

echo $var |sed 's/[^0-9]//g'
[root@centos-04 tmp]# sh 98.sh

1.取出www.aaa.com/root/123.htm

www.aaa.com/root/123.htm

2.取出123.htm

123.htm

3.取出http://www.aaa.com/root

http://www.aaa.com/root

4.取出http:

http:

5.取出http://

http://

6.取出root/123.htm

root/123.htm

root/123.htm

7.取出123

123

[root@centos-04 tmp]#
修改文本格式
[root@centos-04 tmp]# vim 99.sh

#!/bin/bash

#这个脚本用来格式化文本

#作者:猿课-阿铭 www.apelearn.com

#日期:2018-12-19

n=`wc -l test3.txt|awk '{print $1}'`

n2=$[$n/2]

for i in `seq 1 $n2`

do

    i2=$[$i*2]

    j=$[$i2-1]

    l1=`sed -n "$i2"p test3.txt`

    l2=`sed -n "$j"p test3.txt`

    echo $l2:$l1

done
自定义rm

[root@centos-04 tmp]# vim 100.sh

1. 简单

#!/bin/bash

#这个脚本用来自定义rm

#作者:猿课-阿铭 www.apelearn.com

#日期:2018-12-19

filename=$1

big_filesystem=/data/

if [ ! -e $1 ]

then

    echo "$1 不存在,请使用绝对路径"

    exit

fi

d=`date +%Y%m%d%H%M`

read -p "Are U sure delete the file or directory $1? y|n: " c

case $c in

      y|Y)

          mkdir -p $big_filesystem/.$d && rsync -aR $1 $big_filesystem/.$d/$1 && /bin/rm -rf $1

          ;;

      n|N)

          exit 0

          ;;

      *)

          echo "Please input 'y' or 'n'."

          ;;

esac

2.复杂

#!/bin/bash

#这个脚本用来自定义rm

#作者:猿课-阿铭 www.apelearn.com

#日期:2018-12-19

#!/bin/bash

filename=$1

if [ ! -e $1 ]

then

    echo "$1 不存在,请使用绝对路径"

    exit

fi

d=`date +%Y%m%d%H%M`

f_size=`du -sk $1|awk '{print $1}'`

disk_size=`LANG=en; df -k |grep -vi filesystem|awk '{print $4}' |sort -n |tail -n1`

big_filesystem=`LANG=en; df -k |grep -vi filesystem |sort -n -k4 |tail -n1 |awk '{print $NF}'`

if [ $f_size -lt $disk_size ]

then

    read -p "Are U sure delete the file or directory: $1? y|n: " c

    case $c in

      y|Y)

          mkdir -p $big_filesystem/.$d && rsync -aR $1 $big_filesystem/.$d/$1 && /bin/rm -rf $1

          ;;

      n|N)

          exit 0

          ;;

      *)

          echo "Please input 'y' or 'n'."

          ;;

     esac

else

    echo "The disk size is not enough to backup the files $1."

    read -p "Do you want to delete $1? y|n: " c

    case $c in

      y|Y)

        echo "It will delete $1 after 5 seconds whitout backup."

        for i in `seq 1 5`; do echo -ne ". "; sleep 1;done

        echo

        /bin/rm -rf $1

        ;;

     n|N)

        echo "It will not delete $1."

        exit 0

        ;;

      *)

        echo "Please input 'y' or 'n'."

        ;;

    esac

fi
Shell习题100例(2)的更多相关文章
- Shell习题100例
每日一文件 https://github.com/aminglinux/shell100/blob/master/ 要求:安照这样的日期格式(xxxx-xx-xx)每日生成一个文件,如生成的文件为20 ...
- linux shell习题训练
shell习题训练 求2个数之和 计算1-100的和 将一目录下所有的文件的扩展名改为bak 编译当前目录下的所有.c文件: 打印root可以使用可执行文件数,处理结果: root's bins: 2 ...
- C语言程序设计100例之(14):丑数
例14 丑数 问题描述 丑数是其质因子只可能是2,3或5的数.前10个丑数分别为1, 2, 3, 4, 5, 6, 8, 9, 10, 12.输入一个正整数n,求第n个丑数. 输入格式 每行为一个 ...
- shell习题训练
shell习题训练 求2个数之和 计算1-100的和 将一目录下所有的文件的扩展名改为bak 编译当前目录下的所有.c文件: 打印root可以使用可执行文件数,处理结果: root's bins: 2 ...
- Python语言100例
Python版本:python 3.2.2 电脑系统:win7旗舰 实例来源:python菜鸟教程100例 #!/usr/bin/python # -*- coding: UTF-8 -*- impo ...
- C语言经典算法100例
[程序1] 题目:有1.2.3.4个数字,能组成多少个互不相同且无重复数字的三位数?都是多少? 1.程序分析:可填在百位.十位.个位的数字都是1.2.3.4.组成所有的排列后再去 掉不满足条件的排列. ...
- 实用ExtJS教程100例-001:开天辟地的Hello World
ExtJS功能繁多,要想彻底的了解确实很困难.作为初学者,如何能找到一条快速的通道呢?我觉得,如果你有Javascript的基础,那就不要惧怕ExtJS的复杂,从动手开始,遇到问题,解决问题,积累经验 ...
- C 语言经典100例
C 语言经典100例 C 语言练习实例1 C 语言练习实例2 C 语言练习实例3 C 语言练习实例4 C 语言练习实例5 C 语言练习实例6 C 语言练习实例7 C 语言练习实例8 C 语言练习实例9 ...
- Xena L23网络测试仪Valkyrie使用技巧100例,目录
Xena L23网络测试仪Valkyrie使用技巧100例,先写个目录 100例,会不会有点多,写不完... ^_^ 第1次编辑于2019-11-27 22:05:52, Evan YE. 编号 标题 ...
随机推荐
- nginx 域名绑定 域名, nginx 域名绑定 端口
一.nginx 域名绑定 域名 nginx绑定多个域名可又把多个域名规则写一个配置文件里,也可又分别建立多个域名配置文件,我一般为了管理方便,每个域名建一个文件,有些同类域名也可又写在一个总的配置文件 ...
- jQuery实现新浪微博自动底部加载的方法
jQuery ScrollPagination plugin 是一个jQuery 实现的支持无限滚动加载数据的插件. 地址:http://andersonferminiano.com/jquerysc ...
- 数字签名算法(C#)
public static string GetSHA1Method(string strSource) { string strResult = ""; //Create Sys ...
- visual studio2013 php
C:\Users\Administrator\AppData\Local\Microsoft\VisualStudio\12.0\Extensions\DEVSENSE\PHP Tools for V ...
- 【js】用正则表达式对文字进行局部替换
比如有个字符串http://www.55188.com/thread-8306254-2-3.html,需要把8306254后面的2替换成其它数字,其它保持不变,该如何办呢?请看代码: var url ...
- (LeetCode 86)Partition List
Given a linked list and a value x, partition it such that all nodes less than x come before nodes gr ...
- Java从零开始学三十二(正则表达式)
一.为什么要有正则 正则表达式可以方便的对数据进行匹配,可以执行更加复杂的字符串验证.拆份.替换功能. 例如:现在要求判断一个字符串是否由数字组成,则可以有以下的两种做法: 不使用正则完成 使用正则完 ...
- SetWindowsHookEx 钩子
基本介绍 钩子(Hook),是Windows消息处理机制的一个平台,应用程序可以在上面设置子程以监视指定窗口的某种消息,而且所监视的窗口可以是其他进程所创建的.当消息到达后,在目标窗口处理函数之前处理 ...
- Table '' is marked as crashed and should be repaired 解决方法
解决方法: 找到mysql的安装目录的bin/myisamchk工具,在命令行中输入: myisamchk -c -r ../data/mysql/user.MYI 然后myisamchk 工具会帮助 ...
- C#编写Windows服务程序 (服务端),client使用 消息队列 实现淘宝 订单全链路效果
需求: 针对 淘宝提出的 订单全链路 产品接入 .http://open.taobao.com/doc/detail.htm?id=102423&qq-pf-to=pcqq.group oms ...