Android数据适配-ExpandableListView
Android中ListView的用法基本上学的时候都会使用,其中可以使用ArrayAdapter,SimpleAdapter,BaseAdapter去实现,这次主要使用的ExpandableListView展示一种两层的效果,ExpandableListView是android中可以实现下拉list的一个控件类似于QQ那种我好友之后就是一排自己的好友,就是两层效果,实现的话使用SimpleExpandableListAdapter即可。
布局文件
先看下效果:

main中xml代码:
  <Button

        android:onClick="test"

        android:layout_width="fill_parent"

        android:layout_height="wrap_content"

        android:text="FlyElephant" />

    <ExpandableListView

        android:id="@id/android:list"

        android:layout_width="fill_parent"

        android:layout_height="fill_parent"

        android:drawSelectorOnTop="false" />
定义一个省份的province.xml:
<?xml version="1.0" encoding="utf-8"?>

<LinearLayout xmlns:android="http://schemas.android.com/apk/res/android"

    android:layout_width="match_parent"

    android:layout_height="match_parent"

    android:orientation="vertical" >

    <TextView

        android:id="@+id/list_provinceText"

        android:layout_width="fill_parent"

        android:layout_height="fill_parent"

        android:paddingBottom="8px"

        android:paddingLeft="30px"

        android:paddingRight="5px"

        android:paddingTop="8px"

        android:textSize="20sp" />

</LinearLayout>
定义了一个地区的child.xml:
<?xml version="1.0" encoding="utf-8"?>

<LinearLayout xmlns:android="http://schemas.android.com/apk/res/android"

    android:layout_width="match_parent"

    android:layout_height="match_parent"

    android:orientation="vertical" >

       <TextView

        android:id="@+id/child_text"

        android:layout_width="fill_parent"

        android:layout_height="fill_parent"

        android:paddingBottom="8px"

        android:paddingLeft="30px"

        android:paddingRight="5px"

        android:paddingTop="8px"

        android:textSize="20sp" />

</LinearLayout>
Demo实现
主要实现代码,代码中都已经注释,其中最主要的SimpleExpandableListAdapter中的参数,这个参数太多,很容易弄错,可以看下注释或者API文档:
// 创建一级条目
List<Map<String, String>> provinces = new ArrayList<Map<String, String>>();
//创建两个省份一级条目
Map<String, String> firstProvince= new HashMap<String, String>();
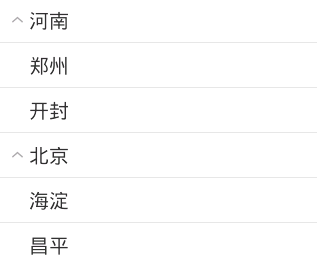
firstProvince.put("province", "河南");
Map<String, String> secondProvince= new HashMap<String, String>();
secondProvince.put("province", "北京");
provinces.add(firstProvince);
provinces.add(secondProvince);
// 创建一级条目下的的二级地区条目
List<Map<String, String>> childList1= new ArrayList<Map<String, String>>();
//同样是在一级条目目录下创建两个对应的二级条目目录
Map<String, String> child1= new HashMap<String, String>();
child1.put("child", "郑州");
Map<String, String> child2 = new HashMap<String, String>();
child2.put("child", "开封");
childList1.add(child1);
childList1.add(child2);
//同上
List<Map<String, String>> childList2 = new ArrayList<Map<String, String>>();
Map<String, String> child3 = new HashMap<String, String>();
child3.put("child", "海淀");
Map<String, String> child4 = new HashMap<String, String>();
child4.put("child", "昌平");
childList2.add(child3);
childList2.add(child4);
// 将二级条目放在一个集合里,供显示时使用
List<List<Map<String, String>>> childs = new ArrayList<List<Map<String, String>>>();
childs.add(childList1);
childs.add(childList2);
/**
* 使用SimpleExpandableListAdapter显示ExpandableListView
* 参数1.上下文对象Context
* 参数2.一级条目目录集合
* 参数3.一级条目对应的布局文件
* 参数4.fromto,就是map中的key,指定要显示的对象
* 参数5.与参数4对应,指定要显示在groups中的id
* 参数6.二级条目目录集合
* 参数7.二级条目对应的布局文件
* 参数8.fromto,就是map中的key,指定要显示的对象
* 参数9.与参数8对应,指定要显示在childs中的id
*/
SimpleExpandableListAdapter adapter = new SimpleExpandableListAdapter(
this, provinces, R.layout.list_group, new String[] { "province" },
new int[] { R.id.list_groupText }, childs, R.layout.child,
new String[] { "child" }, new int[] { R.id.child_text });
setListAdapter(adapter);
这个mainActivity需要继承ExpandableListActivity,当然你可以设置其中的点击事件,只要重写一下方法即可:
    /**

     * 设置哪个二级目录被默认选中

     */

    @Override

    public boolean setSelectedChild(int groupPosition, int childPosition,

            boolean shouldExpandGroup) {

            //do something

        return super.setSelectedChild(groupPosition, childPosition,

                shouldExpandGroup);

    }

    /**

     * 设置哪个一级目录被默认选中

     */

    @Override

    public void setSelectedGroup(int groupPosition) {

        //do something

        super.setSelectedGroup(groupPosition);

    }

    /**

     * 当二级条目被点击时响应

     */

    @Override

    public boolean onChildClick(ExpandableListView parent, View v,

            int groupPosition, int childPosition, long id) {

            //do something

        return super.onChildClick(parent, v, groupPosition, childPosition, id);

    }
效果如下:
上面这个例子写的有点单调,其实第二个你子的布局直接是空的也行,例如定义一个images.xml
<?xml version="1.0" encoding="utf-8"?>

<LinearLayout xmlns:android="http://schemas.android.com/apk/res/android"

    android:layout_width="wrap_content"

    android:layout_height="wrap_content"

    android:orientation="horizontal" >

    <ImageView

        android:src="@drawable/open"

        android:layout_width="20dp"

        android:layout_height="20dp" />

    <TextView

        android:id="@+id/txtName"

       android:paddingLeft="10dp"

        android:layout_width="wrap_content"

        android:layout_height="wrap_content" />

</LinearLayout>
然后定义一个items.xml
<?xml version="1.0" encoding="utf-8"?>

<TextView xmlns:android="http://schemas.android.com/apk/res/android"

    android:id="@+id/items"

    android:layout_width="wrap_content"

    android:layout_height="wrap_content" >

</TextView>
代码调用:
public class MyExpandleActivity extends Activity {

	/**

	 * 实现可扩展展开列ExpandableListView的三种方式

	 * 一是使用SimpleExpandableListAdpater将两个List集合包装成ExpandableListView 二是

	 * 扩展BaseExpandableListAdpter

	 * 三是使用simpleCursorTreeAdapter将Cursor中的数据包装成SimpleCuroTreeAdapter

	 */

	private String[] names = { "腾讯", "百度", "阿里巴巴" };

	private String[][] childnames = { { "马化腾", "张小龙","社交"},

			{ "李彦宏", "马东敏","搜索" }, { "马云", "陆兆禧","电商" } };

	private ExpandableListView ep;

	@Override

	protected void onCreate(Bundle savedInstanceState) {

		super.onCreate(savedInstanceState);

		setContentView(R.layout.activity_my_expandle);

		// 定义父列表项List数据集合

		List<Map<String, String>> group = new ArrayList<Map<String, String>>();

		// 定义子列表项List数据集合

		List<List<Map<String, String>>> ss = new ArrayList<List<Map<String, String>>>();

		for (int i = 0; i < names.length; i++) {

			// 提供父列表的数据

			Map<String, String> maps = new HashMap<String, String>();

			maps.put("names", names[i]);

			group.add(maps);

			// 提供当前父列的子列数据

			List<Map<String, String>> child = new ArrayList<Map<String, String>>();

			for (int j = 0; j < names.length; j++) {

				Map<String, String> mapsj = new HashMap<String, String>();

				mapsj.put("map", childnames[i][j]);

				child.add(mapsj);

			}

			ss.add(child);

		}

		/**

		 * 第一个参数 应用程序接口 this 第二个父列List<?extends Map<String,Object>>集合 为父列提供数据

		 * 第三个参数 父列显示的组件资源文件 第四个参数 键值列表 父列Map字典的key 第五个要显示的父列组件id 第六个 子列的显示资源文件

		 * 第七个参数 键值列表的子列Map字典的key 第八个要显示子列的组件id

		 */

		SimpleExpandableListAdapter expand = new SimpleExpandableListAdapter(

				this, group, R.layout.images, new String[] { "names" },

				new int[] { R.id.txtName }, ss, R.layout.items,

				new String[] { "map" }, new int[] { R.id.items });

		ep = (ExpandableListView) findViewById(R.id.expanable_mylist);

		ep.setAdapter(expand);

	}

}
效果跟上面相同:

Android数据适配-ExpandableListView的更多相关文章
- Android中使用ExpandableListView实现微信通讯录界面(完善仿微信APP)
之前的博文<Android中使用ExpandableListView实现好友分组>我简单介绍了使用ExpandableListView实现简单的好友分组功能,今天我们针对之前的所做的仿微信 ...
- Android中使用ExpandableListView实现好友分组
一个视图显示垂直滚动两级列表中的条目.这不同于列表视图,允许两个层次,类似于QQ的好友分组.要实现这个效果的整体思路为: 1.要给ExpandableListView 设置适配器,那么必须先设置数据源 ...
- 【收藏】Android屏幕适配全攻略(最权威的Google官方适配指导)
来源:http://blog.csdn.net/zhaokaiqiang1992 更多:Android AutoLayout全新的适配方式, 堪称适配终结者 Android的屏幕适配一直以来都在折磨着 ...
- Android屏幕适配全攻略(最权威的官方适配指导)(转),共大家分享。
Android的屏幕适配一直以来都在折磨着我们这些开发者,本篇文章以Google的官方文档为基础,全面而深入的讲解了Android屏幕适配的原因.重要概念.解决方案及最佳实践,我相信如果你能认真的学习 ...
- Android屏幕适配dp、px两套解决办法
"又是屏幕适配,这类文章网上不是很多了吗?" 我也很遗憾,确实又是老问题.但本文重点对网上的各种方案做一个简短的总结,和具体使用方法. 若想了解具体Android设备适配的前世因果 ...
- Android屏幕适配全攻略(最权威的官方适配指导) (转)
招聘信息: Cocos2d-X 前端主程 [新浪微博]手机客户端iOS研发工程师 20k-40k iOS 开发工程师 iOS高级开发工程师(中国排名第一的企业级移动互联网云计算公司 和创科技 红圈营销 ...
- Android多分辨率适配
前一阶段开发android项目,由于客户要求进行多分辨率适配,能够支持国内主流的分辨率手机.因此经过了几次开发走了很多弯路,目前刚刚领略了android多分辨率适配的一些方法. 先介绍一下所走的弯路, ...
- 【转】Android屏幕适配全攻略(最权威的官方适配指导)
原文网址:http://blog.csdn.net/jdsjlzx/article/details/45891551 Android的屏幕适配一直以来都在折磨着我们这些开发者,本篇文章以Google的 ...
- android开发之ExpandableListView的使用,实现类似QQ好友列表
由于工作需要,今天简单研究了一下ExpandableListView,做了一个类似QQ列表的Demo,和大家分享一下. 效果图如下: 先来看看主布局文件: <RelativeLayout xml ...
随机推荐
- 使用IDEA和Maven创建Javaweb项目
1.File -- New -- Project
- CentOS7中热插拔硬盘如何读取新的硬盘
在服务器或虚拟机上,一般会实现热插拔硬盘.此时CentOS7是无法读到新盘的,所以需要重新扫描. 我们添加一个新的硬盘演示: [root@xuexi ~]# ls /dev/sd* //应该还有一个s ...
- es6新增功能
声明命令 1. let命令 ES6新增了let命令,用来声明变量.它的用法类似于var,但是所声明的变量,只在let命令所在的代码块内有效.下面代码在代码块之中,分别用let和var声明了两个变量.然 ...
- SQLSERVER——查看阻塞信息(sp_who_lock优化无误版)
经常会需要分析SQLSERVER的阻塞情况,尤其是某些SQL操作异常缓慢从而怀疑是有人在搞事情的情况下.网上有许多一模一样的帖子,是关于sp_who_lock这个存储过程的,然而,网上流传的这个是略有 ...
- JavaScript 继承和数组
前言 因为篇幅比较短,所以将JavaScript中的继承和数组进行统一写. 继承 当一个函数对象被创建的时候,Function构造器产生的函数对象会运行类似这样的代码: this.prototype ...
- python开发_getpass_获取登录名
我们有时候需要获取到计算机的登录名,这时候,就可以使用python中的getpass模块了 下面是我做的demo 运行效果: ===================================== ...
- JTAG接线描述
http://www.dzsc.com/data/html/2008-12-23/75397.html JTAG测试信号由下面5个信号组成. TRST:测试复位输入信号,测试接口初始化 TCK:测试时 ...
- 常见 core dump 原因分析signal 11 - SIGSEGV
signal 6 - SIGABRT free 多次 char *p = malloc(100); free(p); free(p); fclose 多次 // fclose 内部调用 free FI ...
- .NET泛型04,使用Lazy<T>实现延迟加载
对于一些"大对象"的创建,我们常常希望延迟加载,即在需要的时候再创建对象实例.现在Lazy<T>很好地支持了这一特点.主要包括: 没有Lazy<T>之前 L ...
- ios 中局部变量可以通过传递来进行管理和释放,借此可提高代码的內聚度
ios 中 局部变量可以通过传递来进行管理和释放,通过多使用局部变量,可以提高代码的內聚度.如下: -(void)someMethod { UILabel *label = [[UILabel al ...