Spring Cloud Config入门(本地配置)
spring cloud config 简介
- Spring Cloud Config为分布式系统中的外部化配置提供服务器和客户端支持。使用Config Server,您可以在所有环境中管理应用程序的外部属性。
- Spring Cloud Config 分为两个部分 ,server端和client端。
server端配置服务器,管理配置信息
client端获取配置信息
创建并运行一个Spring Cloud Config Server
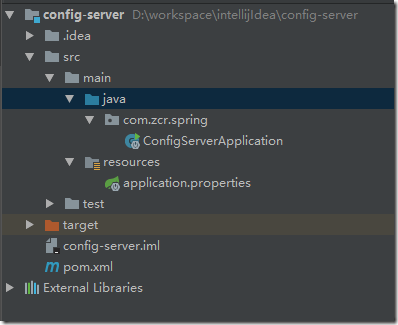
- 创建一个名为config-server的应用,并添加spring-cloud-starter-parent,spring-cloud-config-server依赖,pom信息具体如下
<?xml version="1.0" encoding="UTF-8"?>

<project xmlns="http://maven.apache.org/POM/4.0.0"

         xmlns:xsi="http://www.w3.org/2001/XMLSchema-instance"

         xsi:schemaLocation="http://maven.apache.org/POM/4.0.0 http://maven.apache.org/xsd/maven-4.0.0.xsd">

    <modelVersion>4.0.0</modelVersion>

    <groupId>com.zcr.test</groupId>

    <artifactId>config-server</artifactId>

    <version>1.0-SNAPSHOT</version>

    <packaging>jar</packaging>

    <name>config-server</name>

    <description>Demo project for Spring Boot</description>

    <parent>

        <groupId>org.springframework.boot</groupId>

        <artifactId>spring-boot-starter-parent</artifactId>

        <version>1.5.2.RELEASE</version>

    </parent>

    <properties>

        <project.build.sourceEncoding>UTF-8</project.build.sourceEncoding>

        <project.reporting.outputEncoding>UTF-8</project.reporting.outputEncoding>

        <java.version>1.8</java.version>

    </properties>

    <dependencies>

        <dependency>

            <groupId>org.springframework.cloud</groupId>

            <artifactId>spring-cloud-config-server</artifactId>

        </dependency>

        <dependency>

            <groupId>org.springframework.boot</groupId>

            <artifactId>spring-boot-starter-test</artifactId>

            <scope>test</scope>

        </dependency>

        <dependency>

            <groupId>org.springframework.cloud</groupId>

            <artifactId>spring-cloud-starter-eureka</artifactId>

        </dependency>

    </dependencies>

    <dependencyManagement>

        <dependencies>

            <dependency>

                <groupId>org.springframework.cloud</groupId>

                <artifactId>spring-cloud-dependencies</artifactId>

                <version>Camden.SR6</version>

                <type>pom</type>

                <scope>import</scope>

            </dependency>

        </dependencies>

    </dependencyManagement>

    <build>

        <plugins>

            <plugin>

                <groupId>org.springframework.boot</groupId>

                <artifactId>spring-boot-maven-plugin</artifactId>

            </plugin>

        </plugins>

    </build>

</project> - 创建application主类,并添加@EnableConfigServer注解,代码如下
package com.zcr.spring;

import org.springframework.boot.SpringApplication;

import org.springframework.boot.autoconfigure.SpringBootApplication;

import org.springframework.cloud.config.server.EnableConfigServer;

@SpringBootApplication

@EnableConfigServer

public class ConfigServerApplication {

    public static void main(String[] args) {

        SpringApplication.run(ConfigServerApplication.class,args);

    }

} - 在本地创建一个配置文件db-service-dev.properties,格式如下
sck.type=sck

sck.url=jdbc:oracle:thin:@10.1.50.205:1521:orcl

sck.class=oracle.jdbc.driver.OracleDriver

sck.user=sddb

sck.password=sddb

eom.type=eom

eom.url=jdbc:oracle:thin:@10.1.50.205:1521:orcl

eom.class=oracle.jdbc.driver.OracleDriver

eom.user=eom

eom.password=eom - 在resources文件夹下创建application.properties,内容如下
#tomcat端口号

server.port=8888

#配置文件在本地

spring.profiles.active=native

#配置文件的目录

spring.cloud.config.server.native.search-locations=D:/workspace/GitHub/spring-config/config-file
目录结构:
- 运行应用并打开网址http://localhost:8888/db-service/dev,出现如下页面,证明配置文件发布成功

创建并运行一个Spring Cloud Config Client
- 创建一个名为config-client的应用,并添加spring-cloud-starter-parent,spring-cloud-starter-config,spring-boot-starter-web依赖,pom信息具体如下
<?xml version="1.0" encoding="UTF-8"?>
<project xmlns="http://maven.apache.org/POM/4.0.0"
xmlns:xsi="http://www.w3.org/2001/XMLSchema-instance"
xsi:schemaLocation="http://maven.apache.org/POM/4.0.0 http://maven.apache.org/xsd/maven-4.0.0.xsd">
<modelVersion>4.0.0</modelVersion> <groupId>com.zcr.spring</groupId>
<artifactId>config-client</artifactId>
<version>1.0-SNAPSHOT</version>
<parent>
<groupId>org.springframework.boot</groupId>
<artifactId>spring-boot-starter-parent</artifactId>
<version>1.5.2.RELEASE</version>
</parent>
<properties>
<project.build.sourceEncoding>UTF-8</project.build.sourceEncoding>
<project.reporting.outputEncoding>UTF-8</project.reporting.outputEncoding>
<java.version>1.8</java.version>
</properties>
<dependencies>
<dependency>
<groupId>org.springframework.cloud</groupId>
<artifactId>spring-cloud-starter-config</artifactId>
</dependency> <dependency>
<groupId>org.springframework.boot</groupId>
<artifactId>spring-boot-starter-web</artifactId>
</dependency> <dependency>
<groupId>org.springframework.boot</groupId>
<artifactId>spring-boot-starter-test</artifactId>
<scope>test</scope>
</dependency>
<dependencyManagement>
<dependencies>
<dependency>
<groupId>org.springframework.cloud</groupId>
<artifactId>spring-cloud-dependencies</artifactId>
<version>Dalston.RC1</version>
<type>pom</type>
<scope>import</scope>
</dependency>
</dependencies>
</dependencyManagement> <build>
<plugins>
<plugin>
<groupId>org.springframework.boot</groupId>
<artifactId>spring-boot-maven-plugin</artifactId>
</plugin>
</plugins>
</build> <repositories>
<repository>
<id>spring-milestones</id>
<name>Spring Milestones</name>
<url>https://repo.spring.io/milestone</url>
<snapshots>
<enabled>false</enabled>
</snapshots>
</repository>
</repositories> </project> - 在resources中创建bootstrap.properties(bootstrap.yml会在应用启动之前读取),格式如下
#文件名

spring.application.name=db-service

#文件模式,默认为default

spring.cloud.config.profile=dev

#server端ip地址

spring.cloud.config.uri= http://localhost:8888/

#client端ip端口

server.port=8881 - 创建一个controller
package com.zcr.spring;

import org.springframework.beans.factory.annotation.Value;

import org.springframework.boot.SpringApplication;

import org.springframework.boot.autoconfigure.SpringBootApplication;

import org.springframework.web.bind.annotation.RequestMapping;

import org.springframework.web.bind.annotation.RestController;

@SpringBootApplication

@RestController

public class ConfigClientApplication {

    public static void main(String[] args) {

        SpringApplication.run(ConfigClientApplication.class, args);

    }

    @Value("${sck.user}")

    String sckUser;

    @Value("${sck.password}")

    String sckPassword;

    @RequestMapping("/hello")

    public String showUserAndPassword(){

        String sb = "username is " + sckUser + "," + "password is " +sckPassword;

        return sb;

    }
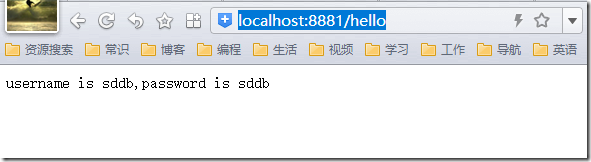
} - 启动Application,并访问http://localhost:8881/hello,出现如下界面,成功
遗留问题:1.初始化时,注入在static代码块之后,故静态代码块无法获取远程配置信息。
2.对spring了解浅。不懂内部原理,bug调试过程中比较费劲。
3.对spring中的注解不了解。
源码地址:https://github.com/310834626/spring-cloud-config
参考:http://www.jianshu.com/p/69dea19abf04
http://blog.didispace.com/springcloud4/
http://tech.lede.com/2017/06/12/rd/server/springCloudConfig/
Spring Cloud Config入门(本地配置)的更多相关文章
- SpringCloud实战之初级入门(三)— spring cloud config搭建git配置中心
目录 1.环境介绍 2.配置中心 2.1 创建工程 2.2 修改配置文件 2.3 在github中加入配置文件 2.3 修改启动文件 3. 访问配置中心 1.环境介绍 上一篇文章中,我们介绍了如何利用 ...
- 【Spring Cloud】Spring Cloud Config 实现分布式配置中心
Spring Cloud Config 实现分布式配置中心 一.分布式配置中心 分布式系统中,往往拥有大量的服务应用,而每个应用程序都需要有对应的配置文件来协助完成服务环境初始化.运行.因此生产了大量 ...
- 使用Spring Cloud Config统一管理配置,别再到处放配置文件了
1 前言 欢迎访问南瓜慢说 www.pkslow.com获取更多精彩文章! 可配置是一个成熟软件系统应该提供的特性,而配置管理对于大型系统就显得十分重要,特别是对于拥有多个应用的微服务系统.可喜的是, ...
- spring cloud config svn仓库配置
之前快速入门了一下spring cloud config 但是仓库用的别人博客上的git仓库,公司用的是svn项目管理中心,下面这个自己配置的时候出现的错误 You need to configure ...
- spring cloud config 入门
简介 Spring cloud config 分为两部分 server client config-server 配置服务端,服务管理配置信息 config-client 客户端,客户端调用serve ...
- .NET Core微服务之基于Steeltoe使用Spring Cloud Config统一管理配置
Tip: 此篇已加入.NET Core微服务基础系列文章索引 => Steeltoe目录快速导航: 1. 基于Steeltoe使用Spring Cloud Eureka 2. 基于Steelt ...
- Spring Cloud config之一:分布式配置中心入门介绍
Spring Cloud Config为服务端和客户端提供了分布式系统的外部化配置支持.配置服务器为各应用的所有环境提供了一个中心化的外部配置.它实现了对服务端和客户端对Spring Environm ...
- Spring Cloud Config(配置中心)
每天学习一点点 编程PDF电子书.视频教程免费下载:http://www.shitanlife.com/code 一.简介 Spring Cloud Config为分布式系统中的外部配置提供服务器和客 ...
- SpringCloud教程 | 第六篇: 分布式配置中心(Spring Cloud Config)
一.简介 在分布式系统中,由于服务数量巨多,为了方便服务配置文件统一管理,实时更新,所以需要分布式配置中心组件.在Spring Cloud中,有分布式配置中心组件spring cloud config ...
随机推荐
- ansible start canal
- name: Start canal server shell: source /etc/profile && nohup /opt/canal/bin/startup.sh
- day20 异常处理
异常处理: 一.语法错误 二.逻辑错误 为什么要进行异常处理? python解释器执行程序时,检测到一个错误,出发异常,异常没有被处理的话,程序就在当前异常处终止,后面的代码不会运行 l = ['lo ...
- python接口设计中的__all__和del
最近在实现python接口中遇到了一些小问题,解决后总结如下. 目的:在设计接口时,只暴露某个文件的特定方法. 例如: t.py import os import sys def a(): pass ...
- SpringBoot学习(七)—— springboot快速整合Redis
目录 Redis缓存 简介 引入redis缓存 代码实战 Redis缓存 @ 简介 redis是一个高性能的key-value数据库 优势 性能强,适合高度的读写操作(读的速度是110000次/s,写 ...
- attach()与detach()的使用
attach()与detach()需要配对使用,如果使用了attach而未使用detach,再次使用attach时,会有"对象被屏蔽"的问题,如下:
- 针对可变类型的for遍历
针对可变类型的for遍历 举个例子 lis = [1,6,1, 2, 3,3, 4, 5] for i in lis: lis.remove(i) print(lis) [6, 1, 2, 3, 3, ...
- 【nodejs原理&源码赏析(7)】【译】Node.js中的事件循环,定时器和process.nextTick
目录 Event Loop 是什么? Event Loop 基本解释 事件循环阶段概览 事件循环细节 timers pending callbacks poll阶段 check close callb ...
- luogu P3913 车的攻击 |数学
题目描述 N×N 的国际象棋棋盘上有KK 个车,第ii个车位于第R_i行,第C_i列.求至少被一个车攻击的格子数量. 车可以攻击所有同一行或者同一列的地方. 输入格式 第1 行,2 个整数N,K. 接 ...
- python数据挖掘第一篇:正则表达式
正则表达式 re 模块 re.match(pattern,string[,flag]) match方法 从首字母开始匹配,如果包含pattern字符串,则匹配成功,返回match对象,失败则返回Non ...
- sublime text3安装中文版插件
安装插件前需要先安装 package control 扩展包管理器,安装方法为:进入 https://sublime.wbond.net/Package%20Control.sublime-packa ...