使用注解方式实现 AOP和IoC
使用注解方式实现AOP和IoC
IOC和DI的注解
IOC:
@Component:实现Bean组件的定义
@Repository:用于标注DAO类,功能与@Component作用相当
@Service:用于标注业务类
@Controller:用于标注控制器
DI:
@Resource(name="userService")
默认ByName方式,如果name确实默认按照ByType方式注入
@Autowired
默认ByType方式,如果出现同名类,则不能按照Type进行注入
需要使用@Qualifier 指明ID
1. 使用注解实现IoC案例
1.1 编写applicationContext.xm文件
<!--扫描注解:包扫描器-->
<context:component-scan base-package="cn.spring"/>
1.2创建mapper接口
public interface UserMapper {
    public int addUser(User user);
}
1.3 创建mapper接口实现类
@Repository
public class UserMapperImpl implements UserMapper {

    @Override
    public int addUser(User user) {
        System.out.println("添加成功");
        return 1;
    }
}
1.4创建Service接口
public interface UserService {
    public int addUser(User user);
}
1.5创建Service接口实现类
@Service("userServiceImpl")
public class UserServiceImpl implements UserService {
    //植入Dao层对象
    //@Resource默认是根据byName的方式,但是一旦名字为空 ,就根据byType
    @Autowired
    private UserMapper userMapper;
    @Override
    public int addUser(User user) {

        return userMapper.addUser(user);
    }

}
1.6 编写测试类
@org.junit.Test
public void test2() {
    ApplicationContext context = new ClassPathXmlApplicationContext("applicationContext.xml");
    //通过类型调度
    //UserInfoService userService=context.getBean(UserService.class);
    //指定@Service的value值后使用bean的id名称调度
    UserService userServiceImpl = (UserService) context.getBean("userServiceImpl");
    userServiceImpl.addUser(new User());
}
1.7 控制台

使用注解方式实现AOP
- 实现AOP的注解有
- @Aspect 声明切面
- @Ponitcut 声明公共的切点表达式
- @Before 前置增强
- @AfterReturning 后置增强
- @Around 环绕增强
- @AfterThrowing 异常抛出增强
- @After 最终增强
1.使用注解方式实现前置增强和后置增强
1.1 编写applicationContext.xml文件
<!--开启AOP注解支持-->
<aop:aspectj-autoproxy/>
1.2 创建Service类
@Service("IDoSomeService")
public class IDoSomeService {

    public void doSome(){
        System.out.println("业务类中dosome方法");
    }

    public void say(){
        System.out.println("业务类中say方法");
    }
}
1.3 编写切面类实现增强
@Aspect
@Component
public class MyAdvice {

@Pointcut("execution(* *..service.*.*(..))")
public void point(){

}

    @Before("point()")
    public void before(){
        System.out.println("前置增强");
    }

    @AfterReturning("execution(* *..service.*.*(..))")
    public void afterReturning(){
        System.out.println("后置增强");
    }

}
1.4 编写测试类
@org.junit.Test
public void test3(){
    ApplicationContext context=new ClassPathXmlApplicationContext("applicationContext.xml");
    IDoSomeService iDoSomeService = (IDoSomeService)context.getBean("IDoSomeService");
    iDoSomeService.doSome();
    iDoSomeService.say();
}
1.5 控制台

2. 使用注解方式实现环绕增强
2.1 编写applicationContext.xml文件
<!--扫描注解:包扫描器-->
<context:component-scan base-package="cn.spring"/>

<!--开启AOP注解支持-->
<aop:aspectj-autoproxy/>
2.2 创建Service类
@Service("IDoSomeService")
public class IDoSomeService {

    public void doSome(){
        System.out.println("业务类中dosome方法");
    }

    public void say(){
        System.out.println("业务类中say方法");
    }
}
2.3编写切面类实现增强
@Aspect
@Component
public class AroundAdvisor {

    @Around("execution(* *..service.*.*(..))")
    public void around(ProceedingJoinPoint PJ) throws Throwable {
        System.out.println("环绕增强");
        PJ.proceed();
        System.out.println("环绕增强");
    }
}
2.4编写测试类
@org.junit.Test
public void test3(){
    ApplicationContext context=new ClassPathXmlApplicationContext("applicationContext.xml");
    IDoSomeService iDoSomeService = (IDoSomeService)context.getBean("IDoSomeService");
    iDoSomeService.doSome();
    iDoSomeService.say();
}
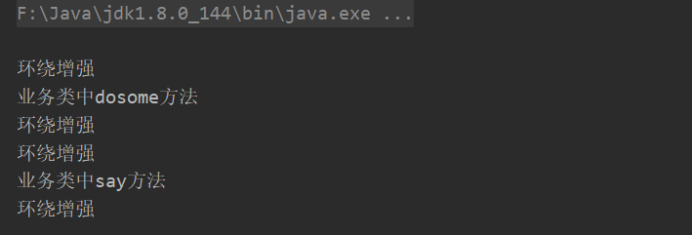
2.5控制台
3. 使用注解实现异常抛出增强
在exception包下完成对应的用例。
声明切面类
@Aspect
public class AroundLoggerAnno {
   @Around("execution(* com.cmy.service.*.*(..))")
   public Object aroundLogger(ProceedingJoinPoint jp) throws Throwable {
      System.out.println("调用 " + jp.getTarget() + " 的 " + jp.getSignature().getName()
            + " 方法。方法入参:" + Arrays.toString(jp.getArgs()));
      try {
         Object result = jp.proceed();
         System.out.println("调用 " + jp.getTarget() + " 的 "
               + jp.getSignature().getName() + " 方法。方法返回值:" + result);
         return result;
      } catch (Throwable e) {
         System.out.println(jp.getSignature().getName() + " 方法发生异常:" + e);
         throw e;
      } finally {
         System.out.println(jp.getSignature().getName() + " 方法结束执行。");
      }
   }
创建Spring的核心配置文件,开启Spring对IOC和AOP注解的支持
新增app-08.xml文件
<!--开启Spring IOC的注解支持 base-package 包扫描语句 com.cmy包下的注解-->
<context:component-scan base-package="com.cmy"/>
<!--配置增强类 交给Spring容器管理-->
<bean class="com.cmy.exception.ErrorLogger"></bean>
<!--开启Spring AOP注解的支持-->
<aop:aspectj-autoproxy />
编写测试用例,在DoSomeServiceImpl模拟异常
public class Demo2 {
    public static void main(String[] args) {
        //声明式增强 必须加载Spring容器
        ApplicationContext app = new ClassPathXmlApplicationContext("com/cmy/exception/app-08.xml");
        //获取代理对象
        DoSomeService doSomeService=(DoSomeService)app.getBean("doSomeService");
        doSomeService.say();
    }
}
4.使用注解实现最终增强
使用After包,增加切面类
/**
 * 通过注解实现最终增强
 */
@Aspect
public class AfterLoggerAnno {

   @After("execution(* com.cmy.service.*.*(..))")
   public void afterLogger(JoinPoint jp) {
      System.out.println(jp.getSignature().getName() + " 方法结束执行。");
   }
}
新建app-10.xml文件
<!--开启Spring IOC的注解支持 base-package 包扫描语句 com.cmy包下的注解-->
<context:component-scan base-package="com.cmy"></context:component-scan>
<!--配置增强类 交给Spring容器管理-->
<bean class="com.cmy.after.AfterLoggerAnno"></bean>
<!--开启Spring AOP注解的支持-->
<aop:aspectj-autoproxy />
创建测试用例
public class Demo2 {
    public static void main(String[] args) {
        //声明式增强 必须加载Spring容器
        ApplicationContext app = new ClassPathXmlApplicationContext("com/cmy/after/app-10.xml");
        //获取代理对象
        DoSomeService doSomeService=(DoSomeService)app.getBean("doSomeService");
        doSomeService.say();
    }
}
使用注解方式实现 AOP和IoC的更多相关文章
- (转)使用Spring的注解方式实现AOP入门
http://blog.csdn.net/yerenyuan_pku/article/details/52865330 首先在Eclipse中新建一个普通的Java Project,名称为spring ...
- 基于AspectJ的注解方式进行AOP开发
-------------------siwuxie095 基于 AspectJ 的注解方式进行 AOP 开发 ...
- (转)使用Spring的注解方式实现AOP的细节
http://blog.csdn.net/yerenyuan_pku/article/details/52879669 前面我们已经入门使用Spring的注解方式实现AOP了,现在我们再来学习使用Sp ...
- Spring系列之aAOP AOP是什么?+xml方式实现aop+注解方式实现aop
Spring系列之aop aop是什么?+xml方式实现aop+注解方式实现aop 什么是AOP? AOP为Aspect Oriented Programming 的缩写,意识为面向切面的编程,是通过 ...
- spring----IOC注解方式以及AOP
技术分析之Spring框架的IOC功能之注解的方式 Spring框架的IOC之注解方式的快速入门 1. 步骤一:导入注解开发所有需要的jar包 * 引入IOC容器必须的6个jar包 * 多引入一个:S ...
- Spring的注解方式实现AOP
Spring对AOP的实现提供了很好的支持.下面我们就使用Spring的注解来完成AOP做一个例子. 首先,为了使用Spring的AOP注解功能,必须导入如下几个包.aspectjrt.jar,asp ...
- 使用Spring的注解方式实现AOP
Spring对AOP的实现提供了很好的支持.下面我们就使用Spring的注解来完成AOP做一个例子. 首先,为了使用Spring的AOP注解功能,必须导入如下几个包.aspectjrt.jar,asp ...
- spring 纯注解方式 与AOP
spring注解方式 以前我也使用过纯注解方式.现在在这里做个记录 我们先认识几个我们都耳熟能详的注解 @configuration :从spring3.0这个注解就可以用于定义配置类,可以替换xml ...
- 注解方式实现AOP编程
步骤: 1) 先引入aop相关jar文件 (aspectj aop优秀组件) spring-aop-3.2.5.RELEASE.jar [spring3.2源码] aopal ...
随机推荐
- 【转帖】2011-2018年中国IPv6地址数量及国际出口带宽数走势情况[图]
2011-2018年中国IPv6地址数量及国际出口带宽数走势情况[图] http://www.chyxx.com/industry/201910/791801.html 三亿多ipv4的地址. 接近9 ...
- EFCore中的导航属性
使用了这么久的EntityFrameworkCore框架,今天想来就其中的一个部分来做一个知识的梳理,从而使自己对于整个知识有一个更加深入的理解,如果你对EFCore中的实体关系不熟悉你需要有一个知识 ...
- google test 打印派生类对象
在Unison中使用google test时,发现EXPECT_EQ在fail时,不能打印Unison Test Language中定义的派生类的对象.于是写了个纯C++的示例,发现在只定义基类的op ...
- svn: E230001: Server SSL certificate verification failed: certificate issued
svn: E230001: Server SSL certificate verification failed: certificate issued 今天在使用svn时候发现出现这个问题,这个是因 ...
- 机器学习-EM算法-GMM模型笔记
GMM即高斯混合模型,下面根据EM模型从理论公式推导GMM: 随机变量X是有K个高斯分布混合而成,取各个高斯分布的概率为φ1,φ2,... ,φK,第i个高斯分布的均值为μi,方差为Σi.若观测到随机 ...
- uwsgi flask gevent 测试代码覆盖率(coverage)
目录 可能出现的问题 解决 可能出现的问题 多进程启动 gevent启动 运行的服务可能不会停止 解决 我先参考了一下这一篇文章使用Coverage分析WSGI项目的代码覆盖率,他基本能够解决掉1.2 ...
- closed channel
func Test_chanel(t *testing.T) { c := make(chan int, 1) go func() { time.Sleep(time.Second * 3) clos ...
- openfeign与gateway中的httpClient类声明冲突
启动spring cloud中的网关,报错: ***************************APPLICATION FAILED TO START*********************** ...
- jQuery控制页面滚动条上下滚动
.向上滚动 $(); .向下滚动 $(); 参数解读:$(this)表示要实现上下滚动的对象,-50表示向上滚动50px , +50表示向下滚动50px ,1000表示滚动速度
- win7用驱动精灵安装了bcm94352ac蓝牙驱动后还是不能用蓝牙的解决方法
驱动精灵安装了驱动后,设备管理器处显示Bluetooth USB,但是没法用蓝牙,找不到蓝牙图标,后来在华硕官方下载了win7的Broadcom 蓝牙驱动程序装上之后就好了