kubernetes监控(12)
一、Weave Scope
1. weave scope 容器地图

2.weave scope部署
[root@cicd kubernetes]# cat scope.yaml

apiVersion: v1

kind: List

items:

  - apiVersion: v1

    kind: Namespace

    metadata:

      name: weave

      annotations:

        cloud.weave.works/version: unknown

  - apiVersion: v1

    kind: ServiceAccount

    metadata:

      name: weave-scope

      annotations:

        cloud.weave.works/launcher-info: |-

          {

            "original-request": {

              "url": "/k8s/v1.8/scope.yaml",

              "date": "Tue Nov 06 2018 11:58:40 GMT+0000 (UTC)"

            },

            "email-address": "support@weave.works"

          }

      labels:

        name: weave-scope

      namespace: weave

  - apiVersion: rbac.authorization.k8s.io/v1beta1

    kind: ClusterRole

    metadata:

      name: weave-scope

      annotations:

        cloud.weave.works/launcher-info: |-

          {

            "original-request": {

              "url": "/k8s/v1.8/scope.yaml",

              "date": "Tue Nov 06 2018 11:58:40 GMT+0000 (UTC)"

            },

            "email-address": "support@weave.works"

          }

      labels:

        name: weave-scope

    rules:

      - apiGroups:

          - ''

        resources:

          - pods

        verbs:

          - get

          - list

          - watch

          - delete

      - apiGroups:

          - ''

        resources:

          - pods/log

          - services

          - nodes

          - namespaces

          - persistentvolumes

          - persistentvolumeclaims

        verbs:

          - get

          - list

          - watch

      - apiGroups:

          - apps

        resources:

          - statefulsets

        verbs:

          - get

          - list

          - watch

      - apiGroups:

          - batch

        resources:

          - cronjobs

          - jobs

        verbs:

          - get

          - list

          - watch

      - apiGroups:

          - extensions

        resources:

          - deployments

          - daemonsets

        verbs:

          - get

          - list

          - watch

      - apiGroups:

          - extensions

        resources:

          - deployments/scale

        verbs:

          - get

          - update

      - apiGroups:

          - storage.k8s.io

        resources:

          - storageclasses

        verbs:

          - get

          - list

          - watch

  - apiVersion: rbac.authorization.k8s.io/v1beta1

    kind: ClusterRoleBinding

    metadata:

      name: weave-scope

      annotations:

        cloud.weave.works/launcher-info: |-

          {

            "original-request": {

              "url": "/k8s/v1.8/scope.yaml",

              "date": "Tue Nov 06 2018 11:58:40 GMT+0000 (UTC)"

            },

            "email-address": "support@weave.works"

          }

      labels:

        name: weave-scope

    roleRef:

      kind: ClusterRole

      name: weave-scope

      apiGroup: rbac.authorization.k8s.io

    subjects:

      - kind: ServiceAccount

        name: weave-scope

        namespace: weave

  - apiVersion: apps/v1beta1

    kind: Deployment

    metadata:

      name: weave-scope-app

      annotations:

        cloud.weave.works/launcher-info: |-

          {

            "original-request": {

              "url": "/k8s/v1.8/scope.yaml",

              "date": "Tue Nov 06 2018 11:58:40 GMT+0000 (UTC)"

            },

            "email-address": "support@weave.works"

          }

      labels:

        name: weave-scope-app

        app: weave-scope

        weave-cloud-component: scope

        weave-scope-component: app

      namespace: weave

    spec:

      replicas:

      revisionHistoryLimit:

      template:

        metadata:

          labels:

            name: weave-scope-app

            app: weave-scope

            weave-cloud-component: scope

            weave-scope-component: app

        spec:

          containers:

            - name: app

              args:

                - '--mode=app'

              command:

                - /home/weave/scope

              env: []

              image: 'reg.yunwei.edu/learn/weavscope:1.9.1'

              imagePullPolicy: IfNotPresent

              ports:

                - containerPort:

                  protocol: TCP

  - apiVersion: v1

    kind: Service

    metadata:

      name: weave-scope-app

      annotations:

        cloud.weave.works/launcher-info: |-

          {

            "original-request": {

              "url": "/k8s/v1.8/scope.yaml",

              "date": "Tue Nov 06 2018 11:58:40 GMT+0000 (UTC)"

            },

            "email-address": "support@weave.works"

          }

      labels:

        name: weave-scope-app

        app: weave-scope

        weave-cloud-component: scope

        weave-scope-component: app

      namespace: weave

    spec:

      type: NodePort

      ports:

        - name: app

          port:

          protocol: TCP

          targetPort:

      selector:

        name: weave-scope-app

        app: weave-scope

        weave-cloud-component: scope

        weave-scope-component: app

  - apiVersion: extensions/v1beta1

    kind: DaemonSet

    metadata:

      name: weave-scope-agent

      annotations:

        cloud.weave.works/launcher-info: |-

          {

            "original-request": {

              "url": "/k8s/v1.8/scope.yaml",

              "date": "Tue Nov 06 2018 11:58:40 GMT+0000 (UTC)"

            },

            "email-address": "support@weave.works"

          }

      labels:

        name: weave-scope-agent

        app: weave-scope

        weave-cloud-component: scope

        weave-scope-component: agent

      namespace: weave

    spec:

      minReadySeconds:

      template:

        metadata:

          labels:

            name: weave-scope-agent

            app: weave-scope

            weave-cloud-component: scope

            weave-scope-component: agent

        spec:

          containers:

            - name: scope-agent

              args:

                - '--mode=probe'

                - '--probe-only'

                - '--probe.kubernetes=true'

                - '--probe.docker.bridge=docker0'

                - '--probe.docker=true'

                - 'weave-scope-app.weave.svc.cluster.local:80'

              command:

                - /home/weave/scope

              env:

                - name: KUBERNETES_NODENAME

                  valueFrom:

                    fieldRef:

                      apiVersion: v1

                      fieldPath: spec.nodeName

              image: 'reg.yunwei.edu/learn/weavscope:1.9.1'

              imagePullPolicy: IfNotPresent

              securityContext:

                privileged: true

              volumeMounts:

                - name: scope-plugins

                  mountPath: /var/run/scope/plugins

                - name: sys-kernel-debug

                  mountPath: /sys/kernel/debug

                - name: docker-socket

                  mountPath: /var/run/docker.sock

          dnsPolicy: ClusterFirstWithHostNet

          hostNetwork: true

          hostPID: true

          serviceAccountName: weave-scope

          tolerations:

            - effect: NoSchedule

              operator: Exists

          volumes:

            - name: scope-plugins

              hostPath:

                path: /var/run/scope/plugins

            - name: sys-kernel-debug

              hostPath:

                path: /sys/kernel/debug

            - name: docker-socket

              hostPath:

                path: /var/run/docker.sock

      updateStrategy:

        type: RollingUpdate
scope.yaml文件


- DaemonSet weave-scope-agent,集群每个节点上都会运行的 scope agent 程序,负责收集数据。
- Deployment weave-scope-app,scope 应用,从 agent 获取数据,通过 Web UI 展示并与用户交互。
- Service weave-scope-app,默认是 ClusterIP 类型,为了方便已通过 kubectl edit 修改为 NodePort。
3.使用 weave scope

(2)拓扑结构


(3)实时资源监控


(4)在线操作


PROCESSES:容器中运行的进程。
(5)在容器信息的上面还有一排操作按钮。
(6)强大的搜索功能


二、用 Heapster 监控集群:
1.heapster介绍

2.grafana部署
[root@cicd kubernetes]# docker ps -a

0918862b8730        1acb4fd5df5b                           "/bin/sh"                 days ago          Up  hours                                                                                    xenodochial_liskov

[root@cicd kubernetes]# docker exec -it 0918862b8730 /bin/sh

/ #

/ # cd /etc/ansible/

/etc/ansible # ls

.prepare.yml      .kube-node.yml    example

.etcd.retry       .network.yml      hosts

.etcd.yml         .clean.yml        manifests

.docker.yml       ansible.cfg         roles

.kube-master.yml  bin                 tools

/etc/ansible # cd manifests/

/etc/ansible/manifests # ls

coredns    dashboard  efk        heapster   ingress    kubedns

/etc/ansible/manifests # cd heapster/

/etc/ansible/manifests/heapster # ls

grafana.yaml      influxdb-v1.1.1   influxdb.yaml

heapster.yaml     influxdb-with-pv

/etc/ansible/manifests/heapster # kubectl apply -f .

deployment "monitoring-grafana" unchanged

service "monitoring-grafana" unchanged

serviceaccount "heapster" unchanged

clusterrolebinding "heapster" configured

deployment "heapster" unchanged

service "heapster" unchanged

deployment "monitoring-influxdb" unchanged

service "monitoring-influxdb" unchanged

/etc/ansible/manifests/heapster # kubectl cluster-info

Kubernetes master is running at https://192.168.42.121:6443

CoreDNS is running at https://192.168.42.121:6443/api/v1/namespaces/kube-system/services/coredns:dns/proxy

kubernetes-dashboard is running at https://192.168.42.121:6443/api/v1/namespaces/kube-system/services/https:kubernetes-dashboard:/proxy

monitoring-grafana is running at https://192.168.42.121:6443/api/v1/namespaces/kube-system/services/monitoring-grafana/proxy

To further debug and diagnose cluster problems, use 'kubectl cluster-info dump'.

用户名和密码都是admi
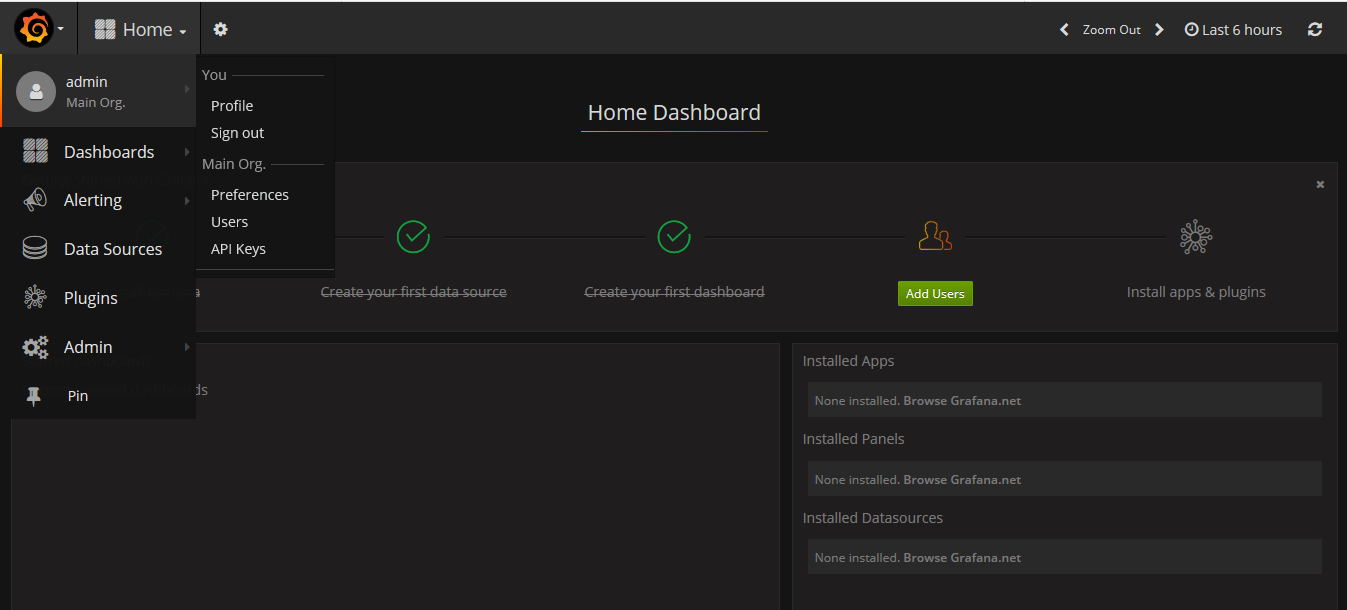
3.界面展示

kubernetes监控(12)的更多相关文章
- Kubernetes 1.12公布:Kubelet TLS Bootstrap与Azure虚拟机规模集(VMSS)迎来通用版本号
版权声明:本文为博主原创文章,未经博主同意不得转载. https://blog.csdn.net/M2l0ZgSsVc7r69eFdTj/article/details/82880341 https: ...
- Kubernetes 监控方案之 Prometheus Operator(十九)
目录 一.Prometheus 介绍 1.1.Prometheus 架构 1.2.Prometheus Operator 架构 二.Helm 安装部署 2.1.Helm 客户端安装 2.2.Tille ...
- 使用Kubeadm搭建Kubernetes(1.12.2)集群
Kubeadm是Kubernetes官方提供的用于快速安装Kubernetes集群的工具,伴随Kubernetes每个版本的发布都会同步更新,在2018年将进入GA状态,说明离生产环境中使用的距离越来 ...
- 使用 Kubeadm 安装部署 Kubernetes 1.12.1 集群
手工搭建 Kubernetes 集群是一件很繁琐的事情,为了简化这些操作,就产生了很多安装配置工具,如 Kubeadm ,Kubespray,RKE 等组件,我最终选择了官方的 Kubeadm 主要是 ...
- 二进制安装 kubernetes 1.12(一) - 安装 ETCD
软件环境 软件 版本 操作系统 CentOS 7.4 Docker 18-ce Kubernetes 1.12 服务器角色 角色 IP 组件 k8s-master 192.168.0.205 kube ...
- Kubernetes监控:部署Heapster、InfluxDB和Grafana
本节内容: Kubernetes 监控方案 Heapster.InfluxDB和Grafana介绍 安装配置Heapster.InfluxDB和Grafana 访问 grafana 访问 influx ...
- 使用kubeadm安装Kubernetes 1.12
使用kubeadm安装Kubernetes 1.12 https://blog.frognew.com/2018/10/kubeadm-install-kubernetes-1.12.html 测试环 ...
- 【译】Kubernetes监控实践(2):可行监控方案之Prometheus和Sensu
本文介绍两个可行的K8s监控方案:Prometheus和Sensu.两个方案都能全面提供系统级的监控数据,帮助开发人员跟踪K8s关键组件的性能.定位故障.接收预警. 拓展阅读:Kubernetes监控 ...
- 云原生应用 Kubernetes 监控与弹性实践
前言 云原生应用的设计理念已经被越来越多的开发者接受与认可,而Kubernetes做为云原生的标准接口实现,已经成为了整个stack的中心,云服务的能力可以通过Cloud Provider.CRD C ...
- Kubernetes v1.12/v1.13 二进制部署集群(HTTPS+RBAC)
官方提供的几种Kubernetes部署方式 minikube Minikube是一个工具,可以在本地快速运行一个单点的Kubernetes,尝试Kubernetes或日常开发的用户使用.不能用于生产环 ...
随机推荐
- 【转】ufw 端口
1.扫描端口 用ubuntu自带的网络工具中的端口扫描不够强大,扫描结果可能不全,推荐用nmap,黑客常用的端口扫描利器!安装方法:sudo apt-get install nmap ,想扫描端口nm ...
- No PostCSS Config found in报错解决
前情提要]日前本人将本地项目上传GitHub之后,然后再clone到本地,运行是报错:Error: No PostCSS Config found in... 项目在本地打包运行的时候不报错,上传到 ...
- 新安装的Ubuntu如何切换到root的方法
Ubuntu中root用户和user用户的相互切换Ubuntu是最近很流行的一款Linux系统,因为Ubuntu默认是不启动root用户,现在介绍如何进入root的方法. (1)从user用户切 ...
- Spring自动注入Bean
通过@Autowired或@Resource来实现在Bean中自动注入的功能,但还要在配置文件中写Bean定义,下面我们将介绍如何注解Bean,从而从XML配置文件 中完全移除Bean定义的配置. 1 ...
- SIGAI深度学习第一集 机器学习与数学基础知识
SIGAI深度学习课程: 本课程全面.系统.深入的讲解深度学习技术.包括深度学习算法的起源与发展历史,自动编码器,受限玻尔兹曼机,卷积神经网络,循环神经网络,生成对抗网络,深度强化学习,以及各种算法的 ...
- 001_89C52之_Proteus_ADC0809采集电压
一)使用ADC0809采集直流电压 1. 第一个数码管显示的是采样输入口 2. 后面三位是采样电压 (二)使用ADC0809进行交流电的采样 1. 先进行交流电降压,即用变压器降压后使用整桥电路进行整 ...
- JAVA类的无参方法
Java注释: //:单行注释 /**/:多行注释 /** */:JavaDoc注释 方法: ...
- [Luogu] 线段树 2
https://www.luogu.org/problemnew/show/P3373 双懒标记下放 先乘后加 #include <bits/stdc++.h> using namespa ...
- JXOJ 9.7 NOIP 放松模拟赛 总结
比赛链接 T1 数数 题意:有a个红球,b个黄球,c个蓝球,d个绿球排成一列,求任意相邻不同色的排列的数目 1 <= a , b, c, d <= 30 答案对1e9 + 7 取膜 用 ...
- openstack 本地导入镜像.
网络很慢,直接本地传. openstack image create "Fedora30" --file Fedora-Cloud-Base-30-1.2.x86_64.qcow2 ...

