mybatis源码配置文件解析之五:解析mappers标签
在上篇博客中分析了plugins标签,《mybatis源码配置文件解析之四:解析plugins标签》,了解了其使用方式及背后的原理。现在来分析<mappers>标签。
一、概述
在mybatis的核心配置文件(mybatis-config.xml)中,有关mappers的配置如下,
<mappers>

        <!-- <mapper resource="cn/com/mybatis/dao/UserMapper.xml"/>

        <mapper resource="cn/com/mybatis/dao/MenuMapper.xml"/> -->

        <!--第二种做法 -->

        <package name="cn.com.mybatis.dao" />

    </mappers>
从上面的配置文件,可以看到配置mappers文件有两种方式,一种是配置mapper标签,另一种是配置package标签。从配置的内容上来看,其配置的方式也是存在差别,配置mapper标签配置的是一个xml文件,该文件中存在相关的sql语句;配置package标签配置的是一个包的权限路径(在spring和mybatis结合的时候使用了此种方式),该包表示的是mapper的接口文件。
最终上面的两种方式都会被解析到mybatis的configuration类中,供用户使用。如果存在重复配置mybatis会如何处理,下面在分析过程中会解答该问题。
二、详述
上面了解了<mappers>标签的使用方式,下面看mybatis是如何解析该标签的。
在XMLConfigBuilder类中的parseConfiguration方法
private void parseConfiguration(XNode root) {

    try {

      //issue #117 read properties first

      //解析properties标签

      propertiesElement(root.evalNode("properties"));

      //解析settings标签,1、把<setting>标签解析为Properties对象

      Properties settings = settingsAsProperties(root.evalNode("settings"));

      /*2、对<settings>标签中的<setting>标签中的内容进行解析,这里解析的是<setting name="vfsImpl" value=",">

      * VFS是mybatis中用来表示虚拟文件系统的一个抽象类,用来查找指定路径下的资源。上面的key为vfsImpl的value可以是VFS的具体实现,必须

      * 是权限类名,多个使用逗号隔开,如果存在则设置到configuration中的vfsImpl属性中,如果存在多个,则设置到configuration中的仅是最后一个

      * */

      loadCustomVfs(settings);

      //解析别名标签,例<typeAlias alias="user" type="cn.com.bean.User"/>

      typeAliasesElement(root.evalNode("typeAliases"));

      //解析插件标签

      pluginElement(root.evalNode("plugins"));

      //解析objectFactory标签,此标签的作用是mybatis每次创建结果对象的新实例时都会使用ObjectFactory,如果不设置

      //则默认使用DefaultObjectFactory来创建,设置之后使用设置的

      objectFactoryElement(root.evalNode("objectFactory"));

      //解析objectWrapperFactory标签

      objectWrapperFactoryElement(root.evalNode("objectWrapperFactory"));

      //解析reflectorFactory标签

      reflectorFactoryElement(root.evalNode("reflectorFactory"));

      settingsElement(settings);

      // read it after objectFactory and objectWrapperFactory issue #631

      //解析environments标签

      environmentsElement(root.evalNode("environments"));

      databaseIdProviderElement(root.evalNode("databaseIdProvider"));

      typeHandlerElement(root.evalNode("typeHandlers"));

      //解析<mappers>标签

      mapperElement(root.evalNode("mappers"));

    } catch (Exception e) {

      throw new BuilderException("Error parsing SQL Mapper Configuration. Cause: " + e, e);

    }

  }
在该方法的最下方,看下面这行代码
//解析<mappers>标签

      mapperElement(root.evalNode("mappers"));
上面这行代码便是解析mappers标签的方法的调用。看其方法定义,
/**

 * 解析<mappers>标签,在此标签中可以配置<mapper>和<package>两种标签,其中<mapper>标签可以配置resource、url、class三种属性,

 * 这里的三种属性,仅可以同时出现一个;<package>标签只需要配置包名即可。

 * @param parent

 * @throws Exception

 */

  private void mapperElement(XNode parent) throws Exception {

    if (parent != null) {

      for (XNode child : parent.getChildren()) {

          //1、解析package标签,获得name属性即包名

        if ("package".equals(child.getName())) {

          String mapperPackage = child.getStringAttribute("name");

          //扫描包名,把

          configuration.addMappers(mapperPackage);

        } else {//2、解析<mapper>标签,标签中可以配置resource、url、class三个属性,但只能配置其中一个。

          String resource = child.getStringAttribute("resource");

          String url = child.getStringAttribute("url");

          String mapperClass = child.getStringAttribute("class");

          if (resource != null && url == null && mapperClass == null) {

            ErrorContext.instance().resource(resource);

            InputStream inputStream = Resources.getResourceAsStream(resource);

            XMLMapperBuilder mapperParser = new XMLMapperBuilder(inputStream, configuration, resource, configuration.getSqlFragments());

            /**

             * 处理mapper文件和对应的接口

             */

            mapperParser.parse();

          } else if (resource == null && url != null && mapperClass == null) {

            ErrorContext.instance().resource(url);

            InputStream inputStream = Resources.getUrlAsStream(url);

            XMLMapperBuilder mapperParser = new XMLMapperBuilder(inputStream, configuration, url, configuration.getSqlFragments());

            mapperParser.parse();

          } else if (resource == null && url == null && mapperClass != null) {

            Class<?> mapperInterface = Resources.classForName(mapperClass);

            configuration.addMapper(mapperInterface);

          } else {

            throw new BuilderException("A mapper element may only specify a url, resource or class, but not more than one.");

          }

        }

      }

    }

  }
通过上面代码的分析及在配置文件中的配置,解析<mappers>标签分为两部分,分别解析package和mapper子标签。且是循环解析,也就是在含义多个包的时候需要配置多个package子标签。
1、解析package子标签
从上面的方法也就是mapperElement方法中,可以知道在解析<mappers>标签时首先解析的是package子标签,也就是说在同时配置package和mapper子标签时,先解析的是package子标签,解析标签是有顺序的。下面解析package子标签的过程,仅给出和解析package有关的代码,
  //1、解析package标签,获得name属性即包名

        if ("package".equals(child.getName())) {

          String mapperPackage = child.getStringAttribute("name");

          //扫描包名,把

          configuration.addMappers(mapperPackage);

        }
上面的代码,解析出package子标签中的包名,调用了configuration.addMappers方法,
public void addMappers(String packageName) {

    mapperRegistry.addMappers(packageName);

  }
调用了mapperRegistry.addMappers方法,
/**

   * @since 3.2.2

   */

  public void addMappers(String packageName) {

    addMappers(packageName, Object.class);

  }
下面看addMappers方法,
public void addMappers(String packageName, Class<?> superType) {

      //解析packageName下的class文件

    ResolverUtil<Class<?>> resolverUtil = new ResolverUtil<Class<?>>();

    resolverUtil.find(new ResolverUtil.IsA(superType), packageName);

    Set<Class<? extends Class<?>>> mapperSet = resolverUtil.getClasses();

    //处理解析好的mapper接口文件

    for (Class<?> mapperClass : mapperSet) {

      addMapper(mapperClass);

    }

  }
上面的方法首先会解析指定包下的class文件,看下面的解析过程,
resolverUtil.find(new ResolverUtil.IsA(superType), packageName);
看find方法,
public ResolverUtil<T> find(Test test, String packageName) {

      //把包名中的“.”替换成“/”

    String path = getPackagePath(packageName);

    try {

        //获得包路径下的所有文件名称

      List<String> children = VFS.getInstance().list(path);

      for (String child : children) {

        if (child.endsWith(".class")) {

          addIfMatching(test, child);

        }

      }

    } catch (IOException ioe) {

      log.error("Could not read package: " + packageName, ioe);

    }

    return this;

  }
遍历包下的所有class文件,调用addIfMatching方法,
@SuppressWarnings("unchecked")

  protected void addIfMatching(Test test, String fqn) {

    try {

      String externalName = fqn.substring(0, fqn.indexOf('.')).replace('/', '.');

      ClassLoader loader = getClassLoader();

      if (log.isDebugEnabled()) {

        log.debug("Checking to see if class " + externalName + " matches criteria [" + test + "]");

      }

      Class<?> type = loader.loadClass(externalName);

      if (test.matches(type)) {

        matches.add((Class<T>) type);

      }

    } catch (Throwable t) {

      log.warn("Could not examine class '" + fqn + "'" + " due to a " +

          t.getClass().getName() + " with message: " + t.getMessage());

    }

  }
加载class文件,判断是否符合test.matches,该方法如下,
/** Returns true if type is assignable to the parent type supplied in the constructor. */

    @Override

    public boolean matches(Class<?> type) {

      return type != null && parent.isAssignableFrom(type);

    }
如果符合条件则放入matches中,matches定义在ResolverUtil中。回到addMappers方法中,find方法结束后调用下面的方法,获取matches中的值,
Set<Class<? extends Class<?>>> mapperSet = resolverUtil.getClasses();
然后循环解析mapperSet,
//处理解析好的mapper接口文件

    for (Class<?> mapperClass : mapperSet) {

      addMapper(mapperClass);

    }
解析过程如下,
public <T> void addMapper(Class<T> type) {

    if (type.isInterface()) {//判断是否为接口

      if (hasMapper(type)) {//如果knownMappers中已经存在该type,则抛出异常

        throw new BindingException("Type " + type + " is already known to the MapperRegistry.");

      }

      boolean loadCompleted = false;

      try {

          //把type放入knownMappers中,其value为一个MapperProxyFactory对象

        knownMappers.put(type, new MapperProxyFactory<T>(type));

        // It's important that the type is added before the parser is run

        // otherwise the binding may automatically be attempted by the

        // mapper parser. If the type is already known, it won't try.

        //对mapper文件进行解析,

        MapperAnnotationBuilder parser = new MapperAnnotationBuilder(config, type);

        //具体的解析过程,1、先解析对应的XML映射文件,2、再解析接口方法中的注解信息

        parser.parse();

        loadCompleted = true;

      } finally {

        if (!loadCompleted) {//如果解析失败,则删除knowMapper中的信息

          knownMappers.remove(type);

        }

      }

    }

  }
把mapper接口类封装为MapperProxyFactory对象,并放入knownMappers中,接着对接口类进行解析,如果解析失败会把刚才放入knownMappers中的值从knownMappers中移除。下面看如何解析接口类(解析对应的XML文件),
public void parse() {

    String resource = type.toString();

    if (!configuration.isResourceLoaded(resource)) {

        //解析和接口同名的xml文件,前提是存在该文件,如果不存在该文件要怎么解析那?答案是解析接口中方法上的注解

        /**

         * 解析和接口同名的xml配置文件,最终要做的是把xml文件中的标签,转化为mapperStatement,

         * 并放入mappedStatements中

         *

         */

      loadXmlResource();

      configuration.addLoadedResource(resource);

      assistant.setCurrentNamespace(type.getName());

      //解析接口上的@CacheNamespace注解

      parseCache();

      parseCacheRef();

      //获得接口中的所有方法,并解析方法上的注解

      Method[] methods = type.getMethods();

      for (Method method : methods) {

        try {

          // issue #237

          if (!method.isBridge()) {

              //解析方法上的注解

            parseStatement(method);

          }

        } catch (IncompleteElementException e) {

          configuration.addIncompleteMethod(new MethodResolver(this, method));

        }

      }

    }

    parsePendingMethods();

  }
上面的解析分为两个过程,首先解析对应的XML映射文件,再解析方法上的注解。
1.1、解析xml文件
下面看如何继续对应的XML文件,
loadXmlResource();
看如何解析xml文件,
private void loadXmlResource() {

    // Spring may not know the real resource name so we check a flag

    // to prevent loading again a resource twice

    // this flag is set at XMLMapperBuilder#bindMapperForNamespace

    if (!configuration.isResourceLoaded("namespace:" + type.getName())) {

        //解析对应的XML映射文件,其名称为接口类+"."+xml,即和接口类同名且在同一个包下。

      String xmlResource = type.getName().replace('.', '/') + ".xml";

      InputStream inputStream = null;

      try {

        inputStream = Resources.getResourceAsStream(type.getClassLoader(), xmlResource);

      } catch (IOException e) {

        // ignore, resource is not required

      }

      if (inputStream != null) {

        XMLMapperBuilder xmlParser = new XMLMapperBuilder(inputStream, assistant.getConfiguration(), xmlResource, configuration.getSqlFragments(), type.getName());

        //解析xml映射文件

        xmlParser.parse();

      }

    }

  }
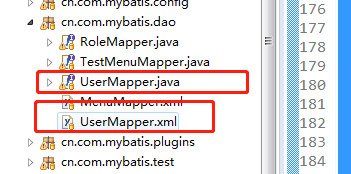
首先确定XML映射文件的位置,和接口类同名且在同一个包下。如下的例子,
确定好对应的映射文件位置,接着便是解析该xml文件,
if (inputStream != null) {

        XMLMapperBuilder xmlParser = new XMLMapperBuilder(inputStream, assistant.getConfiguration(), xmlResource, configuration.getSqlFragments(), type.getName());

        //解析xml映射文件

        xmlParser.parse();

      }
解析过程如下,
public void parse() {

    if (!configuration.isResourceLoaded(resource)) {

        //解析mapper文件中的<mapper>标签及其子标签

      configurationElement(parser.evalNode("/mapper"));

      configuration.addLoadedResource(resource);

      bindMapperForNamespace();

    }

    parsePendingResultMaps();

    parsePendingCacheRefs();

    parsePendingStatements();

  }
解析的过程在解析<mapper>标签的时候再详细分析。解析的最终结果是把XML中的select|update|delete|insert标签转化为MappedStatement对象,放入configuration中。
1.2、解析接口中方法上的注解
上面解析了接口对于的XML文件,下面看如何解析接口中的方法,
//获得接口中的所有方法,并解析方法上的注解

      Method[] methods = type.getMethods();

      for (Method method : methods) {

        try {

          // issue #237

          if (!method.isBridge()) {

              //解析方法上的注解

            parseStatement(method);

          }

        } catch (IncompleteElementException e) {

          configuration.addIncompleteMethod(new MethodResolver(this, method));

        }
看parseStatement方法,
void parseStatement(Method method) {

    Class<?> parameterTypeClass = getParameterType(method);

    LanguageDriver languageDriver = getLanguageDriver(method);

    //获得方法上的注解,并生成SqlSource

    SqlSource sqlSource = getSqlSourceFromAnnotations(method, parameterTypeClass, languageDriver);

    if (sqlSource != null) {

      Options options = method.getAnnotation(Options.class);

      //生成mappedStatementId,为接口的权限类名+方法名。从这里可以得出同一个接口或namespace中不允许有同名的方法名或id

      final String mappedStatementId = type.getName() + "." + method.getName();

      Integer fetchSize = null;

      Integer timeout = null;

      StatementType statementType = StatementType.PREPARED;

      ResultSetType resultSetType = ResultSetType.FORWARD_ONLY;

      SqlCommandType sqlCommandType = getSqlCommandType(method);

      boolean isSelect = sqlCommandType == SqlCommandType.SELECT;

      boolean flushCache = !isSelect;

      boolean useCache = isSelect;

      KeyGenerator keyGenerator;

      String keyProperty = "id";

      String keyColumn = null;

      if (SqlCommandType.INSERT.equals(sqlCommandType) || SqlCommandType.UPDATE.equals(sqlCommandType)) {

        // first check for SelectKey annotation - that overrides everything else

        SelectKey selectKey = method.getAnnotation(SelectKey.class);

        if (selectKey != null) {

          keyGenerator = handleSelectKeyAnnotation(selectKey, mappedStatementId, getParameterType(method), languageDriver);

          keyProperty = selectKey.keyProperty();

        } else if (options == null) {

          keyGenerator = configuration.isUseGeneratedKeys() ? Jdbc3KeyGenerator.INSTANCE : NoKeyGenerator.INSTANCE;

        } else {

          keyGenerator = options.useGeneratedKeys() ? Jdbc3KeyGenerator.INSTANCE : NoKeyGenerator.INSTANCE;

          keyProperty = options.keyProperty();

          keyColumn = options.keyColumn();

        }

      } else {

        keyGenerator = NoKeyGenerator.INSTANCE;

      }

      if (options != null) {

        if (FlushCachePolicy.TRUE.equals(options.flushCache())) {

          flushCache = true;

        } else if (FlushCachePolicy.FALSE.equals(options.flushCache())) {

          flushCache = false;

        }

        useCache = options.useCache();

        fetchSize = options.fetchSize() > -1 || options.fetchSize() == Integer.MIN_VALUE ? options.fetchSize() : null; //issue #348

        timeout = options.timeout() > -1 ? options.timeout() : null;

        statementType = options.statementType();

        resultSetType = options.resultSetType();

      }

      String resultMapId = null;

      ResultMap resultMapAnnotation = method.getAnnotation(ResultMap.class);

      if (resultMapAnnotation != null) {

        String[] resultMaps = resultMapAnnotation.value();

        StringBuilder sb = new StringBuilder();

        for (String resultMap : resultMaps) {

          if (sb.length() > 0) {

            sb.append(",");

          }

          sb.append(resultMap);

        }

        resultMapId = sb.toString();

      } else if (isSelect) {

        resultMapId = parseResultMap(method);

      }

      assistant.addMappedStatement(

          mappedStatementId,

          sqlSource,

          statementType,

          sqlCommandType,

          fetchSize,

          timeout,

          // ParameterMapID

          null,

          parameterTypeClass,

          resultMapId,

          getReturnType(method),

          resultSetType,

          flushCache,

          useCache,

          // TODO gcode issue #577

          false,

          keyGenerator,

          keyProperty,

          keyColumn,

          // DatabaseID

          null,

          languageDriver,

          // ResultSets

          options != null ? nullOrEmpty(options.resultSets()) : null);

    }

  }
从上面的代码,可以看出最终调用了assistant.addMappedStatement方法,该方法会把注解信息封装为MappedStatement对象,放入configuration中。详细过程,后面分析。
2、解析mapper子标签
上面分析了mybatis解析<package>标签的过程,下面看直接解析<mapper>子标签。代码为部分代码
else {//2、解析<mapper>标签,标签中可以配置resource、url、class三个属性,但只能配置其中一个。

          String resource = child.getStringAttribute("resource");

          String url = child.getStringAttribute("url");

          String mapperClass = child.getStringAttribute("class");

          if (resource != null && url == null && mapperClass == null) {

            ErrorContext.instance().resource(resource);

            InputStream inputStream = Resources.getResourceAsStream(resource);

            XMLMapperBuilder mapperParser = new XMLMapperBuilder(inputStream, configuration, resource, configuration.getSqlFragments());

            /**

             * 处理mapper文件和对应的接口

             */

            mapperParser.parse();

          } else if (resource == null && url != null && mapperClass == null) {

            ErrorContext.instance().resource(url);

            InputStream inputStream = Resources.getUrlAsStream(url);

            XMLMapperBuilder mapperParser = new XMLMapperBuilder(inputStream, configuration, url, configuration.getSqlFragments());

            mapperParser.parse();

          } else if (resource == null && url == null && mapperClass != null) {

            Class<?> mapperInterface = Resources.classForName(mapperClass);

            configuration.addMapper(mapperInterface);

          } else {

            throw new BuilderException("A mapper element may only specify a url, resource or class, but not more than one.");

          }

        }
前边说过,在<mapper>子标签中可以配置resource、url、class三个属性,但是只能配置其中一个,上面分别对其进行了解析,其解析过程和上面解析<packge>中的过程类似,解析resource和url属性的时候都是把XML映射文件解析为inputSream,然后对文件进行解析;解析class属性的时候和解析<package>的过程一样。
三、总结
本文分析了mybatis解析<mappers>标签的过程,分为解析<package>、<mapper>子标签,其解析过程主要为解析Mapper接口和XML映射文件,其详细过程后面详细分析。
有不当之处,欢迎指正,感谢!
mybatis源码配置文件解析之五:解析mappers标签的更多相关文章
- mybatis源码配置文件解析之五:解析mappers标签(解析XML映射文件)
在上篇文章中分析了mybatis解析<mappers>标签,<mybatis源码配置文件解析之五:解析mappers标签>重点分析了如何解析<mappers>标签中 ...
- mybatis源码配置文件解析之二:解析settings标签
在前边的博客中分析了mybatis解析properties标签,<mybatis源码配置文件解析之一:解析properties标签>.下面来看解析settings标签的过程. 一.概述 在 ...
- mybatis源码配置文件解析之三:解析typeAliases标签
在前边的博客在分析了mybatis解析settings标签,<mybatis源码配置文件解析之二:解析settings标签>.下面来看解析typeAliases标签的过程. 一.概述 在m ...
- mybatis源码配置文件解析之四:解析plugins标签
在前边的博客在分析了mybatis解析typeAliases标签,<mybatis源码配置文件解析之三:解析typeAliases标签>.下面来看解析plugins标签的过程. 一.概述 ...
- MyBatis 源码分析 - 映射文件解析过程
1.简介 在上一篇文章中,我详细分析了 MyBatis 配置文件的解析过程.由于上一篇文章的篇幅比较大,加之映射文件解析过程也比较复杂的原因.所以我将映射文件解析过程的分析内容从上一篇文章中抽取出来, ...
- Spring mybatis源码篇章-MybatisDAO文件解析(一)
前言:通过阅读源码对实现机制进行了解有利于陶冶情操,承接前文Spring mybatis源码篇章-SqlSessionFactory 加载指定的mybatis主文件 Mybatis模板文件,其中的属性 ...
- Spring mybatis源码篇章-MybatisDAO文件解析(二)
前言:通过阅读源码对实现机制进行了解有利于陶冶情操,承接前文Spring mybatis源码篇章-MybatisDAO文件解析(一) 默认加载mybatis主文件方式 XMLConfigBuilder ...
- mybatis源码配置文件解析之五:解析mappers标签流程图
前面几篇博客分析了mybatis解析mappers标签的过程,主要分为解析package和mapper子标签.补充一张解析的总体过程流程图,画的不好,多多谅解,感谢.
- mybatis源码配置文件解析之一:解析properties标签
mybatis作为日常开发的常用ORM框架,在开发中起着很重要的作用,了解其源码对日常的开发有很大的帮助.源码版本为:3-3.4.x,可执行到github进行下载. 从这篇文章开始逐一分析mybati ...
随机推荐
- Sublime Text3 注册码(Windows/Build 3176版本)| 开发工具
转自:dushusir.com 1.修改hosts文件(路径:C:\Windows\System32\drivers\etc): 0.0.0.0 www.sublimetext.com 0.0.0.0 ...
- Java实现 LeetCode 791 自定义字符串排序(桶排序)
791. 自定义字符串排序 字符串S和 T 只包含小写字符.在S中,所有字符只会出现一次. S 已经根据某种规则进行了排序.我们要根据S中的字符顺序对T进行排序.更具体地说,如果S中x在y之前出现,那 ...
- Java实现 LeetCode 636 函数的独占时间(栈)
636. 函数的独占时间 给出一个非抢占单线程CPU的 n 个函数运行日志,找到函数的独占时间. 每个函数都有一个唯一的 Id,从 0 到 n-1,函数可能会递归调用或者被其他函数调用. 日志是具有以 ...
- Java实现第九届蓝桥杯付账问题
付账问题 题目描述 [题目描述] 几个人一起出去吃饭是常有的事.但在结帐的时候,常常会出现一些争执. 现在有 n 个人出去吃饭,他们总共消费了 S 元.其中第 i 个人带了 ai 元.幸运的是,所有人 ...
- java实现第六届蓝桥杯表格计算
表格计算 某次无聊中, atm 发现了一个很老的程序.这个程序的功能类似于 Excel ,它对一个表格进行操作. 不妨设表格有 n 行,每行有 m 个格子. 每个格子的内容可以是一个正整数,也可以是一 ...
- Linux 系统资源查看
vmstat监控系统资源 vm [刷新延时 刷新次数],vmstat 1 3 dmesg查看开机时内核检测信息 dmesg | grep CPU free命令查看内存使用状态 查看cpu信息:cat ...
- Mybatis基本入门搭建
一:Mybatis框架概述 1:什么是Mybatis 官方定义: MyBatis 是一款优秀的持久层框架,它支持自定义 SQL.存储过程以及高级映射.MyBatis 免除了几乎所有的 JDBC 代码以 ...
- CDN HTTPS安全加速基本概念、解决方案及优化实践
大家都知道,HTTP 本身是明文传输的,没有经过任何安全处理,网站HTTPS解决方案通过在HTTP协议之上引入证书服务,完美解决网站的安全问题.本文将为大家介绍阿里云CDN HTTPS安全加速传输的基 ...
- 温故知新-多线程-Cache Line存在验证
文章目录 简述 缓存行Cache Line 验证CacehLine存在? 参考 你的鼓励也是我创作的动力 Posted by 微博@Yangsc_o 原创文章,版权声明:自由转载-非商用-非衍生-保持 ...
- HDU-3033 I love sneakers! 题解
题目大意 有 n 个物品,分成了 k 组,每个物品有体积和价值,把 n 个物品放到容量为 V 的背包中,保证每组至少放一件,求能获得的最大价值,如果不能实现,输出"Impossible&qu ...