CentOS 中安装 mysql 5.7+
参考:https://www.cnblogs.com/jimboi/p/6405560.html
1.下载rpm文件
wget https://dev.mysql.com/get/mysql57-community-release-el6-9.noarch.rpm
[root@hadoop110 /]# wget https://dev.mysql.com/get/mysql57-community-release-el6-9.noarch.rpm--2019-01-02 18:11:58--  https://dev.mysql.com/get/mysql57-community-release-el6-9.noarch.rpm

正在解析主机 dev.mysql.com... 137.254.60.11

正在连接 dev.mysql.com|137.254.60.11|:... 已连接。

已发出 HTTP 请求,正在等待回应...  Found

位置:https://repo.mysql.com//mysql57-community-release-el6-9.noarch.rpm [跟随至新的 URL]

---- ::--  https://repo.mysql.com//mysql57-community-release-el6-9.noarch.rpm

正在解析主机 repo.mysql.com... 23.76.232.185

正在连接 repo.mysql.com|23.76.232.185|:... 已连接。

已发出 HTTP 请求,正在等待回应...  OK

长度: (.0K) [application/x-redhat-package-manager]

正在保存至: “mysql57-community-release-el6-.noarch.rpm”

%[===================================================>] ,       --.-K/s   in 0s

-- :: (52.9 MB/s) - 已保存 “mysql57-community-release-el6-.noarch.rpm” [/])
2.安装rpm包
rpm -Uvh mysql57-community-release-el6-9.noarch.rpm
[root@hadoop110 /]# rpm -Uvh mysql57-community-release-el6-.noarch.rpm

warning: mysql57-community-release-el6-.noarch.rpm: Header V3 DSA/SHA1 Signature, key ID 5072e1f5: NOKEY

Preparing...                ########################################### [%]

   :mysql57-community-relea########################################### [%]
安装成功后,会在/etc/yum.repos.d/下面多几个mysql的包
[root@hadoop110 /]#  cd /etc/yum.repos.d/

[root@hadoop110 yum.repos.d]# ll

总用量

-rw-r--r--.  root root  5月    CentOS-Base.repo

-rw-r--r--.  root root   5月    CentOS-Debuginfo.repo

-rw-r--r--.  root root   5月    CentOS-fasttrack.repo

-rw-r--r--.  root root   5月    CentOS-Media.repo

-rw-r--r--.  root root  5月    CentOS-Vault.repo

-rw-r--r--.  root root   11月    epel.repo

-rw-r--r--.  root root  11月    epel-testing.repo

-rw-r--r--.  root root  9月    mysql-community.repo

-rw-r--r--.  root root  9月    mysql-community-source.repo
3.安装mysql (此过程需要时间)
yum install mysql-community-server
[root@hadoop110 /]# yum install mysql-community-server

已加载插件:fastestmirror, refresh-packagekit, security

设置安装进程

Loading mirror speeds from cached hostfile

epel/metalink                                                         | 7.5 kB     :

 * base: mirrors.cqu.edu.cn

 * epel: mirrors.huaweicloud.com

 * extras: mirror.bit.edu.cn

 * updates: mirrors.zju.edu.cn

base                                                                  | 3.7 kB     :

epel                                                                  | 3.2 kB     :

epel/primary                                                          | 3.2 MB     :

epel                                                                             /

extras                                                                | 3.4 kB     :

mysql-connectors-community                                            | 2.5 kB     :

mysql-connectors-community/primary_db                                 |   kB     :

mysql-tools-community                                                 | 2.5 kB     :

mysql-tools-community/primary_db                                      |   kB     :

mysql57-community                                                     | 2.5 kB     :

mysql57-community/primary_db                                          |  kB     :

updates                                                               | 3.4 kB     :

解决依赖关系

--> 执行事务检查

---> Package mysql-community-server.x86_64 :5.7.-.el6 will be 安装

--> 处理依赖关系 mysql-community-common(x86-) = 5.7.-.el6,它被软件包 mysql-community-server-5.7.-.el6.x86_64 需要

--> 处理依赖关系 mysql-community-client(x86-) >= 5.7.,它被软件包 mysql-community-server-5.7.-.el6.x86_64 需要

--> 执行事务检查

---> Package mysql-community-client.x86_64 :5.7.-.el6 will be 安装

--> 处理依赖关系 mysql-community-libs(x86-) >= 5.7.,它被软件包 mysql-community-client-5.7.-.el6.x86_64 需要

---> Package mysql-community-common.x86_64 :5.7.-.el6 will be 安装

--> 执行事务检查

---> Package mysql-community-libs.x86_64 :5.7.-.el6 will be obsoleting

---> Package mysql-libs.x86_64 :5.1.-.el6 will be 取代

--> 处理依赖关系 libmysqlclient.so.()(64bit),它被软件包 :postfix-2.6.-.el6_7..x86_64 需要

--> 处理依赖关系 libmysqlclient.so.(libmysqlclient_16)(64bit),它被软件包 :postfix-2.6.-.el6_7..x86_64 需要

--> 执行事务检查

---> Package mysql-community-libs-compat.x86_64 :5.7.-.el6 will be obsoleting

---> Package postfix.x86_64 :2.6.-.el6_7. will be 升级

---> Package postfix.x86_64 :2.6.-.el6 will be an update

--> 完成依赖关系计算

依赖关系解决

=============================================================================================

 软件包                          架构       版本                 仓库                   大小

=============================================================================================

正在安装:

 mysql-community-libs            x86_64     5.7.-.el6         mysql57-community     2.1 M

     replacing  mysql-libs.x86_64 5.1.-.el6

 mysql-community-libs-compat     x86_64     5.7.-.el6         mysql57-community     1.6 M

     replacing  mysql-libs.x86_64 5.1.-.el6

 mysql-community-server          x86_64     5.7.-.el6         mysql57-community      M

为依赖而安装:

 mysql-community-client          x86_64     5.7.-.el6         mysql57-community       M

 mysql-community-common          x86_64     5.7.-.el6         mysql57-community      k

为依赖而更新:

 postfix                         x86_64     :2.6.-.el6        base                  2.0 M

事务概要

=============================================================================================

Install        Package(s)

Upgrade        Package(s)

总下载量: M

确定吗?[y/N]:y

下载软件包:

(/): mysql-community-client-5.7.-.el6.x86_64.rpm                 |   MB     :

(/): mysql-community-common-5.7.-.el6.x86_64.rpm                 |  kB     :

(/): mysql-community-libs-5.7.-.el6.x86_64.rpm                   | 2.1 MB     :

(/): mysql-community-libs-compat-5.7.-.el6.x86_64.rpm            | 1.6 MB     :

(/): mysql-community-server-5.7.-.el6.x86_64.rpm                 |  MB     :

(/): postfix-2.6.-.el6.x86_64.rpm                                 | 2.0 MB     :

---------------------------------------------------------------------------------------------

总计                                                          kB/s |  MB     :

warning: rpmts_HdrFromFdno: Header V3 DSA/SHA1 Signature, key ID 5072e1f5: NOKEY

Retrieving key from file:///etc/pki/rpm-gpg/RPM-GPG-KEY-mysql

Importing GPG key 0x5072E1F5:

 Userid : MySQL Release Engineering <mysql-build@oss.oracle.com>

 Package: mysql57-community-release-el6-.noarch (installed)

 From   : /etc/pki/rpm-gpg/RPM-GPG-KEY-mysql

确定吗?[y/N]:y

运行 rpm_check_debug

执行事务测试

事务测试成功

执行事务

Warning: RPMDB altered outside of yum.

  正在安装   : mysql-community-common-5.7.-.el6.x86_64                                /

  正在安装   : mysql-community-libs-5.7.-.el6.x86_64                                  /

  正在安装   : mysql-community-client-5.7.-.el6.x86_64                                /

  正在安装   : mysql-community-libs-compat-5.7.-.el6.x86_64                           /

  正在升级   : :postfix-2.6.-.el6.x86_64                                              /

  正在安装   : mysql-community-server-5.7.-.el6.x86_64                                /

  清理       : :postfix-2.6.-.el6_7..x86_64                                          /

  正在删除   : mysql-libs-5.1.-.el6.x86_64                                            /

  Verifying  : :postfix-2.6.-.el6.x86_64                                              /

  Verifying  : mysql-community-common-5.7.-.el6.x86_64                                /

  Verifying  : mysql-community-server-5.7.-.el6.x86_64                                /

  Verifying  : mysql-community-client-5.7.-.el6.x86_64                                /

  Verifying  : mysql-community-libs-compat-5.7.-.el6.x86_64                           /

  Verifying  : mysql-community-libs-5.7.-.el6.x86_64                                  /

  Verifying  : mysql-libs-5.1.-.el6.x86_64                                            /

  Verifying  : :postfix-2.6.-.el6_7..x86_64                                          /

已安装:

  mysql-community-libs.x86_64 :5.7.-.el6

  mysql-community-libs-compat.x86_64 :5.7.-.el6

  mysql-community-server.x86_64 :5.7.-.el6

作为依赖被安装:

  mysql-community-client.x86_64 :5.7.-.el6  mysql-community-common.x86_64 :5.7.-.el6

作为依赖被升级:

  postfix.x86_64 :2.6.-.el6

替代:

  mysql-libs.x86_64 :5.1.-.el6

完毕!
4.开启mysql服务
[root@hadoop110 /]# service mysqld start

初始化 MySQL 数据库:                                      [失败]

[root@hadoop110 /]# service mysqld start

正在启动 mysqld:                                          [确定] //正常启动
5.mysql安装完成会创建临时默认的超级用户,密码存储在/var/log/mysqld.log,命令查看密码:
grep 'temporary password' /var/log/mysqld.log
[root@hadoop110 /]# grep 'temporary password' /var/log/mysqld.log

--02T10::.765238Z  [Note] A temporary password is generated for root@localhost: ??dyl3Uduj       (密码)
6.使用默认用户'root'@'localhost'登录数据库并且修改密码:
[root@hadoop110 /]# mysql -u root -p
[root@hadoop110 /]#  mysql -u root -p

Enter password: (上面的密码)

Welcome to the MySQL monitor.  Commands end with ; or \g.

Your MySQL connection id is

Server version: 5.7.

Copyright (c) , , Oracle and/or its affiliates. All rights reserved.

Oracle is a registered trademark of Oracle Corporation and/or its

affiliates. Other names may be trademarks of their respective

owners.

Type 'help;' or '\h' for help. Type '\c' to clear the current input statement.
修改密码:
mysql> ALTER USER 'root'@'localhost' IDENTIFIED BY '';

Query OK,  rows affected (0.00 sec)
注意:如果出现错误提示:

ERROR  (HY000): Your password does not satisfy the current policy requirements

这个是因为密码过于简单,密码必须符合长度,包含数字、大写小写字母、特殊字符。
7.开启远程连接
      1).设置防火墙iptables开放3306接口
      在/etc/sysconfig下面有个iptables文件,在倒数第二行添加端口就可以
在控制台输入:
iptables -I INPUT -p tcp --dport  -j ACCEPT

[root@hadoop110 /]# iptables -I INPUT -p tcp --dport 3306 -j ACCEPT
2).然后进行保存:
[root@hadoop110 /]# service iptables save

iptables:将防火墙规则保存到 /etc/sysconfig/iptables:     [确定]
  更新防火墙规则:service iptables restart
  删除:iptables -D INPUT -p tcp --dport 3306 -j ACCEPT

8.修改mysql权限,将localhost修改为%
  1).登录mysql
mysql -u root -p
2).登录到 mysql 这个表
mysql> use mysql;

Reading table information for completion of table and column names

You can turn off this feature to get a quicker startup with -A

Database changed
3)..将root的host修改为%
mysql> update user set host = '%' where user ='root';

Query OK,  row affected (0.01 sec)

Rows matched:   Changed:   Warnings:
4).重新加载权限
mysql> flush privileges;

Query OK,  rows affected (0.00 sec)
5).输入:
mysql> select host,user from user where user='root';

+------+------+

| host | user |

+------+------+

| %    | root |

+------+------+

 row in set (0.00 sec)
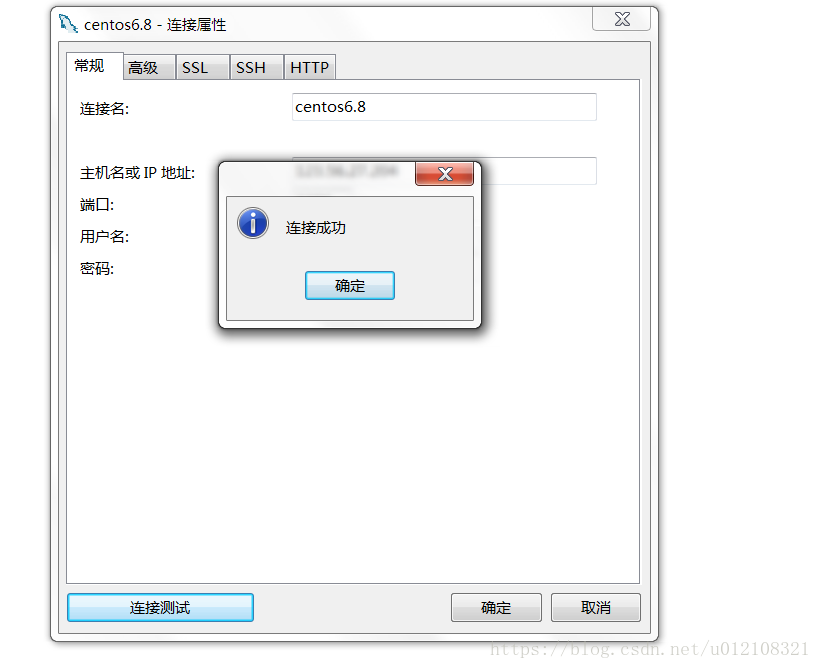
9.Navicat 远程连接
CentOS 中安装 mysql 5.7+的更多相关文章
- Linux CentOS 中安装 MySql
CentOS7的yum源中默认好像是没有mysql的.为了解决这个问题,我们要先下载mysql的repo源. 1. 下载mysql的repo源 $ wget http://repo.mysql.com ...
- centos中安装mysql
一.首先输入指令 rpm -qa|grep mysql 检查操作系统中是否已经安装了MySQL 可以通过 yum list | grep mysql 命令来查看yum上提供的mysql数据库可下载的版 ...
- centos中安装mysql数据库
1.查看是否已有mysql数据库: #rpm -qa |grep mysql 命令返回空,说明没有安装成功. 2.安装mysql yum install mysql* 安装完成后,却发现只安装了JDB ...
- 在Centos中安装mysql
下载mysql 这里是通过安装Yum源rpm包的方式安装,所以第一步是先下载rpm包 1.打开Mysql官网 https://www.mysql.com/, 点击如图选中的按钮 点击如图框选的按钮 把 ...
- 在centos中安装mysql详细步骤说明
Last login: Sun Dec 24 04:55:59 2017 1.安装依赖 [root@node001 ~]# yum install -y perlLoaded plugins: fas ...
- centos 7 中安装 mysql 5.7
centos 7 中安装 mysql 5.7 环境说明: 查看centos的版本:cat /etc/redhat-release 安装和配置步骤: 下载 mysql 源安装包: sudo curl - ...
- 20190526 - CentOS 7 中 安装 MySQL 8 并授权 root 远程访问
1. CentOS 7 中 安装 MySQL 8 CentOS 7 中内置 MariaDB 建议升级一下用,性能好很多.但如果一定要用 MySQL 8,就得自己装. 坦白的说,Oracle 升级 My ...
- Centos7中安装Mysql及配置
CentOS 7 安装 MySQL 首先检查 MySQL 是否已安装 yum list installed | grep mysql 如果有的话 就全部卸载 yum -y remove +数据库名称 ...
- Centos下安装mysql 总结
一.MySQL安装 Centos下安装mysql 请点开:http://www.centoscn.com/CentosServer/sql/2013/0817/1285.html 二.MySQL的几个 ...
随机推荐
- Dubbo+zookeeper应用的入门案例
前提:Linux安装zookeeper Dubbo管理中心部署 简单案例的项目结构: 1,demo_parent的pom.xml,用来统一管理依赖 <?xml version="1. ...
- PHP自动加载配置ArrayAccess类
ArrayAccess是PHP的类,可以把对象当成数组来使用访问. Config.php 配置类 <?php namespace IMooc; class Config implements ...
- solrserver实例化
以下是httpClient实例化方式,需要tomcat运行Solr服务 1.ConcurrentUpdateSolrServer实例化SolrServer,该类实例化多用于更新删除索引操作 Concu ...
- http头部信息解析
HTTP 头部解释 1. Accept:告诉WEB服务器自己接受什么介质类型,*/* 表示任何类型,type/* 表示该类型下的所有子类型,type/sub-type. 2. Accept-Chars ...
- linux系统上部署一个web项目
对于apache开源项目中tomcat的认识,大多停留在Windows下,这次我通过一个简单的实例来介绍一下在linux下如何搭建tomcat环境,并且部署一个web项目. 先从基本安装开始,可别小看 ...
- 23-单词数(HDU2070)
单词数 Time Limit: 1000/1000 MS (Java/Others) Memory Limit: 32768/32768 K (Java/Others)Total Submiss ...
- 使用mail架包发送邮件javax.mail.AuthenticationFailedException: failed to connect at javax.mail.Service.connec
这个错误是因为连接不上邮箱服务器导致的,可能有以下几个原因(以网易邮箱为例) 1.当使用第三方登录邮箱时需要有邮箱的授权码,且要开启POP3/SMTP/IMAP:服务 2.在代码中要调用网易邮箱的密码 ...
- does not name a type
一般都与头文件有关 1.缺少using namespaces std: 2.头文件的地方不对. 3.加错了头文件,还会出现内部函数库的报错.有的函数被多个函数库包含
- 单元测试NUnit 的文章
请参考 https://www.cnblogs.com/ranh941/p/7629279.htmlhttps://blog.csdn.net/qincode/article/details/1831 ...
- php系统常量
(1)__FILE__ :php程序文件名.它可以帮助我们获取当前文件在服务器的物理位置. (2)__LINE__ :PHP程序文件行数.它可以告诉我们,当前代码在第几行. (3)PHP_VERSIO ...