linux3 源代码安装
源代码安装:

通过yum就不会有依赖关系(安装mysql是安装mysqlServer)。Rpm更新的时候,如果没有安装软件就回去安装。

应用程序和系统命令会放在不同的目录中(bin,sbin,usr/bin,usr/sbin),如果yum找不到并且也没有rpm包,就需要自己编译后安装。条件:

1.是否具备软件编译的环境。

首先查询操纵系统中是否安装了编译环境gcc:

$rpm -qa | grep gcc :如果找到libgcc,这个不是编译环境,只是一个库。

root@ubuntu:/# apt-get install gcc

2.应用程序源代码。

打开浏览器去下载nginx的源码(development开发版是比较新但是不稳定,stable是稳定版,beta是测试版)
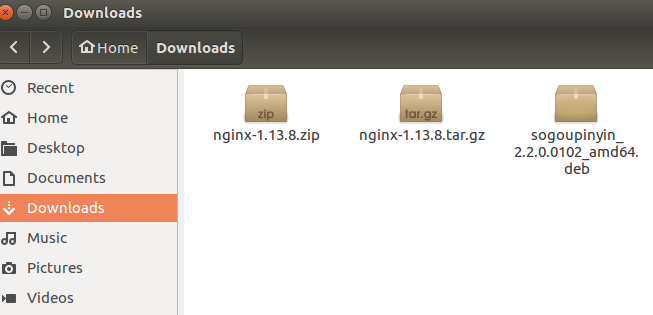
Zip是windows,tar.gz是linux的。

root@ubuntu:/usr# find / -name nginx-1.13.8.tar.gz

/home/yw1989/Downloads/nginx-1.13.8.tar.gz

1.解压压缩包。

root@ubuntu:/home/yw1989/Downloads# tar zxf nginx-1.13.8.tar.gz

root@ubuntu:/home/yw1989/Downloads# cd nginx-1.13.8 :进入这个目录里面去

root@ubuntu:/home/yw1989/Downloads/nginx-1.13.8# ls

auto     CHANGES.ru  configure  html     man     src

CHANGES  conf        contrib    LICENSE  README

root@ubuntu:/home/yw1989/Downloads/nginx-1.13.8# cd src :进入到源代码里面去

root@ubuntu:/home/yw1989/Downloads/nginx-1.13.8/src# ls

core  event  http  mail  misc  os  stream

core:是核心,linux里面很多方法都是用c语言写的。

2.编译前的配置工作(检查工作)(安装到哪个目录,是否需要相关的依赖程序等)。
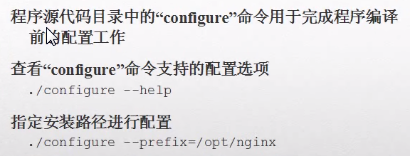
进入到nginx-1.13.8根目录之后都会有一个config文件,或者叫脚本,程序的编译都要基于config,所以config用于完成编译前的配置工作。

root@ubuntu:/home/yw1989/Downloads/nginx-1.13.8# ./configure --help

  --help                             print this message

  --prefix=PATH                      要把软件安装到哪个目录

  --sbin-path=PATH                   nginx执行程序安装到哪个目录

  --modules-path=PATH                set modules path

  --conf-path=PATH                   配置文件安装到哪里

  --error-log-path=PATH              错误日志设置到哪

  --pid-path=PATH                    进程文件pid设置到哪里

  --lock-path=PATH                   锁定文件放到哪里
root@ubuntu:/home/yw1989/Downloads/nginx-1.13.8# ./configure(都走默认配置,什么都不指定)

checking for OS

 + Linux 4.13.0-32-generic x86_64

checking for C compiler ... found

 + using GNU C compiler

 + gcc version: 5.4.0 20160609 (Ubuntu 5.4.0-6ubuntu1~16.04.4)

checking for gcc -pipe switch ... found

checking for -Wl,-E switch ... found

checking for gcc builtin atomic operations ... found

./configure: error: the HTTP rewrite module requires the PCRE library.  : 出错,缺少PCRE相关依赖库

You can either disable the module by using --without-http_rewrite_module
ubuntu安装nginx时提示error: the HTTP rewrite module requires the PCRE library

需要安装pcre包。

sudo apt-get update

sudo apt-get install libpcre3 libpcre3-dev

你可能还需要安装

sudo apt-get install openssl libssl-dev
root@ubuntu:/home/yw1989/Downloads/nginx-1.13.8# ./configure:再次configure(检查当前环境是否满足编译需求,满足才可以进行编译,)

Configuration summary

  + using system PCRE library

  + OpenSSL library is not used

  + using system zlib library

Configure只是一个检查的check的过程:

checking for PCRE library ... found :找到pcre库

checking for zlib library ... found

checking for sys/filio.h ... not found

checking for sys/param.h ... found

checking for sys/mount.h ... found

checking for sys/statvfs.h ... found

checking for crypt.h ... found

  nginx path prefix: "/usr/local/nginx"   :将会安装的路径

  nginx binary file: "/usr/local/nginx/sbin/nginx" :将会安装的nginx的执行文件

  nginx modules path: "/usr/local/nginx/modules"

  nginx configuration prefix: "/usr/local/nginx/conf" :将会安装的配置文件

  nginx configuration file: "/usr/local/nginx/conf/nginx.conf"

  nginx pid file: "/usr/local/nginx/logs/nginx.pid" :将会安装的pid文件

  nginx error log file: "/usr/local/nginx/logs/error.log" :将会安装的错误文件

  nginx http access log file: "/usr/local/nginx/logs/access.log"

  nginx http client request body temporary files: "client_body_temp"

  nginx http proxy temporary files: "proxy_temp"

  nginx http fastcgi temporary files: "fastcgi_temp"

  nginx http uwsgi temporary files: "uwsgi_temp"

  nginx http scgi temporary files: "scgi_temp"
1.编译。

make进行编译,make install进行安装。

root@ubuntu:/home/yw1989/Downloads/nginx-1.13.8# make

make -f objs/Makefile

make[1]: Entering directory '/home/yw1989/Downloads/nginx-1.13.8'

cc -c -pipe  -O -W -Wall -Wpointer-arith -Wno-unused-parameter -Werror -g  -I src/core -I src/event -I src/event/modules -I src/os/unix -I objs \

    -o objs/src/core/nginx.o \
2.编译后安装。

root@ubuntu:/home/yw1989/Downloads/nginx-1.13.8# make install

make -f objs/Makefile install

root@ubuntu:/usr/local# cd nginx/

root@ubuntu:/usr/local/nginx# ls

conf  html  logs  sbin

root@ubuntu:/usr/local/nginx# cd sbin

root@ubuntu:/usr/local/nginx/sbin# ls

Nginx  :这就是执行程序(windows上的exe主执行程序)

root@ubuntu:/usr/local/nginx/sbin# ps -ef | grep nginx

root      12420   3626  0 21:39 pts/2    00:00:00 grep --color=auto nginx :没有执行起来

root@ubuntu:/usr/local/nginx/sbin# ./nginx :运行起来nginx

root@ubuntu:/usr/local/nginx/sbin# ps -ef | grep nginx

root      12422   2571  0 21:39 ?        00:00:00 nginx: master process ./nginx :运行起来了,master process和worker process两个主进程都运行起来了

nobody    12423  12422  0 21:39 ?        00:00:00 nginx: worker process

root      12425   3626  0 21:39 pts/2    00:00:00 grep --color=auto nginx

安装软件可以通过yum,rpm,源代码3中方式安装。首先通过yum安装,yum找不到就用rpm,rpm不行就用源代码安装。
用户和组的管理:
Linux的账号分为用户账号和组账号2种。

用户账号:分为普通用户和超级用户,普通用户只能在特定文件夹下操作,超级用户可以对所有文件夹操作并且控制普通用户。

组账号:组是用户的集合,组分为私有组和公共组,建议一个用户不指定组就会创建一个和该用户同名的私有组(私有组和用户名称同名,并且只有用户一个人),标准组可以容纳多个用户。

root@ubuntu:/etc# vim passwd :存储的是系统创建出来的用户信息

每一行的列(用户名,登陆的名字 :口令,x是密文:id号码:组的标识号:描述:登陆之后进去的目录:命令解释器,root用户登陆进来就默认要使用bash解释器,/usr/sbin/nologin表示是系统内置的账号,有一些功能,是不能登陆系统的)

root :x:0:0:root:/root:/bin/bash

daemon:x:1:1:daemon:/usr/sbin:/usr/sbin/nologin

bin:x:2:2:bin:/bin:/usr/sbin/nologin

sys:x:3:3:sys:/dev:/usr/sbin/nologin

sync:x:4:65534:sync:/bin:/bin/sync

systemd-timesync:x:100:102:systemd Time Synchronization,,,:/run/systemd:/bin/false

systemd-network:x:101:103:systemd Network Management,,,:/run/systemd/netif:/bin/false

systemd-resolve:x:102:104:systemd Resolver,,,:/run/systemd/resolve:/bin/false

systemd-bus-proxy:x:103:105:systemd Bus Proxy,,,:/run/systemd:/bin/false

syslog:x:104:108::/home/syslog:/bin/false

_apt:x:105:65534::/nonexistent:/bin/false

messagebus:x:106:110::/var/run/dbus:/bin/false

uuidd:x:107:111::/run/uuidd:/bin/false
(x是密码,在passwd文件是看不到的,shadow存放的是用户密码)

root@ubuntu:/etc# vim shadow

(第二列是加密后的密码,*因为是不能登陆系统,所以没有密码,)

root:$6$dNWnW/HB$pvRspIT9gcaUqvTDIuhRyCCyoNDfw6utsfRzCO9cxLsQZmql77t9T6fFkibsOeS3C3RIcTa.t2akNS3b19Zn4/:17574:0:99999:7:::

daemon:*:17379:0:99999:7:::

bin:*:17379:0:99999:7:::

sys:*:17379:0:99999:7:::

sync:*:17379:0:99999:7:::

games:*:17379:0:99999:7:::

man:*:17379:0:99999:7:::

proxy:*:17379:0:99999:7:::

www-data:*:17379:0:99999:7:::

backup:*:17379:0:99999:7:::

list:*:17379:0:99999:7:::

irc:*:17379:0:99999:7:::
root@ubuntu:/etc# vim group :查看组的信息

(第一列是组名:第二列是组密码:第三列是组的表示号:最后一列是组里面有哪些用户)

root:x:0:

daemon:x:1:

bin:x:2:

sys:x:3:

adm:x:4:syslog,yw1989

tty:x:5:

disk:x:6:

kmem:x:15:

dialout:x:20:

cdrom:x:24:yw1989

floppy:x:25:

tape:x:26:

sudo:x:27:yw1989
查看组密码:(组密码保存的地方)

root@ubuntu:/etc# vim gshadow

root:*::

daemon:*::

bin:*::

sys:*::

adm:*::syslog,yw1989

tty:*::

disk:*::

lp:*::

mail:*::

news:*::

uucp:*::

man:*::

proxy:*::
------------------------------------------------------------------------------------------------------------------------

用的比较多的是passwd和group文件。

创建用户:root@ubuntu:/# useradd yw1

root@ubuntu:/# vim etc/passwd

yw1:x:1001:1001::/home/yw1:

root@ubuntu:/# useradd -c "shushi" yw2 :添加用户

root@ubuntu:/# vim etc/passwd

yw2:x:1002:1002:shushi:/home/yw2:

root@ubuntu:/# passwd yw1 :添加密码

Enter new UNIX password:

Retype new UNIX password:

passwd: password updated successfully

root@ubuntu:/# userdel yw2 :删除用户(删出用户的时候,私有组还在)

root@ubuntu:/# vim etc/passwd

创建用户的时候会创建一个同名的私有组出来(只能有一个用户,不能别的用户加进来),

root@ubuntu:/# vim etc/group

yw1:x:1001: :同名私有组
root@ubuntu:/# groupadd yw1group(创建的是标准组,其他用户可以加进来)

yw1group:x:1002:

root@ubuntu:/# groupdel  yw1group :删除组

root@ubuntu:/# useradd -G yw1group yw4 :用户yw4加入yw1group组(yw4是不存在的用户)

root@ubuntu:/# vim etc/group

yw1group:x:1002:yw4 :yw4用户在标准组里面

yw4:x:1005: :并且也会创建yw4的私有组

root@ubuntu:/# vim etc/passwd

yw4:x:1004:1005::/home/yw4:
Linux系统管理
Linux的用户必须要有密码,不然没法登陆系统。

Passwd:修改当前用户密码

root@ubuntu:/# vim etc/login.defs

PASS_MAX_DAYS   99999  : 密码最大天数

PASS_MIN_DAYS   0   :密码最小天数

PASS_WARN_AGE   7

su - root,su - yw1989 : 切换用户

sudo :是借用root账号权限做普通用户无法做的事

yw1989@ubuntu:~$ id  : 查看当前用户的uid,gid,groups

uid=1000(yw1989)

gid=1000(yw1989) groups=1000(yw1989),4(adm),24(cdrom),27(sudo),30(dip),46(plugdev),113(lpadmin),128(sambashare),999(docker)

yw1989@ubuntu:~$ groups  :  查看当前用户在哪个组

yw1989 adm cdrom sudo dip plugdev lpadmin sambashare docker

yw1989@ubuntu:~$ pwd  :查看当前目录

/home/yw1989
linux3 源代码安装的更多相关文章
- Linux程序包管理之yum及源代码安装
第十六章.Linux程序包管理之yum及源代码安装 目录 yum介绍 yum配置文件 yum的repo配置文件中可用的变量 yum命令的使用 使用光盘作为本地yum仓库 如何创建yum仓库 编译安装的 ...
- ODOO 源代码安装要求
ODOO 源代码安装要求 ref:http://www.odoo.com/documentation/10.0/setup/install.html#setup-install-source pyth ...
- 源代码安装 MySQL 5.6.28
本文内容 创建 MySQL 用户和组 解压 MySQL 源代码包 生成配置安装文件 编译和安装 MySQL 配置文件 创建 MySQL 授权表 MySQL 目录授权 启动 MySQL 验证 MySQL ...
- Building nginx from Sources(从源代码安装nginx)
Building nginx from Sources(从源代码安装nginx) The build is configured using the configure command. 安装用配置 ...
- 【转载】绝对干货!Linux小白最佳实践:《超容易的Linux系统管理入门书》(连载九)如何通过源代码安装软件
除了使用Linux的包管理机制进行软件的安装.更新和卸载,从源代码进行软件的安装也是非常常见的,开源软件提供了源代码包,开发者可以方便的通过源代码进行安装.从源码安装软件一般经过软件配置.编译软件.执 ...
- 源代码安装GIT
参考URL:http://blog.chinaunix.net/xmlrpc.php?r=blog/article&uid=25150840&id=4250659 若是条件允许,从源代 ...
- 源代码安装软件-MySQL
一.源码安装 1.经典的源代码安装三步曲: 1.编译前的配置 ./configure 2.编译 make 3.安装 make install 2.源代码软件安装步骤: 1.下载软件包 2.校验软件包 ...
- configure - 源代码安装的第一步
configure是源代码安装的第一步,主要的作用是对即将安装的软件进行配置,检查当前的环境是否满足要安装软件的依赖关系 configure有许多参数可配,具体参见./configure --help ...
- Linux 中如何用源代码安装软件,以及如何卸载它
https://www.linuxidc.com/Linux/2017-12/149839.htm http://www.openssh.com/ http://www.openssh.com/por ...
随机推荐
- 平衡树与可持久化treap
平衡树(二叉树) 线段树不支持插入or删除一个数于是平衡树产生了 常见平衡树:treap(比sbt慢,好写吧),SBT(快,比较好写,有些功能不支持),splay(特别慢,复杂度当做根号n来用,功能强 ...
- [Bzoj4942][Noi2017]整数(线段树)
4942: [Noi2017]整数 Time Limit: 50 Sec Memory Limit: 512 MBSubmit: 363 Solved: 237[Submit][Status][D ...
- 【面试】最容易被问到的N种排序算法!
面试官:小明,是吧?你都知道哪些排序算法,哪几种是稳定排序? 小明:这个我有总结! 关于排序稳定性的定义 通俗地讲就是能保证排序前两个相等的数其在序列的前后位置顺序和排序后它们两个的前后位置顺序相同. ...
- SQL-基础学习1--SELECT,LIMIT,DISTINCT,注释
所使用的数据库资料在:数据库资料 1.1 基础概念 1.数据库(database) 保存有组织的数据的容器(通常是一个文件或一组文件) 注意:常用的mysql,等是数据库管理系统DBMS:由这些软件创 ...
- nodeJS一些事儿
node-webkit:开发桌面+WEB混合型应用的神器[大漠穷秋] 展望未来 其实这条路老早就有人在走 网上有很多人在争论,未来究竟是原生的应用会胜出,还是WEB APP会胜出,实际上这两者并不是你 ...
- android clipRect Op.xxx各个参数理解
有点小啰嗦的一篇学习笔记,可以直接看最后得出的结论:前面的各种图片和说明都是为最后的结论服务的 1)剪切:和平常画图工具剪切的作用一样,在画布上剪切一个区域,比如剪切一个Rect区域,画布canvas ...
- jenkins执行单元测试,会产生大量临时文件,要及时删除,不然会把inode耗尽
jenkins的build命令:clean test -U findbugs:findbugs pmd:pmd sonar:sonar -Djava.io.tmpdir=/tmp/ -Dsonar.p ...
- 表现层 JSP 页面实现
一.实验介绍 1.1 实验内容 本节课程主要利用 easyUI 实现系统的前端页面. 1.2 实验知识点 easyUI JavaScript html 1.3 实验环境 JDK1.8 Eclipse ...
- HDU 1698 Just a Hook(线段树区间替换)
题目地址:pid=1698">HDU 1698 区间替换裸题.相同利用lazy延迟标记数组,这里仅仅是当lazy下放的时候把以下的lazy也所有改成lazy就好了. 代码例如以下: # ...
- kettle中使用javascript步骤和fireToDB函数实现自己定义数据库查询
kettle中使用javascript步骤和fireToDB函数实现自己定义数据库查询 如果你须要实现非传统的数据库查询操作.为了讨论这样的情景,我们如果你须要读取数据库中的正則表達式,然后检查输入的 ...