Django项目:CMDB(服务器硬件资产自动采集系统)--06--06CMDB测试Linux系统采集硬件数据的命令01
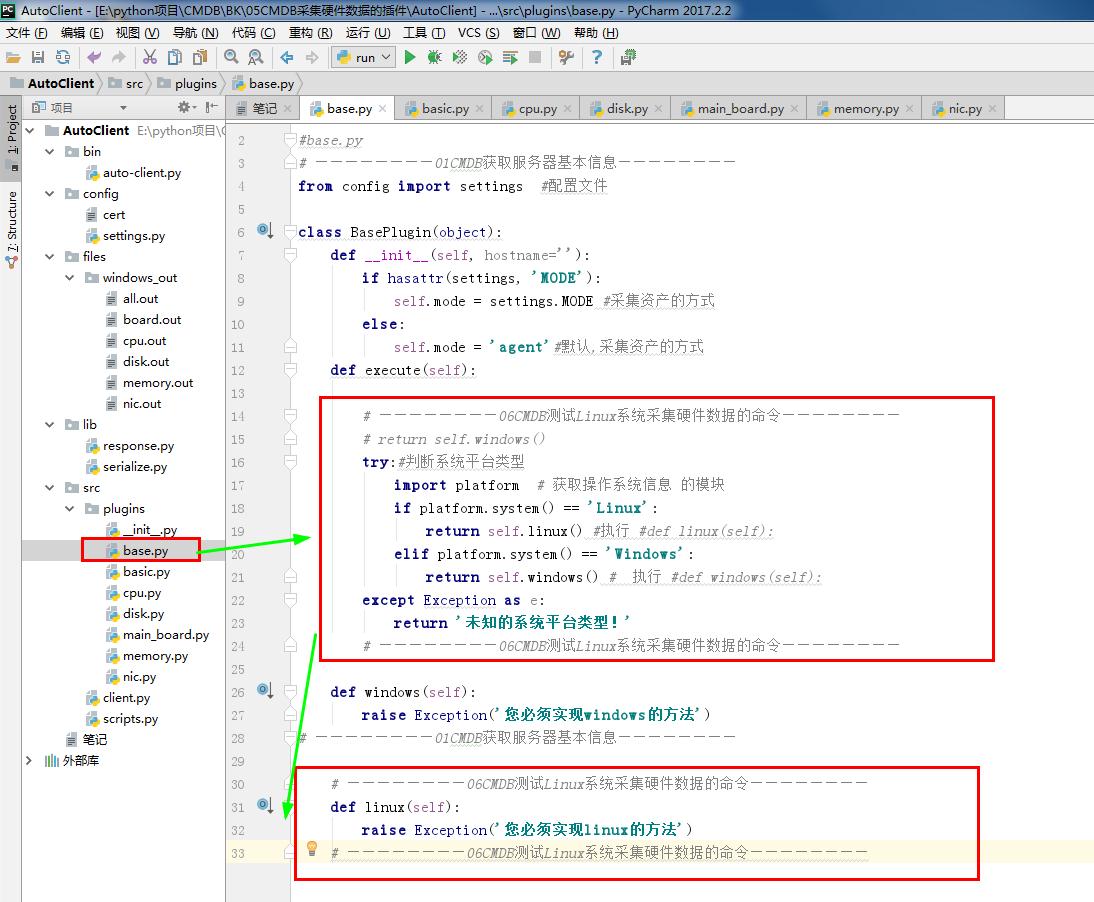
 #base.py

 # ————————01CMDB获取服务器基本信息————————

 from config import settings  #配置文件

 class BasePlugin(object):

     def __init__(self, hostname=''):

         if hasattr(settings, 'MODE'):

             self.mode = settings.MODE #采集资产的方式

         else:

             self.mode = 'agent'#默认,采集资产的方式

     def execute(self):

         # ————————06CMDB测试Linux系统采集硬件数据的命令————————

         # return self.windows()

         try:#判断系统平台类型

             import platform  # 获取操作系统信息 的模块

             if platform.system() == 'Linux':

                 return self.linux() #执行 #def linux(self):

             elif platform.system() == 'Windows':

                 return self.windows() #  执行 #def windows(self):

         except Exception as e:

             return '未知的系统平台类型!'

         # ————————06CMDB测试Linux系统采集硬件数据的命令————————

     def windows(self):

         raise Exception('您必须实现windows的方法')

 # ————————01CMDB获取服务器基本信息————————

     # ————————06CMDB测试Linux系统采集硬件数据的命令————————

     def linux(self):

         raise Exception('您必须实现linux的方法')

     # ————————06CMDB测试Linux系统采集硬件数据的命令————————
#base.py

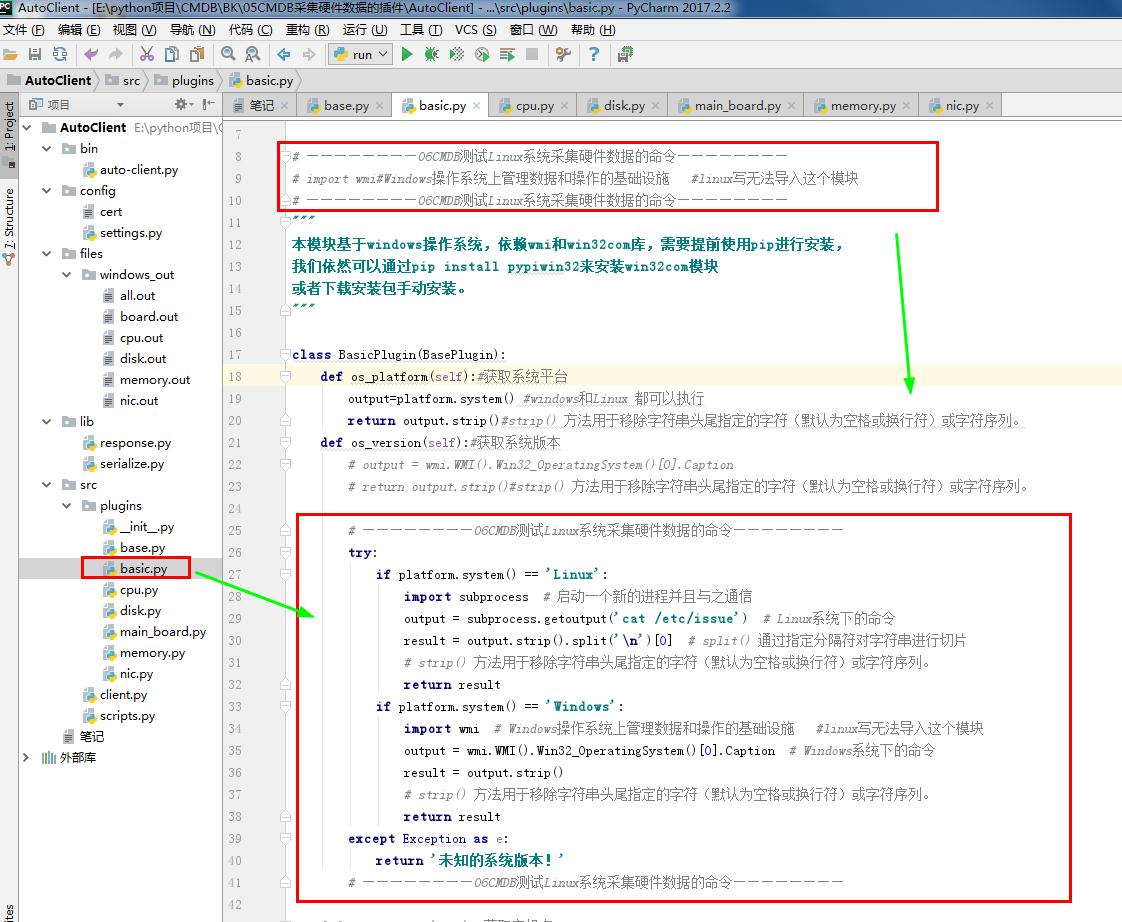

 # basic.py

 # ————————01CMDB获取服务器基本信息————————

 from .base import BasePlugin #采集资产的方式

 from lib.response import BaseResponse   #提交数据的类型

 import platform  #platform模块给我们提供了很多方法去获取操作系统的信息

 # ————————06CMDB测试Linux系统采集硬件数据的命令————————

 # import wmi#Windows操作系统上管理数据和操作的基础设施   #linux写无法导入这个模块

 # ————————06CMDB测试Linux系统采集硬件数据的命令————————

 """

 本模块基于windows操作系统,依赖wmi和win32com库,需要提前使用pip进行安装,

 我们依然可以通过pip install pypiwin32来安装win32com模块

 或者下载安装包手动安装。

 """

 class BasicPlugin(BasePlugin):

     def os_platform(self):#获取系统平台

         output=platform.system() #windows和Linux 都可以执行

         return output.strip()#strip() 方法用于移除字符串头尾指定的字符(默认为空格或换行符)或字符序列。

     def os_version(self):#获取系统版本

         # output = wmi.WMI().Win32_OperatingSystem()[0].Caption

         # return output.strip()#strip() 方法用于移除字符串头尾指定的字符(默认为空格或换行符)或字符序列。

         # ————————06CMDB测试Linux系统采集硬件数据的命令————————

         try:

             if platform.system() == 'Linux':

                 import subprocess  # 启动一个新的进程并且与之通信

                 output = subprocess.getoutput('cat /etc/issue')  # Linux系统下的命令

                 result = output.strip().split('\n')[0]  # split() 通过指定分隔符对字符串进行切片

                 # strip() 方法用于移除字符串头尾指定的字符(默认为空格或换行符)或字符序列。

                 return result

             if platform.system() == 'Windows':

                 import wmi  # Windows操作系统上管理数据和操作的基础设施   #linux写无法导入这个模块

                 output = wmi.WMI().Win32_OperatingSystem()[0].Caption  # Windows系统下的命令

                 result = output.strip()

                 # strip() 方法用于移除字符串头尾指定的字符(默认为空格或换行符)或字符序列。

                 return result

         except Exception as e:

             return '未知的系统版本!'

         # ————————06CMDB测试Linux系统采集硬件数据的命令————————

     def os_hostname(self):#获取主机名

         # output = wmi.WMI().Win32_OperatingSystem()[0].CSName

         # return output.strip()#strip() 方法用于移除字符串头尾指定的字符(默认为空格或换行符)或字符序列。

         # ————————06CMDB测试Linux系统采集硬件数据的命令————————

         try:

             if platform.system() == 'Linux':

                 import subprocess  # 启动一个新的进程并且与之通信

                 output = subprocess.getoutput('hostname')  # Linux系统下的命令

                 return output.strip()  # strip() 方法用于移除字符串头尾指定的字符(默认为空格或换行符)或字符序列。

             elif platform.system() == 'Windows':

                 import wmi # Windows操作系统上管理数据和操作的基础设施   #linux写无法导入这个模块

                 output = wmi.WMI().Win32_OperatingSystem()[0].CSName  # Windows系统下的命令

                 return output.strip()  # strip() 方法用于移除字符串头尾指定的字符(默认为空格或换行符)或字符序列。

         except Exception as e:

             return '未知的主机名!'

         # ————————06CMDB测试Linux系统采集硬件数据的命令————————

     def windows(self):

         response = BaseResponse()#提交数据的类型

         try:

             ret = {

                 'os_platform': self.os_platform(),#系统平台

                 'os_version': self.os_version(),#系统版本

                 'hostname': self.os_hostname(),#主机名

             }

             response.data = ret #字典形式

             print('windows服务器基本信息:',response.data)

         except Exception as e:

             response.status = False#获取信息时出现错误

         return response

     """

     class BaseResponse(object): #提交数据的类型

     def __init__(self):

         self.status = True      #状态

         self.message = None     #消息

         self.data = None        #数据内容

         self.error = None       #错误信息

     """

 # ————————01CMDB获取服务器基本信息————————

     # ————————06CMDB测试Linux系统采集硬件数据的命令————————

     def linux(self):

         response = self.windows() #因为执行同样的方法,所以,就不重复写。

         print('linux服务器基本信息:', response.data)

         return response

     # ————————06CMDB测试Linux系统采集硬件数据的命令————————
# basic.py

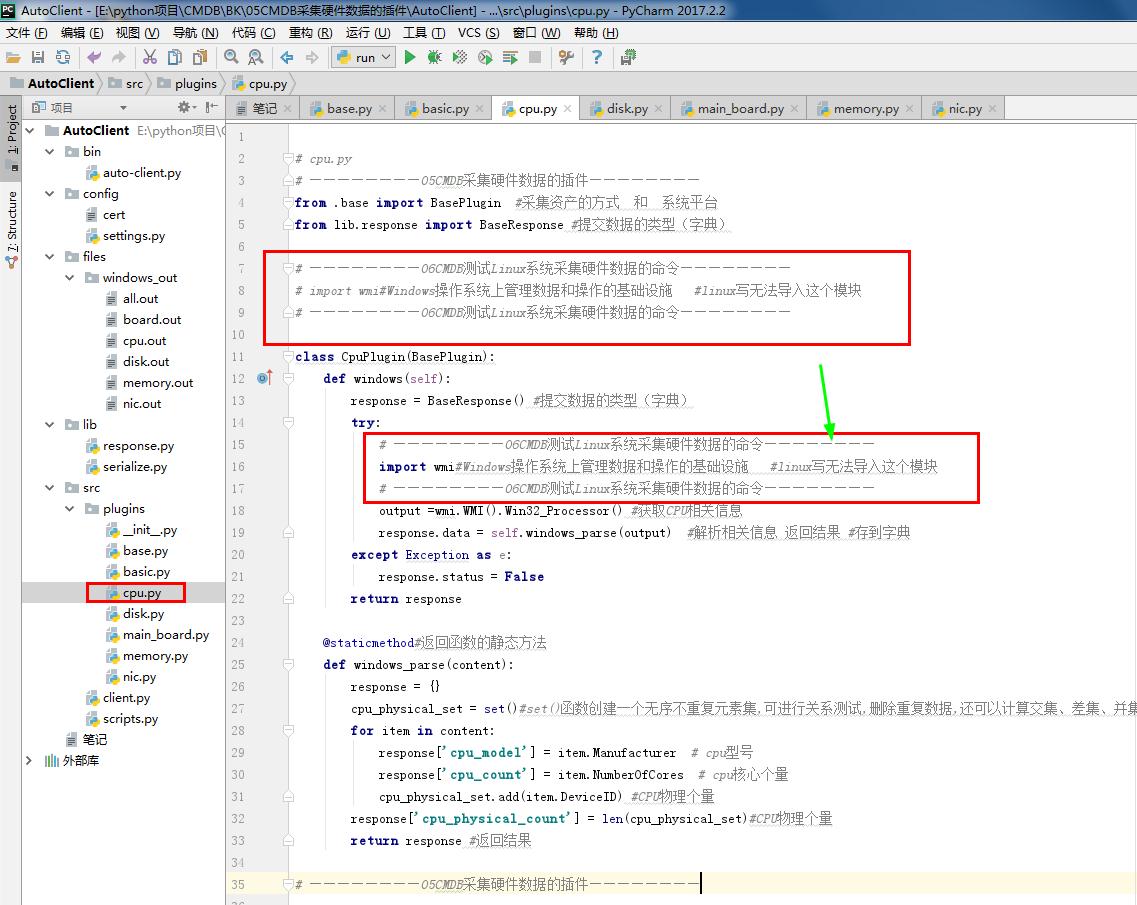
 # cpu.py

 # ————————05CMDB采集硬件数据的插件————————

 from .base import BasePlugin  #采集资产的方式  和  系统平台

 from lib.response import BaseResponse #提交数据的类型(字典)

 # ————————06CMDB测试Linux系统采集硬件数据的命令————————

 # import wmi#Windows操作系统上管理数据和操作的基础设施   #linux写无法导入这个模块

 # ————————06CMDB测试Linux系统采集硬件数据的命令————————

 class CpuPlugin(BasePlugin):

     def windows(self):

         response = BaseResponse() #提交数据的类型(字典)

         try:

             # ————————06CMDB测试Linux系统采集硬件数据的命令————————

             import wmi#Windows操作系统上管理数据和操作的基础设施   #linux写无法导入这个模块

             # ————————06CMDB测试Linux系统采集硬件数据的命令————————

             output =wmi.WMI().Win32_Processor() #获取CPU相关信息

             response.data = self.windows_parse(output)  #解析相关信息 返回结果 #存到字典

         except Exception as e:

             response.status = False

         return response

     @staticmethod#返回函数的静态方法

     def windows_parse(content):

         response = {}

         cpu_physical_set = set()#set()函数创建一个无序不重复元素集,可进行关系测试,删除重复数据,还可以计算交集、差集、并集等。

         for item in content:

             response['cpu_model'] = item.Manufacturer  # cpu型号

             response['cpu_count'] = item.NumberOfCores  # cpu核心个量

             cpu_physical_set.add(item.DeviceID) #CPU物理个量

         response['cpu_physical_count'] = len(cpu_physical_set)#CPU物理个量

         return response #返回结果

 # ————————05CMDB采集硬件数据的插件————————

 # ————————06CMDB测试Linux系统采集硬件数据的命令————————

     def linux(self):

         response = BaseResponse()  # 提交数据的类型(字典)

         try:

             import subprocess  # 启动一个新的进程并且与之通信

             shell_command = "cat /proc/cpuinfo"  # 定义命令 lscpu

             output = subprocess.getoutput(shell_command)  # linux系统上执行的命令

             response.data = self.linux_parse(output)  # 解析shell命令返回结果

         except Exception as e:

             response.status = False

         return response

     @staticmethod  # 返回函数的静态方法

     def linux_parse(content):  # 解析shell命令返回结果

         response = {'cpu_count': 0, 'cpu_physical_count': 0, 'cpu_model': ''}

         cpu_physical_set = set()  # set()函数创建一个无序不重复元素集,可进行关系测试,删除重复数据,还可以计算交集、差集、并集等。

         content = content.strip()  # strip()方法用于移除字符串头尾指定的字符(默认为空格或换行符)或字符序列

         for item in content.split('\n\n'):  # split()通过指定分隔符对字符串进行切片

             for row_line in item.split('\n'):

                 key, value = row_line.split(':')

                 key = key.strip()

                 if key == 'processor':

                     response['cpu_count'] += 1  # cpu核心个量

                 elif key == 'physical id':

                     cpu_physical_set.add(value)  # CPU物理个量

                 elif key == 'model name':

                     if not response['cpu_model']:

                         response['cpu_model'] = value  # cpu型号

         response['cpu_physical_count'] = len(cpu_physical_set)  # CPU物理个量

         return response

 # ————————06CMDB测试Linux系统采集硬件数据的命令————————
# cpu.py
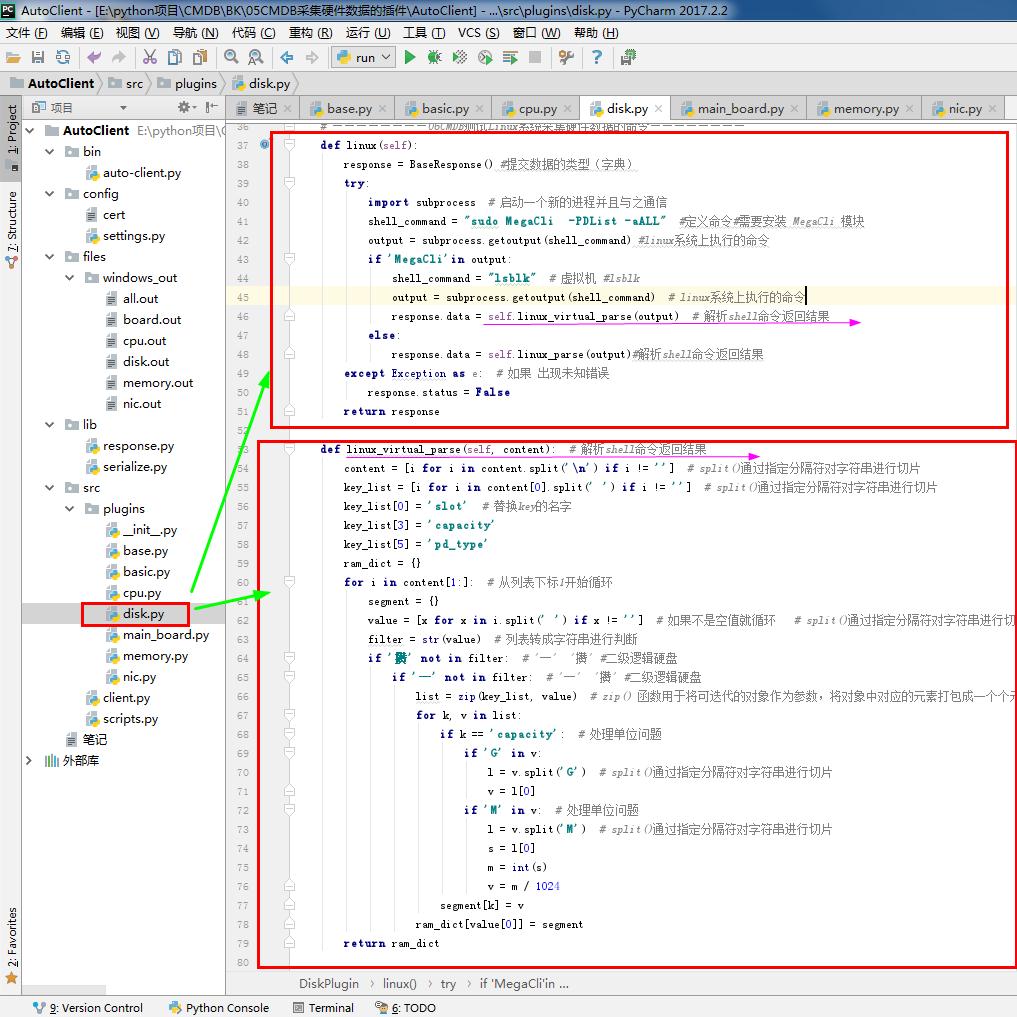
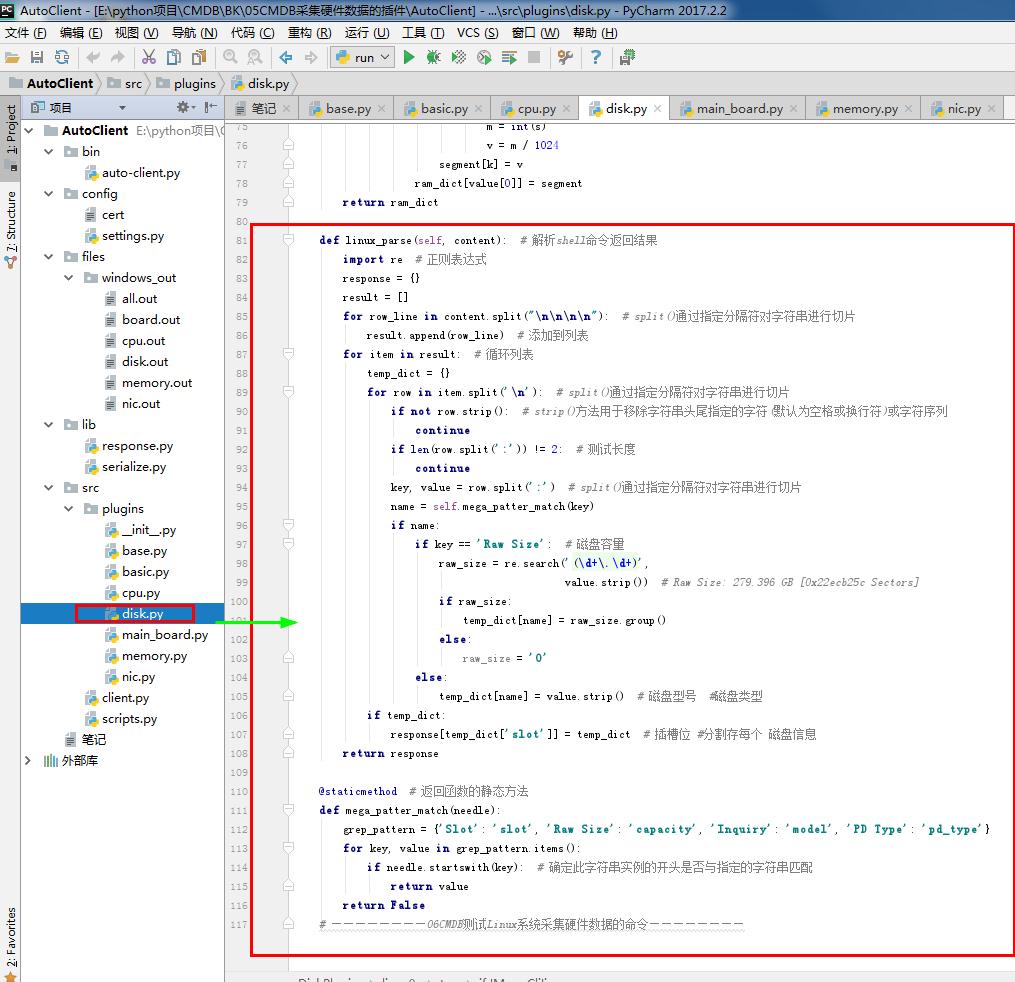
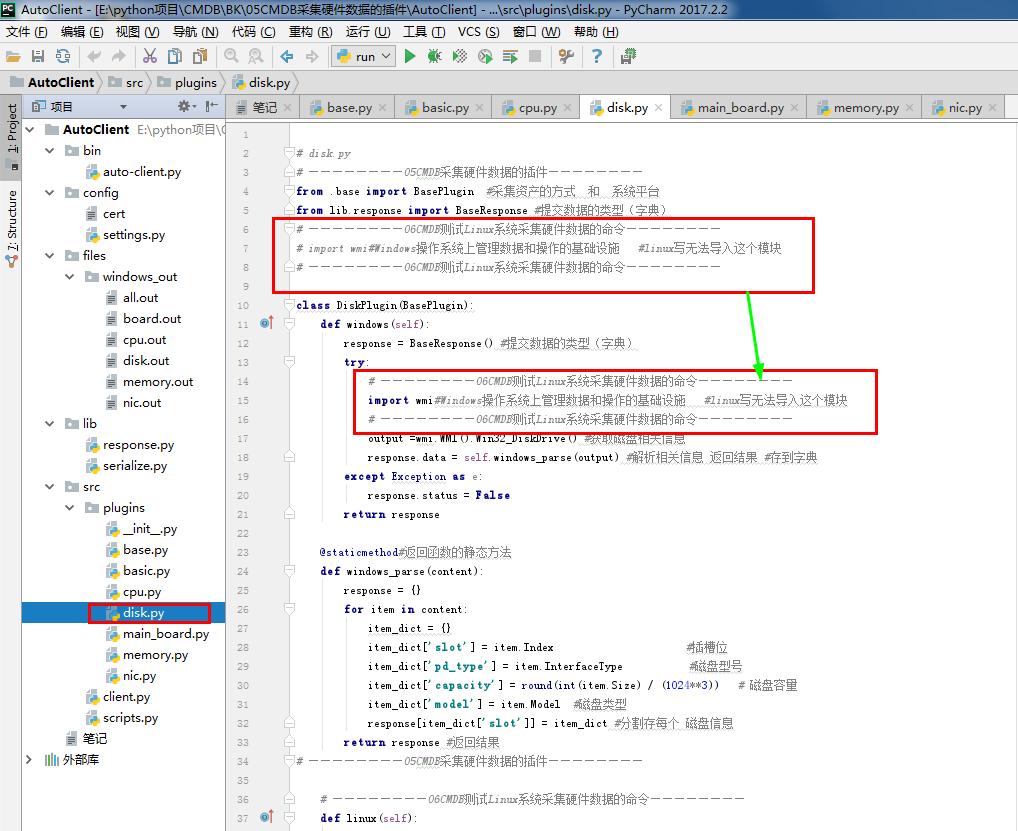
 # disk.py

 # ————————05CMDB采集硬件数据的插件————————

 from .base import BasePlugin  #采集资产的方式  和  系统平台

 from lib.response import BaseResponse #提交数据的类型(字典)

 # ————————06CMDB测试Linux系统采集硬件数据的命令————————

 # import wmi#Windows操作系统上管理数据和操作的基础设施   #linux写无法导入这个模块

 # ————————06CMDB测试Linux系统采集硬件数据的命令————————

 class DiskPlugin(BasePlugin):

     def windows(self):

         response = BaseResponse() #提交数据的类型(字典)

         try:

             # ————————06CMDB测试Linux系统采集硬件数据的命令————————

             import wmi#Windows操作系统上管理数据和操作的基础设施   #linux写无法导入这个模块

             # ————————06CMDB测试Linux系统采集硬件数据的命令————————

             output =wmi.WMI().Win32_DiskDrive() #获取磁盘相关信息

             response.data = self.windows_parse(output) #解析相关信息 返回结果 #存到字典

         except Exception as e:

             response.status = False

         return response

     @staticmethod#返回函数的静态方法

     def windows_parse(content):

         response = {}

         for item in content:

             item_dict = {}

             item_dict['slot'] = item.Index                      #插槽位

             item_dict['pd_type'] = item.InterfaceType           #磁盘型号

             item_dict['capacity'] = round(int(item.Size) / (1024**3))   # 磁盘容量

             item_dict['model'] = item.Model  #磁盘类型

             response[item_dict['slot']] = item_dict #分割存每个 磁盘信息

         return response #返回结果

 # ————————05CMDB采集硬件数据的插件————————

     # ————————06CMDB测试Linux系统采集硬件数据的命令————————

     def linux(self):

         response = BaseResponse() #提交数据的类型(字典)

         try:

             import subprocess  # 启动一个新的进程并且与之通信

             shell_command = "sudo MegaCli  -PDList -aALL"  #定义命令#需要安装 MegaCli 模块

             output = subprocess.getoutput(shell_command) #linux系统上执行的命令

             if 'MegaCli'in output:

                 shell_command = "lsblk"  # 虚拟机 #lsblk

                 output = subprocess.getoutput(shell_command)  # linux系统上执行的命令

                 response.data = self.linux_virtual_parse(output)  # 解析shell命令返回结果

             else:

                 response.data = self.linux_parse(output)#解析shell命令返回结果

         except Exception as e:  # 如果 出现未知错误

             response.status = False

         return response

     def linux_virtual_parse(self, content):  # 解析shell命令返回结果

         content = [i for i in content.split('\n') if i != '']  # split()通过指定分隔符对字符串进行切片

         key_list = [i for i in content[0].split(' ') if i != '']  # split()通过指定分隔符对字符串进行切片

         key_list[0] = 'slot'  # 替换key的名字

         key_list[3] = 'capacity'

         key_list[5] = 'pd_type'

         ram_dict = {}

         for i in content[1:]:  # 从列表下标1开始循环

             segment = {}

             value = [x for x in i.split(' ') if x != '']  # 如果不是空值就循环   # split()通过指定分隔符对字符串进行切片

             filter = str(value)  # 列表转成字符串进行判断

             if '攢' not in filter:  # '─'  '攢' #二级逻辑硬盘

                 if '─' not in filter:  # '─'  '攢' #二级逻辑硬盘

                     list = zip(key_list, value)  # zip() 函数用于将可迭代的对象作为参数,将对象中对应的元素打包成一个个元组,然后返回由这些元组组成的列表。

                     for k, v in list:

                         if k == 'capacity':  # 处理单位问题

                             if 'G' in v:

                                 l = v.split('G')  # split()通过指定分隔符对字符串进行切片

                                 v = l[0]

                             if 'M' in v:  # 处理单位问题

                                 l = v.split('M')  # split()通过指定分隔符对字符串进行切片

                                 s = l[0]

                                 m = int(s)

                                 v = m / 1024

                         segment[k] = v

                     ram_dict[value[0]] = segment

         return ram_dict

     def linux_parse(self, content):  # 解析shell命令返回结果

         import re  # 正则表达式

         response = {}

         result = []

         for row_line in content.split("\n\n\n\n"):  # split()通过指定分隔符对字符串进行切片

             result.append(row_line)  # 添加到列表

         for item in result:  # 循环列表

             temp_dict = {}

             for row in item.split('\n'):  # split()通过指定分隔符对字符串进行切片

                 if not row.strip():  # strip()方法用于移除字符串头尾指定的字符(默认为空格或换行符)或字符序列

                     continue

                 if len(row.split(':')) != 2:  # 测试长度

                     continue

                 key, value = row.split(':')  # split()通过指定分隔符对字符串进行切片

                 name = self.mega_patter_match(key)

                 if name:

                     if key == 'Raw Size':  # 磁盘容量

                         raw_size = re.search('(\d+\.\d+)',

                                              value.strip())  # Raw Size: 279.396 GB [0x22ecb25c Sectors]

                         if raw_size:

                             temp_dict[name] = raw_size.group()

                         else:

                             raw_size = ''

                     else:

                         temp_dict[name] = value.strip()  # 磁盘型号  #磁盘类型

             if temp_dict:

                 response[temp_dict['slot']] = temp_dict  # 插槽位 #分割存每个 磁盘信息

         return response

     @staticmethod  # 返回函数的静态方法

     def mega_patter_match(needle):

         grep_pattern = {'Slot': 'slot', 'Raw Size': 'capacity', 'Inquiry': 'model', 'PD Type': 'pd_type'}

         for key, value in grep_pattern.items():

             if needle.startswith(key):  # 确定此字符串实例的开头是否与指定的字符串匹配

                 return value

         return False

     # ————————06CMDB测试Linux系统采集硬件数据的命令————————
# disk.py

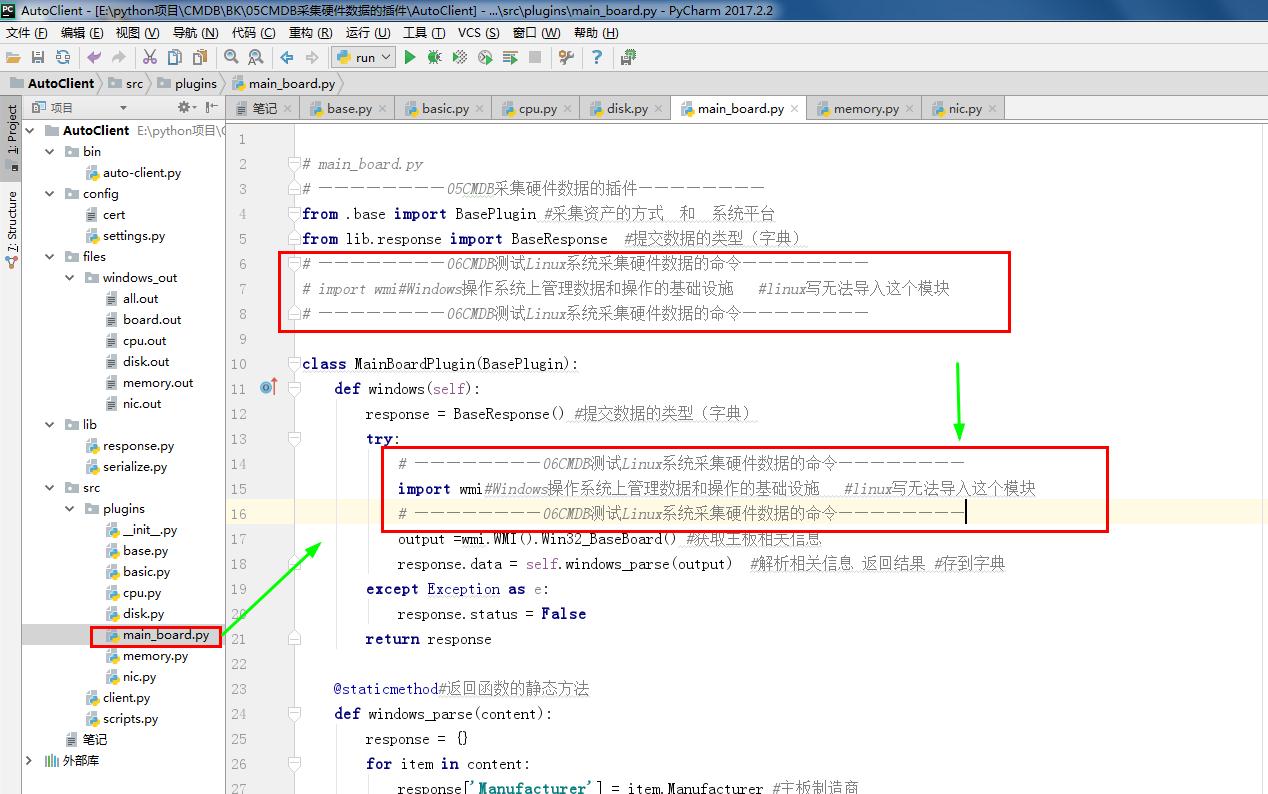
 # main_board.py

 # ————————05CMDB采集硬件数据的插件————————

 from .base import BasePlugin #采集资产的方式  和  系统平台

 from lib.response import BaseResponse  #提交数据的类型(字典)

 # ————————06CMDB测试Linux系统采集硬件数据的命令————————

 # import wmi#Windows操作系统上管理数据和操作的基础设施   #linux写无法导入这个模块

 # ————————06CMDB测试Linux系统采集硬件数据的命令————————

 class MainBoardPlugin(BasePlugin):

     def windows(self):

         response = BaseResponse() #提交数据的类型(字典)

         try:

             # ————————06CMDB测试Linux系统采集硬件数据的命令————————

             import wmi#Windows操作系统上管理数据和操作的基础设施   #linux写无法导入这个模块

             # ————————06CMDB测试Linux系统采集硬件数据的命令————————

             output =wmi.WMI().Win32_BaseBoard() #获取主板相关信息

             response.data = self.windows_parse(output)  #解析相关信息 返回结果 #存到字典

         except Exception as e:

             response.status = False

         return response

     @staticmethod#返回函数的静态方法

     def windows_parse(content):

         response = {}

         for item in content:

             response['Manufacturer'] = item.Manufacturer #主板制造商

             response['model'] = item.Name                 #主板型号

             response['sn'] = item.SerialNumber             #主板SN号

         return response #返回结果

 # ————————05CMDB采集硬件数据的插件————————

 # ————————06CMDB测试Linux系统采集硬件数据的命令————————

     def linux(self):

         response = BaseResponse() #提交数据的类型(字典)

         try:

             import subprocess  # 启动一个新的进程并且与之通信

             shell_command = "sudo dmidecode -t1" #定义命令

             output =subprocess.getoutput(shell_command) #linux系统上执行的命令

             response.data = self.linux_parse(output) #解析shell命令返回结果

         except Exception as e:

             response.status = False

         return response

     def linux_parse(self, content):#解析shell命令返回结果

         result = {}

         key_map = {'Manufacturer': 'manufacturer', 'Product Name': 'model','Serial Number': 'sn',}

         for item in content.split('\n'): #split()通过指定分隔符对字符串进行切片

             row_data = item.strip().split(':') #strip()方法用于移除字符串头尾指定的字符(默认为空格或换行符)或字符序列

             if len(row_data) == 2:

                 if row_data[0] in key_map:#如果在需要的字典里

                     result[key_map[row_data[0]]] = row_data[1].strip() if row_data[1] else row_data[1]

         return result

     # ————————06CMDB测试Linux系统采集硬件数据的命令————————
# main_board.py
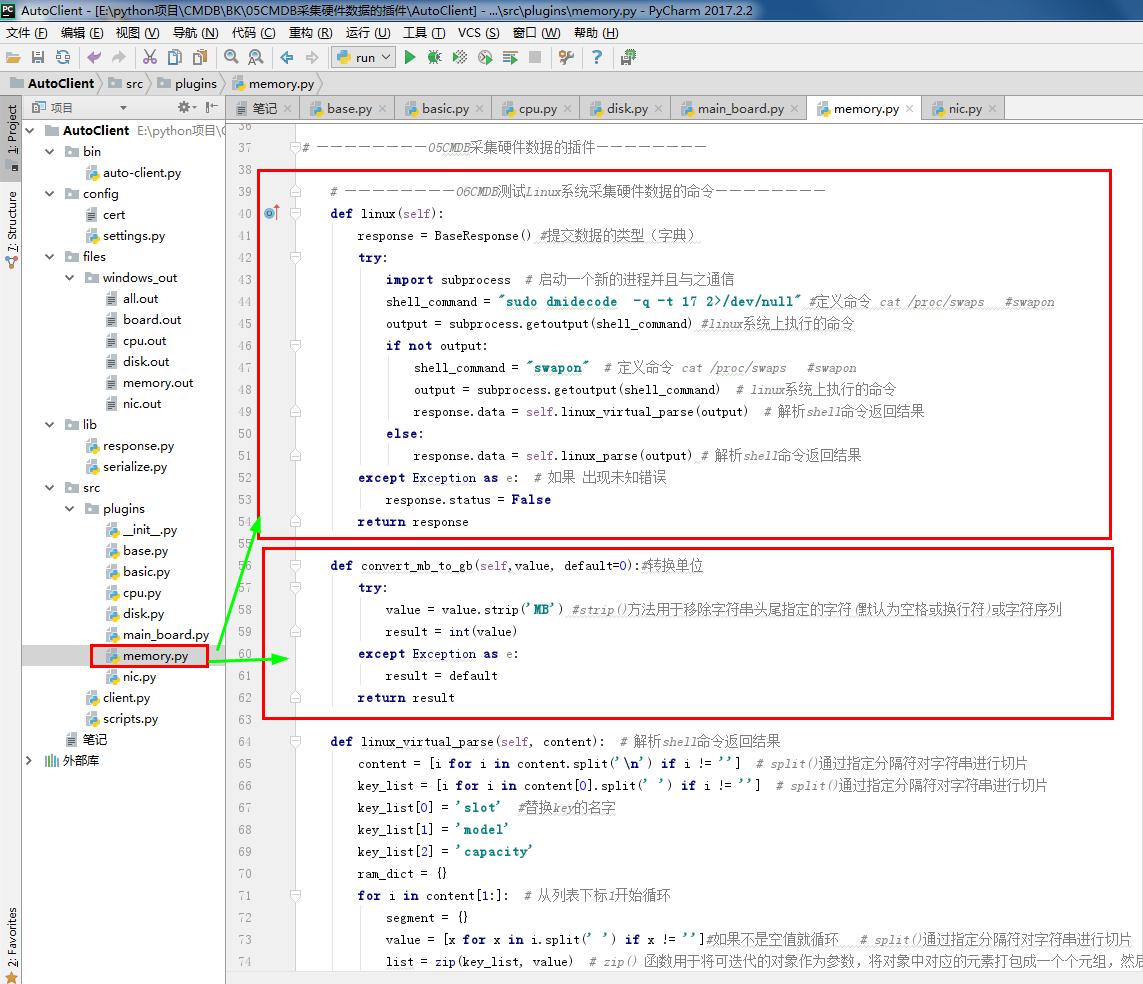

 # memory.py

 # ————————05CMDB采集硬件数据的插件————————

 from .base import BasePlugin  #采集资产的方式  和  系统平台

 from lib.response import BaseResponse #提交数据的类型(字典)

 # ————————06CMDB测试Linux系统采集硬件数据的命令————————

 # import wmi#Windows操作系统上管理数据和操作的基础设施   #linux写无法导入这个模块

 # ————————06CMDB测试Linux系统采集硬件数据的命令————————

 class MemoryPlugin(BasePlugin):

     def windows(self):

         response = BaseResponse()  #提交数据的类型(字典)

         try:

             # ————————06CMDB测试Linux系统采集硬件数据的命令————————

             import wmi#Windows操作系统上管理数据和操作的基础设施   #linux写无法导入这个模块

             # ————————06CMDB测试Linux系统采集硬件数据的命令————————

             output =wmi.WMI().Win32_PhysicalMemory()  #获取内存相关信息

             response.data = self.windows_parse(output)

         except Exception as e:

             response.status = False

         return response

     @staticmethod#返回函数的静态方法

     def windows_parse(content):

         response={}

         for item in content:

             item_dict = {}

             item_dict['slot'] = item.DeviceLocator                          #插槽位

             item_dict['manufacturer'] = item.Manufacturer                   # 内存制造商

             item_dict['model'] =item.FormFactor                             # 内存型号

             item_dict['Capacity'] = round(int(item.Capacity) / (1024**3))   # 内存容量

             item_dict['sn'] = item.SerialNumber                              #内存SN号

             item_dict['speed'] = item.Speed                                 #内存速度

             response[item_dict['slot']] = item_dict                         #分割存每条  内存信息

         return response

 # ————————05CMDB采集硬件数据的插件————————

     # ————————06CMDB测试Linux系统采集硬件数据的命令————————

     def linux(self):

         response = BaseResponse() #提交数据的类型(字典)

         try:

             import subprocess  # 启动一个新的进程并且与之通信

             shell_command = "sudo dmidecode  -q -t 17 2>/dev/null" #定义命令 cat /proc/swaps   #swapon

             output = subprocess.getoutput(shell_command) #linux系统上执行的命令

             if not output:

                 shell_command = "swapon"  # 定义命令 cat /proc/swaps   #swapon

                 output = subprocess.getoutput(shell_command)  # linux系统上执行的命令

                 response.data = self.linux_virtual_parse(output)  # 解析shell命令返回结果

             else:

                 response.data = self.linux_parse(output) # 解析shell命令返回结果

         except Exception as e:  # 如果 出现未知错误

             response.status = False

         return response

     def convert_mb_to_gb(self,value, default=0):#转换单位

         try:

             value = value.strip('MB') #strip()方法用于移除字符串头尾指定的字符(默认为空格或换行符)或字符序列

             result = int(value)

         except Exception as e:

             result = default

         return result

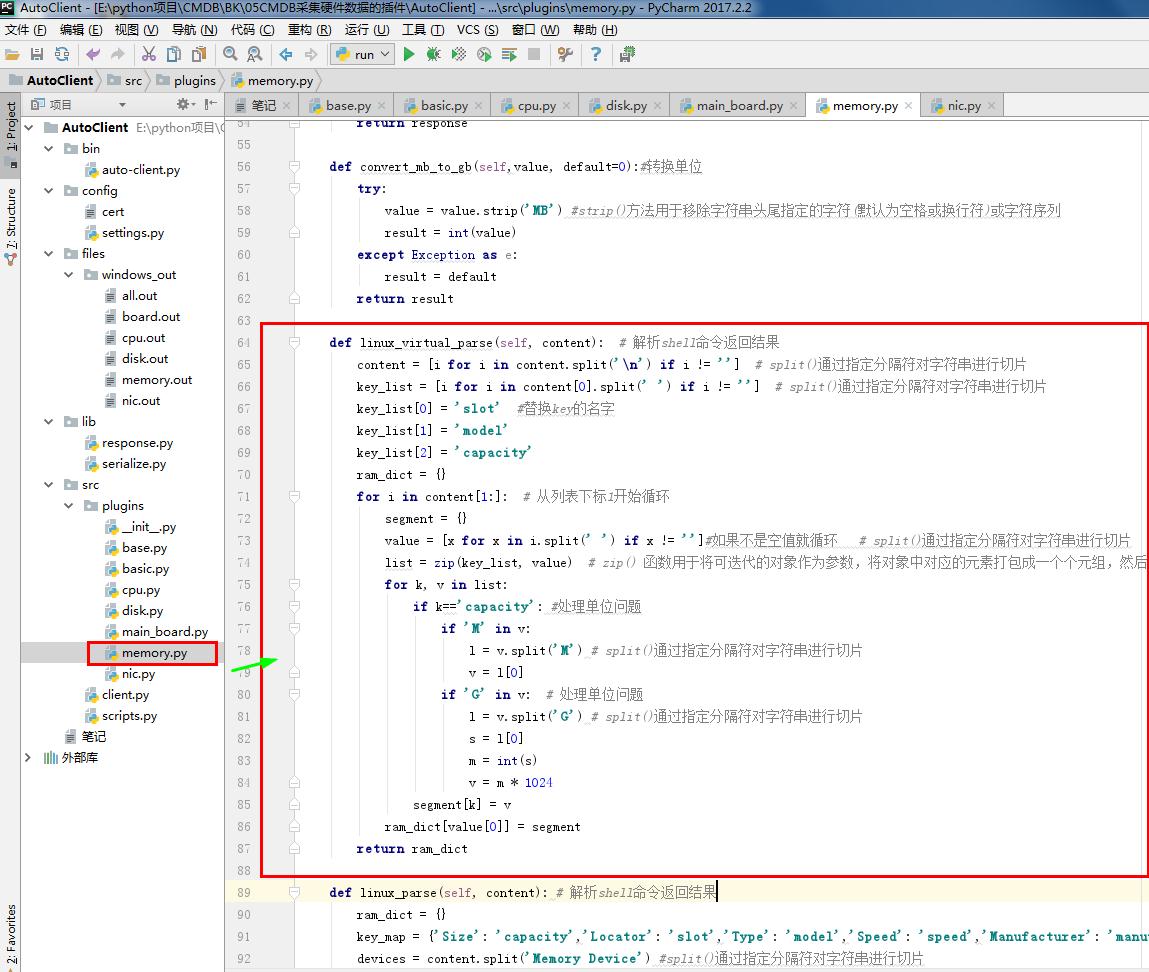
     def linux_virtual_parse(self, content):  # 解析shell命令返回结果

         content = [i for i in content.split('\n') if i != '']  # split()通过指定分隔符对字符串进行切片

         key_list = [i for i in content[0].split(' ') if i != '']  # split()通过指定分隔符对字符串进行切片

         key_list[0] = 'slot'  #替换key的名字

         key_list[1] = 'model'

         key_list[2] = 'capacity'

         ram_dict = {}

         for i in content[1:]:  # 从列表下标1开始循环

             segment = {}

             value = [x for x in i.split(' ') if x != '']#如果不是空值就循环   # split()通过指定分隔符对字符串进行切片

             list = zip(key_list, value)  # zip() 函数用于将可迭代的对象作为参数,将对象中对应的元素打包成一个个元组,然后返回由这些元组组成的列表。

             for k, v in list:

                 if k=='capacity': #处理单位问题

                     if 'M' in v:

                         l = v.split('M') # split()通过指定分隔符对字符串进行切片

                         v = l[0]

                     if 'G' in v:  # 处理单位问题

                         l = v.split('G') # split()通过指定分隔符对字符串进行切片

                         s = l[0]

                         m = int(s)

                         v = m * 1024

                 segment[k] = v

             ram_dict[value[0]] = segment

         return ram_dict

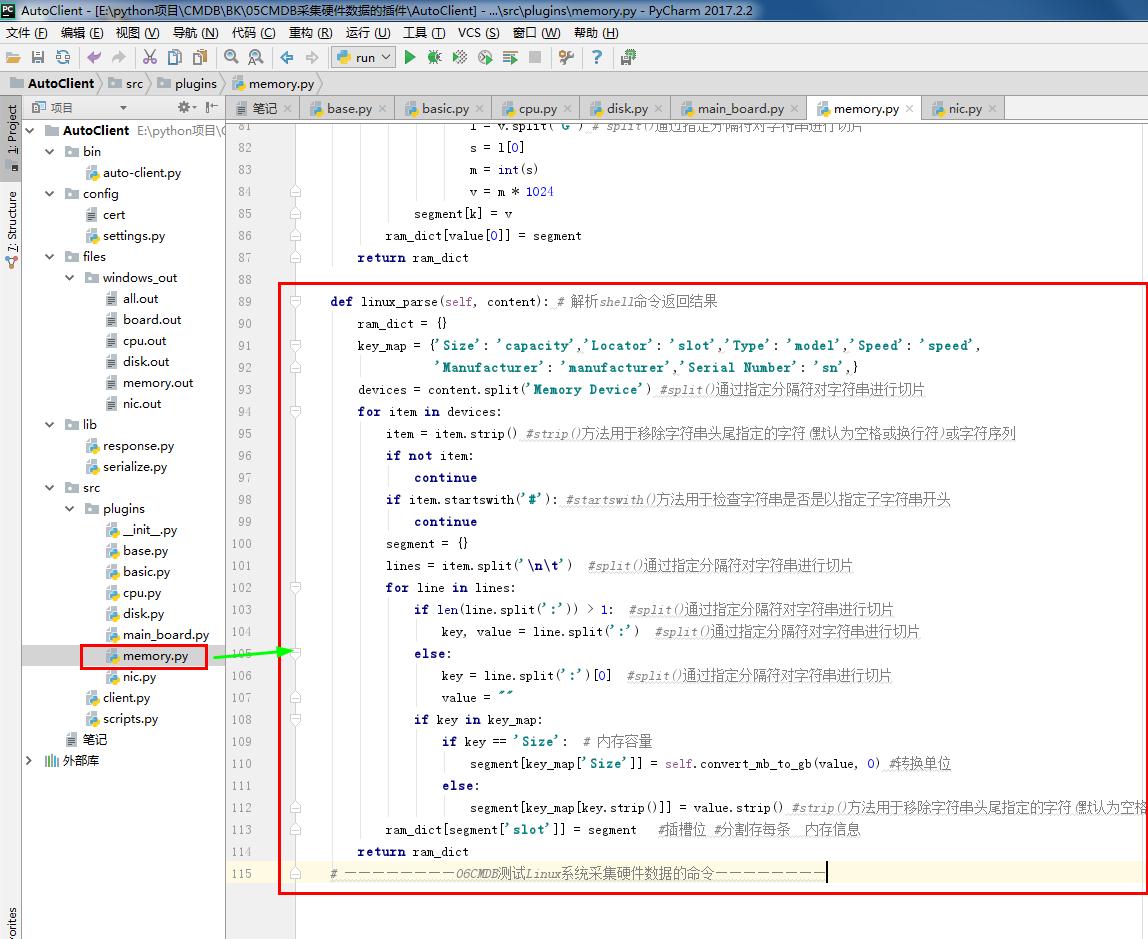
     def linux_parse(self, content): # 解析shell命令返回结果

         ram_dict = {}

         key_map = {'Size': 'capacity','Locator': 'slot','Type': 'model','Speed': 'speed',

                    'Manufacturer': 'manufacturer','Serial Number': 'sn',}

         devices = content.split('Memory Device') #split()通过指定分隔符对字符串进行切片

         for item in devices:

             item = item.strip() #strip()方法用于移除字符串头尾指定的字符(默认为空格或换行符)或字符序列

             if not item:

                 continue

             if item.startswith('#'): #startswith()方法用于检查字符串是否是以指定子字符串开头

                 continue

             segment = {}

             lines = item.split('\n\t')  #split()通过指定分隔符对字符串进行切片

             for line in lines:

                 if len(line.split(':')) > 1:  #split()通过指定分隔符对字符串进行切片

                     key, value = line.split(':')  #split()通过指定分隔符对字符串进行切片

                 else:

                     key = line.split(':')[0]  #split()通过指定分隔符对字符串进行切片

                     value = ""

                 if key in key_map:

                     if key == 'Size':  # 内存容量

                         segment[key_map['Size']] = self.convert_mb_to_gb(value, 0) #转换单位

                     else:

                         segment[key_map[key.strip()]] = value.strip() #strip()方法用于移除字符串头尾指定的字符(默认为空格或换行符)或字符序列

             ram_dict[segment['slot']] = segment   #插槽位 #分割存每条  内存信息

         return ram_dict

     # ————————06CMDB测试Linux系统采集硬件数据的命令————————
# memory.py
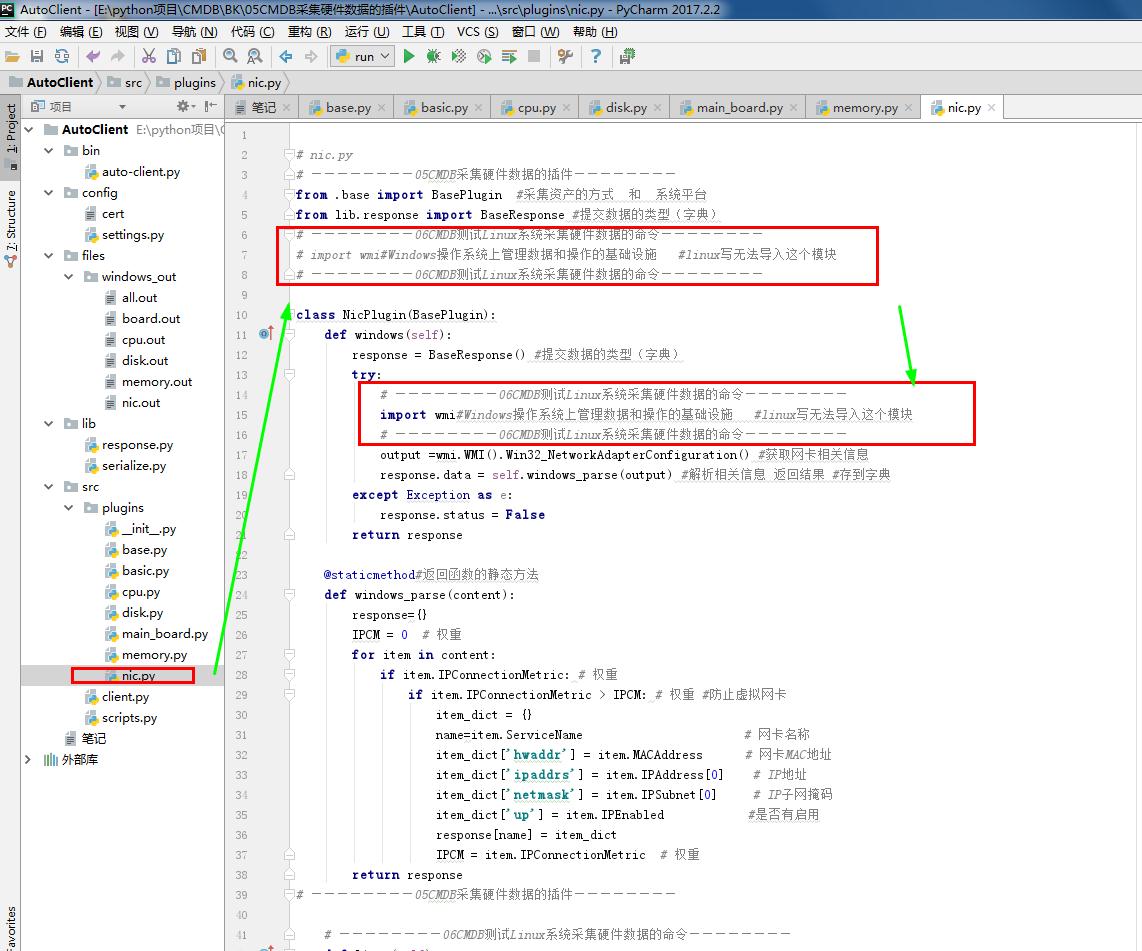
 # nic.py

 # ————————05CMDB采集硬件数据的插件————————

 from .base import BasePlugin  #采集资产的方式  和  系统平台

 from lib.response import BaseResponse #提交数据的类型(字典)

 # ————————06CMDB测试Linux系统采集硬件数据的命令————————

 # import wmi#Windows操作系统上管理数据和操作的基础设施   #linux写无法导入这个模块

 # ————————06CMDB测试Linux系统采集硬件数据的命令————————

 class NicPlugin(BasePlugin):

     def windows(self):

         response = BaseResponse() #提交数据的类型(字典)

         try:

             # ————————06CMDB测试Linux系统采集硬件数据的命令————————

             import wmi#Windows操作系统上管理数据和操作的基础设施   #linux写无法导入这个模块

             # ————————06CMDB测试Linux系统采集硬件数据的命令————————

             output =wmi.WMI().Win32_NetworkAdapterConfiguration() #获取网卡相关信息

             response.data = self.windows_parse(output) #解析相关信息 返回结果 #存到字典

         except Exception as e:

             response.status = False

         return response

     @staticmethod#返回函数的静态方法

     def windows_parse(content):

         response={}

         IPCM = 0  # 权重

         for item in content:

             if item.IPConnectionMetric: # 权重

                 if item.IPConnectionMetric > IPCM: # 权重 #防止虚拟网卡

                     item_dict = {}

                     name=item.ServiceName                       # 网卡名称

                     item_dict['hwaddr'] = item.MACAddress      # 网卡MAC地址

                     item_dict['ipaddrs'] = item.IPAddress[0]    # IP地址

                     item_dict['netmask'] = item.IPSubnet[0]     # IP子网掩码

                     item_dict['up'] = item.IPEnabled            #是否有启用

                     response[name] = item_dict

                     IPCM = item.IPConnectionMetric  # 权重

         return response

 # ————————05CMDB采集硬件数据的插件————————

     # ————————06CMDB测试Linux系统采集硬件数据的命令————————

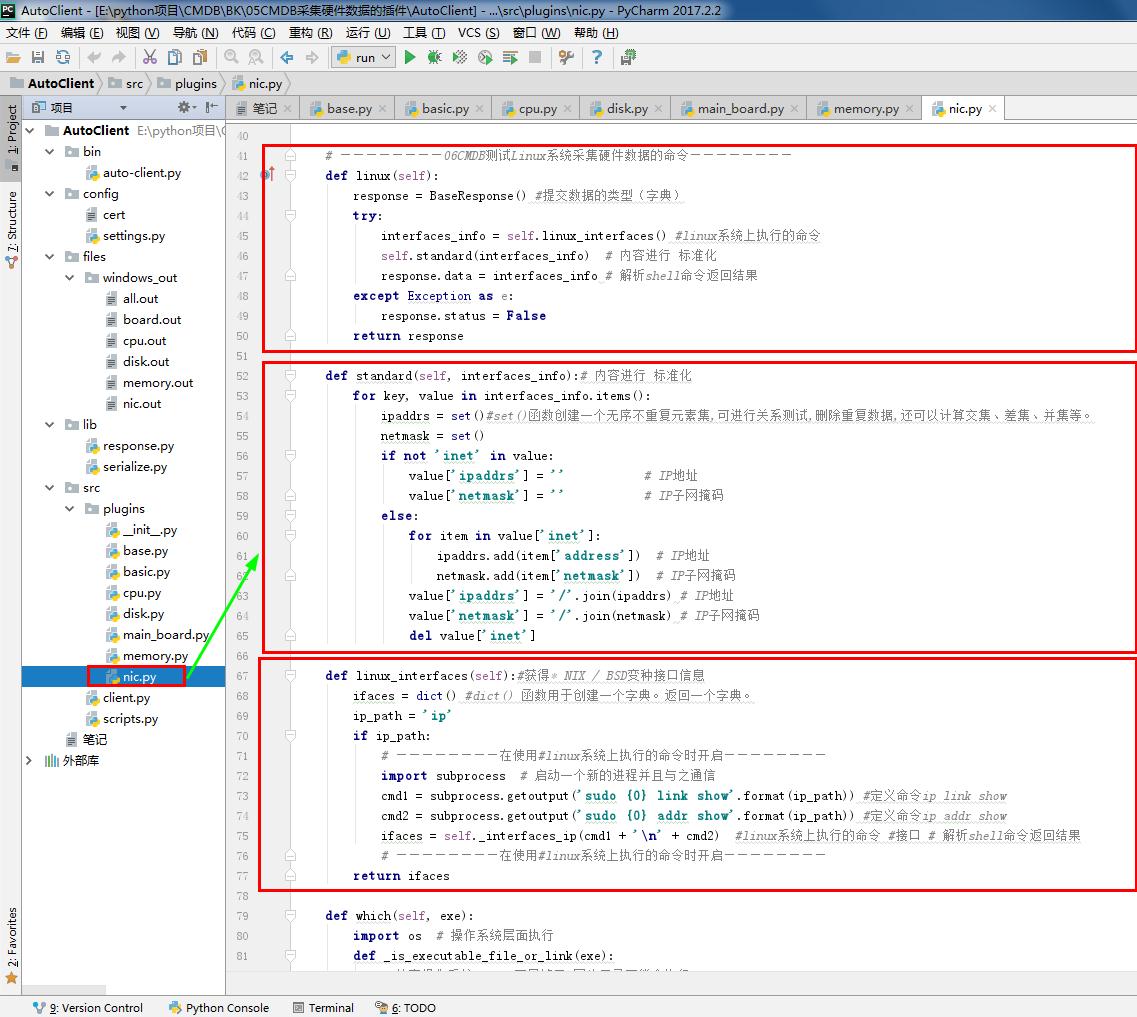
     def linux(self):

         response = BaseResponse() #提交数据的类型(字典)

         try:

             interfaces_info = self.linux_interfaces() #linux系统上执行的命令

             self.standard(interfaces_info)  # 内容进行 标准化

             response.data = interfaces_info # 解析shell命令返回结果

         except Exception as e:

             response.status = False

         return response

     def standard(self, interfaces_info):# 内容进行 标准化

         for key, value in interfaces_info.items():

             ipaddrs = set()#set()函数创建一个无序不重复元素集,可进行关系测试,删除重复数据,还可以计算交集、差集、并集等。

             netmask = set()

             if not 'inet' in value:

                 value['ipaddrs'] = ''           # IP地址

                 value['netmask'] = ''           # IP子网掩码

             else:

                 for item in value['inet']:

                     ipaddrs.add(item['address'])  # IP地址

                     netmask.add(item['netmask'])  # IP子网掩码

                 value['ipaddrs'] = '/'.join(ipaddrs) # IP地址

                 value['netmask'] = '/'.join(netmask) # IP子网掩码

                 del value['inet']

     def linux_interfaces(self):#获得* NIX / BSD变种接口信息

         ifaces = dict() #dict() 函数用于创建一个字典。返回一个字典。

         ip_path = 'ip'

         if ip_path:

             # ————————在使用#linux系统上执行的命令时开启————————

             import subprocess  # 启动一个新的进程并且与之通信

             cmd1 = subprocess.getoutput('sudo {0} link show'.format(ip_path)) #定义命令ip link show

             cmd2 = subprocess.getoutput('sudo {0} addr show'.format(ip_path)) #定义命令ip addr show

             ifaces = self._interfaces_ip(cmd1 + '\n' + cmd2)  #linux系统上执行的命令 #接口 # 解析shell命令返回结果

             # ————————在使用#linux系统上执行的命令时开启————————

         return ifaces

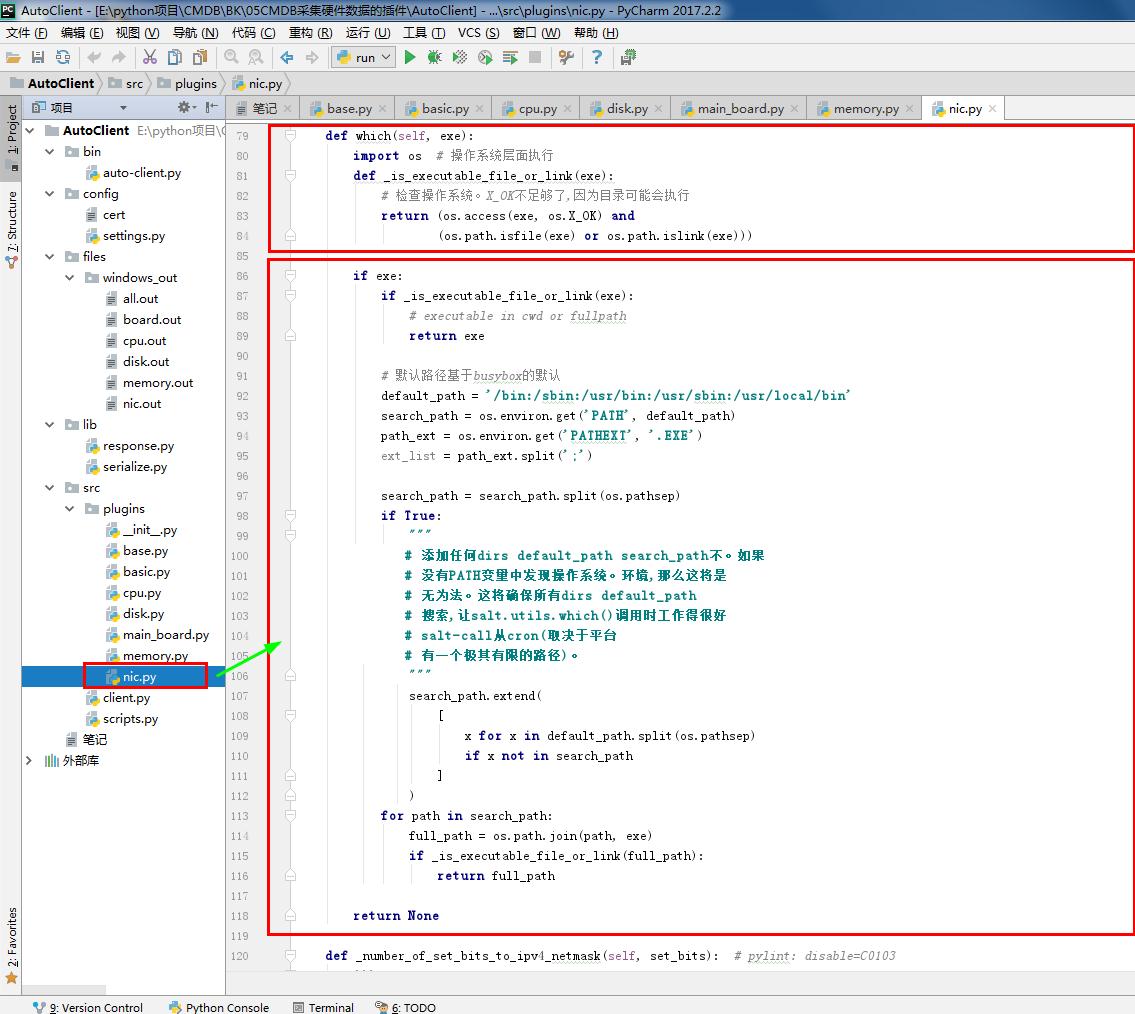
     def which(self, exe):

         import os  # 操作系统层面执行

         def _is_executable_file_or_link(exe):

             # 检查操作系统。X_OK不足够了,因为目录可能会执行

             return (os.access(exe, os.X_OK) and

                     (os.path.isfile(exe) or os.path.islink(exe)))

         if exe:

             if _is_executable_file_or_link(exe):

                 # executable in cwd or fullpath

                 return exe

             # 默认路径基于busybox的默认

             default_path = '/bin:/sbin:/usr/bin:/usr/sbin:/usr/local/bin'

             search_path = os.environ.get('PATH', default_path)

             path_ext = os.environ.get('PATHEXT', '.EXE')

             ext_list = path_ext.split(';')

             search_path = search_path.split(os.pathsep)

             if True:

                 """

             # 添加任何dirs default_path search_path不。如果

             # 没有PATH变量中发现操作系统。环境,那么这将是

             # 无为法。这将确保所有dirs default_path

             # 搜索,让salt.utils.which()调用时工作得很好

             # salt-call从cron(取决于平台

             # 有一个极其有限的路径)。

               """

                 search_path.extend(

                     [

                         x for x in default_path.split(os.pathsep)

                         if x not in search_path

                     ]

                 )

             for path in search_path:

                 full_path = os.path.join(path, exe)

                 if _is_executable_file_or_link(full_path):

                     return full_path

         return None

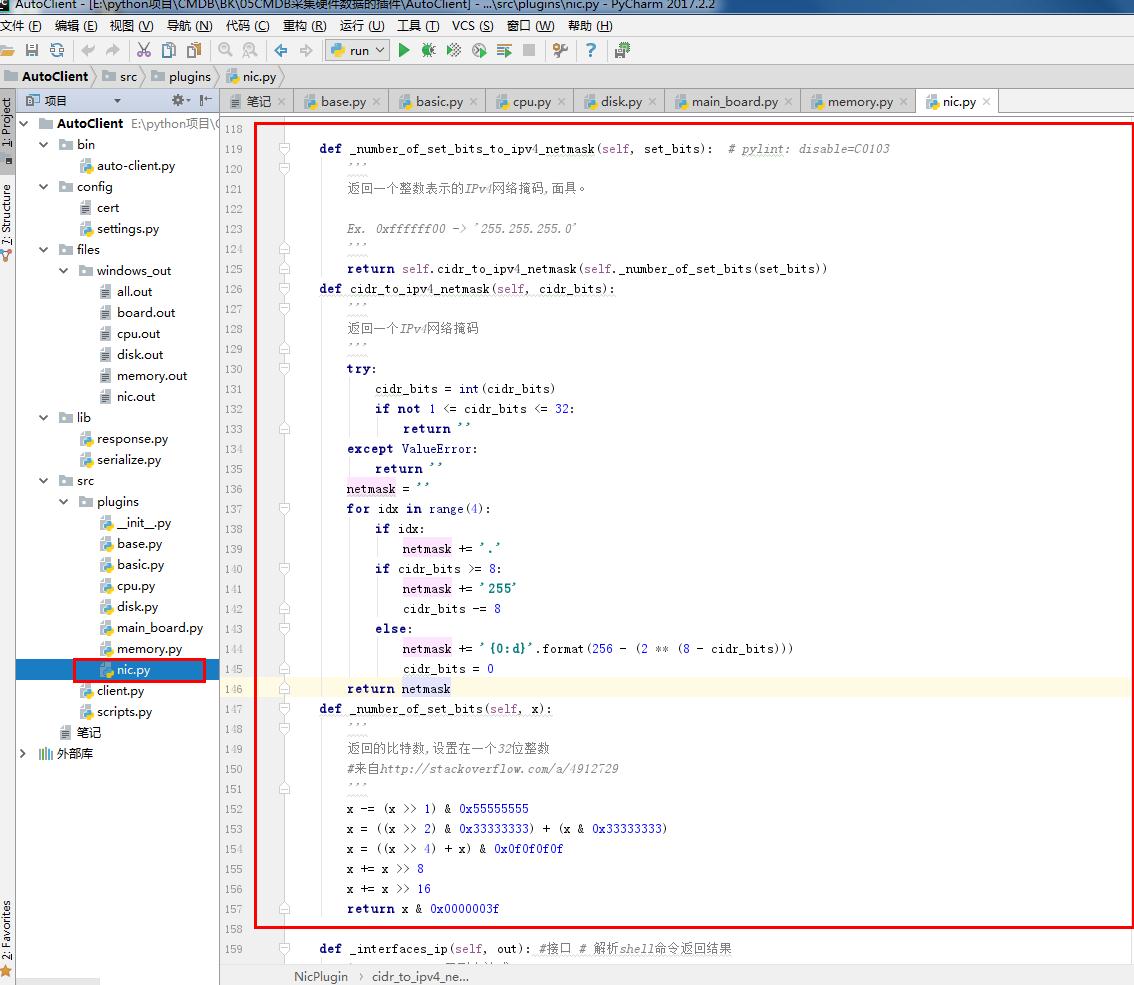
     def _number_of_set_bits_to_ipv4_netmask(self, set_bits):  # pylint: disable=C0103

         '''

         返回一个整数表示的IPv4网络掩码,面具。

         Ex. 0xffffff00 -> '255.255.255.0'

         '''

         return self.cidr_to_ipv4_netmask(self._number_of_set_bits(set_bits))

     def cidr_to_ipv4_netmask(self, cidr_bits):

         '''

         返回一个IPv4网络掩码

         '''

         try:

             cidr_bits = int(cidr_bits)

             if not 1 <= cidr_bits <= 32:

                 return ''

         except ValueError:

             return ''

         netmask = ''

         for idx in range(4):

             if idx:

                 netmask += '.'

             if cidr_bits >= 8:

                 netmask += ''

                 cidr_bits -= 8

             else:

                 netmask += '{0:d}'.format(256 - (2 ** (8 - cidr_bits)))

                 cidr_bits = 0

         return netmask

     def _number_of_set_bits(self, x):

         '''

         返回的比特数,设置在一个32位整数

         #来自http://stackoverflow.com/a/4912729

         '''

         x -= (x >> 1) & 0x55555555

         x = ((x >> 2) & 0x33333333) + (x & 0x33333333)

         x = ((x >> 4) + x) & 0x0f0f0f0f

         x += x >> 8

         x += x >> 16

         return x & 0x0000003f

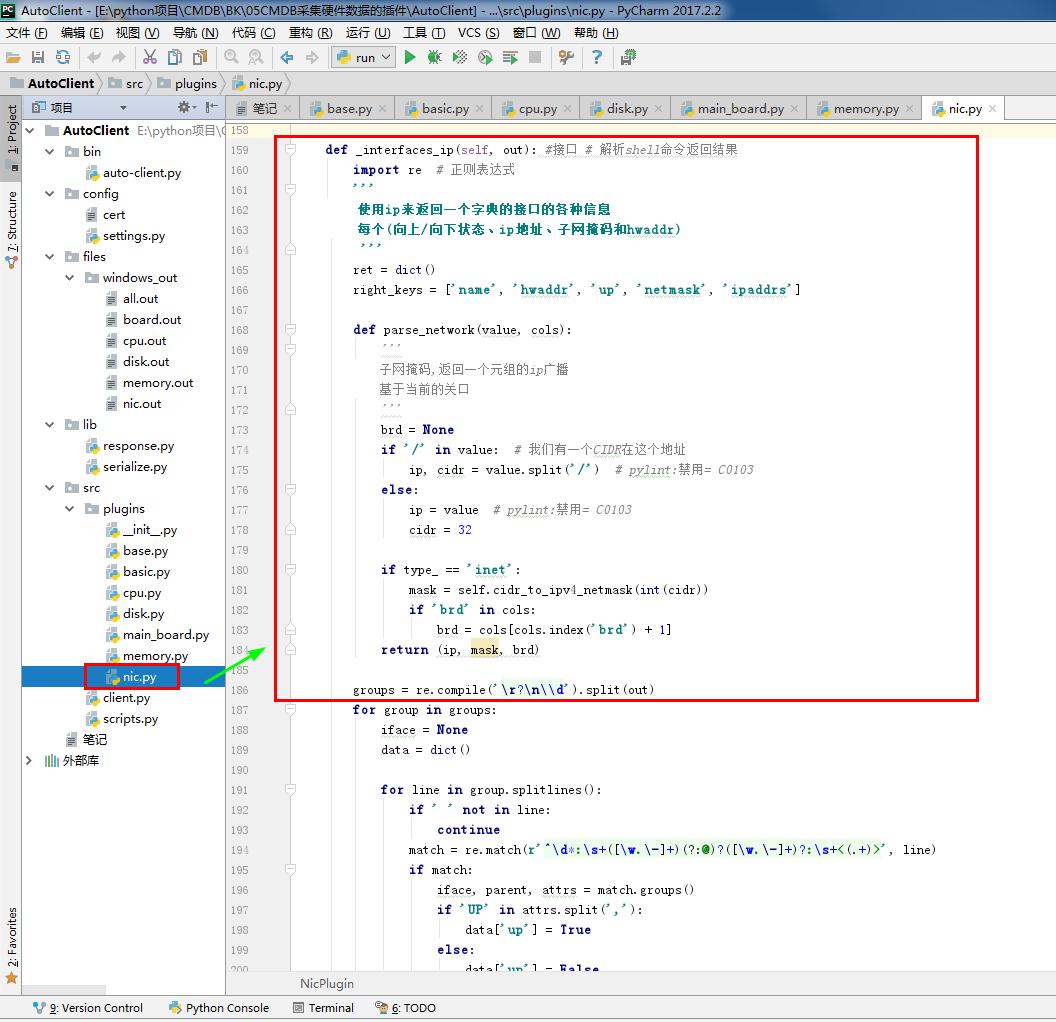
     def _interfaces_ip(self, out): #接口 # 解析shell命令返回结果

         import re  # 正则表达式

         '''

       使用ip来返回一个字典的接口的各种信息

       每个(向上/向下状态、ip地址、子网掩码和hwaddr)

         '''

         ret = dict()

         right_keys = ['name', 'hwaddr', 'up', 'netmask', 'ipaddrs']

         def parse_network(value, cols):

             '''

           子网掩码,返回一个元组的ip广播

           基于当前的关口

             '''

             brd = None

             if '/' in value:  # 我们有一个CIDR在这个地址

                 ip, cidr = value.split('/')  # pylint:禁用= C0103

             else:

                 ip = value  # pylint:禁用= C0103

                 cidr = 32

             if type_ == 'inet':

                 mask = self.cidr_to_ipv4_netmask(int(cidr))

                 if 'brd' in cols:

                     brd = cols[cols.index('brd') + 1]

             return (ip, mask, brd)

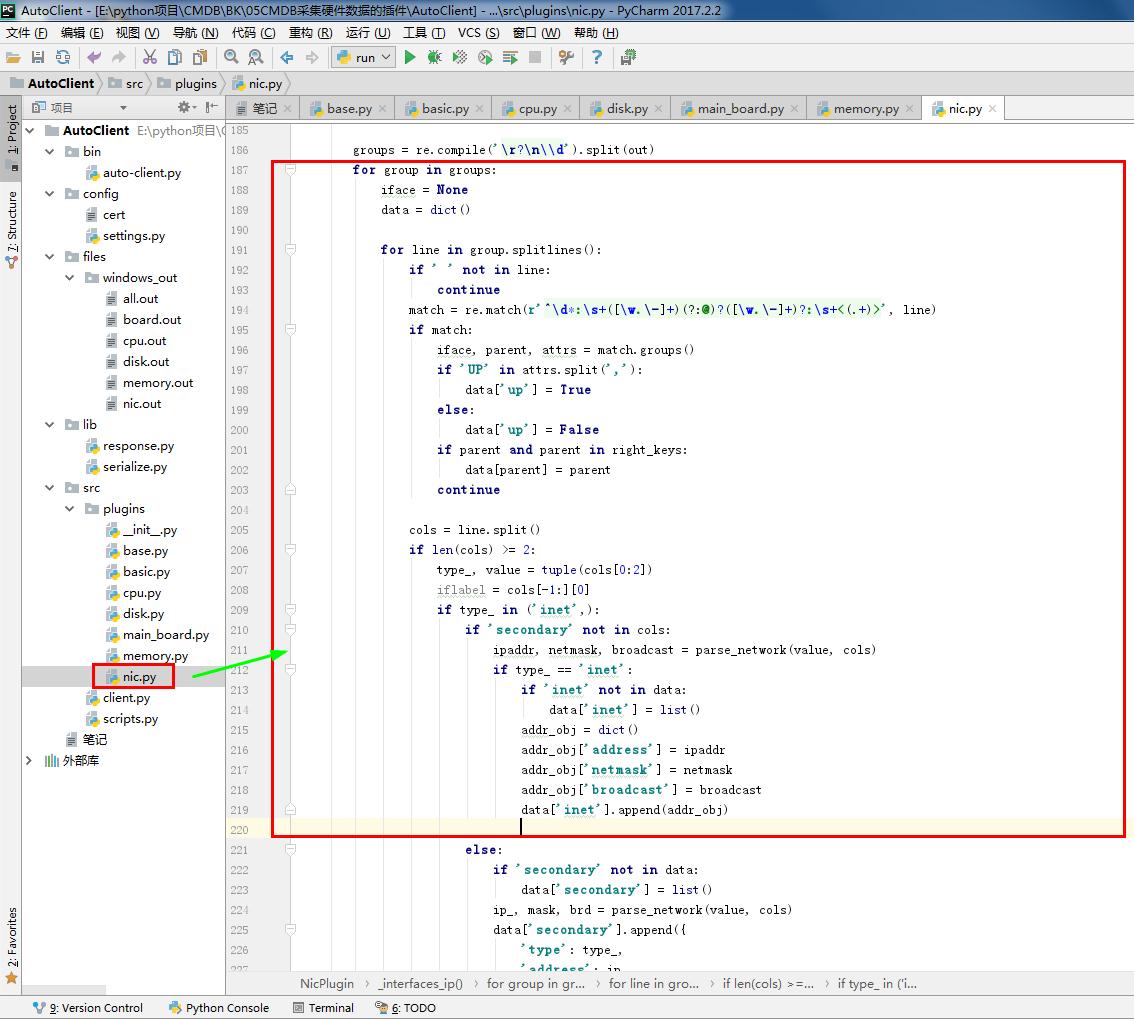
         groups = re.compile('\r?\n\\d').split(out)

         for group in groups:

             iface = None

             data = dict()

             for line in group.splitlines():

                 if ' ' not in line:

                     continue

                 match = re.match(r'^\d*:\s+([\w.\-]+)(?:@)?([\w.\-]+)?:\s+<(.+)>', line)

                 if match:

                     iface, parent, attrs = match.groups()

                     if 'UP' in attrs.split(','):

                         data['up'] = True

                     else:

                         data['up'] = False

                     if parent and parent in right_keys:

                         data[parent] = parent

                     continue

                 cols = line.split()

                 if len(cols) >= 2:

                     type_, value = tuple(cols[0:2])

                     iflabel = cols[-1:][0]

                     if type_ in ('inet',):

                         if 'secondary' not in cols:

                             ipaddr, netmask, broadcast = parse_network(value, cols)

                             if type_ == 'inet':

                                 if 'inet' not in data:

                                     data['inet'] = list()

                                 addr_obj = dict()

                                 addr_obj['address'] = ipaddr

                                 addr_obj['netmask'] = netmask

                                 addr_obj['broadcast'] = broadcast

                                 data['inet'].append(addr_obj)

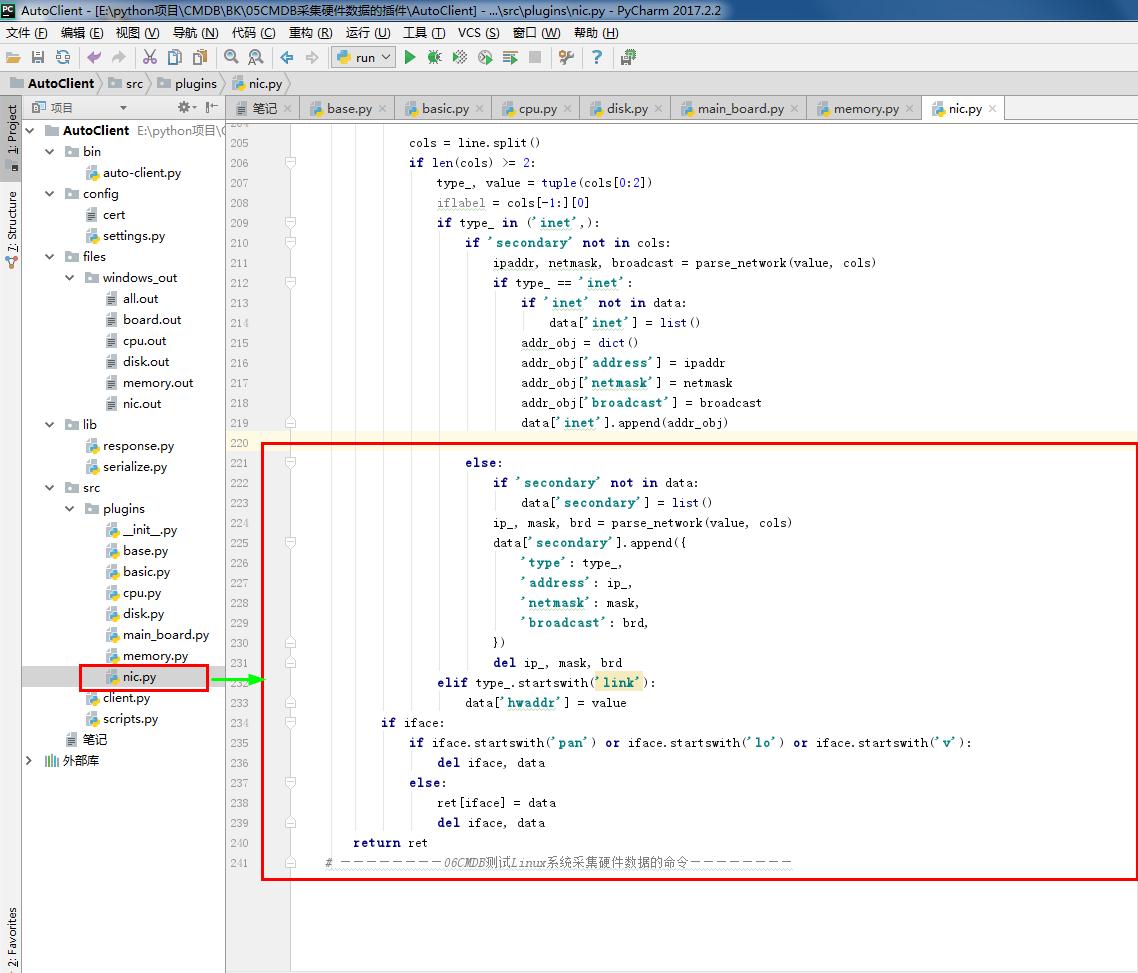
                         else:

                             if 'secondary' not in data:

                                 data['secondary'] = list()

                             ip_, mask, brd = parse_network(value, cols)

                             data['secondary'].append({

                                 'type': type_,

                                 'address': ip_,

                                 'netmask': mask,

                                 'broadcast': brd,

                             })

                             del ip_, mask, brd

                     elif type_.startswith('link'):

                         data['hwaddr'] = value

             if iface:

                 if iface.startswith('pan') or iface.startswith('lo') or iface.startswith('v'):

                     del iface, data

                 else:

                     ret[iface] = data

                     del iface, data

         return ret

     # ————————06CMDB测试Linux系统采集硬件数据的命令————————
# nic.py
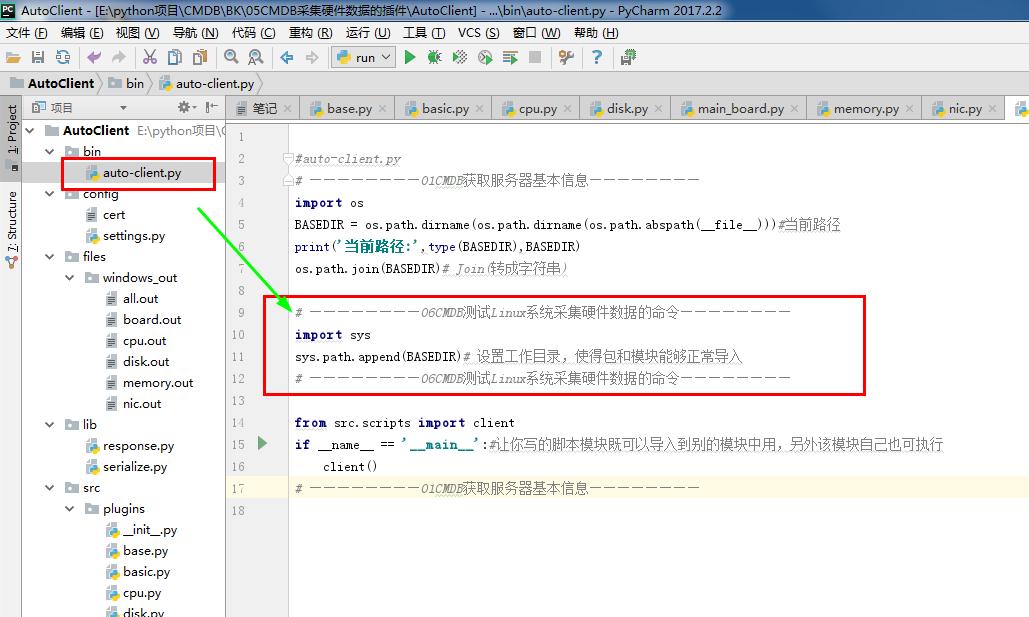
 #auto-client.py

 # ————————01CMDB获取服务器基本信息————————

 import os

 BASEDIR = os.path.dirname(os.path.dirname(os.path.abspath(__file__)))#当前路径

 print('当前路径:',type(BASEDIR),BASEDIR)

 os.path.join(BASEDIR)# Join(转成字符串)

 # ————————06CMDB测试Linux系统采集硬件数据的命令————————

 import sys

 sys.path.append(BASEDIR)# 设置工作目录,使得包和模块能够正常导入

 # ————————06CMDB测试Linux系统采集硬件数据的命令————————

 from src.scripts import client

 if __name__ == '__main__':#让你写的脚本模块既可以导入到别的模块中用,另外该模块自己也可执行

     client()

 # ————————01CMDB获取服务器基本信息————————
#auto-client.py

 #settings.py

 # ————————01CMDB获取服务器基本信息————————

 import os

 BASEDIR = os.path.dirname(os.path.dirname(os.path.abspath(__file__)))##当前路径

 # 采集资产的方式,选项有:agent(默认), salt, ssh

 MODE = 'agent'

 # ————————01CMDB获取服务器基本信息————————

 # ————————02CMDB将服务器基本信息提交到API接口————————

 # 资产信息API

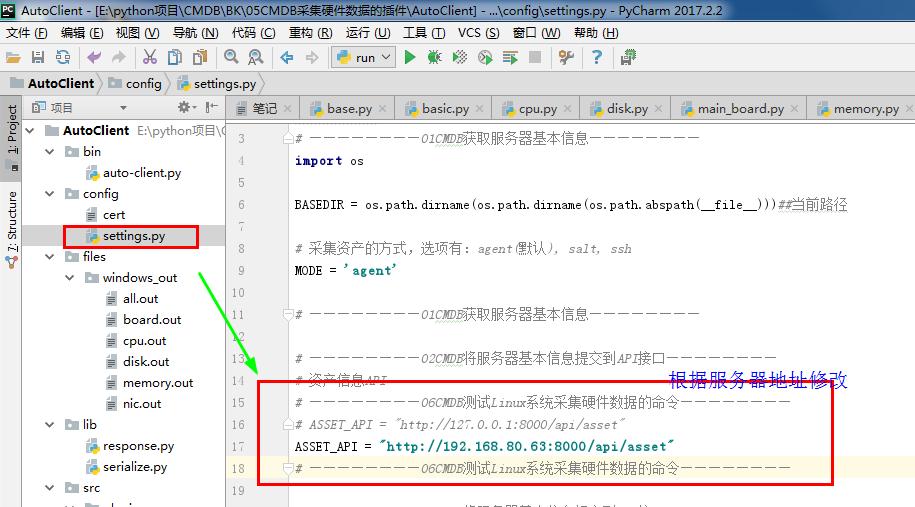
 # ————————06CMDB测试Linux系统采集硬件数据的命令————————

 # ASSET_API = "http://127.0.0.1:8000/api/asset"

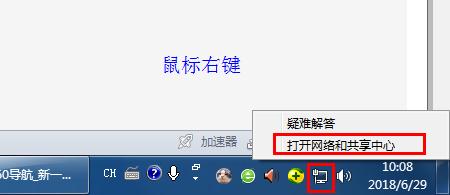
 ASSET_API = "http://192.168.80.63:8000/api/asset"

 # ————————06CMDB测试Linux系统采集硬件数据的命令————————

 # ————————02CMDB将服务器基本信息提交到API接口————————

 # ————————03CMDB信息安全API接口交互认证————————

 # 用于API认证的KEY

 KEY = '299095cc-1330-11e5-b06a-a45e60bec08b' #认证的密码

 # 用于API认证的请求头

 AUTH_KEY_NAME = 'auth-key'

 # ————————03CMDB信息安全API接口交互认证————————

 # ————————04CMDB本地(Agent)模式客户端唯一标识(ID)————————

 # Agent模式保存服务器唯一ID的文件

 CERT_FILE_PATH = os.path.join(BASEDIR, 'config', 'cert') #文件路径

 # ————————04CMDB本地(Agent)模式客户端唯一标识(ID)————————

 # ————————05CMDB采集硬件数据的插件————————

 # 采集硬件数据的插件

 PLUGINS_DICT = {

     'cpu': 'src.plugins.cpu.CpuPlugin',

     'disk': 'src.plugins.disk.DiskPlugin',

     'main_board': 'src.plugins.main_board.MainBoardPlugin',

     'memory': 'src.plugins.memory.MemoryPlugin',

     'nic': 'src.plugins.nic.NicPlugin',

 }

 # ————————05CMDB采集硬件数据的插件————————
#settings.py
Django项目:CMDB(服务器硬件资产自动采集系统)--06--06CMDB测试Linux系统采集硬件数据的命令01的更多相关文章
- Django项目:CMDB(服务器硬件资产自动采集系统)--07--06CMDB测试Linux系统采集硬件数据的命令02
#settings.py """ Django settings for AutoCmdb project. Generated by 'django-admin sta ...
- Django项目:CMDB(服务器硬件资产自动采集系统)--10--06CMDB测试Linux系统采集硬件数据的命令05
cd /py/AutoClient/bin python3 auto-client.py /usr/local/python3/bin/pip install requests python3 aut ...
- Django项目:CMDB(服务器硬件资产自动采集系统)--09--06CMDB测试Linux系统采集硬件数据的命令04
root 123456 ip addr init 0 root 123456 ip addr root 123456 python3 yum -y install zlib-devel bzip2-d ...
- Django项目:CMDB(服务器硬件资产自动采集系统)--08--06CMDB测试Linux系统采集硬件数据的命令03
https://www.virtualbox.org/wiki/Downloads https://mirrors.aliyun.com/centos/7/isos/x86_64/ http://ww ...
- Django项目:CMDB(服务器硬件资产自动采集系统)--12--08CMDB采集硬件数据日志记录
#settings.py # ————————01CMDB获取服务器基本信息———————— import os BASEDIR = os.path.dirname(os.path.dirname(o ...
- Django项目:CMDB(服务器硬件资产自动采集系统)--11--07CMDB文件模式测试采集硬件数据
#settings.py # ————————01CMDB获取服务器基本信息———————— import os BASEDIR = os.path.dirname(os.path.dirname(o ...
- Django项目:CMDB(服务器硬件资产自动采集系统)--05--05CMDB采集硬件数据的插件
#__init__.py # ————————05CMDB采集硬件数据的插件———————— from config import settings import importlib # —————— ...
- Django项目:CMDB(服务器硬件资产自动采集系统)--01--01CMDB获取服务器基本信息
AutoClient #settings.py # ————————01CMDB获取服务器基本信息———————— import os BASEDIR = os.path.dirname(os.pat ...
- Django项目:CMDB(服务器硬件资产自动采集系统)--03--03CMDB信息安全API接口交互认证
#settings.py """ Django settings for AutoCmdb project. Generated by 'django-admin sta ...
随机推荐
- linux中对EINTR错误的处理
https://www.cnblogs.com/flyfish10000/articles/2576885.html EINTR错误的产生:当阻塞于某个慢系统调用的一个进程捕获某个信号且相应信号处理函 ...
- BZOJ 2957楼房重建
传送门 线段树 //Twenty #include<cstdio> #include<cstdlib> #include<iostream> #include< ...
- pycharm for mac安装
http://www.xue51.com/mac/5604.html
- pinmap 和 pin allocation
串口管脚分配
- 第三周课堂笔记1thand2thand3th
元组 元组是以逗号隔开的 元组有索引有切片,元组是小括号和中括号的集合, 元组中的东西不可修改(小括号内的东西不可被修改,但是小括号里的列表和字典可以被修改) 2. 由内存地址来分 可变数据类 ...
- 2019 Multi-University Training Contest 7 Kejin Player Final Exam
Kejin Player 期望DP 题意: 初始等级为1,每一级有四个参数 r , s , x , a . 每一级有一个概率p=r/s花费a的代价升级到下一级,失败可能会倒退到x级 设从 l 到 r ...
- 使用CEfSharp之旅(4)cefsharp 调用F12
原文:使用CEfSharp之旅(4)cefsharp 调用F12 版权声明:本文为博主原创文章,未经博主允许不得转载.可点击关注博主 ,不明白的进群191065815 我的群里问 https://bl ...
- CSS清除默认边距
body,div,dl,dt,dd,ul,ol,li,h1,h2,h3,h4,h5,h6,pre,code,form,fieldset,legend,input,textarea,p,blockquo ...
- js 禁止/允许页面滚动
参考:https://blog.csdn.net/huangfu_chunfeng/article/details/46429997 https://www.cnblogs.com/w ...
- java_缓冲流(字符输出流)
/** 字符缓冲流: * java.io.BufferedWriter extends writer * BufferedWriter:字符缓冲输出流: * * 构造方法: * BufferedWri ...
