Spring Boot整合Spring Security总结
一.创建Spring Boot项目
引入Thymeleaf和Web模块以及Spring Security模块方便进行测试,先在pom文件中将 spring-boot-starter-security 的依赖注解掉测试。
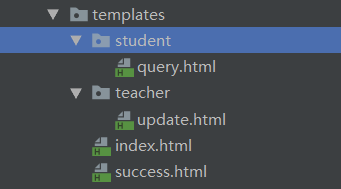
二.创建几个用于测试的页面

<!DOCTYPE html><!--index页面-->

<html lang="en" xmlns:th="http://www.thymeleaf.org">

<head>

    <meta charset="UTF-8">

    <title>Title</title>

</head>

<body>

    <form th:action="@{/success}"><input type="submit" value="登录"></form>

    <br>

    <a th:href="@{/student/query}">查询</a>

    <br>

    <a th:href="@{/teacher/update}">修改</a>

</body>

</html>
<!DOCTYPE html><!--success页面-->

<html lang="en" xmlns:th="http://www.thymeleaf.org">

<head>

    <meta charset="UTF-8">

    <title>Title</title>

</head>

<body>

<form th:action="@{/logout}"><input type="submit" value="注销"></form>

<br>

<a th:href="@{/student/query}">查询</a>

<br>

<a th:href="@{/teacher/update}">修改</a>

</body>

</html>
query.html页面和update页面就放一两句话用于测试即可
三.创建控制器
@Controller
public class MyController {
    @RequestMapping("/index")
    public  String index(){
        return "index";
    }
    @RequestMapping("/success")
    public  String success(){
        return "success";
    }
    @RequestMapping("/student/query")
    public  String query(){
        return "/student/query";
    }
    @RequestMapping("/teacher/update")
    public  String update(){
        return "/teacher/update";
    }
}
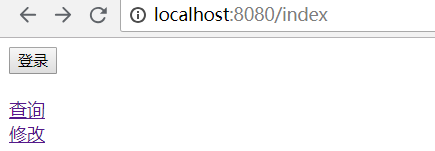
四.导入security前


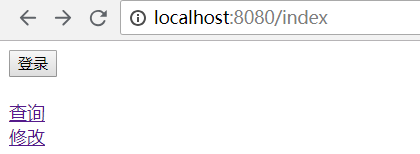
五.导入security模块后
访问任何页面都需要登录,如下图所示:

六.设置权限规则及登录注销
添加一个配置类如下
@EnableWebSecurity
public class MySecurityConfig extends WebSecurityConfigurerAdapter {
    //自定义权限规则
    @Override
    protected void configure(HttpSecurity http) throws Exception {
        http.authorizeRequests().antMatchers("/index").permitAll()   //permitall不需要任何权限
                .antMatchers("/student/**").hasRole("student")  //需要student权限
                .antMatchers("/teacher/**").hasRole("teacher") //需要teacher权限
                .antMatchers("/success").hasRole("student"); //需要student权限

        //开启登录功能
        http.formLogin();
        //开启注销功能并指定注销后的页面
        http.logout().logoutSuccessUrl("/index");
    }

    //自定义验证规则(如果不开启的话,访问需要权限的页面就会抛出403,拒绝访问)
    @Override
    protected void configure(AuthenticationManagerBuilder auth) throws Exception {
        //super.configure(auth);
        auth.inMemoryAuthentication().withUser("zs").password("123456").roles("student");
        auth.inMemoryAuthentication().withUser("ww").password("123456").roles("student","teacher");
    }
}
测试:
访问localhost:8080/index后

访问localhost:8080/teacher/update则会跳转到

用对应拥有权限的用户登录后即可进入页面,但是用户权限不够的话还是会出现403错误
注意:如果是Spring Boot2.0.3及以上的版本,登录后会抛java.lang.IllegalArgumentException: There is no PasswordEncoder mapped for the id "null"异常,这是因为密码没有没有指定加密方式。
解决方案:
添加自定义的PasswordEncoder,代码如下
public class MyPasswordEncoder implements PasswordEncoder {

    @Override

    public String encode(CharSequence charSequence) {

        return charSequence.toString();

    }

    @Override

    public boolean matches(CharSequence charSequence, String s) {

        return s.equals(charSequence.toString());

    }

}
并且,自定义验证规则添加上自定义的PasswordEncoder
 @Override

    protected void configure(AuthenticationManagerBuilder auth) throws Exception {

        auth.inMemoryAuthentication().passwordEncoder(new MyPasswordEncoder()).withUser("zs").password("123456").roles("student");

        auth.inMemoryAuthentication().passwordEncoder(new MyPasswordEncoder()).withUser("ww").password("123456").roles("student","teacher");

    }
七.根据登录状态显示信息
1.导入thymeleaf与security整合的模块
<dependency>

            <groupId>org.thymeleaf.extras</groupId>

            <artifactId>thymeleaf-extras-springsecurity4</artifactId>

            <version>3.0.4.RELEASE</version>

        </dependency>
2.修改页面,例如修改success.html页面
<!DOCTYPE html><!--success页面-->

<html xmlns:th="http://www.thymeleaf.org"

      xmlns:sec="http://www.thymeleaf.org/thymeleaf-extras-springsecurity4">

<head>

    <meta charset="UTF-8">

    <title>Title</title>

</head>

<body>

<div sec:authorize="isAuthenticated()">

    <h2><span sec:authentication="name"></span>,您好,您拥有的角色有:

        <span sec:authentication="principal.authorities"></span></h2>

</div>

<hr>

<form th:action="@{/logout}" method="post"><input type="submit" value="注销"></form>

<br>

<a th:href="@{/student/query}">查询</a>

<br>

<a th:href="@{/teacher/update}">修改</a>

<div sec:authorize="hasRole('teacher')">如果您拥有teacher这个角色,这句话会显示</div>

</body>

</html>
访问登录后如下图所示

注意:我这里的thymeleaf-extras-springsecurity4版本是3.0.4,但是Spring Boot的版本是2.1.4,可能是jar包冲突问题,sec属性不起作用

解决办法:修改SpringBoot版本到2.0.x及以下,例如本人修改如下:

八.记住用户
可以直接在开启登录功能后添加一行代码即可
http.rememberMe();
九.自定义登录页面
如果不想使用其自带的登录页面,可以在开启登录页面的时候自定义登录页面(注意,xxxx页面中的表单的用户名输入框的name属性和下面对应,密码输入框的name属性也和下面的对应)
http.formLogin().usernameParameter("name").passwordParameter("password").loginPage("/xxxx");
自定义的登录页案例如下
<!DOCTYPE html>

<html xmlns:th="http://www.thymeleaf.org">

<head>

<meta charset="UTF-8">

<title>Insert title here</title>

</head>

<body>

    <div align="center">

        <form th:action="@{/xxxx}" method="post">

            用户名:<input name="name"/><br>

            密码:<input name="password"><br/>

            <input type="checkbox" name="remeberme"> 记住我<br/>

            <input type="submit" value="登陆">

        </form>

    </div>

</body>

</html>
Spring Boot整合Spring Security总结的更多相关文章
- Spring Boot 整合Spring Data JPA
Spring Boot整合Spring Data JPA 1)加入依赖 <dependency> <groupId>org.springframework.boot</g ...
- Spring boot 整合spring Data JPA+Spring Security+Thymeleaf框架(上)
近期上班太忙所以耽搁了给大家分享实战springboot 框架的使用. 以下是spring boot 整合多个框架的使用. 首先是准备工作要做好. 第一 导入框架所需的包,我们用的事maven 进行 ...
- Spring Boot整合Spring Security
Spring Boot对于该家族的框架支持良好,但是当中本人作为小白配置还是有一点点的小问题,这里分享一下.这个项目是使用之前发布的Spring Boot会员管理系统重新改装,将之前filter登录验 ...
- Spring Boot整合Spring Security自定义登录实战
本文主要介绍在Spring Boot中整合Spring Security,对于Spring Boot配置及使用不做过多介绍,还不了解的同学可以先学习下Spring Boot. 本demo所用Sprin ...
- Spring Boot 整合 Spring Security,用户登录慢
场景 Spring Boot + Spring Security搭建一个Web项目. 临时用了inMemoryAuthentication. @EnableWebSecurity public cla ...
- Spring Boot整合Spring Batch
引言 Spring Batch是处理大量数据操作的一个框架,主要用来读取大量数据,然后进行一定的处理后输出指定的形式.比如我们可以将csv文件中的数据(数据量几百万甚至几千万都是没问题的)批处理插入保 ...
- Spring Boot整合Spring Session实战
传统java web应用session都是由应用服务器(如tomcat)保存在内存中,这对应但节点应用来说没问题:但对于应用集群来说会造成各节点之间的session无法共享,一个节点挂掉后,其他节点接 ...
- Spring Boot 整合Spring Security 和Swagger2 遇到的问题小结
How to configure Spring Security to allow Swagger URL to be accessed without authentication @Configu ...
- spring boot整合spring Data JPA和freemarker
1.spring Data JPA简介 是一个替代hibernate的一个作用于数据库的框架. 2.整合 1.导入依赖 <dependency> <groupId>org.sp ...
随机推荐
- mysql replaceinto VS insertinto
https://blog.csdn.net/t8116189520/article/details/78908975 所以,若想基于插入值累加是不行的,需要insert into https://ww ...
- leetcode 75颜色分类
两趟扫描,由于排序变量的特殊性,使用计数排序方法可以明显降低至O(n)time O(n) space 关于计数排序:https://mp.weixin.qq.com/s/WGqndkwLlzyVOHO ...
- jenkins docker 发布
分享下怎么使用jenkins 发布 docker 首先准备docker的相关部分 docker tomcat基础镜像,这边使用centos7做系统,dockerfile如下: #tomcat基础镜 ...
- windows10上同时安装py2和py3的情况
2018-06-14 16:14:51 1.同时安装python2和python3的时候,pip只是其中一个版本,使用对应Python版本的pip时,在命令行分别输入如下命令: 查看不同Python ...
- 在Spring容器外调用bean
这个东西源于这种需求:一个应用丢到服务其后,不管用户有没有访问项目,这个后台线程都必须给我跑,而且这个线程还调用了Spring注入的bean,这样自然就会想到去监听Servlet的状态,当Servle ...
- centos7成功部署OpenLDAP
目录 一.部署OpenLDAP. 1 1.安装openLDAP. 1 2.设置openldap管理员密码... 1 3.更改openldap配置... 2 4.更改监控认证配置... 2 5.设置DB ...
- 线程间的协作(wait/notify/sleep/yield/join)(五)
一.线程的状态 Java中线程中状态可分为五种:New(新建状态),Runnable(就绪状态),Running(运行状态),Blocked(阻塞状态),Dead(死亡状态). New:新建状态,当线 ...
- 关于Vue的一些事
Vue的官方网站 https://cn.vuejs.org/ Vue中的一些重点 router Vuex 知其然,后知其所以然 这是一篇Vue的源码解读 http://hcysun.me/2017/0 ...
- SpringBoot启动时 提示没有主清单属性 MANIFEST
SpringBoot启动时 提示没有主清单属性 MANIFEST <?xml version="1.0" encoding="UTF-8"?> &l ...
- shell下的 awk/sed/grep/seq/tr
转自:实例手册 https://github.com/liquanzhou/ops_doc/blob/master/shell%E5%AE%9E%E4%BE%8B%E6%89%8B%E5%86%8C. ...
