Django SimpleCMDB 项目
创建 SimpleCMDB 项目:
[root@localhost ~]$ django-admin.py startproject SimpleCMDB
创建应用,收集主机信息:
[root@localhost ~]$ cd SimpleCMDB/

[root@localhost SimpleCMDB]$ python manage.py startapp hostinfo
修改配置:
[root@localhost SimpleCMDB]$ cat SimpleCMDB/settings.py

INSTALLED_APPS = (    # 添加应用

    ......

    'hostinfo',

)

MIDDLEWARE_CLASSES = (    # 禁用CSRF,使得可以使用POST传递数据

    ......

    #'django.middleware.csrf.CsrfViewMiddleware',

)

LANGUAGE_CODE = 'zh-cn'    # 修改语言

TIME_ZONE = 'Asia/Shanghai'    # 修改时区
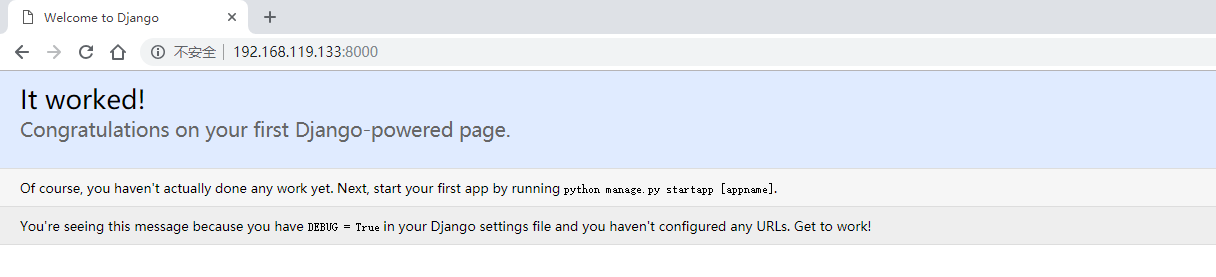
启动开发服务器:
[root@localhost SimpleCMDB]$ python manage.py runserver 0.0.0.0:8000
定义数据模型:
[root@localhost SimpleCMDB]$ cat hostinfo/models.py

from django.db import models

# Create your models here.

class Host(models.Model):

    hostname = models.CharField(max_length=50)

    ip = models.IPAddressField()

    vendor = models.CharField(max_length=50)

    product = models.CharField(max_length=50)

    sn = models.CharField(max_length=50)

    cpu_model = models.CharField(max_length=50)

    cpu_num = models.IntegerField()

    memory = models.CharField(max_length=50)

    osver = models.CharField(max_length=50)
同步到数据库:
[root@localhost SimpleCMDB]$ python manage.py validate

[root@localhost SimpleCMDB]$ python manage.py syncdb
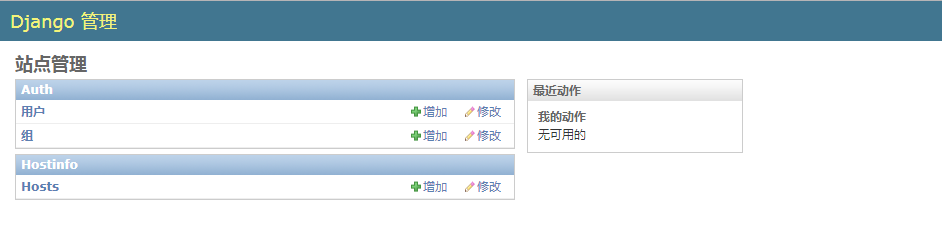
将数据模型注册到管理后台:
[root@localhost SimpleCMDB]$ cat hostinfo/admin.py

from django.contrib import admin

from hostinfo.models import Host

# Register your models here.

class HostAdmin(admin.ModelAdmin):

    list_display = [

        'hostname',

        'ip',

        'cpu_model',

        'cpu_num',

        'memory',

        'vendor',

        'product',

        'osver',

        'sn',

    ]

admin.site.register(Host, HostAdmin)
通过 POST 方法收集主机信息到 SimpleCMDB:
[root@localhost SimpleCMDB]$ cat SimpleCMDB/urls.py

....

urlpatterns = patterns('',

    ....

    url(r'^hostinfo/collect/$', 'hostinfo.views.collect'),

)
[root@localhost SimpleCMDB]$ cat hostinfo/views.py

from django.shortcuts import render

from django.http import HttpResponse

from hostinfo.models import Host

# Create your views here.

def collect(request):

    if request.POST:

        hostname = request.POST.get('hostname')

        ip = request.POST.get('ip')

        osver = request.POST.get('osver')

        vendor = request.POST.get('vendor')

        product = request.POST.get('product')

        cpu_model = request.POST.get('cpu_model')

        cpu_num = request.POST.get('cpu_num')

        memory = request.POST.get('memory')

        sn = request.POST.get('sn')

        host = Host()

        host.hostname = hostname

        host.ip = ip

        host.osver = osver

        host.vendor = vendor

        host.product = product

        host.cpu_model = cpu_model

        host.cpu_num = cpu_num

        host.memory = memory

        host.sn = sn

        host.save()

        return HttpResponse('OK')

    else:

        return HttpResponse('No Data!')
[root@localhost ~]$ cat /data/script/getHostInfo.py

#!/usr/bin/env python

#-*- coding:utf-8 -*-

import urllib, urllib2

from subprocess import Popen, PIPE

# 获取IP地址

def getIP():

    p = Popen('ifconfig', stdout=PIPE, shell=True)

    data = p.stdout.read().split('\n\n')

    for lines in data:

        if lines.startswith('lo'):

            continue

        if lines:

            ip = lines.split('\n')[1].split()[1].split(':')[1]

            break

    return ip

# 获取主机名

def getHostname():

    p = Popen('hostname', stdout=PIPE, shell=True)

    hostname = p.stdout.read().strip()

    return hostname

# 获取操作系统版本

def getOSVersion():

    with open('/etc/issue') as fd:

        data = fd.read().split('\n')[0]

        osVer = data.split()[0] + ' ' + data.split()[2]

    return osVer

# 获取服务器硬件信息

def getHardwareInfo(name):

    cmd = ''' dmidecode --type system | grep "%s" ''' % name

    p = Popen(cmd, stdout=PIPE, shell=True)

    hardwareInfo = p.stdout.read().split(':')[1].strip()

    return hardwareInfo

# 获取CPU型号

def getCPUModel():

    with open('/proc/cpuinfo') as fd:

        for line in fd.readlines():

            if line.startswith('model name'):

                cpuModel = line.split()[3].split('(')[0]

                break

    return cpuModel

# 获取CPU核数

def getCPUNum():

    with open('/proc/cpuinfo') as fd:

        for line in fd.readlines():

            if line.startswith('cpu cores'):

                cpuNum = line.split()[3]

                break

    return cpuNum

# 获取物理内存大小

def getMemorySize():

    with open('/proc/meminfo') as fd:

        memTotal = fd.readline().split()[1]

    memSize = str(int(memTotal)/1024) + 'M'

    return memSize

if __name__ == '__main__':

    hostInfo = {}

    hostInfo['ip'] = getIP()

    hostInfo['hostname'] = getHostname()

    hostInfo['osver'] = getOSVersion()

    hostInfo['vendor'] = getHardwareInfo('Manufacturer')

    hostInfo['product'] = getHardwareInfo('Product Name')

    hostInfo['sn'] = getHardwareInfo('Serial Number')

    hostInfo['cpu_model'] = getCPUModel()

    hostInfo['cpu_num'] = getCPUNum()

    hostInfo['memory'] = getMemorySize()

    data = urllib.urlencode(hostInfo)    # 通过POST方法传递数据

    request = urllib2.urlopen('http://192.168.216.128:8000/hostinfo/collect/', data)

    print(request.read())
[root@localhost ~]$ python /data/script/getHostInfo.py    # 如果想收集其他主机信息,直接在其他主机跑这个脚本即可

OK

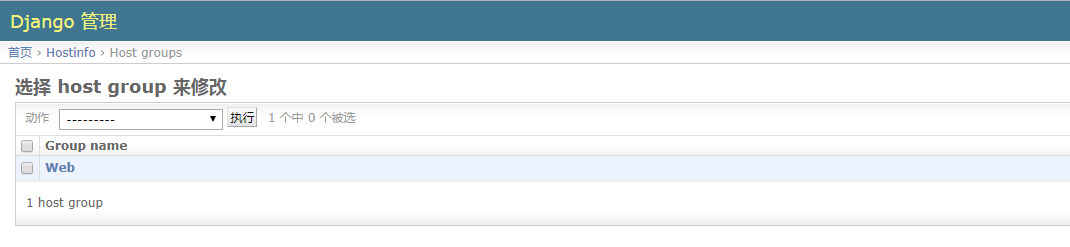
主机分组管理:
[root@localhost SimpleCMDB]$ cat hostinfo/models.py   # 创建模型,添加一张主机组的表

from django.db import models

....

class HostGroup(models.Model):

    group_name = models.CharField(max_length=50)      # 组名,使用的字段类型是CharField

    group_members = models.ManyToManyField(Host)      # 组成员,注意使用的字段及字段参数
[root@localhost SimpleCMDB]$ python manage.py validate

[root@localhost SimpleCMDB]$ python manage.py syncdb
[root@localhost SimpleCMDB]$ cat hostinfo/models.py    # 注册模型

from django.db import models

# Create your models here.

class Host(models.Model):

    hostname = models.CharField(max_length=50)

    ip = models.IPAddressField()

    vendor = models.CharField(max_length=50)

    product = models.CharField(max_length=50)

    sn = models.CharField(max_length=50)

    cpu_model = models.CharField(max_length=50)

    cpu_num = models.IntegerField()

    memory = models.CharField(max_length=50)

    osver = models.CharField(max_length=50)

    def __str__(self):

        return self.ip

class HostGroup(models.Model):

    group_name = models.CharField(max_length=50)

    group_members = models.ManyToManyField(Host)
如下,当我们多次使用指定脚本收集主机信息时,如果数据库里有记录了,它还是会添加一条相同的记录:
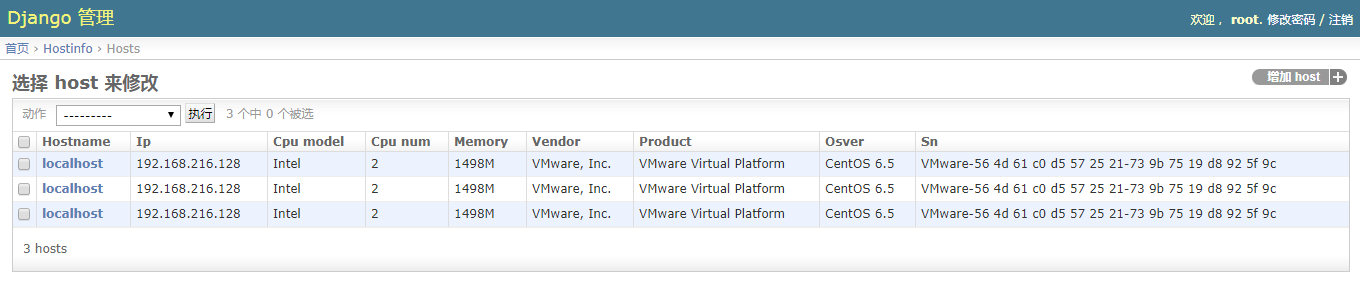
因此我们需要修改一下视图函数,加个判断:
[root@localhost SimpleCMDB]$ cat hostinfo/views.py

from django.shortcuts import render

from django.http import HttpResponse

from hostinfo.models import Host

# Create your views here.

def collect(request):

    if request.POST:

        hostname = request.POST.get('hostname')

        ip = request.POST.get('ip')

        osver = request.POST.get('osver')

        vendor = request.POST.get('vendor')

        product = request.POST.get('product')

        cpu_model = request.POST.get('cpu_model')

        cpu_num = request.POST.get('cpu_num')

        memory = request.POST.get('memory')

        sn = request.POST.get('sn')

        try:

            host = Host.objects.get(sn=sn)    # 查询数据库,查看是否有记录,如果有就重写记录,没有就添加记录

        except:

            host = Host()

        host.hostname = hostname

        host.ip = ip

        host.osver = osver

        host.vendor = vendor

        host.product = product

        host.cpu_model = cpu_model

        host.cpu_num = cpu_num

        host.memory = memory

        host.sn = sn

        host.save()

        return HttpResponse('OK')

    else:

        return HttpResponse('No Data!')
Django SimpleCMDB 项目的更多相关文章
- Python第十三天 django 1.6 导入模板 定义数据模型 访问数据库 GET和POST方法 SimpleCMDB项目 urllib模块 urllib2模块 httplib模块 django和web服务器整合 wsgi模块 gunicorn模块
Python第十三天 django 1.6 导入模板 定义数据模型 访问数据库 GET和POST方法 SimpleCMDB项目 urllib模块 urllib2模块 ...
- Django SimpleCMDB WSGI
一.WSGI 介绍 (1) 在前面的学习中,我们是通过 python manage.py runserver 0.0.0.0:8000 来启动并访问开发服务器的:(2) 但在实际中我们是通过直接访问 ...
- django创建项目
django创建项目 安装django pip install django==1.9 Note: C:\Python34\Scripts\pip.exe 创建项目 django-admin star ...
- Django练习项目之搭建博客
背景:自从今年回家过年后,来到公司给我转了试用,我的学习效率感觉不如从前,而且刚步入社会我总是想要怎么想明白想清楚一些事,这通常会花掉,消耗我大量的精力,因为我想把我的生活管理规划好了,而在it技术学 ...
- Python Django CMDB项目实战之-3创建form表单,并在前端页面上展示
基于之前的项目代码 Python Django CMDB项目实战之-1如何开启一个Django-并设置base页.index页.文章页面 Python Django CMDB项目实战之-2创建APP. ...
- Python Django CMDB项目实战之-2创建APP、建模(models.py)、数据库同步、高级URL、前端页面展示数据库中数据
基于之前的项目代码来编写 Python Django CMDB项目实战之-1如何开启一个Django-并设置base页index页文章页面 现在我们修改一个文章列表是从数据库中获取数据, 下面我们就需 ...
- Python Django CMDB项目实战之-1如何开启一个Django-并设置base页、index页、文章页面
1.环境 win10 python 2.7.14 django 1.8.2 需要用到的依赖包:MySQLdb(数据库的接口包).PIL/pillow(处理图片的包) 安装命令: pip install ...
- nginx + uwsgi 部署 Django+Vue项目
nginx + uwsgi 部署 Django+Vue项目 windows 本地 DNS 解析 文件路径 C:\Windows\System32\drivers\etc 单机本地测试运行方式,调用dj ...
- Django商城项目笔记No.12用户部分-QQ登录2获取QQ用户openid
Django商城项目笔记No.12用户部分-QQ登录2获取QQ用户openid 上一步获取QQ登录网址之后,测试登录之后本该跳转到这个界面 但是报错了: 新建oauth_callback.html & ...
随机推荐
- Python __init__函数的使用
class Cat: def __init__(self,_name): self.name = _name def eat(self): print("i am eating ." ...
- Android单行本+多渠道脚本工具
多渠道包的build相信广大android开发者应该很熟悉了,既可以用ant,写一写正则替换然后build出n个apk, 有时后情况会更复杂些,你比如你有一个app,需要build出一些单行本,代码基 ...
- 解决DoubanFM第三方客户端UI线程与工作线程交互问题
最新文章:Virson's Blog 首先要感谢yk000123的慷慨开源,开源地址见:http://doubanfm.codeplex.com/ 最近正好在学习WPF,然后在Codeplex上找到了 ...
- 关于Unity中如何判断一个动画播放结束
方法一(强力推荐): 在动画结束帧或其他帧处加个动画事件,在播放到这一帧的时候会自动调用这个动画函数 如图,找到对应动画的inspector面板,在里面有个Events下拉条,下拉后在想要的帧的位置添 ...
- 关于Unity中Shader的基础认识
Shader也叫着色器,是Unity里面比较难的一个点,网上有很多别人写好的shader,我们可以下载下来用或者修改学习. Shader可以做出很多非常不错的效果,因为它是插在渲染管道里面的程序,一来 ...
- 【Python】windows电脑 python3.6安装lxml库
1.下载lxml的wheel文件 https://download.lfd.uci.edu/pythonlibs/t5yhk4lc/lxml-4.2.1-cp36-cp36m-win32.whl 其他 ...
- java.lang.ClassCastException: java.lang.Long cannot be cast to java.lang.Integer
hibernate查询结果条数集 原写法: Integer count = (Integer )session.createQuery(hql).uniqueResult(); 报错:java.lan ...
- 初步了解学习将传统单机应用改造成Dubbo服务的过程
Dubbo作为RPC框架,实现的效果就是调用远程的方法就像在本地调用一样.如何做到呢?就是本地有对远程方法的描述,包括方法名.参数.返回值,在Dubbo中是远程和本地使用同样的接口:然后呢,要有对网络 ...
- Linux Shell 基本语法
一. Linux基本命令 1.1. cp命令 该命令的功能是将给出的文件或目录拷贝到另一文件或目录中,功能十分强大. 语法: cp [选项] 源文件或目录 目标文件或目录 1.2. mv命令 用户可 ...
- C# 分享几个ip的方法吧,包括正则验证ip
/// <summary> /// 正规则试验IP地址 /// </summary> /// <param name="IP"></par ...