activeMQ的安装和使用
什么是ActiveMQ?
一款开源的JMS具体实现,是一个易于使用的消息中间件,一个消息容器
安装
下载
官方网站:http://activemq.apache.org/
解压
linux下的安装,解压命令:tar zxvf activemq-x.x.x-bin.tar.gz
启动
- 前端进程的方式启动(控制台关闭则服务关闭)
cd [activemq_install_dir]/bin./activemq console
- 后台进程的方式启动
d [activemq_install_dir]/bin./activemq start
测试是否启动成功
浏览器中输入 http://127.0.0.1:8161/admin/登录名/密码: admin/admin
Linux下ActiveMQ默认监听的端口号:61616,可以通过netstat -nl|grep 61616 查看
关闭
如果启动的是前端进程,那么可以直接在控制台 ctrl + C 关闭
如果启动的是后端进程 cd [activemq_install_dir]/bin./activemq stop
目录结构
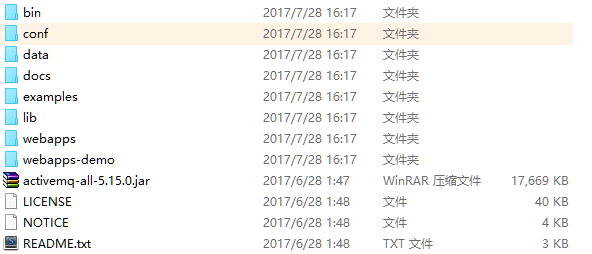
bin存放的是脚本文件
conf存放的是基本配置文件
data存放的是日志文件
docs存放的是说明文档
examples存放的是简单的实例
lib存放的是activemq所需jar包
webapps用于存放项目的目录
与spring的整合
直接上代码
所需jar包
<dependency>

       <groupId>javax.jms</groupId>

       <artifactId>javax.jms-api</artifactId>

       <version>2.0</version>

    </dependency>

    <!-- spring-jms API -->

    <dependency>

       <groupId>org.springframework</groupId>

       <artifactId>spring-jms</artifactId>

       <version>${spring.version}</version>

    </dependency>

    <!-- active-mq核心包 -->

    <dependency>

       <groupId>org.apache.activemq</groupId>

       <artifactId>activemq-core</artifactId>

       <version>5.7.0</version>

    </dependency>
xml代码
<?xml version="1.0" encoding="UTF-8"?>

<beans xmlns="http://www.springframework.org/schema/beans"

   xmlns:xsi="http://www.w3.org/2001/XMLSchema-instance"

   xmlns:p="http://www.springframework.org/schema/p"

   xmlns:context="http://www.springframework.org/schema/context"

   xmlns:jms="http://www.springframework.org/schema/jms"

   xmlns:amq="http://activemq.apache.org/schema/core"

   xsi:schemaLocation="http://www.springframework.org/schema/beans

                       http://www.springframework.org/schema/beans/spring-beans.xsd

                       http://www.springframework.org/schema/context

                       http://www.springframework.org/schema/context/spring-context.xsd

                       http://www.springframework.org/schema/jms

                       http://www.springframework.org/schema/jms/spring-jms.xsd

                       http://activemq.apache.org/schema/core

                       http://activemq.apache.org/schema/core/activemq-core.xsd">

        <!-- 配置连接ActiveMQ的ConnectionFactory -->

        <bean id="amqConnectionFactory" class="org.apache.activemq.ActiveMQConnectionFactory">

             <property name="brokerURL" value="tcp://localhost:61616"/>

         </bean>

        <!--为了提高效率,配置一个spring提供的缓存连接池-->

        <bean id="cachedConnectionFactory"

              class="org.springframework.jms.connection.CachingConnectionFactory"

              p:targetConnectionFactory-ref="amqConnectionFactory"

              p:sessionCacheSize="10"/>

        <!-- 定义JmsTemplate的Topic类型 -->

        <bean id="jmsTopicTemplate" class="org.springframework.jms.core.JmsTemplate">

             <!-- 这个connectionFactory对应的是我们定义的Spring提供的那个ConnectionFactory对象 -->

            <constructor-arg ref="cachedConnectionFactory" />

            <!-- pub/sub模型(发布/订阅) -->

            <property name="pubSubDomain" value="true" />

            <!-- 指定默认的destination -->

            <property name="defaultDestination" ref="topicDestination"/>

            <!-- deliveryMode, priority, timeToLive 的开关,要生效,必须配置explicitQosEnabled为true,默认false-->

             <property name="explicitQosEnabled" value="true" />

            <!-- 发送模式  DeliveryMode.NON_PERSISTENT=1:非持久 ; DeliveryMode.PERSISTENT=2:持久-->

            <property name="deliveryMode" value="2" />

        </bean>

            <!--Spring JmsTemplate 的消息生产者 end-->

        <!-- 配置queue的destination目的地-->

        <!-- 接收者 -->

        <bean id="activeMqReceiverDestination" class="org.apache.activemq.command.ActiveMQQueue">

               <!-- 指定队列的名称 -->

            <constructor-arg value="activeMqReceiver"/>

        </bean>

        <!-- 评论消息 -->

        <!-- <bean id="commentMessageDestination" class="org.apache.activemq.command.ActiveMQQueue">

            <constructor-arg value="commentMessage"/>

        </bean> -->

        <!-- 发布任务消息 -->

        <!-- <bean id="releaseMessageDestination" class="org.apache.activemq.command.ActiveMQQueue">

            <constructor-arg value="releaseMessage"/>

        </bean> -->

        <!-- 发布任务批量保存 -->

        <!-- <bean id="batchSaveTaskDestination" class="org.apache.activemq.command.ActiveMQQueue">

            <constructor-arg value="batchSaveTask"/>

        </bean> -->

        <!-- 更新评论数量 -->

        <!-- <bean id="updateCommentNumberDestination" class="org.apache.activemq.command.ActiveMQQueue">

            <constructor-arg value="updateCommentNumber"/>

        </bean> -->

        <!-- 回帖相关 -->

        <!-- <bean id="repliesDestination" class="org.apache.activemq.command.ActiveMQQueue">

            <constructor-arg value="repliesDestination"/>

        </bean> -->

        <!-- 配置topic的Destination地址 -->

        <bean id="topicDestination" class="org.apache.activemq.command.ActiveMQTopic">

            <constructor-arg value="myTopic"/>

        </bean>

        <!-- Spring JmsTemplate 的消息生产者 start-->

        <!-- 定义JmsTemplate的Queue类型 -->

        <bean id="queueTemplate" class="org.springframework.jms.core.JmsTemplate">

            <!-- 这个connectionFactory对应的是我们定义的Spring提供的那个ConnectionFactory对象 -->

            <constructor-arg ref="cachedConnectionFactory" />

            <!-- 非pub/sub模型(发布/订阅),即队列模式 -->

            <property name="pubSubDomain" value="false" />

             <!-- 指定默认的destination

            <property name="defaultDestination" ref="queueDestination"/>-->

        </bean>

            <!-- 消息消费者相关配置 start-->

            <!-- 鲜花消息监听类 -->

          <!--   <bean id="flowerMessageConsumerService" class="com.tfedu.discuss.service.mq.FlowerMessageConsumerService"/>

            评论消息监听类

            <bean id="commentMessageConsumerService" class="com.tfedu.discuss.service.mq.CommentMessageConsumerService"/>

            发布消息监听类

            <bean id="releaseMessageConsumerService" class="com.tfedu.discuss.service.mq.ReleaseMessageConsumerService"/>

            批量保存发布任务

            <bean id="batchSaveTaskConsumerService" class="com.tfedu.discuss.service.mq.BatchSaveTaskConsumerService"/>

            评论数维护监听类

            <bean id="commentNumberMessageConsumerService" class="com.tfedu.discuss.service.mq.CommentNumberMessageConsumerService"/> -->

            <bean id="activeMqReceiverService" class="com.activemq.ActiveMqReceiverService"></bean>

             <!-- 定义Queue监听器 -->

             <jms:listener-container destination-type="queue" container-type="default"  connection-factory="cachedConnectionFactory" acknowledge="transacted">

                  <!-- <jms:listener destination="flowerMessageDestination" ref="flowerMessageConsumerService"/>

                  <jms:listener destination="commentMessageDestination" ref="commentMessageConsumerService"/>

                  <jms:listener destination="releaseMessageDestination" ref="releaseMessageConsumerService"/>

                  <jms:listener destination="batchSaveTaskDestination" ref="batchSaveTaskConsumerService"/>

                  <jms:listener destination="updateCommentNumber" ref="commentNumberMessageConsumerService"/>

                  <jms:listener destination="repliesDestination" ref="repliesMessageConsumerService"/> -->

                  <jms:listener destination="activeMqReceiverDestination" ref="activeMqReceiverService"/>

             </jms:listener-container>

         <!-- 消息消费者相关配置 end-->

</beans>
消息生产者代码
package com.activemq;

import javax.annotation.Resource;

import org.springframework.jms.core.JmsOperations;

import org.springframework.stereotype.Service;

@Service

public class ActiveMqSenderService {

    //JmsTemplate为JmsOperations的具体实现,一般注入接口解耦

        @Resource(name = "queueTemplate")

        private JmsOperations queueTemplate;

        /**

         * 发送鲜花消息

         * <p>

         * 赠送鲜花时触发

         *

         * @param messageEntity 消息实体

         */

        public void sendFlowerMessage(MQMessageEntity messageEntity) {

            System.out.println("准备发送消息");

            queueTemplate.convertAndSend("activeMqReceiverDestination", messageEntity);

        }

}
消息接收者
package com.activemq;

import javax.jms.JMSException;

import javax.jms.Message;

import javax.jms.MessageListener;

import javax.jms.ObjectMessage;

import org.springframework.beans.factory.annotation.Autowired;

public class ActiveMqReceiverService  implements MessageListener{

    @Autowired

    private MessageService messageService;

    @Override

    public void onMessage(Message message) {

        ObjectMessage ObjectMessage = (ObjectMessage) message;

        MQMessageEntity messageEntity;

        try {

            messageEntity = (MQMessageEntity) ObjectMessage.getObject();

            messageService.messageFlower(messageEntity.getSourceId(), messageEntity.getSourceType(),

                    messageEntity.getSendId());

        } catch (JMSException e) {

            e.printStackTrace();

        }

    }

}
activeMQ的安装和使用的更多相关文章
- activemq的安装与使用
一.activemq的安装 环境:CentOS 6.JDK8 1. 确保系统已安装了可用的jdk版本2. 从网上下载 Linux 版的 ActiveMQ( apache-activemq-5.11.1 ...
- ActiveMQ的安装与配置
ActiveMQ的安装与配置详情 (1)ActiveMQ的简介 MQ: (message queue) ,消息队列,也就是用来处理消息的,(处理JMS的).主要用于大型企业内部或与企业之间的传递数据信 ...
- 170516、ActiveMQ 的安装与使用(单节点)
ActiveMQ 的安装与使用(单节点)IP: 192.168.4.101环 境: CentOS 6.6 . JDK71. 安装 JDK 并配置环境变量(略)JAVA_HOME=/usr/local/ ...
- activemq的安装使用
近期有项目中用到消息队列,JMS规范中实现最好的开源框架就是activemq.所以选择它(当然这是我老大决定的,像我这样的刚入职场的小菜鸟考虑问题还不太全面)作为消息队列数据传输.公司有有成型的消息队 ...
- 淘淘商城项目_同步索引库问题分析 + ActiveMQ介绍/安装/使用 + ActiveMQ整合spring + 使用ActiveMQ实现添加商品后同步索引库_匠心笔记
文章目录 1.同步索引库问题分析 2.ActiveM的介绍 2.1.什么是ActiveMQ 2.2.ActiveMQ的消息形式 3.ActiveMQ的安装 3.1.安装环境 3.2.安装步骤 4.Ac ...
- ActiveMQ的安装与使用。
1.什么是ActiveMQ ActiveMQ 是Apache出品,最流行的,能力强劲的开源消息总线.ActiveMQ 是一个完全支持JMS1.1和J2EE .4规范的 JMS Provider实现,尽 ...
- Dubbo入门到精通学习笔记(八):ActiveMQ的安装与使用(单节点)、Redis的安装与使用(单节点)、FastDFS分布式文件系统的安装与使用(单节点)
文章目录 ActiveMQ的安装与使用(单节点) 安装(单节点) 使用 目录结构 edu-common-parent edu-demo-mqproducer edu-demo-mqconsumer 测 ...
- Active-MQ的安装
(1)首先就是下载软件 wget http://archive.apache.org/dist/activemq/apache-activemq/5.9.0/apache-activemq-5.9.0 ...
- 分布式架构实战--ActiveMQ的安装与使用(单节点)
具体内容请参考样例代码和视频教程: http://www.roncoo.com/course/view/85d6008fe77c4199b0cdd2885eaeee53 IP:192.168.4.10 ...
- ActiveMQ——activemq的安装详情,修改密码
1.安装 下载 http://activemq.apache.org/download-archives.html, [推荐]ActiveMQ 5.13.4 Release与jdk1.7搭配(其它版本 ...
随机推荐
- 【iCore4 双核心板_ARM】例程十:RTC实时时钟实验——显示时间和日期
实验现象: 核心代码: int main(void) { /* USER CODE BEGIN 1 */ RTC_TimeTypeDef sTime; RTC_DateTypeDef sDate; ; ...
- 【emWin】例程二十三:窗口对象——Graph
简介: 图形小工具可用于可视化数据.图形小工具的典型应用是显示测量值或函数图形的曲线,可同时显 示多条曲线.可使用水平和垂直刻度来标记曲线.可在背景上显示具有不同水平和垂直间距的网格.如 果数据阵列不 ...
- http://www.cnblogs.com/chenmeng0818/p/6370819.html
http://www.cnblogs.com/chenmeng0818/p/6370819.html js中的正则表达式入门 什么是正则表达式呢? 正则表达式(regular expression ...
- talk 1
话转偏锋 让别人可以接话, 同时可以设计转换到的话题, 把"谈话带到正确的轨道", 就像下象棋一样, 要看三步 A: 很喜欢看篮球比赛, 对B说 我每次都堵湖人队会赢 B: 篮球最 ...
- azkaban在centos下的部署安装
azkaban 是一个用Java开发的开源调度工具workflow. 下面介绍具体安装过程,我这里使用的版本是3.43.0,使用的是solo运行模式. 编译 git clone https://git ...
- 错误代码CS0051可访问性不一致_解决方案
一.问题的出现 用C#在写多线程时报错 二.解决方案 1,分析思路 本来对BaseStruct设置为私有访问,但调用时又想公开化,从而造成了编译错误. 2,解决 将红色部分改为公有 3,总结 注意pu ...
- 这才是真正的裸眼3D!超级震撼!!
大家有没认为有意思啦,反正俺是被震撼到了. 好奇异-- ! " src="http://www.yixieshi.com/uploads/allimg/141116/1446431 ...
- DataTable导出为word,excel,html,csv,pdf,.txt
using System; using System.Data; using System.Configuration; using System.Collections; using System. ...
- Python 函数(参数组合)
在Python中定义函数,可以用必选参数.默认参数.可变参数和关键字参数,这4种参数都可以一起使用,或者只用其中某些,但是请注意,参数定义的顺序必须是:必选参数.默认参数.可变参数和关键字参数 定义一 ...
- Math.ceil()、Math.floor()和Math.round()
下面来介绍将小数值舍入为整数的几个方法:Math.ceil().Math.floor()和Math.round(). 这三个方法分别遵循下列舍入规则: Math.ceil()执行向上舍入,即它总是将数 ...