springboot(五)-使用Redis
Redis服务器
springboot要使用redis,首先当然要确保redis服务器能够正常跑起来。

pom.xml
这里添加redis的依赖,当然也是springboot集成好的。
<!-- redis -->

        <dependency>

            <groupId>org.springframework.boot</groupId>

            <artifactId>spring-boot-starter-data-redis</artifactId>

        </dependency>
application.properties
增加redis相关配置
同时让hibernate的sql语句显示出来,这样才知道到底是通过 Redis 取到的数据,还是依然是从数据库取到的数据
 spring.mvc.view.prefix=/WEB-INF/jsp/

 spring.mvc.view.suffix=.jsp

 spring.datasource.url=jdbc:mysql://127.0.0.1:3306/how2java?characterEncoding=UTF-8

 spring.datasource.username=root

 spring.datasource.password=admin

 spring.datasource.driver-class-name=com.mysql.jdbc.Driver

 spring.jpa.properties.hibernate.hbm2ddl.auto=update

 ###########################redis#########################

 #Redis数据库索引(默认为0)

 spring.redis.database=0

 #Redis服务器地址

 spring.redis.host=127.0.0.1

 #Redis服务器连接端口

 spring.redis.port=6379

 #Redis服务器连接密码(默认为空)

 spring.redis.password=

 #连接池最大连接数(使用负值表示没有限制)

 spring.redis.pool.max-active=10

 #连接池最大阻塞等待时间(使用负值表示没有限制)

 spring.redis.pool.max-wait=-1

 #连接池中的最大空闲连接

 spring.redis.pool.max-idle=8

 #连接池中的最小空闲连接

 spring.redis.pool.min-idle=0

 #连接超时时间(毫秒)

 spring.redis.timeout=0

 spring.jpa.show-sql=true
Application.java
增加注解,以开启缓存
@EnableCaching
 package com.how2java.springboot;

 import org.springframework.boot.SpringApplication;

 import org.springframework.boot.autoconfigure.SpringBootApplication;

 import org.springframework.cache.annotation.EnableCaching;

 @SpringBootApplication

 @EnableCaching

 public class Application {

     public static void main(String[] args) {

         SpringApplication.run(Application.class, args);

     }

 }
RedisConfig.java
Redis 缓存配置类。
这个配置,一个作用: 让保存到 Redis 里的 key 和 value 都转换为可读的 json 格式。 否则会是二进制格式,通过RedisClient 工具也无法识别。
 package com.how2java.springboot.config;

 import org.springframework.cache.CacheManager;

 import org.springframework.cache.annotation.CachingConfigurerSupport;

 import org.springframework.cache.annotation.EnableCaching;

 import org.springframework.context.annotation.Bean;

 import org.springframework.context.annotation.Configuration;

 import org.springframework.data.redis.cache.RedisCacheManager;

 import org.springframework.data.redis.core.RedisTemplate;

 import org.springframework.data.redis.serializer.Jackson2JsonRedisSerializer;

 import org.springframework.data.redis.serializer.RedisSerializer;

 import org.springframework.data.redis.serializer.StringRedisSerializer;

 import com.fasterxml.jackson.annotation.JsonAutoDetect;

 import com.fasterxml.jackson.annotation.PropertyAccessor;

 import com.fasterxml.jackson.databind.ObjectMapper;

 @Configuration

 @EnableCaching

 //Redis 缓存配置类

 public class RedisConfig extends CachingConfigurerSupport {

     @Bean

     public CacheManager cacheManager(RedisTemplate<?,?> redisTemplate) {

         RedisSerializer stringSerializer = new StringRedisSerializer();

         Jackson2JsonRedisSerializer jackson2JsonRedisSerializer = new Jackson2JsonRedisSerializer(Object.class);

         ObjectMapper om = new ObjectMapper();

         om.setVisibility(PropertyAccessor.ALL, JsonAutoDetect.Visibility.PUBLIC_ONLY);

         om.enableDefaultTyping(ObjectMapper.DefaultTyping.NON_FINAL);

         jackson2JsonRedisSerializer.setObjectMapper(om);

         redisTemplate.setKeySerializer(stringSerializer);

         redisTemplate.setHashKeySerializer(stringSerializer);

         redisTemplate.setValueSerializer(jackson2JsonRedisSerializer);

         redisTemplate.setHashValueSerializer(jackson2JsonRedisSerializer);

         CacheManager cacheManager = new RedisCacheManager(redisTemplate);

         return cacheManager;

     }

 }
点击展开
Page4Navigator
创建一个工具类 Page4Navigator 用以替换 原本分页查询要返回的 org.springframework.data.domain.Page 类。 原因是 Page 类对json 还原不支持,在放如 Redis 之后,再拿出来,就会报错失败。
使用 Page4Navigator 对其包裹,就解决了这个问题了。
 package com.how2java.springboot.util;

 import java.util.List;

 import org.springframework.data.domain.Page;

 public class Page4Navigator<T> {

     Page<T> page4jpa;

     int navigatePages;

     int totalPages;

     int number;

     long totalElements;

     int size;

     int numberOfElements;

     List<T> content;

     boolean isHasContent;

     boolean first;

     boolean last;

     boolean isHasNext;

     boolean isHasPrevious;

     int[] navigatepageNums;

     public Page4Navigator() {

         //这个空的分页是为了 Redis 从 json格式转换为 Page4Navigator 对象而专门提供的

     }

     public Page4Navigator(Page<T> page4jpa,int navigatePages) {

         this.page4jpa = page4jpa;

         this.navigatePages = navigatePages;

         totalPages = page4jpa.getTotalPages();

         number  = page4jpa.getNumber() ;

         totalElements = page4jpa.getTotalElements();

         size = page4jpa.getSize();

         numberOfElements = page4jpa.getNumberOfElements();

         content = page4jpa.getContent();

         isHasContent = page4jpa.hasContent();

         first = page4jpa.isFirst();

         last = page4jpa.isLast();

         isHasNext = page4jpa.hasNext();

         isHasPrevious  = page4jpa.hasPrevious();

         calcNavigatepageNums();

     }

     private void calcNavigatepageNums() {

         int navigatepageNums[];

         int totalPages = getTotalPages();

         int num = getNumber();

         //当总页数小于或等于导航页码数时

         if (totalPages <= navigatePages) {

             navigatepageNums = new int[totalPages];

             for (int i = 0; i < totalPages; i++) {

                 navigatepageNums[i] = i + 1;

             }

         } else { //当总页数大于导航页码数时

             navigatepageNums = new int[navigatePages];

             int startNum = num - navigatePages / 2;

             int endNum = num + navigatePages / 2;

             if (startNum < 1) {

                 startNum = 1;

                 //(最前navigatePages页

                 for (int i = 0; i < navigatePages; i++) {

                     navigatepageNums[i] = startNum++;

                 }

             } else if (endNum > totalPages) {

                 endNum = totalPages;

                 //最后navigatePages页

                 for (int i = navigatePages - 1; i >= 0; i--) {

                     navigatepageNums[i] = endNum--;

                 }

             } else {

                 //所有中间页

                 for (int i = 0; i < navigatePages; i++) {

                     navigatepageNums[i] = startNum++;

                 }

             }

         }

         this.navigatepageNums = navigatepageNums;

     }

     public int getNavigatePages() {

         return navigatePages;

     }

     public void setNavigatePages(int navigatePages) {

         this.navigatePages = navigatePages;

     }

     public int getTotalPages() {

         return totalPages;

     }

     public void setTotalPages(int totalPages) {

         this.totalPages = totalPages;

     }

     public int getNumber() {

         return number;

     }

     public void setNumber(int number) {

         this.number = number;

     }

     public long getTotalElements() {

         return totalElements;

     }

     public void setTotalElements(long totalElements) {

         this.totalElements = totalElements;

     }

     public int getSize() {

         return size;

     }

     public void setSize(int size) {

         this.size = size;

     }

     public int getNumberOfElements() {

         return numberOfElements;

     }

     public void setNumberOfElements(int numberOfElements) {

         this.numberOfElements = numberOfElements;

     }

     public List<T> getContent() {

         return content;

     }

     public void setContent(List<T> content) {

         this.content = content;

     }

     public boolean isHasContent() {

         return isHasContent;

     }

     public void setHasContent(boolean isHasContent) {

         this.isHasContent = isHasContent;

     }

     public boolean isFirst() {

         return first;

     }

     public void setFirst(boolean first) {

         this.first = first;

     }

     public boolean isLast() {

         return last;

     }

     public void setLast(boolean last) {

         this.last = last;

     }

     public boolean isHasNext() {

         return isHasNext;

     }

     public void setHasNext(boolean isHasNext) {

         this.isHasNext = isHasNext;

     }

     public boolean isHasPrevious() {

         return isHasPrevious;

     }

     public void setHasPrevious(boolean isHasPrevious) {

         this.isHasPrevious = isHasPrevious;

     }

     public int[] getNavigatepageNums() {

         return navigatepageNums;

     }

     public void setNavigatepageNums(int[] navigatepageNums) {

         this.navigatepageNums = navigatepageNums;

     }

 }
点击展开
CategoryService
增加 Service接口。 注意: list 返回的是 Page4Navigator 而不再是 Page 类型了。
 package com.how2java.springboot.service;

 import org.springframework.data.domain.Pageable;

 import com.how2java.springboot.pojo.Category;

 import com.how2java.springboot.util.Page4Navigator;

 public interface CategoryService {

     public Page4Navigator<Category> list(Pageable pageable);

     public void save(Category category);

     public void delete(int id);

     public Category get(int id);

 }
CategoryServiceImpl
实现类CategoryServiceImp 做了一下工作:
1. 实现 CategoryService 接口,提供 crud
2. 在相应方法实现的时候,都是通过调用 dao 实现的
3. CacheConfig,表示 分类数据在 redis 中都放在 category 这个分组里。
@CacheConfig(cacheNames="category")
4. list方法讲解:
先说注解
@Cacheable(key="'category '+#p0.offset + '-' + #p0.pageSize ")
假如是第一页,即offset=0,pageSize=0,那么会创建一个 key: "category 0-5"
首先根据这个key 到 redis中查询数据。 第一次是不会有数据的,那么就会从数据库中取到这5条数据,然后以这个 key: "category 0-5" 保存到 redis 数据库中。
下一次再次访问的时候,根据这个key,就可以从 redis 里取到数据了。
5. get 方法讲解
先说注解:
@Cacheable(key="'category '+ #p0")
假如是获取id=71的数据,那么
就会以 key= "category 71" 到reids中去获取,如果没有就会从数据库中拿到,然后再以 key= "category 71" 这个值存放到 redis 当中。
下一次再次访问的时候,根据这个key,就可以从 redis 里取到数据了。
6. add 方法讲解
先说注解:
@CacheEvict(allEntries=true)// @CachePut(key="'category '+ #p0")
可以看到,本来有个 CachePut,但是被注释掉了。 按理说,本来是应该用这个的。 这样会到在,在增加数据之后,就会在Redis 中以 key= "category 71" 缓存一条数据。 但是为什么被注释掉不用呢?
因为加入这样做了,那么 list 对应的数据,在缓存在对应的数据,并没有发生变化呀? 因为 list 对应的数据是这样的 key: "category 0-5"。 如果用这种方式,就会导致数据不同步,即,虽然增加了,并且也增加到缓存中了,但是因为 key 不一样,通过查询拿到的数据,是不会包含新的这一条的。
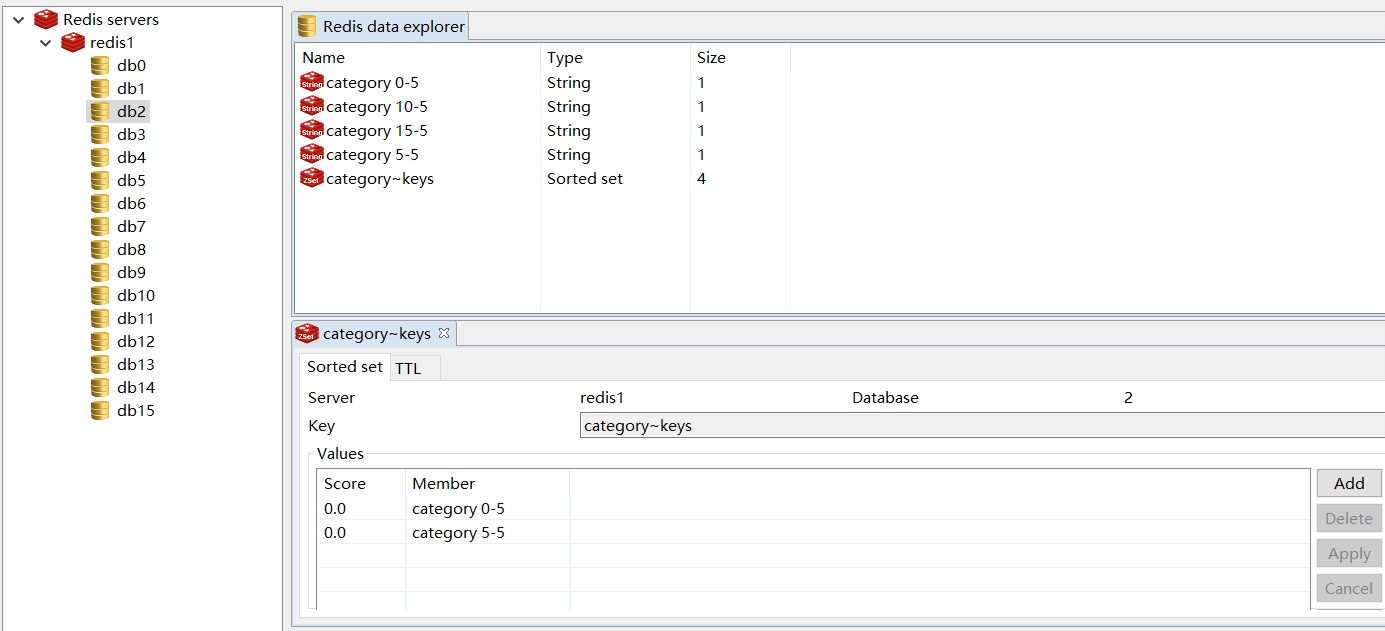
所以,才会使用CacheEvict 这个注解,这个注解就表示清除掉缓存。 allEntries= true 是表示清除掉 category 分组 下所有的keys. 注意看截图,里面有一个 category~keys ,里面就表明了都有哪些 keys,都会被清除掉。
假如这个时候,还有一个分组 cacheNames="product", 那么它下面对应的缓存,都是不会被影响到的。 这样就保证了,只清楚当前分组下的缓存,而不是清除 redis 所有的数据了。
7. delete 方法讲解
先说注解:
@CacheEvict(allEntries=true)
// @CacheEvict(key="'category '+ #p0")
这个道理和 add 是一样的,仅仅删除 key= "category 71" ,没有什么意义, key: "category 0-5" 里面的数据没有影响呀。 所以还是通过 CacheEvict删除掉所有的缓存就好了。
 package com.how2java.springboot.service.impl;

 import org.springframework.beans.factory.annotation.Autowired;

 import org.springframework.cache.annotation.CacheConfig;

 import org.springframework.cache.annotation.CacheEvict;

 import org.springframework.cache.annotation.CachePut;

 import org.springframework.cache.annotation.Cacheable;

 import org.springframework.data.domain.Page;

 import org.springframework.data.domain.Pageable;

 import org.springframework.stereotype.Service;

 import com.how2java.springboot.dao.CategoryDAO;

 import com.how2java.springboot.pojo.Category;

 import com.how2java.springboot.service.CategoryService;

 import com.how2java.springboot.util.Page4Navigator;

 @Service

 @CacheConfig(cacheNames="category")

 public class CategoryServiceImpl implements CategoryService{

     @Autowired CategoryDAO categoryDAO;

     @Override

     @Cacheable(key="'category '+#p0.offset + '-' + #p0.pageSize ")

     public Page4Navigator<Category> list(Pageable pageable) {

         Page<Category> pageFromJPA=  categoryDAO.findAll(pageable);

         Page4Navigator<Category> page = new Page4Navigator<>(pageFromJPA,5);

         return page;

     }

     @Override

     @Cacheable(key="'category '+ #p0")

     public Category get(int id) {

         Category c =categoryDAO.findOne(id);

         return c;

     }

     @Override

     @CacheEvict(allEntries=true)

 //  @CachePut(key="'category '+ #p0")

     public void save(Category category) {

         // TODO Auto-generated method stub

         categoryDAO.save(category);

     }

     @Override

     @CacheEvict(allEntries=true)

 //  @CacheEvict(key="'category '+ #p0")

     public void delete(int id) {

         // TODO Auto-generated method stub

         categoryDAO.delete(id);

     }

 }
点击展开
CategoryController
 package com.how2java.springboot.web;

 import org.springframework.beans.factory.annotation.Autowired;

 import org.springframework.data.domain.PageRequest;

 import org.springframework.data.domain.Pageable;

 import org.springframework.data.domain.Sort;

 import org.springframework.stereotype.Controller;

 import org.springframework.ui.Model;

 import org.springframework.web.bind.annotation.RequestMapping;

 import org.springframework.web.bind.annotation.RequestParam;

 import com.how2java.springboot.pojo.Category;

 import com.how2java.springboot.service.CategoryService;

 import com.how2java.springboot.util.Page4Navigator;

 @Controller

 public class CategoryController {

     @Autowired CategoryService categoryService;

     @RequestMapping("/listCategory")

     public String listCategory(Model m,@RequestParam(value = "start", defaultValue = "0") int start,@RequestParam(value = "size", defaultValue = "5") int size) throws Exception {

         start = start<0?0:start;

         Sort sort = new Sort(Sort.Direction.DESC, "id");

         Pageable pageable = new PageRequest(start, size, sort);

         Page4Navigator<Category> page =categoryService.list(pageable);

         m.addAttribute("page", page);

         return "listCategory";

     }

     @RequestMapping("/addCategory")

     public String addCategory(Category c) throws Exception {

         categoryService.save(c);

         return "redirect:listCategory";

     }

     @RequestMapping("/deleteCategory")

     public String deleteCategory(Category c) throws Exception {

         categoryService.delete(c.getId());

         return "redirect:listCategory";

     }

     @RequestMapping("/updateCategory")

     public String updateCategory(Category c) throws Exception {

         categoryService.save(c);

         return "redirect:listCategory";

     }

     @RequestMapping("/editCategory")

     public String ediitCategory(int id,Model m) throws Exception {

         Category c= categoryService.get(id);

         m.addAttribute("c", c);

         return "editCategory";

     }

 }
运行
我们来看运行结果。
1.向上面一样,打开redis服务器。
2.打开redis客户端,并建立连接。
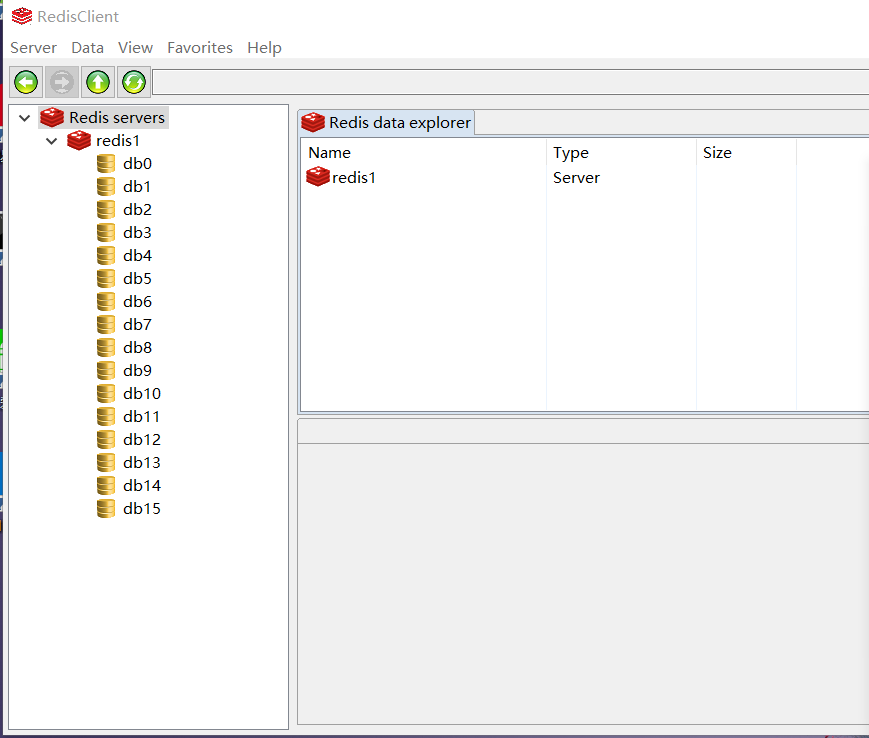
就是这个,安装这个可以很清晰的看到redis里面的值。
运行springboot工程,访问http://127.0.0.1:8080/listCategory?start=0
在控制台上你会看到这个:
Hibernate: select category0_.id as id1_0_, category0_.name as name2_0_ from category_ category0_ order by category0_.id desc limit ?
Hibernate: select count(category0_.id) as col_0_0_ from category_ category0_
第一次访问,需要查询数据库。然后再看redis客户端:

我这里用的是db2,上面application.properties代码里是db0.这个可以随便该,每个项目用一个嘛。
第一次查询的内容保存到redis里面了。然后你刷新下页面,也就是再访问一次,控制台就没有打印sql语句了。
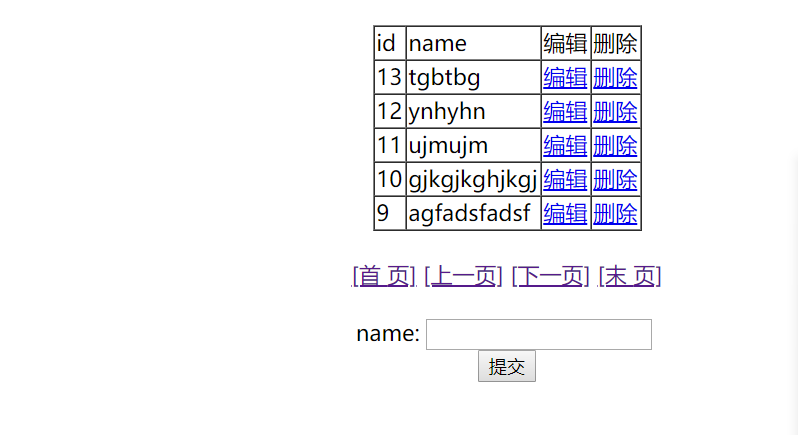
好了,你现在多点几次下一页,目的是给redis缓存多一点数据。
你在下面添加一条数据。
控制台打印三条sql语句
Hibernate: insert into category_ (name) values (?)
Hibernate: select category0_.id as id1_0_, category0_.name as name2_0_ from category_ category0_ order by category0_.id desc limit ?
Hibernate: select count(category0_.id) as col_0_0_ from category_ category0_
很明显的呀,一条插入,两条查询。这两条查询语句对应着第一页记录。
这时候再看redis客户端:

这就说明,我们在修改数据之后,redis中的数据就清空了。实现了我们想要的结果。
代码下载地址:https://gitee.com/fengyuduke/my_open_resources/blob/master/springboot-redis.zip
springboot(五)-使用Redis的更多相关文章
- 基于springboot+bootstrap+mysql+redis搭建一套完整的权限架构【六】【引入bootstrap前端框架】
https://blog.csdn.net/linzhefeng89/article/details/78752658 基于springboot+bootstrap+mysql+redis搭建一套完整 ...
- SpringBoot简单整合redis
Jedis和Lettuce Lettuce 和 Jedis 的定位都是Redis的client,所以他们当然可以直接连接redis server. Jedis在实现上是直接连接的redis serve ...
- 由浅入深学习springboot中使用redis
很多时候,我们会在springboot中配置redis,但是就那么几个配置就配好了,没办法知道为什么,这里就详细的讲解一下 这里假设已经成功创建了一个springboot项目. redis连接工厂类 ...
- 在SpringBoot中引入Redis
前言 之前我们只是在Spring中加入Redis用于session的存放,并没有对redis进行主动的存放,这次我们需要加入redis工具类来方便我们在实际使用过程中操作redis 已经加入我的git ...
- SpringBoot入门 (七) Redis访问操作
本文记录学习在SpringBoot中使用Redis. 一 什么是Redis Redis 是一个速度非常快的非关系数据库(Non-Relational Database),它可以存储键(Key)与 多种 ...
- (一)由浅入深学习springboot中使用redis
很多时候,我们会在springboot中配置redis,但是就那么几个配置就配好了,没办法知道为什么,这里就详细的讲解一下 这里假设已经成功创建了一个springboot项目. redis连接工厂类 ...
- SpringBoot中使用Redis
在SpringBoot中使用Redis,思路如下: 查询时先查Redis缓存,如果缓存中存在信息,就直接从缓存中获取. 如果缓存中没有相关信息,就去数据库中查找,查完顺便将信息存放进缓存里,以便下一次 ...
- SpringBoot(五)_表单验证
SpringBoot(五)_表单验证 参数校验在我们日常开发中非常常见,最基本的校验有判断属性是否为空.长度是否符合要求等,在传统的开发模式中需要写一堆的 if else 来处理这些逻辑,很繁琐,效率 ...
- SpringBoot之整合Redis
一.SpringBoot整合单机版Redis 1.在pom.xml文件中加入redis的依赖 <dependency> <groupId>org.springframework ...
随机推荐
- 多线程协作 FileStream文件读写操作,读写冲突解决
using System; using System.Collections.Generic; using System.IO; using System.Linq; using System.Tex ...
- Android 单位dp和px之间相互转换
public class DensityUtil { /** * 根据手机的分辨率从 dp 的单位 转成为 px(像素) */ public static int dip2px(Context con ...
- JS Img对象获取图片高度宽度(兼容Chrome)
一般获取图片高度宽度的写法: var img = new Image();img.src = imgsrc;var imgWH = CalcImgTiple(img.width, img.height ...
- 使用CodeMaid自动程序排版[转]
前言 「使用StyleCop验证命名规则」这篇文章,指引开发人员透过StyleCop这个工具,来自动检验项目中产出的程序代码是否合乎命名规则. [Tool] 使用StyleCop验证命名规则 但是在项 ...
- 基于verilog的FFT算法8点12位硬件实现
FFT算法8点12位硬件实现 (verilog) 1 一.功能描述: 1 二.设计结构: 2 三.设计模块介绍 3 1.蝶形运算(第一级) 3 2.矢量角度旋转(W) 4 3.CORDIC 结果处理 ...
- mysql相关的软件
数据库采用mysql,那么问题来了,mysql的部署是采用主备模式?主主模式?集群模式?在然后采取分库.分表模式? 其次:在外围的辅助开源软件的选择mycat?mybatis?keepalived?r ...
- 解决eclipse Building workspace(Sleeping)闪烁
出现这个是因为我,把两个有错的项目.从工程里面删除掉之后,再接着运行新的工程,但是Building workspace一直没有执行完毕,导致新的工程无法运行. 这个时候可以关闭自动编译,就可以运行新的 ...
- Postman接口测试之POST、GET请求方法
一.基础知识 1.HTTP的五种请求方法:GET, POST ,HEAD,OPTIONS, PUT, DELETE, TRACE 和 CONNECT 方法. GET请求:请求指定的页面信息,并返回实体 ...
- delphi 给字符指针分配内存
今天,对接第三方dll的时候出现如下问题: 接口声明如下: long BL_tradeBalance (char *MerchantNumber,char *PosId,char *OperatorN ...
- form表单提交回调函数
form表单没有回调函数,不过可以通过jquery-form.js这个插件来实现回调函数: <form id="addform" class="form-horiz ...