I finally made sense of front end build tools. You can, too.
来源于:https://medium.freecodecamp.com/making-sense-of-front-end-build-tools-3a1b3a87043b#.nvnd2vsd8
Front end build tools can be confusing even to experienced developers like me. The solution is to understand how they work — and work together — on a conceptual level.
This article presents my opinionated approach to making sense of front end build tools. Instead of diving into code, I’ll walk you through my mental model of how these tools work and what they accomplish.
Don’t be intimidated by the state of the art
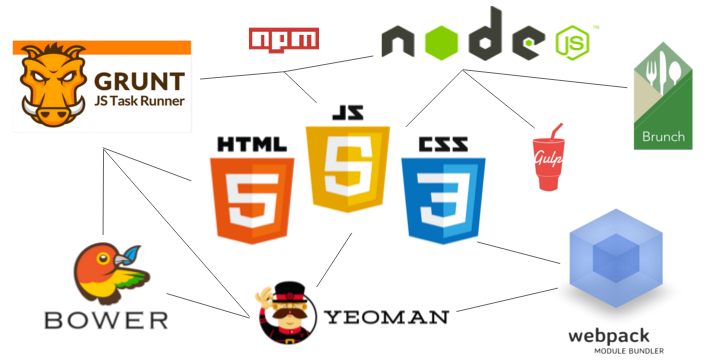
Node, NPM, Grunt, Gulp, Bower, Webpack, Browserify, Yeoman, Brunch… there are so many front-end build tools out there that it can seem impossible to keep up.
The key is not being intimidating. All of these projects are designed to make your life easier.
To understand the what, why, and how of these tools, you just need to grasp a few concepts.
Concept #1 — The core dichotomy of build tools is “installing vs. doing”
Build tools do two things:
- Install things
- Do things
The first question to ask yourself when confronting a new build tool is: “Is this tool intended to install things for me, or do things for me?”
“Installing” tools like npm, Bower, and Yeoman can install pretty much anything. They can install front-end libraries like Angular.js or React.js. They can install servers for your dev environment. They can install testing libraries. They even help you install other front end build tools.
In short, they install most any code-related things you can think of.
The “doing” tools like Grunt, Webpack, Require.js, Brunch, and Gulp are much more complicated. The goal of the “doing” tools is to automate all the menial and error prone tasks in web development. The things they do are sometimes called “tasks.”
To do these “tasks” they often use their own ecosystem of packages and plugins. Each tool writes tasks in different ways. These tools also don’t all do the same thing. Some “doing” tools try to handle any task you throw at it (Grunt, Gulp, etc). Others focus on one thing, such as handling Javascript dependencies (Browserify, Require.js, etc).
Sometimes you end up using several of these tools in the same project.
Here’s a short list of “tasks” I’ve automated with these “doing” tools:
- Replacing a string of text in a file
- Creating folders and moving files into those folders
- Running my unit tests with a single command
- Refreshing my browser when I save a file
- Combining all my JavaScript files into one, and all my CSS files into one
- Minifying my concatenated JavaScript and CSS files
- Modifying the placement of <script> tags on an html page
Once you understand that tools install stuff or do stuff, categorizing them becomes much easier:
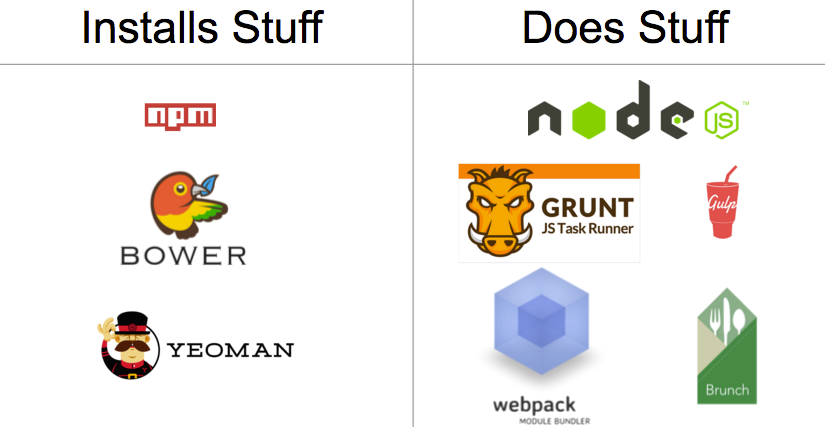
Build tools sorted by whether they primarily install things or do things
Concept #2 — The grandparent of all build tools is Node and npm
Node and npm install and run all these build tools, so there is always a trace of them in your project. Because of this, many developers try to use these two tools as much as possible before they resort to installing an additional tool.
Node and NPM fall into our “build” and “do” dichotomy. Node is the “do” tool, and npm is the “install” tool.
npm can install libraries like Angular.js or React.js. It can also install a server to run your app locally for development. It can even install tools to do things like minify your code.
Node, on the other hand, “does” things for you, like run JavaScript files, servers, and so much more.
If you need a place to start learning, start with Node+npm, and stay there for a while. When your project gets large enough, you’ll reach the limits of what Node and npm can automate for you. At that point you can organically incorporate another build tool.
Concept #3 — A build is just a production ready version of your app
Developers often break JavaScript and CSS out into separate files. Separate files let you focus on writing more modular chunks of code that do one single thing. Files that do one thing decrease your cognitive load. (If you think separate files are more confusing than one large file, try working in a 5000 line file, and you will quickly change your mind
I finally made sense of front end build tools. You can, too.的更多相关文章
- VS报错:The build tools for v140 (Platform Toolset = 'v140') cannot be found
VS低版本打开高版本常会出现的错: The build tools for v140 (Platform Toolset = 'v140') cannot be found. To build usi ...
- 开发错误记录3:问题 Error:failed to find Build Tools revision 23.0.2
今天导入swiperefreshlayoutdemo 问题 Error:failed to find Build Tools revision 23.0.2 修改build.gradle 里面设置,其 ...
- SDK Build Tools revision (19.0.3) is too low for project Min
SDK Build Tools revision (19.0.3) is too low for project Min(转) 如果你正在使用Android Studio工具进行开发,且将 ...
- 关于SVN下载代码和Android Studio里面导入别人代码build tools不一致问题总结
项目build tools的sdk我没有 网络问题没法下载. 解决问题 方法 1.下载对应的SDK.需要VPN,或者FQ 2.将bulid.gradle的内容用下面的内容替换 // Top-level ...
- Gradle sync failed: failed to find Build Tools revision 21.1.2
从github上下载了一个开源项目到Android Studio 出现以下问题: 下午2:56:05 Gradle sync started下午3:00:11 Gradle sync failed: ...
- using 1.7 requires using android build tools version 19 or later
这意思大概是adt用了1.7,abt(android build tools)就要用19或更高,可是abt在哪设置呢,原来是在sdk manager中 之前我已安装的最高的abt是17,然后~~~,F ...
- Error:The SDK Build Tools revision (19.0.3) is too low for project ':app'. Minimum required is 19.1.
今天更新了一下AndroidStudio, 结果编译程序时报错, 错误如下: Error:The SDK Build Tools revision (19.0.3) is too low for pr ...
- building 'twisted.test.raiser' extension error: Microsoft Visual C++ 14.0 is required. Get it with "Microsoft Visual C++ Build Tools": http://landinghub.visualstudio.com/visual-cpp-build-tools
Error msg: building 'twisted.test.raiser' extension error: Microsoft Visual C++ 14.0 is required. Ge ...
- Android sdk platform,sdk tools,sdk Build tools,sdk platform tools 的关系
1. sdk platform 简单理解为系统版本 最新级别: 28:Android 9 27:Android 8.1 26:Android 8.0 25:Android 7.1 24:Android ...
随机推荐
- 网络分析之Pgrouting(转载)
网上关于Pgrouting的使用介绍太简单了,这里想详细的总结一下Pgrouting的使用,其实主要参照官方文档:http://workshop.pgrouting.org/ 第一步:配置环境 关于P ...
- MyEclipse快捷键大全
MyEclipse 快捷键1(CTRL)Ctrl+1 快速修复Ctrl+D: 删除当前行Ctrl+Q 定位到最后编辑的地方Ctrl+L 定位在某行Ctrl+O 快速显示 OutLineCtrl+T 快 ...
- 如何正确响应ArcGIS JavaScript API中图形的鼠标事件
在使用ArcGIS JavaScript API编写程序的时候,程序员往往需要完成这样一个功能:点击地图上的图形,自动进行专题GIS数据查询,当在地图非图形区域上点击时,自动进行底图兴趣点查询. 由于 ...
- hyperv 创建虚拟以太网交换机失败
问题: hyperv 创建虚拟以太网交换机失败 解决办法: 取消无线共享,重新创建虚拟以太网交换机即可
- Sharepoint学习笔记—习题系列--70-576习题解析 -(Q116-Q120)
Question 116 You are helping a corporate IT department create a SharePoint 2010 information archite ...
- Android-两种方式实现走马灯效果
第一种方法(很普遍,很简单的在xml布局文件中设置TextView的属性): <TextView android:id="@+id/tv_text" android:layo ...
- Intent属性详解二 Action、Category
先看效果图: 1.Action:该activity可以执行的动作 该标识用来说明这个activity可以执行哪些动作,所以当隐式intent传递过来action时,如果跟这里<intent-fi ...
- AP是什么
百度链接: AP---http://baike.baidu.com/link?url=_mC-Wkgl8j1_awpuicoZk3i4MWVcLaio1nm9XRt60F9QD4V_lJ-kE7J4C ...
- stm32 hid 键盘描述
/* USB Standard Device Descriptor */ const uint8_t Joystick_DeviceDescriptor[JOYSTICK_SIZ_DEVICE_DES ...
- UNIX文件的权限之“设置用户ID位”
用stat函数可以获取一个文件的状态信息,原型是这样的: int stat(const char *path, struct stat *buf); 其中结构体stat的结构: struct stat ...